Page 129 of 595
Features of your vehicle
44
4
Closing the hood
1. Before closing the hood, check the
following:
partment must be correctly
installed.
bustible material must be
removed from the engine com-
partment.
2. Lower the hood halfway and push down to securely lock in place.
WARNING - Fire risk
Do not leave gloves, rags or any
other combustible material in the
engine compartment. Doing so
may cause a heat-induced fire.
WARNING - Unsecured
engine hood
Always double check to be sure
that the hood is firmly latched
before driving away. If it is not
latched, the hood could fly open
while the vehicle is being driv-
en, causing a total loss of visi-
bility, which might result in an
accident.CAUTION - Hood obstruc-
tion
Before closing the hood, ensure that all obstructions are removedfrom the hood opening. Closingthe hood with an obstructionpresent in the hood opening mayresult in property damage orsevere personal injury.
Page 130 of 595
445
Features of your vehicle
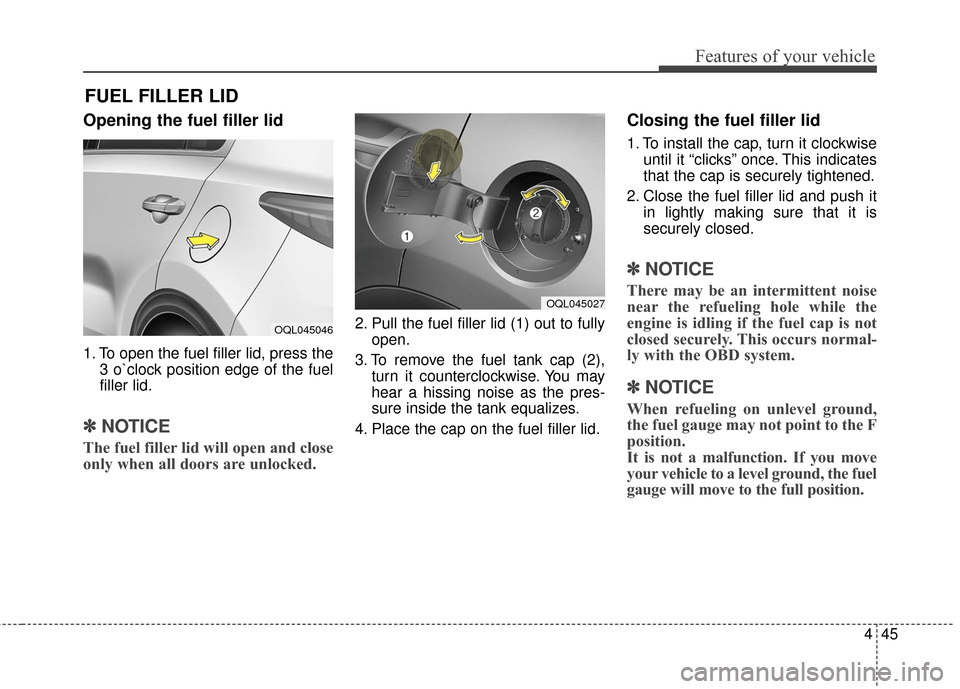
Opening the fuel filler lid
1. To open the fuel filler lid, press the3 o`clock position edge of the fuel
filler lid.
✽ ✽NOTICE
The fuel filler lid will open and close
only when all doors are unlocked.
2. Pull the fuel filler lid (1) out to fully
open.
3. To remove the fuel tank cap (2), turn it counterclockwise. You may
hear a hissing noise as the pres-
sure inside the tank equalizes.
4. Place the cap on the fuel filler lid.
Closing the fuel filler lid
1. To install the cap, turn it clockwise until it “clicks” once. This indicates
that the cap is securely tightened.
2. Close the fuel filler lid and push it in lightly making sure that it is
securely closed.
✽ ✽NOTICE
There may be an intermittent noise
near the refueling hole while the
engine is idling if the fuel cap is not
closed securely. This occurs normal-
ly with the OBD system.
✽ ✽NOTICE
When refueling on unlevel ground,
the fuel gauge may not point to the F
position.
It is not a malfunction. If you move
your vehicle to a level ground, the fuel
gauge will move to the full position.
FUEL FILLER LID
OQL045027
OQL045046
Page 133 of 595
Features of your vehicle
48
4
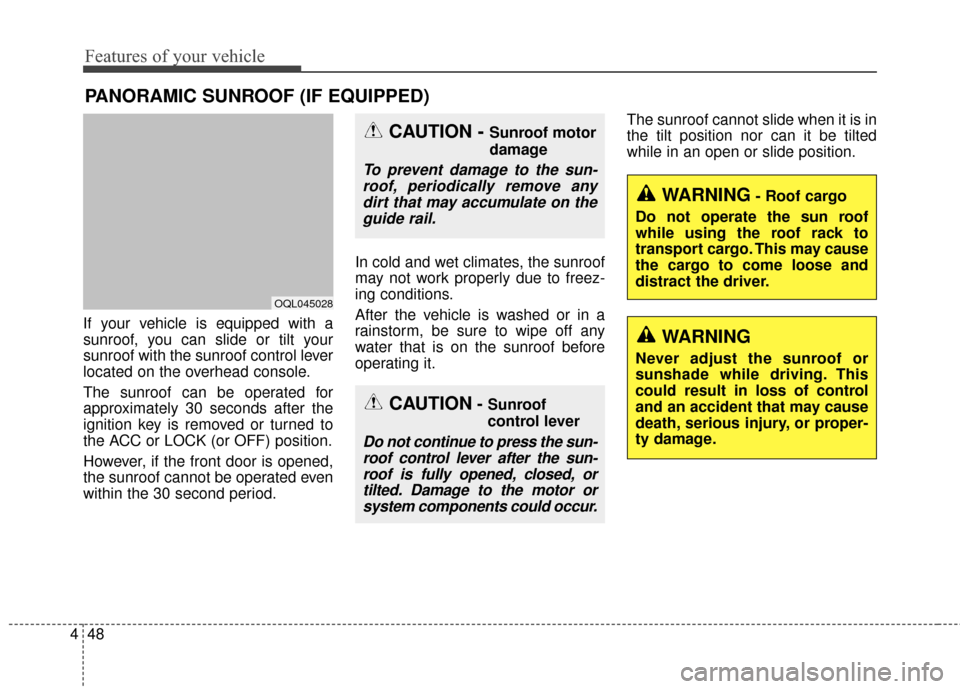
If your vehicle is equipped with a
sunroof, you can slide or tilt your
sunroof with the sunroof control lever
located on the overhead console.
The sunroof can be operated for
approximately 30 seconds after the
ignition key is removed or turned to
the ACC or LOCK (or OFF) position.
However, if the front door is opened,
the sunroof cannot be operated even
within the 30 second period. In cold and wet climates, the sunroof
may not work properly due to freez-
ing conditions.
After the vehicle is washed or in a
rainstorm, be sure to wipe off any
water that is on the sunroof before
operating it.The sunroof cannot slide when it is in
the tilt position nor can it be tilted
while in an open or slide position.
PANORAMIC SUNROOF (IF EQUIPPED)
CAUTION- Sunroof
control lever
Do not continue to press the sun-
roof control lever after the sun-roof is fully opened, closed, ortilted. Damage to the motor orsystem components could occur.
CAUTION - Sunroof motor
damage
To prevent damage to the sun-roof, periodically remove anydirt that may accumulate on theguide rail.
WARNING- Roof cargo
Do not operate the sun roof
while using the roof rack to
transport cargo. This may cause
the cargo to come loose and
distract the driver.
OQL045028
WARNING
Never adjust the sunroof or
sunshade while driving. This
could result in loss of control
and an accident that may cause
death, serious injury, or proper-
ty damage.
Page 139 of 595
Features of your vehicle
54
4
Electronic power steering
(EPS)
The power steering uses a motor to
assist you in steering the vehicle. If
the engine is off or if the power steer-
ing system becomes inoperative, the
vehicle may still be steered, but it will
require increased steering effort.
Electronic power steering is con-
trolled by a power steering control
unit which senses the steering wheel
torque and vehicle speed to com-
mand the motor.
The steering becomes heavier as the
vehicle’s speed increases and
becomes lighter as the vehicle’s
speed decreases for optimum steer-
ing control.
Should you notice any change in the
effort required to steer during normal
vehicle operation, have the power
steering checked by an authorized
Kia dealer. If the Electronic Power Steering
System does not operate normally,
the warning light will illuminate on
the instrument cluster. The steering
wheel may require increased
steering effort. Take your vehicle to
an authorized Kia dealer and have
the vehicle checked as soon as
possible.
When you operate the steering wheel in low temperature, the steer-
ing effort may be high or abnormal
noise may occur. If temperature
rises, the noise will likely disappear.
This is a normal condition.
When the vehicle is stationary, and the steering wheel is turned all the
way to the left or right continuous-
ly, the steering wheel becomes
harder to turn. The power assist is
limited to protect the motor from
overheating.
As time passes, the steering wheel
will return to its normal condition.
✽ ✽ NOTICE
The following symptoms may occur
during normal vehicle operation:
• The EPS warning light does not
illuminate.
• The steering gets heavy immedi- ately after turning the ignition
switch on. This happens as the sys-
tem performs the EPS system
diagnostics. When the diagnostics
are completed, the steering wheel
will return to its normal condition.
• A click noise may be heard from the EPS relay after the ignition
switch is turned to the ON or
LOCK (OFF) position.
• A motor noise may be heard when the vehicle is at a stop or at a low
driving speed.
• If the Electronic Power Steering System does not operate normally,
the warning light will illuminate on
the instrument cluster. The steer-
ing wheel may become difficult to
control or operate abnormally.
Take your vehicle to an authorized
Kia dealer and have the vehicle
checked as soon as possible. (Continued)
STEERING WHEEL
Page 140 of 595
455
Features of your vehicle
(Continued)
• When the charging system warninglight comes on due to the low volt-
age (When the alternator or bat-
tery) does not operate normally or
malfunctions), the steering wheel
may require increased steering
effort.Tilt and telescopic steering
Tilt and telescopic steering allows
you to adjust the steering wheel
before you drive. You can also raise it
to give your legs more room when
you exit and enter the vehicle.
The steering wheel should be posi-
tioned so that it is comfortable for
you to drive, while permitting you to
see the instrument panel warning
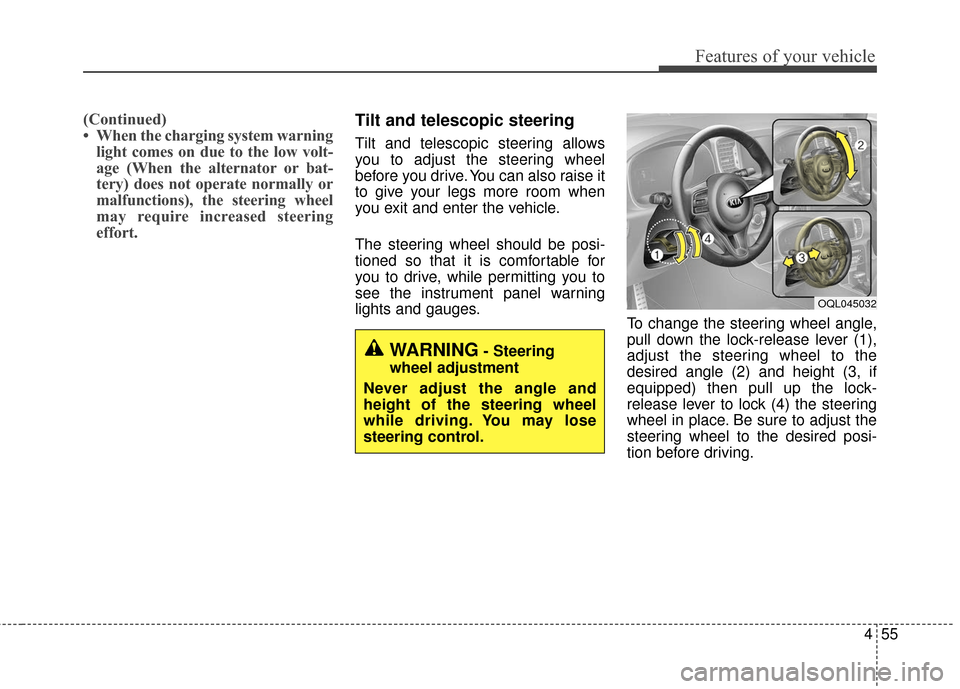
lights and gauges. To change the steering wheel angle,
pull down the lock-release lever (1),
adjust the steering wheel to the
desired angle (2) and height (3, if
equipped) then pull up the lock-
release lever to lock (4) the steering
wheel in place. Be sure to adjust the
steering wheel to the desired posi-
tion before driving.
WARNING- Steering
wheel adjustment
Never adjust the angle and
height of the steering wheel
while driving. You may lose
steering control.
OQL045032
Page 141 of 595
Features of your vehicle
56
4
✽ ✽
NOTICE
After adjustment, sometimes the
lock release lever may not lock the
steering wheel. It is not a malfunc-
tion. This occurs when two gears are
not engaged correctly. In this case,
adjust the steering wheel again and
then lock the steering wheel.
Heated steering wheel
(if equipped)
With the ignition switch in the ON
position, pressing the heated steer-
ing wheel button warms the steering
wheel. The indicator on the button
will illuminate.
To turn the heated steering wheel off,
press the button once again. The
indicator on the button will turn off.
✽ ✽NOTICE
The heated steering wheel will turn
off automatically approximately 30
minutes after the heated steering
wheel is turned on.
WARNING
If the steering wheel becomes
too warm, turn the system off.
The heated steering wheel may
cause burns even at low tem-
peratures, especially if used for
long periods of time.
OQL045033
Page 148 of 595
463
Features of your vehicle
6. Return to the vehicle and firmlypress and release the pro-
grammed HomeLink button up to
three times. The rolling code
equipped device should now rec-
ognize the HomeLink signal and
activate when the HomeLink but-
ton is pressed. The remaining two
buttons may now be programmed
if this has not previously been
done. Refer to the “Programming”
portion of this text. Operating HomeLink
To operate, simply press the
programmed HomeLink button.
Activation will now occur for the
trained product (garage door, securi-
ty system, entry door lock, estate
gate, or home or office lighting). For
convenience, the hand-held trans-
mitter of the device may also be used
at any time. The HomeLink Wireless
Controls System (once programmed)
or the original hand-held transmitter
may be used to activate the device
(e.g. garage door, entry door lock,
etc.). In the event that there are still
programming difficulties, contact
HomeLink at 1-800-355-3515 or on
the internet at www.homelink.com. Erasing programmed HomeLink
buttons
To erase the three programmed but-
tons (individual buttons cannot be
erased):
Press and hold the left and center
buttons simultaneously, until the
indicator light begins to flash
(approximately 20 seconds).
Release both buttons. Do not hold
for longer than 30 seconds.
HomeLink is now in the train (or
learning) mode and can be pro-
grammed at any time.
OQLA045070
Flashing
Page 152 of 595
467
Features of your vehicle
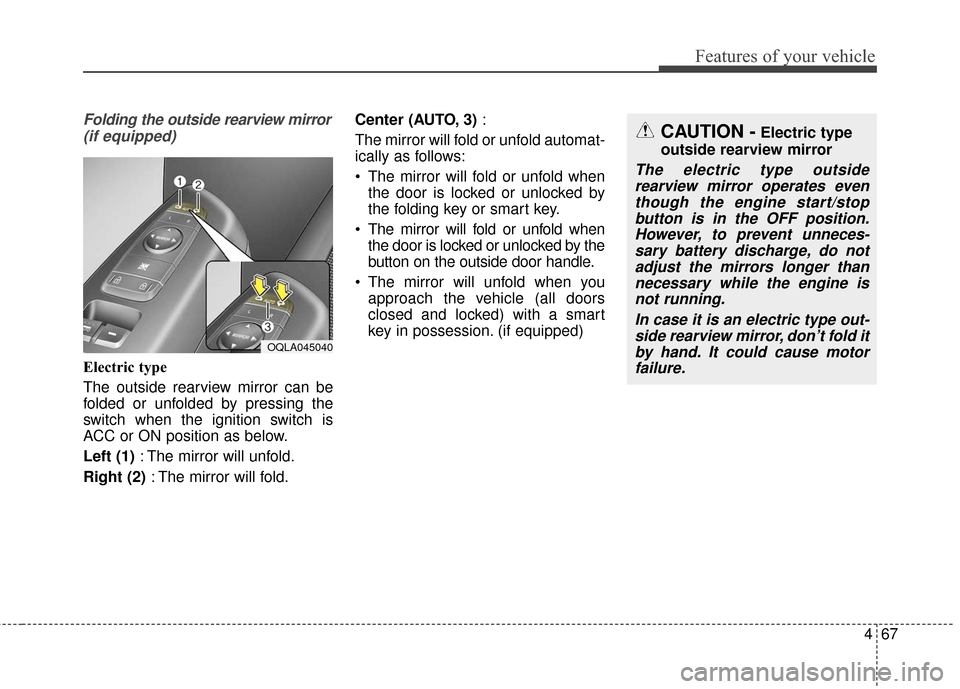
Folding the outside rearview mirror(if equipped)
Electric type
The outside rearview mirror can be
folded or unfolded by pressing the
switch when the ignition switch is
ACC or ON position as below.
Left (1) : The mirror will unfold.
Right (2) : The mirror will fold. Center (AUTO, 3)
:
The mirror will fold or unfold automat-
ically as follows:
The mirror will fold or unfold when the door is locked or unlocked by
the folding key or smart key.
The mirror will fold or unfold when the door is locked or unlocked by the
button on the outside door handle.
The mirror will unfold when you approach the vehicle (all doors
closed and locked) with a smart
key in possession. (if equipped)
OQLA045040
CAUTION -Electric type
outside rearview mirror
The electric type outside rearview mirror operates eventhough the engine start/stopbutton is in the OFF position.However, to prevent unneces-sary battery discharge, do notadjust the mirrors longer thannecessary while the engine isnot running.
In case it is an electric type out-side rearview mirror, don’t fold itby hand. It could cause motorfailure.