2017 KIA Sportage check engine
[x] Cancel search: check enginePage 469 of 595
Maintenance
Engine compartment . . . . . . . . . . . . . . . . . . . . . . . . 8-3
Maintenance services . . . . . . . . . . . . . . . . . . . . . . . . 8-4
• Owner’s responsibility . . . . . . . . . . . . . . . . . . . . . . . . . 8-4
• Owner maintenance precautions . . . . . . . . . . . . . . . . . 8-5
Owner maintenance . . . . . . . . . . . . . . . . . . . . . . . . . 8-6
• Owner maintenance schedule. . . . . . . . . . . . . . . . . . . . 8-6
Scheduled maintenance service. . . . . . . . . . . . . . . . 8-8
Explanation of scheduled maintenance items . . . 8-24
Engine oil. . . . . . . . . . . . . . . . . . . . . . . . . . . . . . . . . 8-28
• Checking the engine oil level . . . . . . . . . . . . . . . . . . . 8-28
• Changing the engine oil and filter . . . . . . . . . . . . . . . 8-29
Engine coolant . . . . . . . . . . . . . . . . . . . . . . . . . . . . 8-30
• Checking the coolant level . . . . . . . . . . . . . . . . . . . . . 8-30
• Changing the coolant . . . . . . . . . . . . . . . . . . . . . . . . . 8-33
Brake fluid . . . . . . . . . . . . . . . . . . . . . . . . . . . . . . . 8-34
• Checking the brake fluid level . . . . . . . . . . . . . . . . . . 8-34
Washer fluid . . . . . . . . . . . . . . . . . . . . . . . . . . . . . . 8-35
• Checking the washer fluid level . . . . . . . . . . . . . . . . . 8-35
Parking brake . . . . . . . . . . . . . . . . . . . . . . . . . . . . . 8-36
• Checking the parking brake. . . . . . . . . . . . . . . . . . . . 8-36
Air cleaner. . . . . . . . . . . . . . . . . . . . . . . . . . . . . . . . 8-37
• Filter replacement . . . . . . . . . . . . . . . . . . . . . . . . . . . . 8-37
Climate control air filter . . . . . . . . . . . . . . . . . . . . 8-39
• Filter inspection . . . . . . . . . . . . . . . . . . . . . . . . . . . . . . 8-39
Wiper blades . . . . . . . . . . . . . . . . . . . . . . . . . . . . . . 8-41
• Blade inspection . . . . . . . . . . . . . . . . . . . . . . . . . . . . . . 8-41
• Blade replacement . . . . . . . . . . . . . . . . . . . . . . . . . . . . 8-41
Battery . . . . . . . . . . . . . . . . . . . . . . . . . . . . . . . . . . . 8-\
44
• For best battery service . . . . . . . . . . . . . . . . . . . . . . . 8-44
• Recharging the battery . . . . . . . . . . . . . . . . . . . . . . . . 8-45
• Reset items . . . . . . . . . . . . . . . . . . . . . . . . . . . . . . . . . . 8-46\
Tires and wheels . . . . . . . . . . . . . . . . . . . . . . . . . . . 8-47
• Tire care . . . . . . . . . . . . . . . . . . . . . . . . . . . . . . . . . . . . \
8-47
• Recommended cold tire inflation pressures . . . . . . . 8-47
• Tire pressure . . . . . . . . . . . . . . . . . . . . . . . . . . . . . . . . 8-48
• Checking tire inflation pressure. . . . . . . . . . . . . . . . . 8-48
• Tire rotation . . . . . . . . . . . . . . . . . . . . . . . . . . . . . . . . . 8-49
• Wheel alignment and tire balance . . . . . . . . . . . . . . . 8-50
• Tire replacement . . . . . . . . . . . . . . . . . . . . . . . . . . . . . 8-51
• Wheel replacement . . . . . . . . . . . . . . . . . . . . . . . . . . . 8-52
• Tire traction . . . . . . . . . . . . . . . . . . . . . . . . . . . . . . . . . 8-52
• Tire maintenance . . . . . . . . . . . . . . . . . . . . . . . . . . . . . 8-52
• Tire sidewall labeling . . . . . . . . . . . . . . . . . . . . . . . . . 8-52
• All season tires . . . . . . . . . . . . . . . . . . . . . . . . . . . . . . . 8-59
• Summer tires . . . . . . . . . . . . . . . . . . . . . . . . . . . . . . . . 8-59
• Snow tires . . . . . . . . . . . . . . . . . . . . . . . . . . . . . . . . . . . 8-\
59
• Radial-ply tires . . . . . . . . . . . . . . . . . . . . . . . . . . . . . . 8-59
• Low aspect ratio tire . . . . . . . . . . . . . . . . . . . . . . . . . . 8-60
8
Page 474 of 595
Maintenance
68
OWNER MAINTENANCE
The following lists are vehicle checks
and inspections that should be per-
formed by the owner or an author-
ized Kia dealer at the frequencies
indicated to help ensure safe,
dependable operation of your vehi-
cle.
Any adverse conditions should be
brought to the attention of your deal-
er as soon as possible.
These Owner Maintenance Checks
are generally not covered by war-
ranties and you may be charged for
labor, parts and lubricants used.Owner maintenance schedule
When you stop for fuel:
Check the engine oil level.
Check the coolant level in coolantreservoir.
Check the windshield washer fluid level.
Look for low or under-inflated tires.
While operating your vehicle:
Note any changes in the sound of the exhaust or any smell of
exhaust fumes in the vehicle.
Check for vibrations in the steering wheel. Notice any increased steer-
ing effort or looseness in the steer-
ing wheel, or change in its straight-
ahead position.
Notice if your vehicle constantly turns slightly or “pulls” to one side
when traveling on smooth, level
road.
When stopping, listen and check for unusual sounds, pulling to one
side, increased brake pedal travel
or “hard-to-push” brake pedal.
If any slipping or changes in the operation of your transaxle occurs,
check the transaxle fluid level.
Check the automatic transaxle P (Park) function.
Check the parking brake.
Check for fluid leaks under your vehicle (water dripping from the air
conditioning system during or after
use is normal).
WARNING - Hot coolant
Be careful when checking your
engine coolant level when the
engine is hot. Scalding hot
coolant and steam may blow
out under pressure.
Page 475 of 595
87
Maintenance
At least monthly:
Check the coolant level in theengine coolant reservoir.
Check the operation of all exterior lights, including the stoplights, turn
signals and hazard warning flash-
ers.
Check the inflation pressures of all tires including the spare.
At least twice a year
(i.e., every Spring and Fall) :
Check the radiator, heater and air conditioning hoses for leaks or
damage.
Check the windshield washer spray and wiper operation. Clean
the wiper blades with clean cloth
dampened with washer fluid.
Check the headlight alignment.
Check the muffler, exhaust pipes, shields and clamps.
Check the lap/shoulder belts for wear and function.
Check for worn tires and loose wheel lug nuts.
At least once a year :
Clean the body and door drainholes.
Lubricate the door hinges and check the hood hinges.
Lubricate the door and hood locks and latches.
Lubricate the door rubber weather- strips.
Check the air conditioning system.
Inspect and lubricate automatic transaxle linkage and controls.
Clean the battery and terminals.
Check the brake fluid level.
Page 489 of 595
821
Maintenance
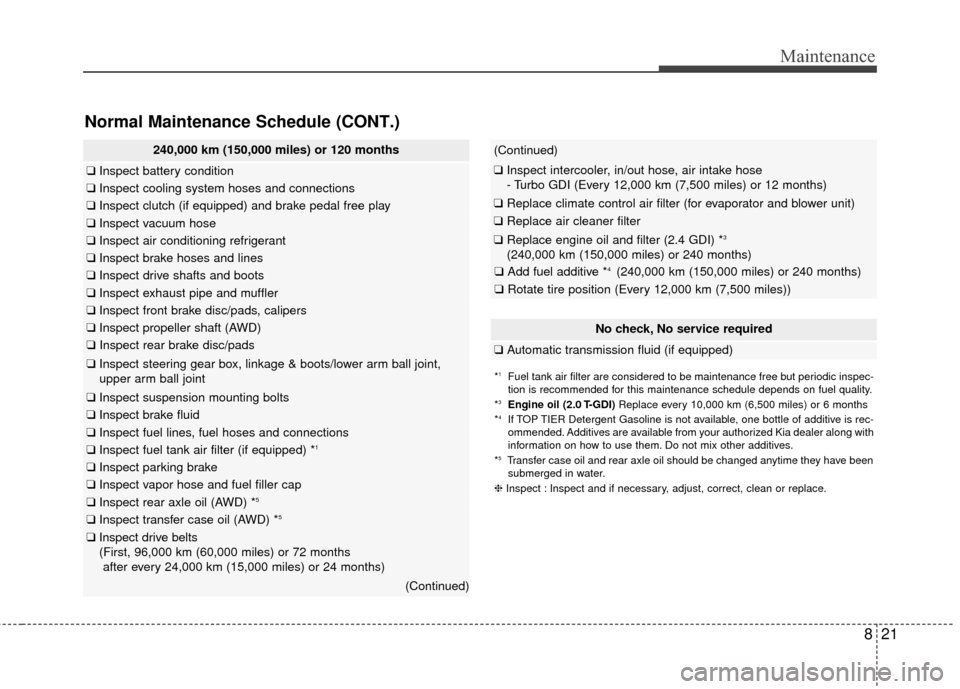
Normal Maintenance Schedule (CONT.)
240,000 km (150,000 miles) or 120 months
❑Inspect battery condition
❑Inspect cooling system hoses and connections
❑Inspect clutch (if equipped) and brake pedal free play
❑Inspect vacuum hose
❑Inspect air conditioning refrigerant
❑Inspect brake hoses and lines
❑Inspect drive shafts and boots
❑Inspect exhaust pipe and muffler
❑Inspect front brake disc/pads, calipers
❑Inspect propeller shaft (AWD)
❑Inspect rear brake disc/pads
❑Inspect steering gear box, linkage & boots/lower arm ball joint,
upper arm ball joint
❑ Inspect suspension mounting bolts
❑Inspect brake fluid
❑Inspect fuel lines, fuel hoses and connections
❑Inspect fuel tank air filter (if equipped) *1
❑Inspect parking brake
❑Inspect vapor hose and fuel filler cap
❑Inspect rear axle oil (AWD) *5
❑Inspect transfer case oil (AWD) *5
❑Inspect drive belts
(First, 96,000 km (60,000 miles) or 72 months
after every 24,000 km (15,000 miles) or 24 months)
(Continued)
(Continued)
❑ Inspect intercooler, in/out hose, air intake hose
- Turbo GDI (Every 12,000 km (7,500 miles) or 12 months)
❑ Replace climate control air filter (for evaporator and blower unit)
❑Replace air cleaner filter
❑Replace engine oil and filter (2.4 GDI) *3
(240,000 km (150,000 miles) or 240 months)
❑ Add fuel additive *4 (240,000 km (150,000 miles) or 240 months)
❑Rotate tire position (Every 12,000 km (7,500 miles))
No check, No service required
❑Automatic transmission fluid (if equipped)
*1Fuel tank air filter are considered to be maintenance free but periodic inspec-
tion is recommended for this maintenance schedule depends on fuel quality.
*
3Engine oil (2.0 T-GDI) Replace every 10,000 km (6,500 miles) or 6 months
*4If TOP TIER Detergent Gasoline is not available, one bottle of additive is rec-
ommended. Additives are available from your authorized Kia dealer along with
information on how to use them. Do not mix other additives.
*
5Transfer case oil and rear axle oil should be changed anytime they have been submerged in water.
❈ Inspect : Inspect and if necessary, adjust, correct, clean or replace.
Page 492 of 595
Maintenance
24
8
EXPLANATION OF SCHEDULED MAINTENANCE ITEMS
Engine oil and filter
The engine oil and filter should be
changed at the intervals specified in
the maintenance schedule. If the
vehicle is being driven in severe con-
ditions, more frequent oil and filter
changes are required.
Drive belts
Inspect all drive belts for evidence of
cuts, cracks, excessive wear or oil
saturation and replace if necessary.
Drive belts should be checked peri-
odically for proper tension and
adjusted as necessary.
Fuel filter (for gasoline)
Kia gasoline vehicle is equipped a
lifetime fuel filter that integrated with
the fuel tank. Regular maintenance
or replacement is not needed but
depends on fuel quality. If there are
some important safety matters like
fuel flow restriction, surging, loss of
power, hard starting problem etc, fuel
filter inspection or replace is needed.
The fuel filter be Inspected or
replaced by an authorized Kia dealer.
Fuel lines, fuel hoses and con-
nections
Check the fuel lines, fuel hoses and
connections for leakage and dam-
age. Have an authorized Kia dealer
replace any damaged or leaking
parts immediately.
Vapor hose and fuel filler cap
The vapor hose and fuel filler cap
should be inspected at those inter-
vals specified in the maintenance
schedule. Make sure that a new
vapor hose or fuel filler cap is cor-
rectly replaced.
Page 493 of 595
825
Maintenance
Vacuum crankcase ventilation
hoses
Inspect the surface of hoses for evi-
dence of heat and/or mechanical
damage. Hard and brittle rubber,
cracking, tears, cuts, abrasions, and
excessive swelling indicate deterio-
ration. Particular attention should be
paid to examine those hose surfaces
nearest to high heat sources, such
as the exhaust manifold.
Inspect the hose routing to assure
that the hoses do not come in con-
tact with any heat source, sharp
edges or moving component which
might cause heat damage or
mechanical wear. Inspect all hose
connections, such as clamps and
couplings, to make sure they are
secure, and that no leaks are pres-
ent. Hoses should be replaced
immediately if there is any evidence
of deterioration or damage.
Air cleaner filter
A Genuine Kia air cleaner filter is
recommended when the filter is
replaced.
Spark plugs
Make sure to install new spark plugs
of the correct heat range.
Valve clearance (if equipped)
Inspect excessive valve noise and/or
engine vibration and adjust if neces-
sary. An authorized Kia dealer
should perform the operation.
Cooling system
Check the cooling system compo-
nents, such as the radiator, coolant
reservoir, hoses and connections for
leakage and damage. Replace any
damaged parts.
Coolant
The coolant should be changed at
the intervals specified in the mainte-
nance schedule.
Page 495 of 595
827
Maintenance
Brake discs, pads, calipers
and rotors
Check the pads for excessive wear,
discs for run out and wear, and
calipers for fluid leakage.
Exhaust pipe and muffler
Visually inspect the exhaust pipes,
muffler and hangers for cracks, dete-
rioration, or damage. Start the
engine and listen carefully for any
exhaust gas leakage. Tighten con-
nections or replace parts as neces-
sary.
Suspension mounting bolts
Check the suspension connections
for looseness or damage. Retighten
to the specified torque.
Steering gear box, linkage &
boots/lower arm ball joint
With the vehicle stopped and engine
off, check for excessive free-play in
the steering wheel.
Check the linkage for bends or dam-
age. Check the dust boots and ball
joints for deterioration, cracks, or
damage. Replace any damaged
parts.
Drive shafts and boots
Check the drive shafts, boots and
clamps for cracks, deterioration, or
damage. Replace any damaged
parts and, if necessary, repack the
grease.
Air conditioning refrigerant
Check the air conditioning lines and
connections for leakage and dam-
age.
Page 496 of 595
Maintenance
28
8
ENGINE OIL
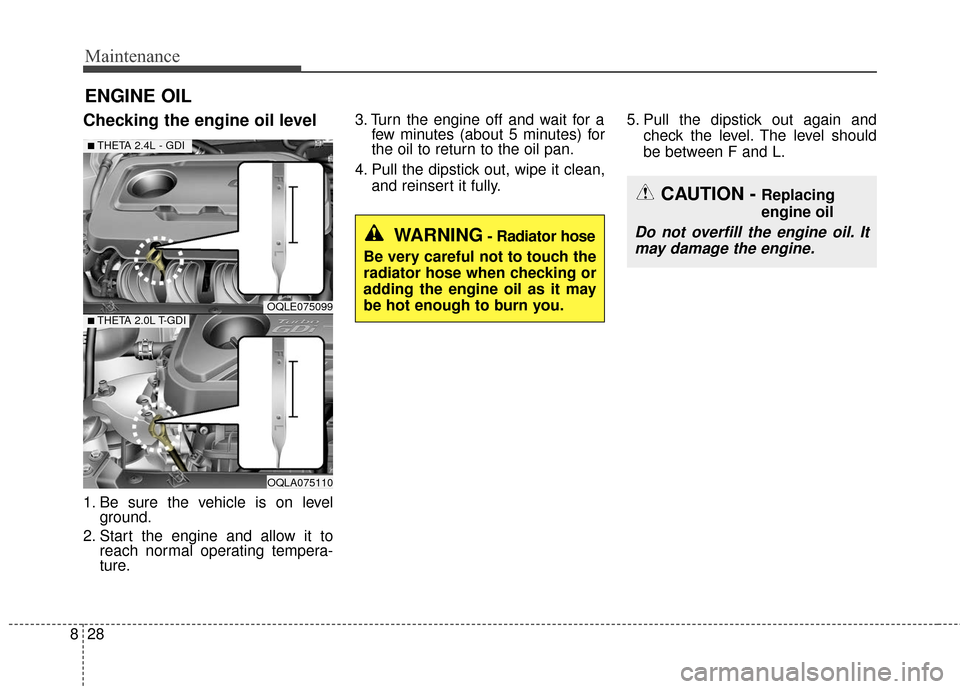
Checking the engine oil level
1. Be sure the vehicle is on level
ground.
2. Start the engine and allow it to reach normal operating tempera-
ture. 3. Turn the engine off and wait for a
few minutes (about 5 minutes) for
the oil to return to the oil pan.
4. Pull the dipstick out, wipe it clean, and reinsert it fully. 5. Pull the dipstick out again and
check the level. The level should
be between F and L.
CAUTION - Replacing
engine oil
Do not overfill the engine oil. Itmay damage the engine.WARNING- Radiator hose
Be very careful not to touch the
radiator hose when checking or
adding the engine oil as it may
be hot enough to burn you.
OQLE075099
OQLA075110
■THETA 2.4L - GDI
■THETA 2.0L T-GDI