2017 KIA Sportage Seat position
[x] Cancel search: Seat positionPage 52 of 595
Safety features of your vehicle
36
3
Booster seats
A booster seat is a restraint designed
to improve the fit of the vehicle’s seat
belt system. A booster seat positions
the seat belt so that it fits properly
over the lap of your child.
Keep your child in a booster seat
until they are big enough to sit in the
seat without a booster and still have
the seat belt fit properly. For a seat
belt to fit properly, the lap belt must
lie snugly across the upper thighs,
not the stomach. The shoulder belt
should lie snug across the shoulder
and chest and not across the neck or
face. Children under age 13 must
always ride in the rear seats and
must always be properly restrained
to minimize the risk of injury.Installing a Child Restraint
System (CRS)
After selecting a proper child seat for
your child, check to make sure it fits
properly in your vehicle. Follow the
instructions provided by the manu-
facturer when installing the child
seat. Note these general steps when
installing the seat to your vehicle:
Properly secure the child
restraint to the vehicle. All child
restraints must be secured to the
vehicle with the lap part of a
lap/shoulder belt or with the
LATCH system.
Make sure the child restraint is
firmly secured. After installing a
child restraint to the vehicle, push
and pull the seat forward and from
side-to-side to verify that it is
securely attached to the seat. A
child restraint secured with a seat
belt should be installed as firmly as
possible. However, some side-to-
side movement can be expected.
Secure the child in the child
restraint. Make sure the child is
properly strapped in the child
restraint according to the manufac-
turer instructions.
Page 53 of 595
337
Safety features of your vehicle
Lower Anchors and Tether forChildren (LATCH) System
The LATCH system holds a child
restraint during driving and in an
accident. This system is designed to
make installation of the child restraint
easier and reduce the possibility of
improperly installing your child
restraint. The LATCH system uses
anchors in the vehicle and attach-
ments on the child restraint. The
LATCH system eliminates the need
to use seat belts to secure the child
restraint to the rear seats.
Lower anchors are metal bars built
into the vehicle. There are two lower
anchors for each LATCH seating
position that will accommodate a
child restraint with lower attach-
ments.
To use the LATCH system in your
vehicle, you must have a child
restraint with LATCH attachments.
The child seat manufacturer will pro-
vide you with instructions on how to
use the child seat with its attach-
ments for the LATCH lower anchors. LATCH anchors have been provided
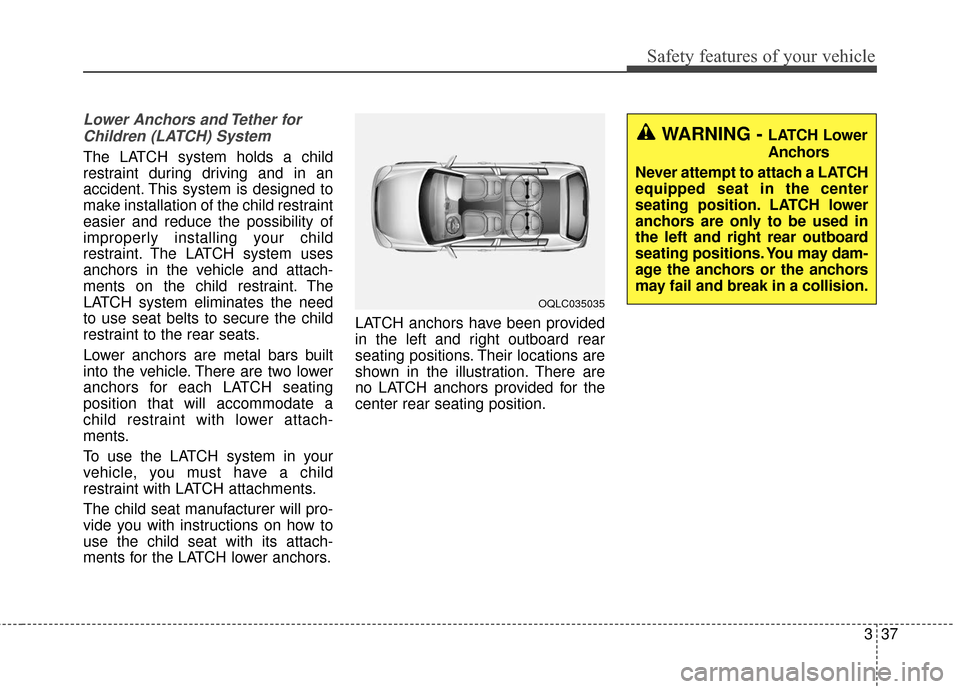
in the left and right outboard rear
seating positions. Their locations are
shown in the illustration. There are
no LATCH anchors provided for the
center rear seating position.
OQLC035035
WARNING - LATCH Lower
Anchors
Never attempt to attach a LATCH
equipped seat in the center
seating position. LATCH lower
anchors are only to be used in
the left and right rear outboard
seating positions. You may dam-
age the anchors or the anchors
may fail and break in a collision.
Page 54 of 595
Safety features of your vehicle
38
3
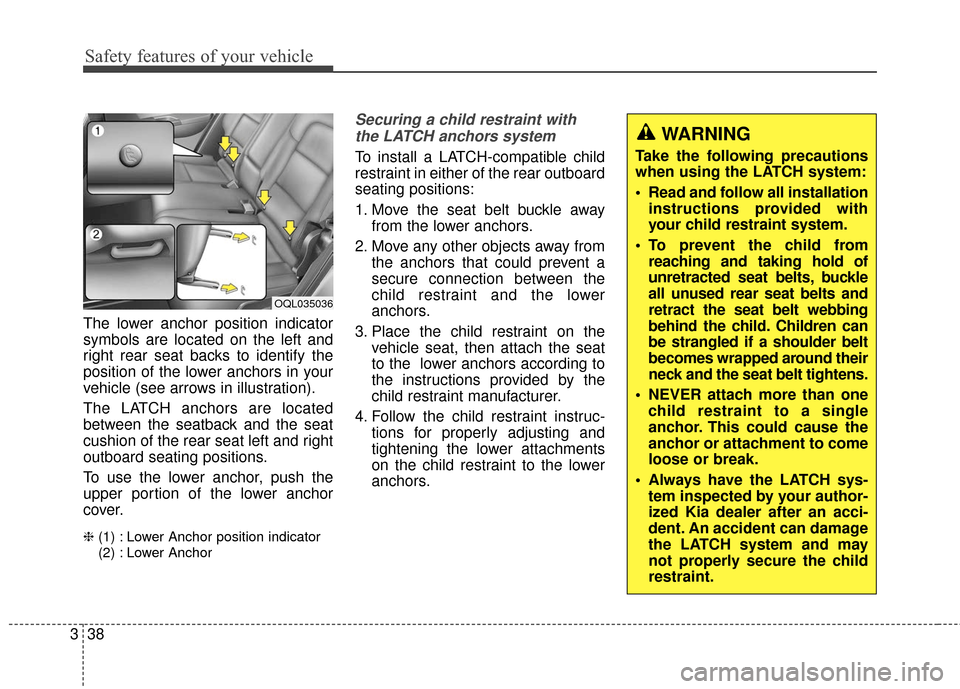
The lower anchor position indicator
symbols are located on the left and
right rear seat backs to identify the
position of the lower anchors in your
vehicle (see arrows in illustration).
The LATCH anchors are located
between the seatback and the seat
cushion of the rear seat left and right
outboard seating positions.
To use the lower anchor, push the
upper portion of the lower anchor
cover.
❈ (1) : Lower Anchor position indicator
(2) : Lower Anchor
Securing a child restraint with
the LATCH anchors system
To install a LATCH-compatible child
restraint in either of the rear outboard
seating positions:
1. Move the seat belt buckle away from the lower anchors.
2. Move any other objects away from the anchors that could prevent a
secure connection between the
child restraint and the lower
anchors.
3. Place the child restraint on the vehicle seat, then attach the seat
to the lower anchors according to
the instructions provided by the
child restraint manufacturer.
4. Follow the child restraint instruc- tions for properly adjusting and
tightening the lower attachments
on the child restraint to the lower
anchors.
OQL035036
WARNING
Take the following precautions
when using the LATCH system:
Read and follow all installationinstructions provided with
your child restraint system.
To prevent the child from reaching and taking hold of
unretracted seat belts, buckle
all unused rear seat belts and
retract the seat belt webbing
behind the child. Children can
be strangled if a shoulder belt
becomes wrapped around their
neck and the seat belt tightens.
NEVER attach more than one child restraint to a single
anchor. This could cause the
anchor or attachment to come
loose or break.
Always have the LATCH sys- tem inspected by your author-
ized Kia dealer after an acci-
dent. An accident can damage
the LATCH system and may
not properly secure the child
restraint.
Page 57 of 595
341
Safety features of your vehicle
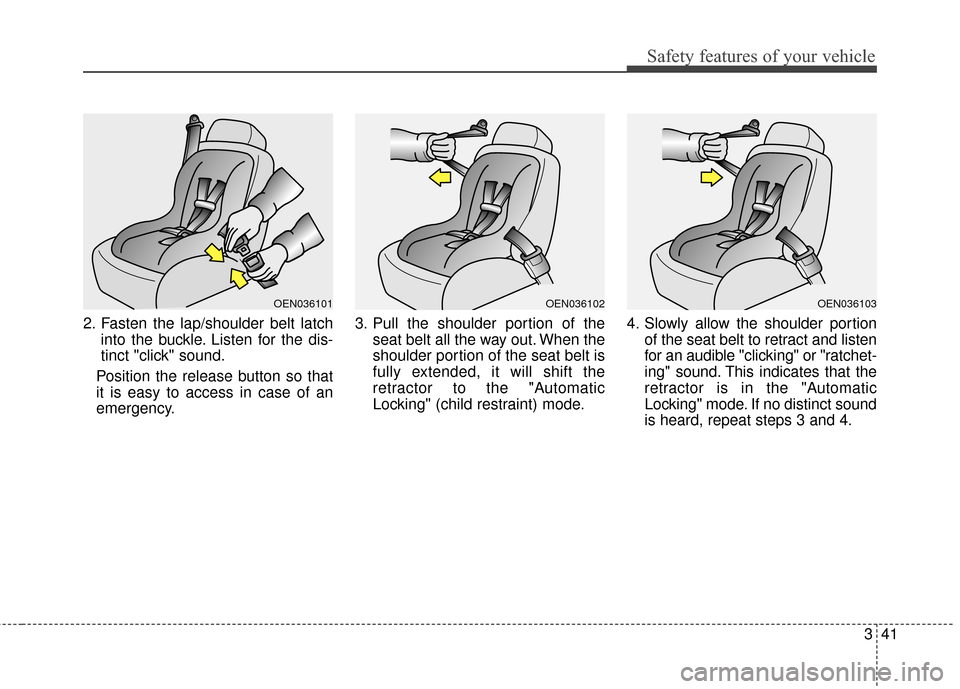
2. Fasten the lap/shoulder belt latchinto the buckle. Listen for the dis-
tinct "click" sound.
Position the release button so that
it is easy to access in case of an
emergency. 3. Pull the shoulder portion of the
seat belt all the way out. When the
shoulder portion of the seat belt is
fully extended, it will shift the
retractor to the "Automatic
Locking" (child restraint) mode. 4. Slowly allow the shoulder portion
of the seat belt to retract and listen
for an audible "clicking" or "ratchet-
ing" sound. This indicates that the
retractor is in the "Automatic
Locking" mode. If no distinct sound
is heard, repeat steps 3 and 4.
OEN036101OEN036102OEN036103
Page 58 of 595
Safety features of your vehicle
42
3
5. Remove as much slack from the
belt as possible by pushing down
on the child restraint system while
feeding the shoulder belt back into
the retractor.
6. Push and pull on the child restraint system to confirm that the seat
belt is holding it firmly in place. If it
is not, release the seat belt and
repeat steps 2 through 6.
7. Double check that the retractor is in the "Automatic Locking" mode
by attempting to pull more of the
seat belt out of the retractor. If you
cannot, the retractor is in the
"Automatic Locking" mode.
If your CRS manufacturer instructs or
recommends you to use a tether
anchor with the lap/shoulder belt,
refer to the previous pages for more
information.✽ ✽ NOTICE
When the seat belt is allowed to
retract to its fully stowed position,
the retractor will automatically
switch from the "Automatic
Locking" mode to the emergency
lock mode for normal adult usage.
To remove the child restraint, press
the release button on the buckle and
then pull the lap/shoulder belt out of
the restraint and allow the seat belt
to retract fully.
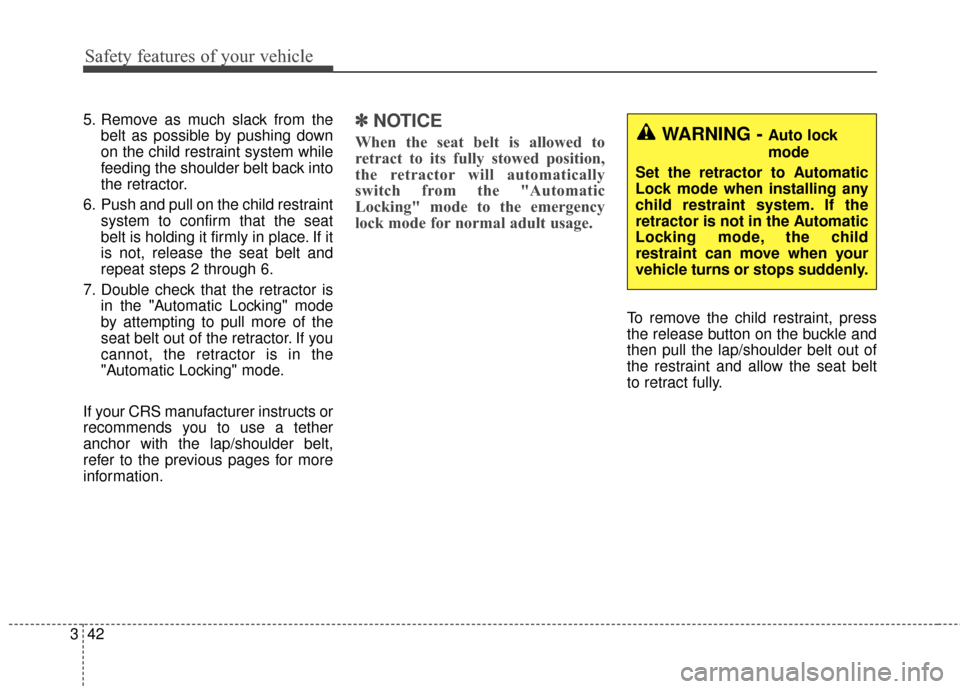
WARNING - Auto lock
mode
Set the retractor to Automatic
Lock mode when installing any
child restraint system. If the
retractor is not in the Automatic
Locking mode, the child
restraint can move when your
vehicle turns or stops suddenly.
Page 60 of 595
Safety features of your vehicle
44
3
How does the air bag system
operate?
Air bags are activated (able to
inflate if necessary) only when the
ignition switch is turned to the ON
or START position.
The appropriate air bags inflate instantly in the event of a serious
frontal collision or side collision in
order to help protect the occupants
from serious physical injury.
In normal conditions, the airbag is designed to deploy based on cer-
tain angle and intensity of the colli-
sion. These two factors are crucial
elements for deciding whether to
transmit airbag deployment signal
or start the electrical operation or
not.
The airbag will deploy based on angle and intensity of the collision.
It will not deploy in every crash or
collision situations The front air bags will completely
inflate and deflate in an instant.
It is virtually impossible for you to
see the air bags inflate during an
accident.
It is much more likely that you will
simply see the deflated air bags
hanging out of their storage com-
partments after the collision.
In addition to inflating in serious side collisions, side and/or curtain
air bags will inflate if the sensing
system detects a rollover.
When a rollover is detected curtain air bags will remain inflated longer
to help provide protection from
ejection, especially when used in
conjunction with the seat belts. In order to help provide protection,
the air bags must inflate rapidly.
The speed of the air bag inflation is
a consequence of extremely short
time in which to inflate the air bag
between the occupant and the
vehicle structures before the occu-
pant impacts those structures. This
speed of inflation reduces the risk
of serious or life-threatening
injuries and is thus a necessary
part of the air bag design.
However, air bag inflation can also
cause injuries which can include
facial abrasions, bruises and bro-
ken bones because the inflation
speed also causes the air bags to
expand with a great deal of force.
There are even circumstances under which contact with the
steering wheel or passenger air
bag can cause fatal injuries,
especially if the occupant is
positioned excessively close to
the steering wheel or passenger
air bag.
Page 66 of 595
Safety features of your vehicle
50
3
The SRS can function only when
the ignition switch is in the ON
position. If the SRS air bag warning
light does not illuminate, or contin-
uously remains on after illuminat-
ing for about 6 seconds when the
ignition switch is turned to the ON
position, or after the engine is
started, comes on while driving,
the SRS is not working properly. If
this occurs, have your vehicle
immediately inspected by an
authorized Kia dealer.
✽ ✽ NOTICE
Before you replace a fuse or discon-
nect a battery terminal, turn the
ignition switch to the LOCK posi-
tion and remove the ignition switch.
Never remove or replace the air bag
related fuse(s) when the ignition
switch is in the ON position. Failure
to heed this warning will cause the
SRS air bag warning light to illumi-
nate.
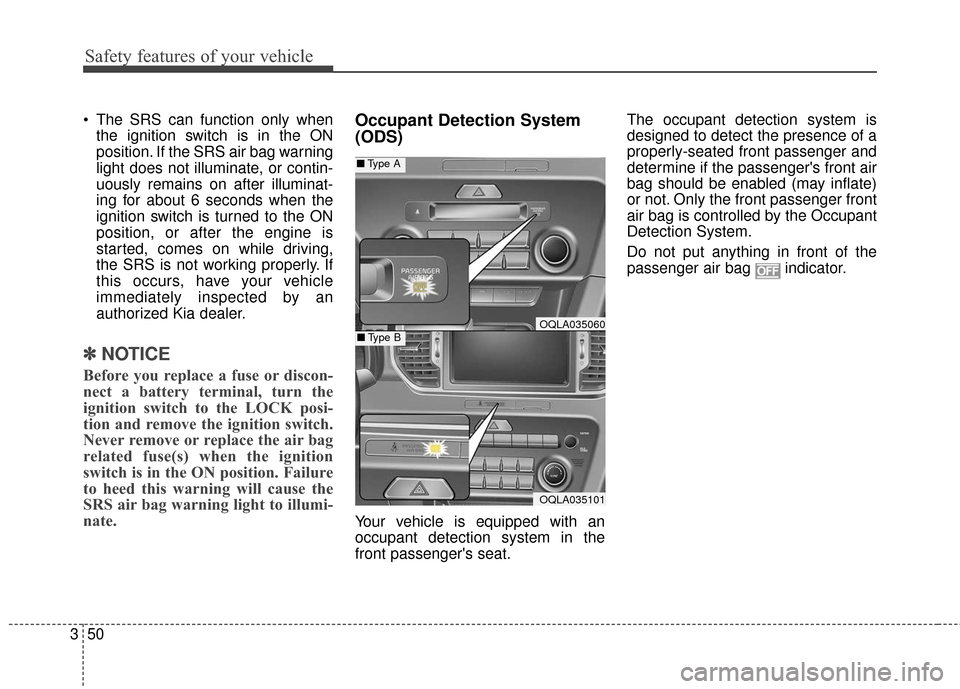
Occupant Detection System
(ODS)
Your vehicle is equipped with an
occupant detection system in the
front passenger's seat. The occupant detection system is
designed to detect the presence of a
properly-seated front passenger and
determine if the passenger's front air
bag should be enabled (may inflate)
or not. Only the front passenger front
air bag is controlled by the Occupant
Detection System.
Do not put anything in front of the
passenger air bag indicator.
OQLA035101
■
Type A
■Type BOQLA035060
Page 67 of 595
351
Safety features of your vehicle
Main components of the occu-pant detection system
An detection device located within the front passenger seat cushion.
An electronic system which deter- mines whether the passenger air
bag systems should be activated
or deactivated.
An indicator light located on the instrument panel which illuminates
the words PASSENGER AIR BAG
“OFF” indicates the front passen-
ger air bag system is deactivated.
The instrument panel air bag warn- ing light is interconnected with the
occupant detection system. If the front passenger seat is occu-
pied by a person that the system
determines to be of appropriate size,
and he/she sits properly (sitting
upright with the seatback in an
upright position, centered on the
seat cushion with their seat belt on,
legs comfortably extended and their
feet on the floor), the PASSENGER
AIR BAG “OFF” indicator will turn off
and the front passenger's air bag will
be able to inflate, if necessary, in
frontal crashes.
You will find the PASSENGER AIR
BAG “OFF” indicator on the center
facia panel. This system detects the
conditions 1~4 in the following table
and activates or deactivates the front
passenger air bag based on these
conditions. Always be sure that you and all vehicle
occupants are seated and restrained
properly (sitting upright with the seat in
an upright position, centered on the
seat cushion, with the person’s legs
comfortably extended, feet on the
floor, and wearing the safety belt prop-
erly) for the most effective protection
by the air bag and the safety belt.
The ODS (Occupant Detection
System) may not function properly if
the passenger takes actions which
can defeat the detection system.
These include:
(1) Failing to sit in an upright position.
(2) Leaning against the door or cen- ter console.
(3) Sitting towards the sides or the front of the seat.
(4) Putting legs on the dashboard or resting them on other locations
which reduce the passenger
weight on the front seat.
(5) Improperly wearing the safety belt.
(6) Reclining the seat back.