2017 KIA SOUL tire type
[x] Cancel search: tire typePage 6 of 589
Introduction
21
We want to help you get the greatest
possible driving pleasure from your
vehicle. Your Owner’s Manual can
assist you in many ways. We strong-
ly recommend that you read the
entire manual. In order to minimize
the chance of death or injury, you
must read the WARNING and CAU-
TION sections in the manual.
Illustrations complement the words
in this manual to best explain how to
enjoy your vehicle. By reading your
manual, you will learn about fea-
tures, important safety information,
and driving tips under various road
conditions.The general layout of the manual is
provided in the Table of Contents.
Use the index when looking for a
specific area or subject; it has an
alphabetical listing of all located in
the back of this manual.
Sections: This manual has eight sec-
tions plus an index. Each section
begins with a brief list of contents so
you can tell at a glance if that section
has the information you want.
You will find various types of safety
instructions in this manual. These
instructions were prepared to
enhance your personal safety.
Carefully read and follow ALL proce-
dures and recommendations provid-
ed in these instructions.
✽ ✽
NOTICE
A NOTICE indicates interesting or
helpful information is being provided.
HOW TO USE THIS MANUAL
WARNING
A WARNING indicates a situation
in which harm, serious bodily
injury or death could result if the
warning is ignored.
CAUTION
A CAUTION indicates a situation
in which damage to your vehiclecould result if the caution isignored.
Page 391 of 589
Driving your vehicle
72
6
If at all possible, avoid sharp turns or
abrupt maneuvers, do not load your
roof rack with heavy cargo, and
never modify your vehicle in any way.Rocking the vehicle
If it is necessary to rock the vehicle to
free it from snow, sand, or mud, first
turn the steering wheel right and left
to clear the area around your front
wheels. Then, shift back and forth
between 1st (First) and R (Reverse)
in vehicles equipped with a manual
transaxle or R (Reverse) and any for-
ward gear in vehicles equipped with
an automatic transaxle. Do not race
the engine, and spin the wheels as lit-
tle as possible. If you are still stuck
after a few tries, have the vehicle
pulled out by a tow vehicle to avoid
engine overheating and possible
damage to the transaxle.
The ESC system should be turned
OFF prior to rocking the vehicle.CAUTION- Vehicle rocking
Prolonged rocking may causeengine overheating, transaxledamage or failure, and tire dam-age.
WARNING- Replacement
tires
Always use the size and type of
tires recommended in the tire
section of the manual.
Installation of variant tires can
affect the safety and perform-
ance of your vehicle.
CAUTION- Spinning tires
Do not spin the wheels, espe- cially at speeds more than 35mph (56 km/h). Spinning thewheels at high speeds when thevehicle is stationary couldcause a tire to overheat whichcould result in tire damage thatmay injure bystanders.
WARNING
- Sudden vehicle movement
Do not attempt to rock the vehi-
cle if people or objects are near-
by. The vehicle may suddenly
move forward or backwards as
it becomes unstuck.
Page 395 of 589
Driving your vehicle
76
6
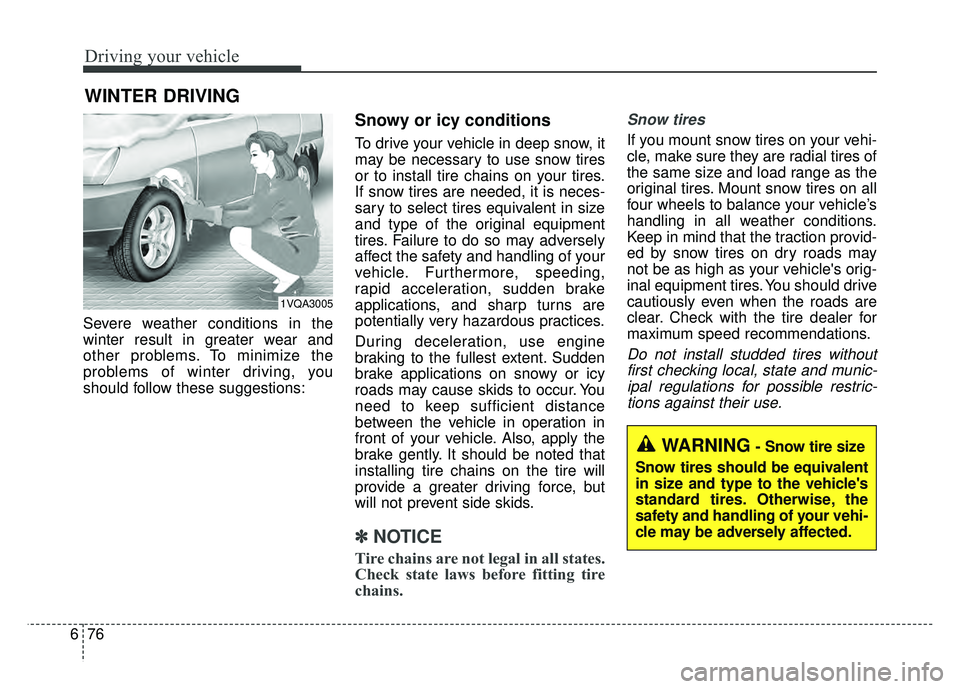
Severe weather conditions in the
winter result in greater wear and
other problems. To minimize the
problems of winter driving, you
should follow these suggestions:
Snowy or icy conditions
To drive your vehicle in deep snow, it
may be necessary to use snow tires
or to install tire chains on your tires.
If snow tires are needed, it is neces-
sary to select tires equivalent in size
and type of the original equipment
tires. Failure to do so may adversely
affect the safety and handling of your
vehicle. Furthermore, speeding,
rapid acceleration, sudden brake
applications, and sharp turns are
potentially very hazardous practices.
During deceleration, use engine
braking to the fullest extent. Sudden
brake applications on snowy or icy
roads may cause skids to occur. You
need to keep sufficient distance
between the vehicle in operation in
front of your vehicle. Also, apply the
brake gently. It should be noted that
installing tire chains on the tire will
provide a greater driving force, but
will not prevent side skids.
✽ ✽
NOTICE
Tire chains are not legal in all states.
Check state laws before fitting tire
chains.
Snow tires
If you mount snow tires on your vehi-
cle, make sure they are radial tires of
the same size and load range as the
original tires. Mount snow tires on all
four wheels to balance your vehicle’s
handling in all weather conditions.
Keep in mind that the traction provid-
ed by snow tires on dry roads may
not be as high as your vehicle's orig-
inal equipment tires. You should drive
cautiously even when the roads are
clear. Check with the tire dealer for
maximum speed recommendations.
Do not install studded tires without
first checking local, state and munic-ipal regulations for possible restric-tions against their use.
WINTER DRIVING
1VQA3005
WARNING- Snow tire size
Snow tires should be equivalent
in size and type to the vehicle's
standard tires. Otherwise, the
safety and handling of your vehi-
cle may be adversely affected.
Page 396 of 589
677
Driving your vehicle
Tire chains
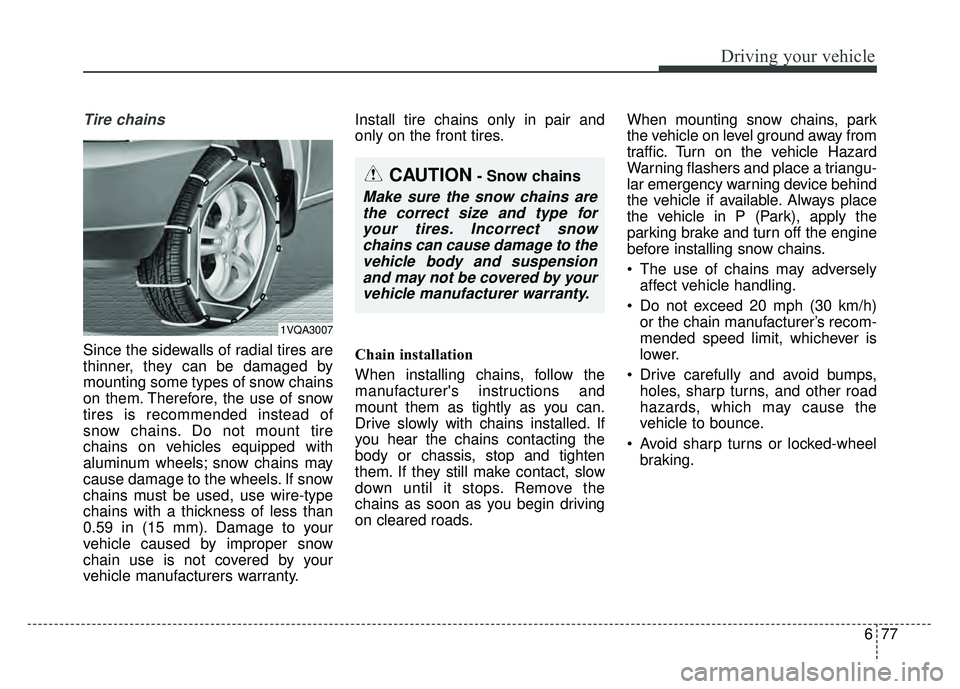
Since the sidewalls of radial tires are
thinner, they can be damaged by
mounting some types of snow chains
on them. Therefore, the use of snow
tires is recommended instead of
snow chains. Do not mount tire
chains on vehicles equipped with
aluminum wheels; snow chains may
cause damage to the wheels. If snow
chains must be used, use wire-type
chains with a thickness of less than
0.59 in (15 mm). Damage to your
vehicle caused by improper snow
chain use is not covered by your
vehicle manufacturers warranty.Install tire chains only in pair and
only on the front tires.
Chain installation
When installing chains, follow the
manufacturer's instructions and
mount them as tightly as you can.
Drive slowly with chains installed. If
you hear the chains contacting the
body or chassis, stop and tighten
them. If they still make contact, slow
down until it stops. Remove the
chains as soon as you begin driving
on cleared roads.
When mounting snow chains, park
the vehicle on level ground away from
traffic. Turn on the vehicle Hazard
Warning flashers and place a triangu-
lar emergency warning device behind
the vehicle if available. Always place
the vehicle in P (Park), apply the
parking brake and turn off the engine
before installing snow chains.
The use of chains may adversely
affect vehicle handling.
Do not exceed 20 mph (30 km/h) or the chain manufacturer’s recom-
mended speed limit, whichever is
lower.
Drive carefully and avoid bumps, holes, sharp turns, and other road
hazards, which may cause the
vehicle to bounce.
Avoid sharp turns or locked-wheel braking.
1VQA3007
CAUTION- Snow chains
Make sure the snow chains arethe correct size and type foryour tires. Incorrect snowchains can cause damage to thevehicle body and suspensionand may not be covered by yourvehicle manufacturer warranty.
Page 414 of 589
79
What to do in an emergency
TIRE PRESSURE MONITORING SYSTEM (TPMS)
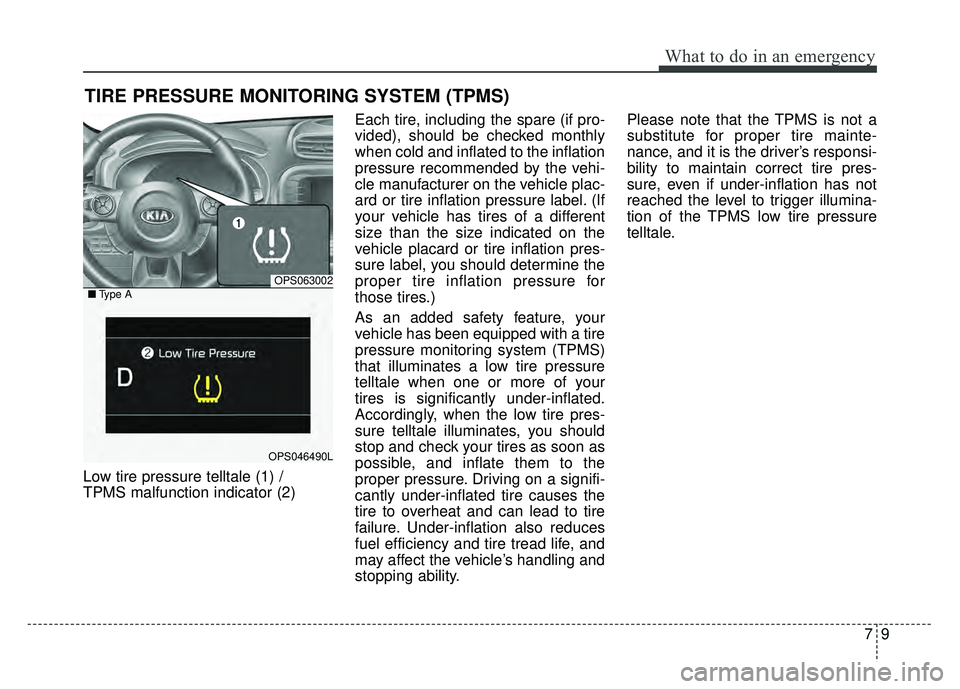
Low tire pressure telltale (1) /
TPMS malfunction indicator (2)Each tire, including the spare (if pro-
vided), should be checked monthly
when cold and inflated to the inflation
pressure recommended by the vehi-
cle manufacturer on the vehicle plac-
ard or tire inflation pressure label. (If
your vehicle has tires of a different
size than the size indicated on the
vehicle placard or tire inflation pres-
sure label, you should determine the
proper tire inflation pressure for
those tires.)
As an added safety feature, your
vehicle has been equipped with a tire
pressure monitoring system (TPMS)
that illuminates a low tire pressure
telltale when one or more of your
tires is significantly under-inflated.
Accordingly, when the low tire pres-
sure telltale illuminates, you should
stop and check your tires as soon as
possible, and inflate them to the
proper pressure. Driving on a signifi-
cantly under-inflated tire causes the
tire to overheat and can lead to tire
failure. Under-inflation also reduces
fuel efficiency and tire tread life, and
may affect the vehicle’s handling and
stopping ability.Please note that the TPMS is not a
substitute for proper tire mainte-
nance, and it is the driver’s responsi-
bility to maintain correct tire pres-
sure, even if under-inflation has not
reached the level to trigger illumina-
tion of the TPMS low tire pressure
telltale.
OPS063002
OPS046490L
■
Type A
Page 430 of 589
725
What to do in an emergency
It is possible that some tires, espe-
cially with larger punctures or dam-
age to the sidewall, cannot be sealed
completely.
Air pressure loss in the tire may
adversely affect tire performance.
For this reason, you should avoid
abrupt steering or other driving
maneuvers, especially if the vehicle
is heavily loaded or if a trailer is in
use.
The Tire Mobility Kit is not designed
or intended as a permanent tire
repair method and is to be used for
one tire only.
This instruction shows you step by
step how to temporarily seal the
puncture simply and reliably.
Read the section "Notes on the safe
use of the Tire Mobility Kit".Notes on the suggested use of
the Tire Mobility Kit
Park your car at the side of the roadso that you can work with the Tire
Mobility Kit away from moving traf-
fic.
To be sure your vehicle will not move, even when you're on fairly
level ground, always set your park-
ing brake.
Only use the Tire Mobility Kit for sealing/inflation passenger car tires.
Only punctured areas located with-
in the tread region of the tire can be
sealed using the tire mobility kit.
Do not use on motorcycles, bicycles or any other type of tires.
When the tire and wheel are dam- aged, do not use Tire Mobility Kit for
your safety.
Use of the Tire Mobility Kit may not be effective for tire damage larger
than approximately 0.24 in (6 mm).
Please contact the nearest Kia
dealership if the tire cannot be
made roadworthy with the Tire
Mobility Kit. Do not use the Tire Mobility Kit if a
tire is severely damaged by driving
run flat or with insufficient air pres-
sure.
Do not remove any foreign objects such as nails or screws that have
penetrated the tire.
Provided the car is outdoors, leave the engine running. Otherwise
operating the compressor may
eventually drain the car battery.
Never leave the Tire Mobility Kit unattended while it is being used.
Do not leave the compressor run- ning for more than 10 min. at a time
or it may overheat.
Do not use the Tire Mobility Kit if the ambient temperature is below -
22°F (-30°C).
Page 506 of 589
865
Maintenance
2. Tire size designation
A tire’s sidewall is marked with a tire
size designation. You will need this
information when selecting replace-
ment tires for your vehicle. The fol-
lowing explains what the letters and
numbers in the tire size designation
mean.
Example tire size designation:
(These numbers are provided as an
example only; your tire size designa-
tor could vary depending on your
vehicle.)
P235/65R17 108TP - Applicable vehicle type (tires
marked with the prefix “P’’ are
intended for use on passenger
vehicles or light trucks; however,
not all tires have this marking).
235 - Tire width in millimeters.
65 - Aspect ratio. The tire’s section height as a percentage of its
width.
R - Tire construction code (Radial).
17 - Rim diameter in inches.
108 - Load Index, a numerical code associated with the maximum
load the tire can carry.
T - Speed Rating Symbol. See the speed rating chart in this section
for additional information. Wheel size designation
Wheels are also marked with impor-
tant information that you need if you
ever have to replace one. The follow-
ing explains what the letters and
numbers in the wheel size designa-
tion mean.
Example wheel size designation:
7.0JX17
7.0 - Rim width in inches.
J - Rim contour designation.
17 - Rim diameter in inches.
Page 513 of 589
Maintenance
72
8
When driving on roads covered
with snow or ice, drive at less than
20 mph (30 km/h).
Use the SAE “S” class or wire chains.
If you hear noise caused by chains contacting the body, retighten the
chain to avoid contact with the
vehicle body.
To prevent body damage, retighten the chains after driving 0.3~0.6
miles (0.5~1.0 km).
Do not use tire chains on vehicles equipped with aluminum wheels.
In unavoidable circumstance, use
a wire type chain.
Use wire chains less than 0.59 inches (15 mm) to prevent damage
to the chain’s connection.Radial-ply tires
Radial-ply tires provide improved
tread life, road hazard resistance and
smoother high speed ride. The radi-
al-ply tires used on this vehicle are of
belted construction, and are selected
to complement the ride and handling
characteristics of your vehicle.
Radial-ply tires have the same load
carrying capacity, as bias-ply or bias
belted tires of the same size, and use
the same recommended inflation
pressure. Mixing of radial-ply tires
with bias-ply or bias belted tires is
not recommended. Any combina-
tions of radial-ply and bias-ply or bias
belted tires when used on the same
vehicle will seriously deteriorate
vehicle handling. The best rule to fol-
low is: Identical radial-ply tires should
always be used as a set of four. Longer wearing tires can be more
susceptible to irregular tread wear. It
is very important to follow the tire
rotation interval shown in this section
to achieve the tread life potential of
these tires. Cuts and punctures in
radial-ply tires are repairable only in
the tread area, because of sidewall
flexing. Consult your tire dealer for
radial-ply tire repairs.