2017 KIA SOUL jump start
[x] Cancel search: jump startPage 356 of 589
637
Driving your vehicle
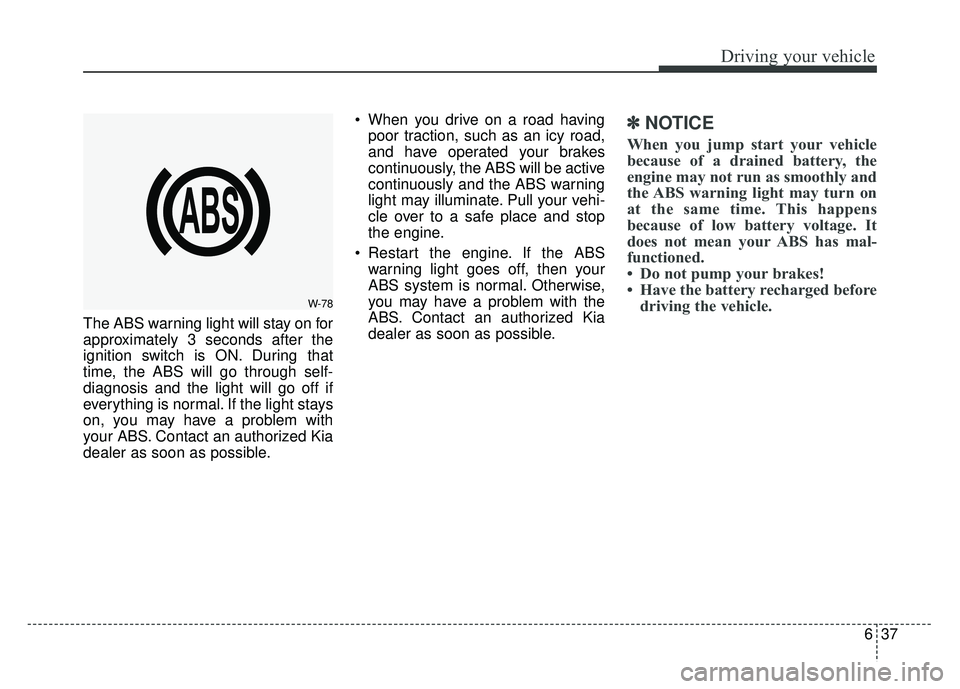
The ABS warning light will stay on for
approximately 3 seconds after the
ignition switch is ON. During that
time, the ABS will go through self-
diagnosis and the light will go off if
everything is normal. If the light stays
on, you may have a problem with
your ABS. Contact an authorized Kia
dealer as soon as possible. When you drive on a road having
poor traction, such as an icy road,
and have operated your brakes
continuously, the ABS will be active
continuously and the ABS warning
light may illuminate. Pull your vehi-
cle over to a safe place and stop
the engine.
Restart the engine. If the ABS warning light goes off, then your
ABS system is normal. Otherwise,
you may have a problem with the
ABS. Contact an authorized Kia
dealer as soon as possible.
✽ ✽ NOTICE
When you jump start your vehicle
because of a drained battery, the
engine may not run as smoothly and
the ABS warning light may turn on
at the same time. This happens
because of low battery voltage. It
does not mean your ABS has mal-
functioned.
• Do not pump your brakes!
• Have the battery recharged before
driving the vehicle.
W-78
Page 409 of 589
What to do in an emergency
47
IF THE ENGINE WILL NOT START
If engine doesn't turn over or
turns over slowly
1.If your vehicle has an automatictransaxle, be sure the shift lever is
in N (Neutral) or P (Park) and the
emergency brake is set.
2.Check the battery connections to be sure they are clean and tight.
3.Turn on the interior light. If the light dims or goes out when you operate
the starter, the battery is dis-
charged.
4.Check the starter connections to be sure they are securely tight-
ened.
5.Do not push or pull the vehicle to start it. See instructions for "Jump
starting".
If engine turns over normally
but does not start
1.Check the fuel level.
2.With the ignition switch in theLOCK position, check all connec-
tors at the ignition coils and spark
plugs. Reconnect any that may be
disconnected or loose.
3.Check the fuel line in the engine compartment.
4.If the engine still does not start, call an authorized Kia dealer or seek
other qualified assistance.
WARNING- Push/pull
start
Do not push or pull the vehicle
to start it. Push or pull starting
may cause the catalytic con-
verter to overload and create a
fire hazard.
Page 410 of 589
75
What to do in an emergency
EMERGENCY STARTING
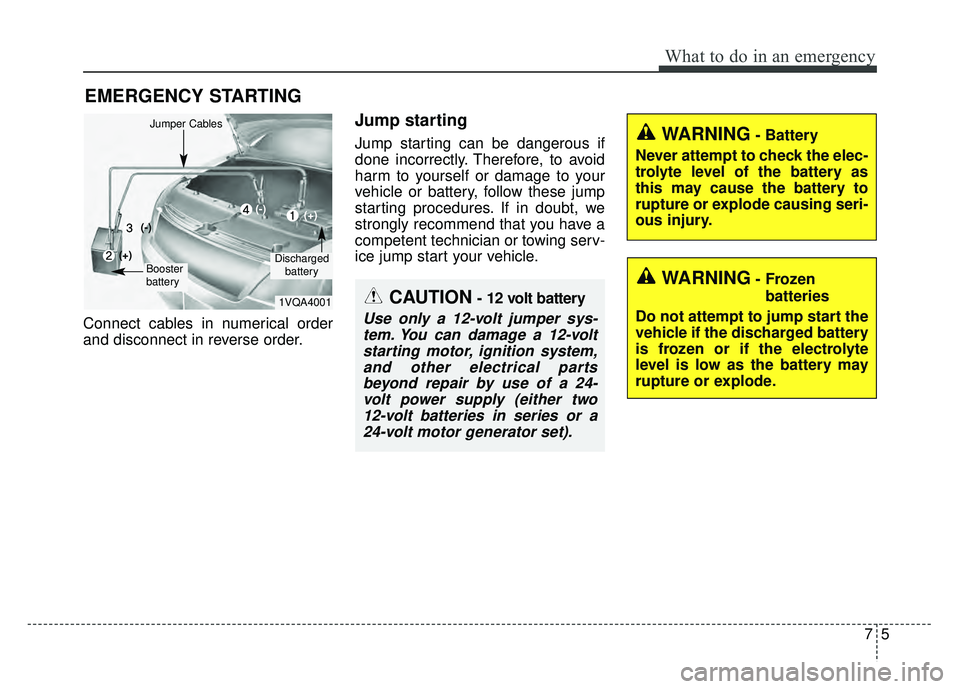
Connect cables in numerical order
and disconnect in reverse order.
Jump starting
Jump starting can be dangerous if
done incorrectly. Therefore, to avoid
harm to yourself or damage to your
vehicle or battery, follow these jump
starting procedures. If in doubt, we
strongly recommend that you have a
competent technician or towing serv-
ice jump start your vehicle.
CAUTION- 12 volt battery
Use only a 12-volt jumper sys-tem. You can damage a 12-voltstarting motor, ignition system,and other electrical partsbeyond repair by use of a 24-volt power supply (either two12-volt batteries in series or a24-volt motor generator set).
WARNING- Battery
Never attempt to check the elec-
trolyte level of the battery as
this may cause the battery to
rupture or explode causing seri-
ous injury.
1VQA4001
Discharged battery
Jumper Cables
Booster
battery
(-)
(+)
(+)(-)
WARNING- Frozenbatteries
Do not attempt to jump start the
vehicle if the discharged battery
is frozen or if the electrolyte
level is low as the battery may
rupture or explode.
Page 411 of 589
What to do in an emergency
67
Jump starting procedure
1.Make sure the booster battery is12-volt and that its negative termi-
nal is grounded.
2.If the booster battery is in another vehicle, do not allow the vehicles to
come in contact.
3.Turn off all unnecessary electrical loads.
4.Connect the jumper cables in the exact sequence shown in the illus-
tration. First connect one end of a
jumper cable to the positive termi-
nal of the discharged battery (1),
then connect the other end to the
positive terminal of the booster
battery (2).
Proceed to connect one end of the
other jumper cable to the negative
terminal of the booster battery (3),
then the other end to a solid, sta-
tionary, metallic point (for example,
the engine lifting bracket) away
from the battery (4). Do not con-
nect it to or near any part that
moves when the engine is cranked. Do not allow the jumper cables to
contact anything except the correct
battery terminals or the correct
ground. Do not lean over the bat-
tery when making connections.WARNING- Battery
Keep all flames or sparks away
from the battery. The battery
produces hydrogen gas which
will explode if exposed to flame
or sparks.
WARNING- Sulfuric acid risk
When jump starting your vehi-
cle be careful not to get acid on
yourself, your clothing or on the
vehicle. Automobile batteries
contain sulfuric acid. This is
poisonous and highly corro-
sive.
WARNING- Battery cables
Do not connect the jumper
cable from the negative terminal
of the booster battery to the
negative terminal of the dis-
charged battery. This can cause
the discharged battery to over-
heat and crack, releasing bat-
tery acid.
Page 412 of 589
77
What to do in an emergency
5.Start the engine of the vehicle withthe booster battery and let it run at
2,000 rpm, then start the engine of
the vehicle with the discharged
battery.
If the cause of your battery discharg-ing is not apparent, you should haveyour vehicle checked by an author-ized Kia dealer.
Push-starting
Vehicles equipped with automatic
transaxle lock system cannot be
push-started.
Follow the directions in this section
for jump-starting.
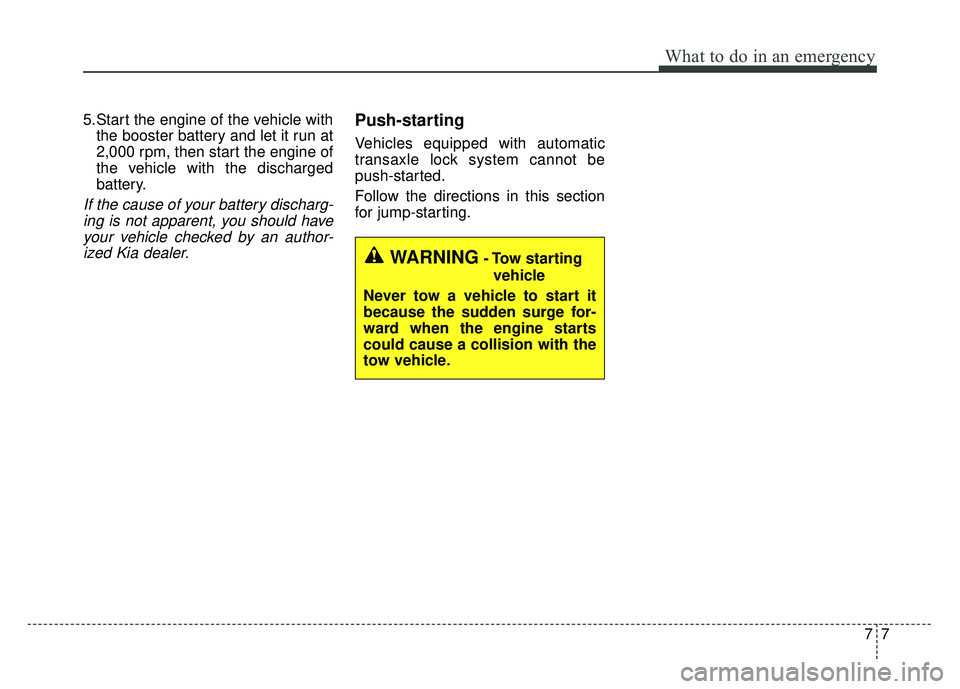
WARNING- Tow starting
vehicle
Never tow a vehicle to start it
because the sudden surge for-
ward when the engine starts
could cause a collision with the
tow vehicle.
Page 579 of 589
I5
Index
ECO mode (Drive mode integrated control system) . . 6-50
Economical operation . . . . . . . . . . . . . . . . . . . . . . . . . . 6-69
Electric power steering . . . . . . . . . . . . . . . . . . . . . . . . . 4-39
ELECTRICAL EQUIPMENT . . . . . . . . . . . . . . . . . . . 9-15
Electrochromic mirror (ECM) . . . . . . . . . . . . . . . . . . . 4-44
Electronic stability control (ESC) . . . . . . . . . . . . . . . . 6-38
Emergency starting . . . . . . . . . . . . . . . . . . . . . . . . . . . . . 7-5Jump starting . . . . . . . . . . . . . . . . . . . . . . . . . . . . . . . 7-5
Emergency while driving . . . . . . . . . . . . . . . . . . . . . . . . 7-3
Emission control system . . . . . . . . . . . . . . . . . . . . . . . 8-114 Crankcase emission control system . . . . . . . . . . . . 8-114
Evaporative emission control (including ORVR:Onboard Refueling Vapor Recovery) system. . . . 8-114
Exhaust emission control system . . . . . . . . . . . . . . 8-115
Engine . . . . . . . . . . . . . . . . . . . . . . . . . . . . . . . . . . . . \
. . . 9-3
Engine compartment . . . . . . . . . . . . . . . . . . . . . . . . . . . . 2-6
Engine compartment . . . . . . . . . . . . . . . . . . . . . . . . . . . . 8-3
Engine coolant . . . . . . . . . . . . . . . . . . . . . . . . . . . . . . . 8-41 Checking the coolant level . . . . . . . . . . . . . . . . . . . . 8-41
Changing the coolant . . . . . . . . . . . . . . . . . . . . . . . . 8-44
Engine Coolant Temperature Gauge. . . . . . . . . . . . . . . 4-51
Engine number . . . . . . . . . . . . . . . . . . . . . . . . . . . . . . . 9-11
Engine oil . . . . . . . . . . . . . . . . . . . . . . . . . . . . . . . . . . . 8-\
39 Checking the engine oil level . . . . . . . . . . . . . . . . . . 8-39
Changing the engine oil and filter . . . . . . . . . . . . . . 8-40
Engine overheats . . . . . . . . . . . . . . . . . . . . . . . . . . . . . . . 7-8 Engine start/stop button . . . . . . . . . . . . . . . . . . . . . . . . . 6-9
Illuminated engine start/stop button. . . . . . . . . . . . . . 6-9
Engine start/stop button position . . . . . . . . . . . . . . . . 6-9
Starting the engine . . . . . . . . . . . . . . . . . . . . . . . . . . 6-11
Engine start/stop button illumination . . . . . . . . . . . . . . . 6-9
Engine start/stop button position . . . . . . . . . . . . . . . . . . 6-9
Engine will not start . . . . . . . . . . . . . . . . . . . . . . . . . . . . 7-4
Evaporative emission control (including ORVR: Onboard Refueling Vapor Recovery) system . . . . . 8-114
Exhaust emission control system . . . . . . . . . . . . . . . . 8-115
Explanation of scheduled maintenance items . . . . . . . 8-34 Engine oil and filter . . . . . . . . . . . . . . . . . . . . . . . . . 8-34
Drive belts . . . . . . . . . . . . . . . . . . . . . . . . . . . . . . . . 8-34
Fuel filter (for gasoline) . . . . . . . . . . . . . . . . . . . . . . 8-34
Fuel lines, fuel hoses and connections . . . . . . . . . . . 8-34
Vapor hose and fuel filler cap . . . . . . . . . . . . . . . . . 8-34
Vacuum crankcase ventilation hoses . . . . . . . . . . . . 8-35
Air cleaner filter . . . . . . . . . . . . . . . . . . . . . . . . . . . . 8-35
Spark plugs . . . . . . . . . . . . . . . . . . . . . . . . . . . . . . . . 8-35
Valve clearance. . . . . . . . . . . . . . . . . . . . . . . . . . . . . 8-35
Cooling system . . . . . . . . . . . . . . . . . . . . . . . . . . . . . 8-35
Coolant . . . . . . . . . . . . . . . . . . . . . . . . . . . . . . . . . . 8-35\
Manual transaxle fluid . . . . . . . . . . . . . . . . . . . . . . . 8-36
Automatic transaxle fluid . . . . . . . . . . . . . . . . . . . . . 8-36
Dual clutch transmission fluid . . . . . . . . . . . . . . . . . 8-36
Brake hoses and lines . . . . . . . . . . . . . . . . . . . . . . . . 8-36
Brake/clutch fluid . . . . . . . . . . . . . . . . . . . . . . . . . . . 8-37
Parking brake . . . . . . . . . . . . . . . . . . . . . . . . . . . . . 8-37
E
Page 582 of 589
Index
8I
Vanity mirror lamp . . . . . . . . . . . . . . . . . . . . . . . . . 4-100
Interior overview. . . . . . . . . . . . . . . . . . . . . . . . . . . . . . . 2-4
Jack and tools . . . . . . . . . . . . . . . . . . . . . . . . . . . . . . . . 7-15
Jump starting. . . . . . . . . . . . . . . . . . . . . . . . . . . . . . . . . . 7-5
Key operations . . . . . . . . . . . . . . . . . . . . . . . . . . . . . . . . 4-4
Key positions . . . . . . . . . . . . . . . . . . . . . . . . . . . . . . . . . 6-6 Illuminated ignition switch . . . . . . . . . . . . . . . . . . . . 6-6
Ignition switch position . . . . . . . . . . . . . . . . . . . . . . . 6-6
Starting the engine . . . . . . . . . . . . . . . . . . . . . . . . . . . 6-7
Keys . . . . . . . . . . . . . . . . . . . . . . . . . . . . . . . . . . . . \
. . . . 4-4 Record your key number . . . . . . . . . . . . . . . . . . . . . . 4-4
Key operations . . . . . . . . . . . . . . . . . . . . . . . . . . . . . . 4-4
Transmitter precautions . . . . . . . . . . . . . . . . . . . . . . . 4-6
Battery replacement . . . . . . . . . . . . . . . . . . . . . . . . . . 4-7
Immobilizer system . . . . . . . . . . . . . . . . . . . . . . . . . . 4-8
Label Air bag warning label. . . . . . . . . . . . . . . . . . . . . . . . 3-68
Tire sidewall labeling . . . . . . . . . . . . . . . . . . . . . . . . 8-64
Vehicle certification label. . . . . . . . . . . . . . . . . . . . . 9-10 Tire specification and pressure label . . . . . . . . . . . . 9-11
Refrigerant label . . . . . . . . . . . . . . . . . . . . . . . . . . . . 9-11
Lane Departure Warning System (LDWS) . . . . . . . . . 6-52 Warning indicator . . . . . . . . . . . . . . . . . . . . . . . . . . 6-54
The LDWS does not operate when . . . . . . . . . . . . . 6-55
The LDWS may not warn you even if the vehicleleaves the lane, or may warn you even if the
vehicle does not leave the lane when; . . . . . . . . . . 6-55
LCD Display . . . . . . . . . . . . . . . . . . . . . . . . . . . . . . . . . 4-56 LCD Modes . . . . . . . . . . . . . . . . . . . . . . . . . . . . . . . 4-56
Service mode . . . . . . . . . . . . . . . . . . . . . . . . . . . . . . 4-57
User Settings Mode . . . . . . . . . . . . . . . . . . . . . . . . . 4-58
Turn by turn Mode . . . . . . . . . . . . . . . . . . . . . . . . . . 4-64
Warning messages . . . . . . . . . . . . . . . . . . . . . . . . . . 4-64
LCD Modes . . . . . . . . . . . . . . . . . . . . . . . . . . . . . . . . . 4-56
License plate lamp bulb replacement . . . . . . . . . . . . 8-102
Liftgate . . . . . . . . . . . . . . . . . . . . . . . . . . . . . . . . . . . . \
. 4-22 Opening Liftgate . . . . . . . . . . . . . . . . . . . . . . . . . . . 4-22
Closing Liftgate . . . . . . . . . . . . . . . . . . . . . . . . . . . . 4-22
Emergency Liftgate safety release . . . . . . . . . . . . . . 4-23
Light bulb position (Front) . . . . . . . . . . . . . . . . . . . . . . 8-89
Light bulb position (Rear) . . . . . . . . . . . . . . . . . . . . . . 8-90
Light bulbs . . . . . . . . . . . . . . . . . . . . . . . . . . . . . . . . . . 8-88\
Bulb replacement precaution . . . . . . . . . . . . . . . . . . 8-88
Light bulb position (Front). . . . . . . . . . . . . . . . . . . . 8-89
Light bulb position (Rear) . . . . . . . . . . . . . . . . . . . . 8-90
Headlamp (HID type) bulb replacement . . . . . . . . . 8-90
Headlamp (Low/High beam) bulb replacement . . . . 8-91
K
J
L