Page 237 of 586
4135
Features of your vehicle
The high beam switches to low beam
in the below conditions.
- When the High Beam Assist is off.
- When the light switch is not in theAUTO position.
- When the headlamp is detected from the on-coming vehicle.
- When the tail lamp is detected from the front vehicle.
- When the surrounding is bright enough high beam is not needed.
- When streetlights or other lights are detected.
- When vehicle speed is below 35km/h (21.7mph). The system may not operate normal-
ly in the below conditions.
When the light from the on-coming
or front vehicle is not detected
because of lamp damage, hidden
from sight, etc.
When the lamp of the on-coming or front vehicle is covered with dust,
snow or water.
When the light from the on-coming or front vehicle is not detected
because of exhaust fume, smoke,
fog, snow, etc.
When the front window is covered with foreign matters such as ice,
dust, fog, or is damaged.
When there is a similar shape lamp with the front vehicle’s lamps.
When it is hard to see because of fog, heavy rain or snow.
When the headlamp is not repaired or replaced at an authorized dealer. When headlamp aiming is not
properly adjusted.
When driving on a narrow curved road or rough road.
When driving downhill or uphill.
When only part of the vehicle in front is visible on a crossroad or
curved road.
When there is a traffic light, reflect- ing sign, flash sign or mirror.
When the road conditions are bad such as being wet or covered with
snow.
When the front vehicle’s head- lamps are off but the fog lamps on.
When a vehicle suddenly appears from a curve.
When the vehicle is tilted from a flat tire or being towed.
When the LDWS (Lane Departure Warning System) warning light illu-
minates. (if equipped)
Page 238 of 586
Features of your vehicle
136
4
Do not place any accessories,
stickers or tint the windshield.
Have the windshield glass replaced from an authorized dealer.
Do not remove or impact related parts of the High Beam system.
Be careful that water doesn’t get into the High Beam unit.
Do not place objects on the dash- board that reflects light such as
mirrors, white paper, etc. The sys-
tem may malfunction if sunlight is
reflected.
At times, the High Beam system may not work properly, always
check the road conditions for your
safety. When the system does not
operate normally, manually change
between the high beam and low
beam.Turn signals and lane change
signals
The ignition switch must be on for the
turn signals to function. To turn on
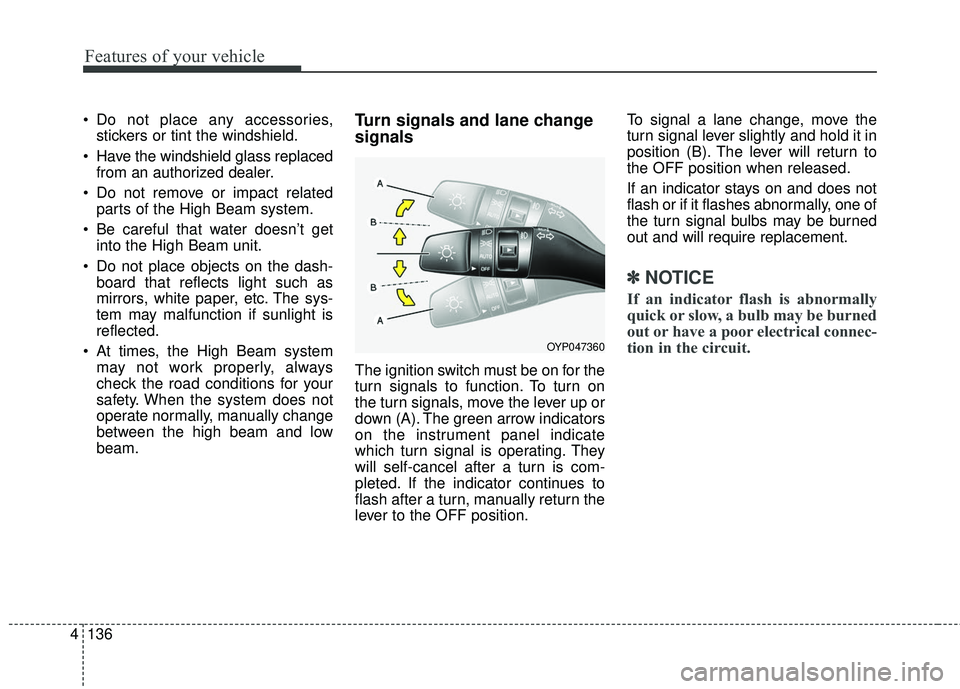
the turn signals, move the lever up or
down (A). The green arrow indicators
on the instrument panel indicate
which turn signal is operating. They
will self-cancel after a turn is com-
pleted. If the indicator continues to
flash after a turn, manually return the
lever to the OFF position. To signal a lane change, move the
turn signal lever slightly and hold it in
position (B). The lever will return to
the OFF position when released.
If an indicator stays on and does not
flash or if it flashes abnormally, one of
the turn signal bulbs may be burned
out and will require replacement.
✽ ✽
NOTICE
If an indicator flash is abnormally
quick or slow, a bulb may be burned
out or have a poor electrical connec-
tion in the circuit.
OYP047360
Page 245 of 586
4143
Features of your vehicle
Luggage lamp (if equipped)
DOOR : The light comes on whenthe tailgate is opened.
OFF : The light stays off at all times.
ON : The light stays on at all times.
Vanity mirror lamp (if equipped)
Opening the lid of the vanity mirror
will automatically turn on the mirror
light.
Portable lamp usage
(if equipped)
1. In-vehicle lamp, if necessary, after separation can be used as a
portable.
2. Press push button (1).
3. Pull out the lamp holder.
4. Press the power switch (2).
❈ If the portable lamp does not turn
on, it means the portable lamp
needs to be charged. Insert the
lamp holder and then charge it
again. The charge mode will be
activated if the ignition switch (or
engine start/stop button) is on
position or engine is running.
OHG040128
OYP044069K
OYP044277N
■ Type B
■ Type A
OYP044266N
Page 247 of 586
4145
Features of your vehicle
If you want to defrost and defog the
front windshield, refer to “Windshield
defrosting and defogging” in this sec-
tion.
Rear window defroster
The defroster heats the window to
remove frost, fog and thin ice from
the rear window, while the engine is
running.To activate the rear window
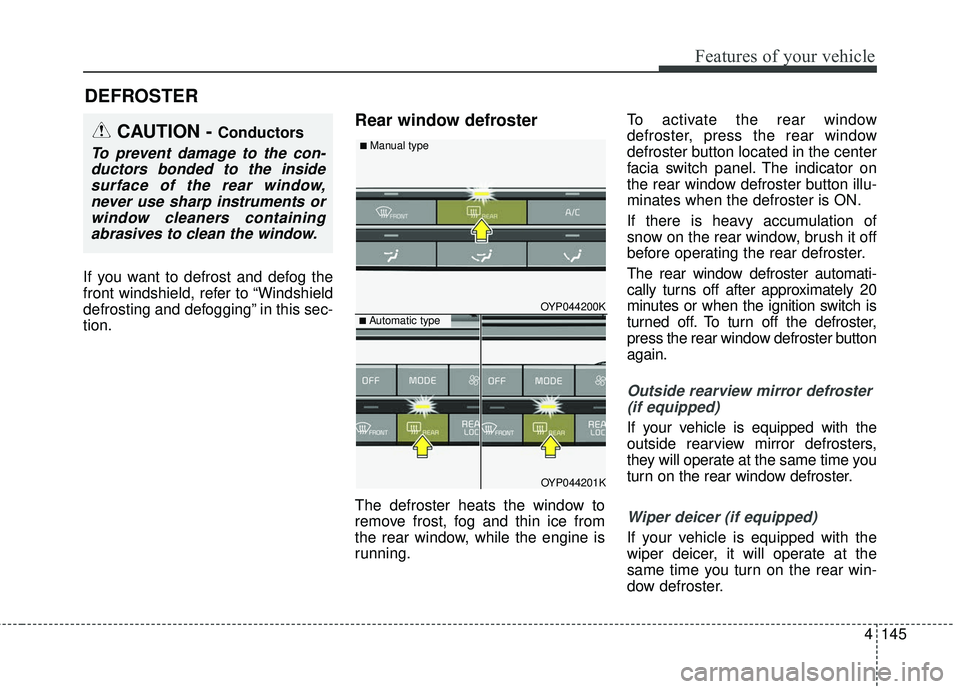
defroster, press the rear window
defroster button located in the center
facia switch panel. The indicator on
the rear window defroster button illu-
minates when the defroster is ON.
If there is heavy accumulation of
snow on the rear window, brush it off
before operating the rear defroster.
The rear window defroster automati-
cally turns off after approximately 20
minutes or when the ignition switch is
turned off. To turn off the defroster,
press the rear window defroster button
again.
Outside rearview mirror defroster
(if equipped)
If your vehicle is equipped with the
outside rearview mirror defrosters,
they will operate at the same time you
turn on the rear window defroster.
Wiper deicer (if equipped)
If your vehicle is equipped with the
wiper deicer, it will operate at the
same time you turn on the rear win-
dow defroster.
DEFROSTER
CAUTION - Conductors
To prevent damage to the con-ductors bonded to the insidesurface of the rear window,never use sharp instruments orwindow cleaners containingabrasives to clean the window.
OYP044200K
OYP044201K
■ Automatic type
■ Manual type
Page 282 of 586

Features of your vehicle
180
4
For maximum defrosting, set the
temperature control to the extreme
right/hot position and the fan speed
control to the highest speed.
If warm air to the floor is desired while defrosting or defogging, set
the mode to the floor-defrost posi-
tion.
Before driving, clear all snow and ice from the windshield, rear win-
dow, outside rear view mirrors, and
all side windows.
Clear all snow and ice from the hood and air inlet in the cowl grill to
improve heater and defroster effi-
ciency and to reduce the probabili-
ty of fogging up the inside of the
windshield.Manual climate control system
To defog inside windshield
1. Set the fan speed to the desired position.
2. Select desired temperature.
3. Select the or position.
4. The outside (fresh) air and air con- ditioning will be selected automat-
ically.
If the air conditioning and/or outside
(fresh) air position are not selected
automatically, press the correspon-
ding button manually.
WINDSHIELD DEFROSTING AND DEFOGGING
WARNING - Windshield
heating
Do not use the or posi-
tion during cooling operation in
extremely humid weather. The
difference between the temper-
ature of the outside air and the
windshield could cause the
outer surface of the windshield
to fog up, causing loss of visi-
bility. In this case, set the mode
selection to the position
and fan speed control to the
lower speed.
OYP044240K
Page 294 of 586
Features of your vehicle
192
4
Sunvisor
Use the sunvisor to shield direct light
through the front or side windows.
To use the sunvisor, pull it downward.
To use the sunvisor for the side win-
dow, pull it downward, unsnap it from
the bracket (1) and swing it to the
side (2).
Adjust the sunvisor extension for-
ward or backward (3). (if equipped)
To use the vanity mirror, pull down the
visor and slide the mirror cover (4). The ticket holder (5) is provided for
holding a tollgate ticket. (if equipped)
* The actual sunvisor lamp in the vehi-
cle may differ from the illustration.
Power outlet
OYP044086K
CAUTION- Vanity mirror
lamp
If you use the vanity mirror lamp,turn off the lamp before return-ing the sunvisor to its originalposition, otherwise it couldresult in battery discharge andpossible sunvisor damage.
OYP044087K
OYP044088K
■Front
OYP044089N
■Rear
Page 348 of 586
Driving your vehicle
45
Before entering vehicle
• Be sure that all windows, outsidemirror(s), and outside lights are
clean.
Check the condition of the tires.
Check under the vehicle for any sign of leaks.
Be sure there are no obstacles behind you if you intend to back up.
Necessary inspections
Fluid levels, such as engine oil,
engine coolant, brake fluid, and
washer fluid should be checked on a
regular basis, at the exact interval
depending on the fluid. Further
details are provided in chapter 7,
“Maintenance”.
Before starting
Close and lock all doors.
Position the seat so that all con-trols are easily reached.
Buckle your seat belt.
Adjust the inside and outside rearview mirrors.
Be sure that all lights work.
Check all gauges.
Check the operation of warning lights when the ignition switch is
turned to the ON position.
Release the parking brake and make sure the brake warning light
goes out.
For safe operation, be sure you are
familiar with your vehicle and its
equipment.
BEFORE DRIVING
WARNING - Distracted driving
Focus on the road while driving.
The driver's primary responsi-
bility is in the safe and legal
operation of the vehicle. Use of
any handled devices, other
equipment or vehicle systems
that distract the drive should
not be used during vehicle
operation.
Page 414 of 586
Driving your vehicle
70
5
BSD (Blind Spot Detection) /
LCA (Lane Change Assist)
Operating conditions
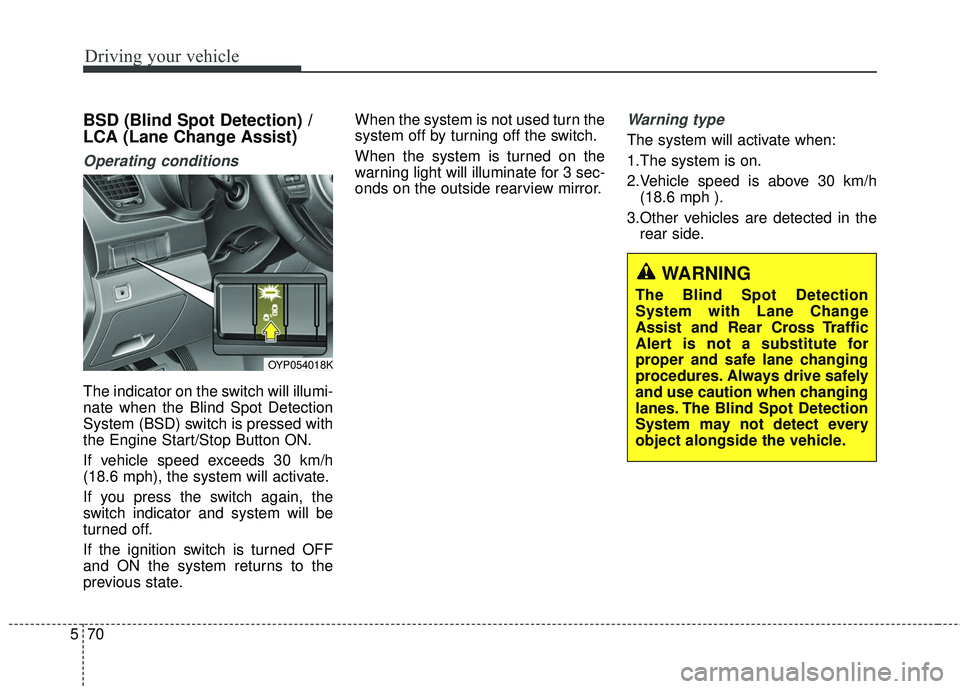
The indicator on the switch will illumi-
nate when the Blind Spot Detection
System (BSD) switch is pressed with
the Engine Start/Stop Button ON.
If vehicle speed exceeds 30 km/h
(18.6 mph), the system will activate.
If you press the switch again, the
switch indicator and system will be
turned off.
If the ignition switch is turned OFF
and ON the system returns to the
previous state. When the system is not used turn the
system off by turning off the switch.
When the system is turned on the
warning light will illuminate for 3 sec-
onds on the outside rearview mirror.
Warning type
The system will activate when:
1.The system is on.
2.Vehicle speed is above 30 km/h
(18.6 mph ).
3.Other vehicles are detected in the rear side.
WARNING
The Blind Spot Detection
System with Lane Change
Assist and Rear Cross Traffic
Alert is not a substitute for
proper and safe lane changing
procedures. Always drive safely
and use caution when changing
lanes. The Blind Spot Detection
System may not detect every
object alongside the vehicle.
OYP054018K