Page 9 of 54

7ALWAYS CHECK THE OWNER’S MANUAL FOR COMPLETE OPER ATING INFORMATION AND SAFET Y WARNINGS *IF EQUIPPED
Active ECO System Video
To view a video on your mobile device, snap this QR Code or visit the listed website
Refer to page 2 for more information
QR CODE
www.KuTechVideos.com/yp13/2017
REMINDER: When Active ECO button is ON, and ignition is cycled, the system defaults in the ON position
For more information on Active ECO, refer to your Owner’s Manual or contact your local dealership.
(Located below Gear Shift)(Located on Center Panel below Gear Shift)* (Located in Instrument Cluster Type C Cluster shown)
To help improve your fuel economy: •Drive at a moderate speed, accelerating smoothly and at a moderate rate •Keep tires inflated to the recommended pressure •Be sure the wheels are properly aligned
QUICK TIPS
A
DC
B
Active ECO System (ECO Mode)*
The Active ECO system helps improve fuel economy by
controlling several vehicle components When activated,
it optimizes drivetrain operations such as engine power
and transmission to help improve fuel economy
To turn ON, press the ACTIVE ECO button C The button
light will turn on, and the green ECO indicator light D
in the instrument cluster will illuminate, indicating that
Active ECO is operating
The Active ECO system will remain on even when the
ignition is cycled
To turn the Active ECO system OFF, press the ACTIVE
ECO button C again
Drive Mode Integrated Control System*
The Drive Mode may be selected depending on driver’s
preferences and road conditions
To cycle through the different Drive Modes A, press the
DRIVE MODE button B The Instrument Cluster will display
COMFORT or ECO when selected When in Normal mode, it
will not display in the Instrument Cluster
REMINDERS:
•
The system is turned ON and in Normal mode when ignition is in the ON position
•
When ECO mode is selected, the indicator will display and system remains on, even when ignition is cycled
Your vehicle’s buttons may differ from those in the illustrations. See your Owner’s Manual for more details.
INSTRUMENT CLUSTER
Page 10 of 54

HAC helps prevent the vehicle from rolling backwards when accelerating
from a stop while on a steep incline The HAC a")
SEDONA FEATURES & FUNCTIONS GUIDE8*IF EQUIPPED
Hill-Start Assist Control (HAC)
HAC helps prevent the vehicle from rolling backwards when accelerating
from a stop while on a steep incline The HAC automatically activates
whether the ESC is OFF or ON but does NOT activate when the ESC
has malfunctioned
REMINDER: The HAC does not operate when the gear shift is in the P (Park) or the N (Neutral) position
•HAC provides a 2-second delay before the vehicle may start rolling backwards •When HAC is active (e g , during initial acceleration from a stop on an incline), you may notice that the brakes will momentarily remain engaged after you depress the accelerator – this is normal HAC operation
QUICK TIPS
(Button panel located left of Steering Wheel)
(Outlet located on back of Center Console and the Luggage Zone*)
ABC
Instrument Panel Dimmer
With parking lights/headlights ON, press button B (+) or (-) to adjust the
brightness of the instrument panel illumination
REMINDER: The Instrument Panel Dimmer does not adjust brightness on the Standard Audio System/UVO eServices System/UVO eServices with Premium Navigation System* screens Use the system setup menu to adjust brightness on the screen
AC Inverter*
The AC Inverter supplies 115V/100W electrical power to operate accessories
or equipment Press AC Inverter button C to activate
Electronic Stability Control (ESC)
The ESC system is designed to help stabilize the vehicle during cornering
maneuvers It is a good idea to keep the ESC turned on for daily driving
whenever possible
Press ESC OFF button A to turn Traction Control OFF/ON
To turn OFF both the Traction Control and Stability Control, press and hold
for more than 3 seconds Press again to turn ON
REMINDERS:
•ESC is turned ON by default at vehicle start-up If vehicle power is cycled, ESC will turn ON again
•
The ESC Indicator Light [~] in the instrument cluster will illuminate whenever the ESC is in operation
For more information on Electronic Stability Control (ESC) and its specific features and operations, please refer to your Owner’s Manual.
DRIVER'S PANEL
Page 11 of 54
 System*
The BSD system uses radar sensors to help alert the drive")
9ALWAYS CHECK THE OWNER’S MANUAL FOR COMPLETE OPER ATING INFORMATION AND SAFET Y WARNINGS *IF EQUIPPED
Blind Spot Detection (BSD) System*
The BSD system uses radar sensors to help alert the driver before changing lanes
The light on the BSD button A will illuminate when turned ON The outside
rearview mirror warning lights will also illuminate for 3 seconds
The system will become active when the vehicle is traveling more than 9 mph
and will alert the driver if another vehicle is detected by the radar sensor
Blind Spot Detection / Lane Change Assist
1st-stage alert: When another vehicle is detected within the BSD System
boundary B, a yellow indicator will illuminate on the outside rearview mirrors
2nd-stage alert: When 1st-stage alert is on and the driver activates a turn signal,
a flashing yellow indicator will illuminate on the outside rearview mirrors and the
system will sound an alert
RCTA (Rear Cross Traffic Alert)
If the RCTA system sensors detect approaching vehicles from the left or right
side C, the system will sound an audible alert, the warning indicators on the outside
rearview mirror will illuminate and a message will appear on the LCD screen, when
these conditions are met:
•The gear shift is in Reverse
•The vehicles moves in reverse
•The vehicle is moving less than 6 mph
•The RCTA can be set to on/off in User Settings from the LCD Instrument
Cluster modes
REMINDERS:
•
When the BSD is ON and the vehicle power is cycled to OFF then ON again, the BSD system returns to ON
•
The RCTA feature can be turned OFF/ON in User Settings When vehicle power is cycled, the RCTA will remain in the previous state
For more information on the above systems, please refer to the Owner’s Manual.
Blind Spot Detection System w/ RCTA Video
To view a video on your mobile device, snap this QR Code or visit the listed website
Refer to page 2 for more information
QR CODE
www.KuTechVideos.com/yp13/2017
A
B
C
(Button panel located left of Steering Wheel)
DRIVER'S PANEL
Page 12 of 54

SEDONA FEATURES & FUNCTIONS GUIDE10*IF EQUIPPED
Lane Departure Warning System Video
To view a video on your mobile device, snap this QR Code or visit the listed website
Refer to page 2 for more information
QR CODE
www.KuTechVideos.com/yp13/2017
Lane Departure Warning System (LDWS)*
With the ENGINE START/STOP button in the ON position, press
the LDWS button A to turn system ON The instrument cluster
indicator will illuminate green
If the LDWS detects that you are veering outside of your lane,
the system may issue a warning on the LCD screen and an alert
may sound, under these conditions:
•The vehicle exceeds approximately 44 mph
•The LDWS system recognizes the lane the vehicle is
traveling in
REMINDERS:
•LDWS will not issue a warning if the turn signal is activated
•
If the LDWS button is ON and ignition is cycled, the system will turn ON again If the LDWS button is OFF, the system remains OFF
The Lane Departure Warning System (LDWS) is not a substitute for safe and proper driving. Always drive safely and use caution. LDWS may not always alert the driver if the vehicle is driven outside of its lane.
Autonomous (Assist) Emergency Braking (AEB) / Forward Collision Warning System (FCWS)*
The AEB helps to alert the driver when rapidly approaching a vehicle that is slowing down, braking or stopped A warning message will appear on the LCD
screen and a chime will sound The AEB will become active when the vehicle is traveling more than 25 mph
To turn the AEB off, go to User Settings in the LCD Instrument Cluster modes
REMINDERS:
•The AEB will be activated by default when vehicle power is cycled on, even when previous setting to off
•The AEB will not operate when the vehicle is traveling more than approximately 50 mph
The Autonomous (Assist) Emergency Braking (AEB) / Forward Collision Warning System (FCWS) is not a substitute for safe and proper driving. Always drive safely and use caution. FCWS may not always alert the driver when the vehicle is approaching another vehicle.
When the LDWS sensor detects the lane traveling in, both lanes are illuminatedWhen the LDWS sensor does not detect the lane traveling in the lanes are not illuminated
When the LDWS sensor detects the vehicle veering outside of the lane traveling in, a yellow indicator will illuminate either on the left or right lane (shown in both images above)
A(Button panel located left of Steering Wheel)
DRIVER'S PANEL
Page 13 of 54

Power Windows, Window Lock & Central Door Lock
A Pul")
11ALWAYS CHECK THE OWNER’S MANUAL FOR COMPLETE OPER ATING INFORMATION AND SAFET Y WARNINGS *IF EQUIPPED
(Button located left of Steering Wheel)
Power Windows, Window Lock & Central Door Lock
A Pull/Press to operate Front Windows Auto Up/Down*
B Press to Unlock /Lock All Doors
C Press to disable Rear Passenger Windows and Rear Sunroof passenger controls
REMINDER: When pressed C, window controls for the Rear Passenger Windows are disabled
Button configuration may vary depending on vehicle model.
Power Folding Outside Mirrors*
Press the L or R buttons D to select the mirror to adjust
Press button arrows E left /right or up/down to adjust mirror position
Toggle button F left /right to unfold/fold the outside rearview mirrors
Toggle button F to center to automatically fold/unfold mirrors when:
•The Smart Key Lock /Unlock buttons are pressed
•The door outside handle button is pressed
REMINDERS:
•
When mirror button F is in the center, press the Lock button on the Smart Key to automatically fold the mirrors
•To lock position of mirrors, toggle switch to the neutral (center) position
Power/Heated Outside Mirrors*
Mirror heaters automatically turn ON/OFF at the same time the Rear
Window Defroster is turned ON/OFF Rear Window Defroster button*
is located on climate control system panel
Automatic Door Lock/Unlock
When the gear shift is moved into or out of P (PARK ), all doors will
Lock /Unlock Refer to the User Settings on how to turn Auto Door
Lock/Unlock ON/OFF
Fuel Door Release Button
Press the Fuel Door Release
button to release the fuel door
(Button/switch panel located on Driver's Door )
The mirrors will automatically unfold when the Smart Key* is within close proximity to the vehicle
QUICK TIP
Press button again to stop Auto Up/Down function
QUICK TIP
A
BC
D
D
EF
DRIVER'S PANEL
Page 14 of 54

SEDONA FEATURES & FUNCTIONS GUIDE12*IF EQUIPPED
Reverse Parking Aid Function*
The left or right mirror buttons A need to be depressed
for the Reverse Parking Aid Function to operate
When the gear shift lever is moved into R (Reverse)
and while the vehicle is moving backwards, the outside
rearview mirrors B will rotate downward to aid in
reverse parking
To turn OFF the function, press the L or R buttons
again.
The outside rearview mirrors will automatically return
to their original positions when:
•The ENGINE START/STOP Button is in the
OFF position
•The gear shift lever is moved to any position except
R (Reverse)
•
Outside rearview mirror switches are not depressed
REMINDER: When the outside rearview mirror buttons (L or R) A are not depressed, the Reverse Parking Aid Function will not operate and the outside rearview mirrors will not rotate downward
(Button/switch panel located on Driver's Door )
AB
Engine Start/Stop Button & Smart Key Video
To view a video on your mobile device, snap this QR Code or visit the listed website
Refer to page 2 for more information
QR CODE
www.KuTechVideos.com/yp13/2017
Engine Start/Stop Button*
To start the engine:
1 Depress the brake pedal
2
Press the ENGINE START/STOP button while gear shift is in P (Park)
To turn the engine OFF: Press the ENGINE START/STOP button
To use the ENGINE START/STOP button, you must have the
Smart Key fob on your person or inside the vehicle
REMINDERS:
•
In an emergency situation while the vehicle is in motion, you are able to turn the engine off and to the ACC position by pressing the ENGINE START/STOP button for more than 2 seconds or 3 times successively within 3 seconds
•
If Smart Key fob battery is dead, with the lock button facing the ENGINE START/STOP button, hold the fob up against the ENGINE START/STOP button and press
To use electrical accessories:
ACC position •When in the OFF position and without depressing the brake pedal, press the ENGINE START/STOP button once (amber light)
ON position •When already in the ACC position (orange light) and without depressing the brake pedal, press the ENGINE START/STOP button again (reddish orange light) •
When in the OFF position and without depressing the brake pedal, press the ENGINE START/STOP button twice (reddish orange light)
Keeping the vehicle in ACC or the ON position for extended periods of time without turning engine on may discharge the vehicle’s battery
QUICK TIPS
DRIVER'S PANEL
Page 15 of 54

13ALWAYS CHECK THE OWNER’S MANUAL FOR COMPLETE OPER ATING INFORMATION AND SAFET Y WARNINGS *IF EQUIPPED
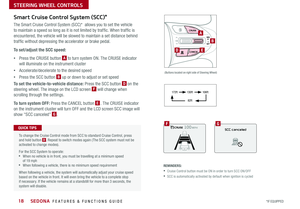
Tilt/Telescoping Steering Wheel
To adjust the Steering Wheel, press the Lock-Release Lever A
down and adjust B the desired angle and C distance
When finished, pull the Lock-Release Lever A up to lock
Steering Wheel in place
A
C
B
Headlights & High Beams
To o p e r a t e :
•Rotate lever to change the Headlight function
•Push lever to turn High Beams ON
•Pull lever to flash Headlights / High Beams
AUTO Light position — When the light switch is in the AUTO Light position, the
tail lights and headlights will turn ON/OFF automatically depending on the amount
of light outside the vehicle
Adaptive Front Lighting System (AFLS)* — The Adaptive Front Lighting System
helps improve visibility during nighttime driving by aiming the low beam headlights
in the direction the vehicle is moving AFLS controls the aiming direction based on
steering angle and speed
When the headlight switch is in the AUTO Light position, the AFLS will activate
REMINDER: When the AFLS indicator illuminates on the instrument cluster, the AFLS is not working properly See authorized Kia dealer for service
High Beam Assist* — The High Beam Assist will automatically adjust the
brightness depending on brightness of oncoming vehicles and road conditions
When switch is in the AUTO position and the vehicle’s ignition or the Engine Start /
Stop button* is on, the High Beam Assist will operate To turn the system off,
change the switch setting
Headlight position
Parking light position
AUTOAuto Light Position* / AFLS (Adaptive Front Lighting System)* / High Beam Assist*
OFFOFF position
STEERING WHEEL CONTROLS
Page 16 of 54

SEDONA FEATURES & FUNCTIONS GUIDE14*IF EQUIPPED
Turn Signals & Fog Lights*
To o p e r a t e :
•Turn Signals - Move lever Up/Down for Right /Left Turn Signal
•Fog Lights - Push toggle switch to turn Fog Lights ON/OFF
REMINDER: Headlights must be ON for Fog Light operation
One-Touch Lane Change Signal is activated by moving the
Turn Signal Lever slightly for less than 1 second and then
releasing The lane change signal will blink 3 times
To change how many times (3/5/7) the Lane Change Signal
blinks, go to User Settings Mode in the LCD Instrument
Cluster modes
For more information on the User Settings Mode, please refer to your Owner’s Manual.
Windshield Wipers & Washers
To o p e r a t e :
•Move lever Up/Down to change Wiper modes
•Press button A to adjust Intermittent Wipe
•Pull lever to spray and wipe
M I S T: Single wipe
OFF: Wiper off
I N T: Intermittent Wipe
LO: Slow wipe
HI: Fast wipe
PUSH
FRONT
PULL
FRONT
PUSH
PULL
PUSH
FRONT
PULL
FRONT
PUSH
PULL
A
Rear Wiper & Washer*
To operate:
•Rotate Rear Wiper switch to change Wiper modes
•Push to spray and wipe
HI: Continuous wipe
LO: Intermittent* wipe
OFF: Wiper off
• Pressing button up increases Intermittent wipe frequency and wipe speed Pressing button down decreases frequency of wipes
• Set the wiper to OFF position when the wiper is not in use
QUICK TIPS
LO and HI sets wiper speed No intermittent wipe function on Rear Wipers
QUICK TIP
STEERING WHEEL CONTROLS