Page 25 of 50

23ALWAYS CHECK THE OWNER’S MANUAL FOR COMPLETE OPER ATING INFORMATION AND SAFET Y WARNINGS . *IF EQUIPPED
AUDIO SYSTEMS
REMINDERS:
• Android Auto compatibility requirements: Micro-USB cable that came with your phone, OS Android™ 5 .0 or higher, compatible Android smartphone and data and wireless plan for applicable feature(s) .
• Apple CarPlay compatibility requirements: Apple Lightning cable, latest iOS software, iPhone 5 or later and data and wireless plan for applicable feature(s)
For further UVO eServices System operations, refer to the Car Multimedia System User's Manual. For other audio system information, refer to pages 22-25.
UVO eServices Setup*
UVO eServices Registration/Activation – To use UVO eServices:
1 . On your Smartphone, go to an app store or marketplace to download the free Kia UVO eServices app .
2 . Open the UVO eServices app and create an account by clicking on REGISTER . After entering your information and following the prompts to complete
registration, go to your email and click on the confirmation link ( You can also register an account by logging into MyUVO .com) .
3 . In the app, click CONTINUE, accept the terms and click CONTINUE once again .
4 . Follow the app’s IN-CAR SETUP instructions to connect your smartphone and complete UVO eServices activation .
Apple CarPlay®*
Setting up and starting Apple CarPlay®:
1 . Connect the Apple CarPlay® compatible iPhone with the vehicle’s USB
port using the manufacture’s cable provided with your iPhone .
2 . On the UVO eServices System audio control unit, press the SETUP key .
3 . Press the CONNECTIVIT Y button on the screen and select Apple
CarPlay® .
4 . Select ENABLE APPLE CARPL AY .
5 . From the vehicle’s home screen, select the Apple CarPlay® button,
where you’ll see all the Apple CarPlay® supported apps
Android Auto™*
Setting up Android Auto™:
1 . From an Android Auto™ compatible device, download the Android
Auto™ app from the Google Play™ Store .
2 . Open the Android Auto™ app and proceed with the on-screen
instructions to complete setup on the mobile device .
How to start Android Auto™:
1 . Press the SETUP key on your UVO eServices system’s control panel .
2 . Press the CONNECTIVIT Y button, select Android Auto™ then select
ENABLE ANDROID AUTO .
3 . Connect the Android™ device with the vehicle’s USB port using the
manufacturer’s cable provided with your phone .
4 . From the vehicle’s home screen, select the Android Auto™ button,
where you’ll see all the Android Auto™ supported apps .
Page 26 of 50

AUDIO SYSTEMS
OPTIMA FEATURES & FUNCTIONS GUIDE24*IF EQUIPPED
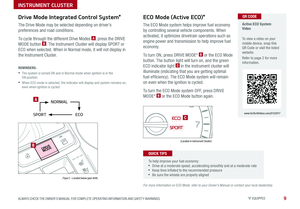
Press to Power ON/OFF . Rotate to adjust Volume
Press to enter Phone Mode
Press to select FM/AM/SiriusXM® modes
Press to select MEDIA mode
Press to display SE TUP/Settings mode
Press to change Radio/SiriusXM® Stations/Media tracks/files
Press to enter APPS/Info menu
Press and hold to reset the system settings
Press to select UVO eServices mode
Press to select previous/next Radio/SiriusXM® stations/Media tracks/ files . Press and hold to move quickly through stations/tracks/files
Rotate to change Radio/SiriusXM® Station/Media tracks/ files . Press to select .
UVO eServices System Videos To view these videos on your mobile device, snap this QR Code or visit the listed website .
Refer to page 2 for more information .
www.KuTechVideos.com/audio/ uvo3_eservices
QR CODE
Your audio system may differ from those in the illustrations. For further navigation system operations, refer to the Car Multimedia System User's Manual. For further audio system operations, refer to pages 22-25.
UVO eServices System*
– FM/AM/SiriusXM®/Media (USB, iPod®, Aux, Bluetooth® Audio, My Music, Pandora®)
•Prolonged use of the navigation system in ACC mode may drain the vehicle’s battery . A warning screen may appear periodically to remind users that the navigation system should be operated when the engine is running to prevent battery discharge •When using the voice command feature, wait for the system BEEP before speaking the command •A warning screen may appear periodically to remind users that the UVO eServices System should be operated when the engine is running to prevent battery discharge
QUICK TIPS
Sound Settings
To adjust the UVO eServices System sound settings:
1 . Press the SETUP key on the audio control unit or the on-screen MENU
button, when in MEDIA mode .
2 . Select the on-screen SOUND button, or SOUND SET TINGS
3 . Select the menu item (Position, Tone, Advanced, Default)
4 . Use the onscreen buttons to adjust settings
5 . Press the return button to save settings
REMINDER: To help minimize driver distraction, some audio system functionalities have been modified while the vehicle is in Drive, Reverse or moved out of Park .
Page 27 of 50

AUDIO SYSTEMS
25ALWAYS CHECK THE OWNER’S MANUAL FOR COMPLETE OPER ATING INFORMATION AND SAFET Y WARNINGS . *IF EQUIPPED
Press to Power ON/OFF . Rotate to adjust Volume
Press to enter Phone Mode
Press to select FM/AM/SiriusXM® modes
Press to select MEDIA mode
Press to display SE TUP/Settings mode
Press to change Radio/SiriusXM® Stations/Media tracks/files
Press to display the Map screen for the current position/ Voice mode
Press to select UVO eServices mode
Press to select previous/next Radio/SiriusXM® stations/Media tracks/ files . Press and hold to move quickly through stations/tracks/files
Rotate to change Radio/SiriusXM® Station/Media tracks/ files . Press to select .
UVO eServices with Premium Navigation Videos To view these videos on your mobile device, snap this QR Code or visit the listed website .
Refer to page 2 for more information .
www.KuTechVideos.com/audio/avn4
QR CODE
Your audio system may differ from those in the illustrations. For further navigation system operations, refer to the Car Multimedia System User's Manual. For further audio system operations, refer to pages 22-25.
•Prolonged use of the navigation system in ACC mode may drain the vehicle’s battery . A warning screen may appear periodically to remind users that the navigation system should be operated when the engine is running to prevent battery discharge •When using the voice command feature, wait for the system BEEP before speaking the command •A warning screen may appear periodically to remind users that the UVO eServices System should be operated when the engine is running to prevent battery discharge
QUICK TIPS
Sound Settings
To adjust the UVO eServices System sound settings:
1 . Press the SETUP key on the audio control unit or the on-screen MENU
button, when in MEDIA mode .
2 . Select the on-screen SOUND button, or SOUND SET TINGS
3 . Select the menu item (Position, Tone, Advanced, Default)
4 . Use the onscreen buttons to adjust settings
5 . Press the return button to save settings
UVO eServices with Premium Navigation*
– FM/AM/SiriusXM®/Media (USB, iPod®, Aux, Bluetooth® Audio, My Music, Pandora®)
REMINDER: To help minimize driver distraction, some audio system functionalities have been modified while the vehicle is in Drive, Reverse or moved out of Park .
Page 28 of 50
 System*
The Surround View Monitor (SVM) system is a parking support system that shows the areas around the
front, rea")
OPTIMA FEATURES & FUNCTIONS GUIDE26*IF EQUIPPED
Surround View Monitoring (SVM) System*
The Surround View Monitor (SVM) system is a parking support system that shows the areas around the
front, rear, left, and right sides of the vehicle via four cameras displayed onto the navigation screen .
The SVM system will turn on when the SVM button A is pressed and the LED is illuminated .
•The Front SVM camera is ON when the ENGINE START/STOP
button is On, the gear shift is in Drive or Neutral and the SVM
button is pressed ON
•Rear SVM: The camera view will automatically display on the
navigation screen when the vehicle is shifted into Reverse . The
camera view will turn off when the vehicle is shifted out of Reverse
•Front SVM: The camera view will display on the navigation screen
in both Drive and Neutral . In Drive, the camera view will continue
to display until the vehicle is above approximately 12 mph . The
camera view will reappear on the navigation screen whenever the
vehicle drops below approximately 12 mph
Camera View Modes – To change camera view modes, press the icons shown below on the navigation screen to
select the mode .
REMINDER: The SVM camera is equipped with an optical lens to provide a wider range of vision and may appear different from the actual distance .
Surround View Monitor Video To view a video on your mobile device, snap this QR Code or visit the listed website .
Refer to page 2 for more information .
www.KuTechVideos.com/jf13/2017
QR CODE
Check yo ur sur roun dings for safety.
Front SVM - when in Drive & Neutral: Rear SVM - when in Reverse:
Displays the front side and SVM images
simultaneously on the screen
Displays the front side image on
the screen
Displays the front side and left side
images simultaneously on the screen
Displays the front side and right side
images simultaneously on the screen
Displays the rear view and SVM images
simultaneously on the screen
Displays the rear side image on
the screen
Displays the rear and left side images
simultaneously on the screen
Displays the rear and right side images
simultaneously on the screen
The Surround View Monitor system is only a supplemental device. Drivers should not rely solely on the SVM information when parking and backing up. Drivers should always pay attention and directly check the left/right and rear.
A
(Located below gear shift)
CENTER PANEL
Page 29 of 50

27ALWAYS CHECK THE OWNER’S MANUAL FOR COMPLETE OPER ATING INFORMATION AND SAFET Y WARNINGS . *IF EQUIPPED
REMINDERS:
•
Avoid placing other metal items in the bin while charging as to not impede the charging area
•
This vehicle is equipped with wireless charging technology which allows for a device to be charged using inductive charging, however, device compatibility varies . See your owner’s manual for more detailed information and the back page for legal disclaimers
•
Inductive charging systems are less ef ficient than conventional charging through cable . As a result, higher device operating temperatures may be experienced during use
•
Charging Performance - Device position on the wireless charging system can affect charging performance . Other factor that may affect the charging rate includes foreign objects, such as coins or pens, and phone case thickness
The power outlets are inactive when ignition is in the OFF position .
Wireless Charging Video To view a video on your mobile device, snap this QR Code or visit the listed website .
Refer to page 2 for more information .
www.KuTechVideos.com/jf13/2017
Standard Audio System Clock Setup:
Press the CLOCK key to display the Clock setting screen . Then use the
on-screen buttons to navigate through setup and return to exit .
UVO eServices / UVO eServices with Premium Navigation*
Clock Setup:
Press the SETUP key, then the CLOCK button to display the Clock setting
screen . Then use the on-screen buttons to navigate through setup and return
to exit . To access manual date and time setting, turn GPS time OFF in the
Clock Settings (UVO eServices with Premium Navigation System*)
QR CODEDigital Clock*
12V180W
B
A
Aux/USB/iPod® Port & Power Outlets
QUICK TIP
REMINDER: Using the power outlet (accessory plug) for prolonged periods of time with the engine off could cause the battery to discharge .
For more information on the Aux/USB/iPod® Port & Power Outlets, refer to the Owner's Manual.
USB Charger*
The USB charger is located inside
the Center Console and on rear of
the Center Console A .
Wireless Smartphone
Charging System*
1 . Slide open tray cover
2 . Place smartphone on the center of the charging pad
3 . Indicator light B will change to amber once the wireless charging begins
4 . Once charging is complete, the
orange light will change to green
If wireless charging does not work, move smartphone around the pad until the charging indicator turns amber . Avoid placing other metal items in the bin while charging as to not impede the charging area .
QUICK TIP
(Rear of Center Console shown)
(Located in front of Gear Shift)
Requires QI enabled device or QI enabled case
Use the Aux port to connect audio devices and the USB port to connect
USB audio devices, smartphones and iPod® devices
REMINDER: When needed, Daylight Savings must be enabled in the Clock Settings screen
CENTER PANEL
Page 30 of 50

OPTIMA FEATURES & FUNCTIONS GUIDE28*IF EQUIPPED
Climate Control Auto Function
1 . Press AUTO to select Full Auto Operation . The Auto setting automatically controls
the airflow modes, fan speeds, air intake and air conditioning according to the
temperature setting selected .
2 . Set desired Temperature
3 . Press SYNC to synchronize driver and passenger temperature .
Defrost Outside Windshield:
1 .
Set Fan Speed to the highest position
2 . Set Temperature to Hot
3 .
Press the Defrost button
Defog Inside Windshield:
1 .
Set Fan Speed to desired position
2 . Set desired Temperature
3 .
Press the Defrost button
REMINDERS:
•
Pressing any button during AUTO operation will deactivate the AUTO function and switch to manual mode, except for Temperature Control
•
When in AUTO mode, Air Flow mode and Fan Speed do not display on the Climate Control Display
•
Warm air may flow in through vents if Recirculated Air button is not pressed ON (LED lit)
Your Automatic Climate Control system may differ from those in the illustrations. See your Owner’s Manual for more details.
Automatic Climate Control*
( Type B)
FRONT REAR
MODECLIMATE
OFF
AUTO SYNC
Fan speed control buttons
Rear windshield defroster button
Front windshield defroster button
Air flow mode selection button
Climate information screen selection button
Air conditioning on/off button
Recirculated air button
Dual temperature control knob
System off button
Automatic climate control button
•Defrost mode activates A /C and opens Fresh Air Vent to help dehumidify the air and improve Defroster performance •During Auto Operation, the A /C indicator will NOT illuminate . The fan speed, air intake, air flow and air conditioning may automatically be engaged at any time to reach desired temperature and reduce humidity •Keep inside glass as clean as possible to reduce window fogging
QUICK TIPS
Air Flow Modes
To select Air Flow Modes, press the Mode
selection buttons:
Face-Level
Bi-Level
F lo o r- L evel
Floor/Defrost-Level
CENTER PANEL
Page 31 of 50

29ALWAYS CHECK THE OWNER’S MANUAL FOR COMPLETE OPER ATING INFORMATION AND SAFET Y WARNINGS . *IF EQUIPPED
Defrost Outside Windshield:
1 . Set Fan Speed to the highest position
2 . Set desired Temperature
3 .
Press the Defrost button
Defog Inside Windshield:
1 . Set Fan Speed to desired position
2 . Set desired Temperature
3 . Press the Defrost button
Your Manual Climate Control system may differ from those in the illustrations. See your Owner’s Manual for more details.
Air Flow Modes
To select Air Flow Modes, press the Mode
selection buttons:
Face-Level
Bi-Level
F lo o r- L evel
Floor/Defrost-Level
Manual Climate Control*
FRONT REARA/CMAX01
2
3
4
P A SSEN GER
Front windshield defroster button
Rear windshield defroster button
Air flow mode selection buttons
Recirculated air button
Air conditioning on/off button
Temperature control knobFan speed control knob
• Defrost mode activates A /C and opens Fresh Air Vent to help dehumidify the air and improve Defroster performance
• Keep inside glass as clean as possible to reduce window fogging
QUICK TIPS
CENTER PANEL
Page 32 of 50

OPTIMA FEATURES & FUNCTIONS GUIDE30*IF EQUIPPED
•When leaving your keys with parking lot attendants or valet, make sure to inform them how to operate the EPB •If parked on a steep incline, pull up the EPB switch for more than 3 seconds for a firmer EPB application •Pull up and hold EPB switch a second time to increase brake pressure if parked on a decline or incline
Electric Parking Brake (EPB)* Electric Parking Break (EPB) Video
To view a video on your mobile device, snap this QR Code or visit the listed website .
Refer to page 2 for more information .
www.KuTechVideos.com/jf13/2017
QR CODE
The Electric Parking Brake (EPB) system utilizes
an electric motor to engage the parking brake .
Applying the Parking Brake
Depress the brake pedal and pull up the
EPB switch . Ensure that the indicator light is
illuminated on the instrument cluster .
Releasing the Parking Brake
The EPB will automatically release when the
shifter is placed in Reverse or Drive .
To release EPB manually, depress the brake pedal, then press the EPB
switch A, with the ignition switch in the ON position . Ensure that the
indicator light is OFF .
REMINDERS:
•
As a bulb check, the EPB malfunction indicator will illuminate for approximately 3 seconds when the ignition switch is turned ON
•
If the warning light does not illuminate temporarily, or continues to remain lit, take your vehicle to an authorized Kia dealer and have the system checked
•The EPB should not be operated while the vehicle is moving
•
A click or electric brake motor sound may be heard while operating or releasing the EPB, but these conditions are normal and indicates that the EPB is functioning properly
QUICK TIPS
Auto Hold*
Auto Hold temporarily maintains the
vehicle at a standstill even if the brake
pedal is released . Auto Hold can be turned
On/Off using the AUTO HOLD switch B
on the center panel below gear shift .
Before Auto Hold will operate, the driver’s
door, engine hood and trunk must be
closed, and the driver’s seat belt must be
fastened .
The Auto Hold indicator on the
Instrument Cluster has four states:
White: Standby - With vehicle at a
standstill, and AUTO HOLD switch B is
pressed On, the indicator will illuminate
white . While driving the vehicle (vehicle is
not at a standstill), the Auto Hold indicator
will remain white .
Green: Engaged - When coming to a complete stop by depressing the
brake pedal, the Auto Hold indicator changes from white to green .
Off (not illuminated) - The indicator will turn Off when the AUTO
HOLD switch B is manually pressed Off or when the EPB is manually
turned On .
Yellow: Malfunction - When the indicator is illuminated yellow, there
may be a system malfunction . Take your vehicle to a local Kia dealer .
Refer to page 4 for location of Instrument Cluster indicators.
A
B
(Located below gear shift)
CENTER PANEL