2017 KIA CARENS RHD fog light
[x] Cancel search: fog lightPage 99 of 723
. . . . . . . . . . . 4-122
. . . . . . . . . . . . . . . . . . . . . . . . . . . . . . 4-123
. . . . . . . . . . . . . . . . . . . . . . . . . . . . . . . 4-124
. . . . . . . . . . . . . . . . . . . . . 4-125
Wipers and washers . . . . . . . . . . . . . . . . . . . . . . . 4-126
. . . . . . . . . . . . . . . . . . . 4-127
. . . . . . . . . . . . . . . . . . . . . . . . . . 4-129
. . . . . . . . . . . . . . . . . . 4-131
. . . . . . . . . 4-133
Interior light . . . . . . . . . . . . . . . . . . . . . . . . . . . . . 4-134 . . . . . . . . . . . . . . . . . . . . . . 4-134
. . . . . . . . . . . . . . . . . . . . . . . . . . . . . . . . . 4-134
. . . . . . . . . . . . . . . . . . . . . . . . . . . . . . . . . 4-135
. . . . . . . . . . . . . . . . . . . . . . . . . . 4-136
. . . . . . . . . . . . . . . . . . . . . . . . . 4-136
Welcome system . . . . . . . . . . . . . . . . . . . . . . . . . . 4-137 . . . . . . . . . . . . . . . . . . . . . . . . . . 4-137
. . . . . . . . . . . . . . . . . . . . . . . . . . . . . . . 4-137
. . . . . . . . . . . . . . . . . . . . . . . . . . . . . . . . 4-137
Defroster . . . . . . . . . . . . . . . . . . . . . . . . . . . . . . . . 4-138 . . . . . . . . . . . . . . . . . . . . . . . 4-138
Manual climate control system . . . . . . . . . . . . . . 4-140 . . . . . . . . . . . . . . . . . . 4-141
. . . . . . . . . . . . . . . . . . . . . . . . . . . . 4-146 . . . . . . . . . . . . . . . . . . . . . 4-148
compressor lubricant . . . . . . . . . . . . . . . . . . . . . . . 4-149
Automatic climate control system. . . . . . . . . . . . 4-150 . . . . . . . . . 4-151
. . . . . . . . . . . 4-153
. . . . . . . . . . . . . . . . . . . . . . . . . . . . 4-159
. . . . . . . . . . . . . . . . . . . . . 4-161
compressor lubricant . . . . . . . . . . . . . . . . . . . . . . . 4-162
Windscreen defrosting and defogging . . . . . . . 4-163 . . . . . . . . . . . . . . . . 4-163
. . . . . . . . . . . . . . 4-164
Clean air . . . . . . . . . . . . . . . . . . . . . . . . . . . . . . . . 4-167
Storage compartment. . . . . . . . . . . . . . . . . . . . . . 4-168 . . . . . . . . . . . . . . . . . . . . . . . 4-168
. . . . . . . . . . . . . . . . . . . . . . . . . . . . . . . . . . . 4-169
. . . . . . . . . . . . . . . . . . . . . . . . . . . . . 4-170
. . . . . . . . . . . . . . . . . . . . . . . . . . . . . . . 4-170
. . . . . . . . . . . . . . . . . . . . . . . . . . . . 4-171
Interior features . . . . . . . . . . . . . . . . . . . . . . . . . . 4-172
. . . . . . . . . . . . . . . . . . . . . . . . . . . . . . . . . . . . 4-172
. . . . . . . . . . . . . . . . . . . . . . . . . . . . . . . . . 4-173
4
Page 190 of 723
Features of your vehicle
94
4
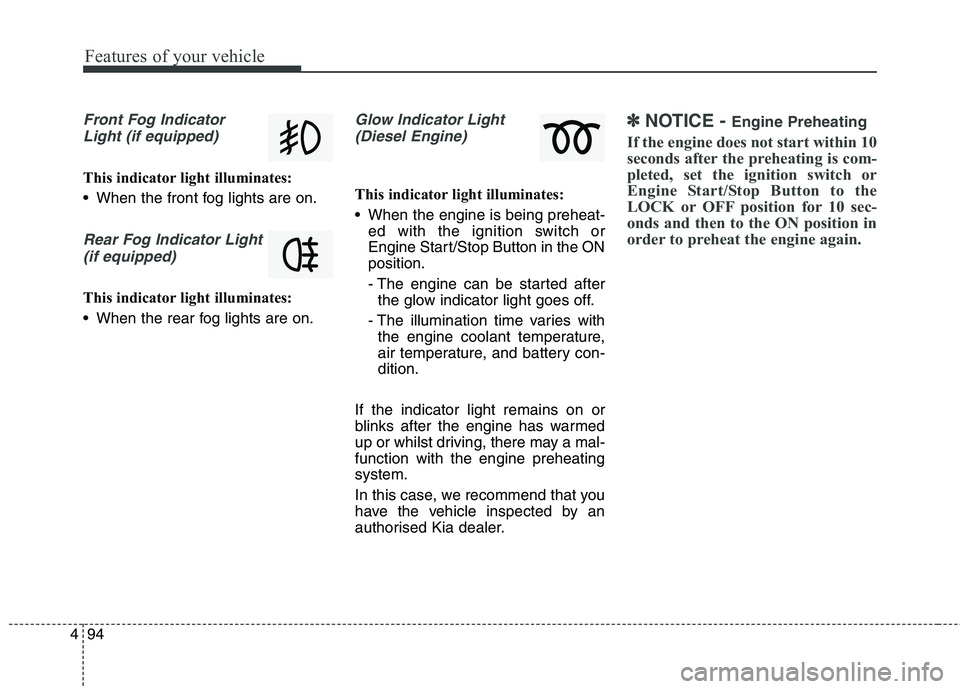
Front Fog Indicator
Light (if equipped)
This indicator light illuminates:
When the front fog lights are on.
Rear Fog Indicator Light (if equipped)
This indicator light illuminates:
When the rear fog lights are on.
Glow Indicator Light(Diesel Engine)
This indicator light illuminates:
When the engine is being preheat- ed with the ignition switch or
Engine Start/Stop Button in the ONposition.
- The engine can be started afterthe glow indicator light goes off.
- The illumination time varies with the engine coolant temperature,
air temperature, and battery con-dition.
If the indicator light remains on or
blinks after the engine has warmed
up or whilst driving, there may a mal-function with the engine preheatingsystem.
In this case, we recommend that you
have the vehicle inspected by an
authorised Kia dealer.
✽✽ NOTICE - Engine Preheating
If the engine does not start within 10
seconds after the preheating is com-
pleted, set the ignition switch or
Engine Start/Stop Button to the
LOCK or OFF position for 10 sec-
onds and then to the ON position in
order to preheat the engine again.
Page 214 of 723

Features of your vehicle
118
4
Headlight (Headlamp) welcome function (if equipped)
When the headlight switch is in the
ON or AUTO position and all doors
(and tailgate) are closed and locked,
if you press the door unlock button
on the transmitter or smart key, the
headlights will come on for about 15
seconds.
If the headlight switch is in the AUTO position, the function can only oper-ate at night.
At this time, if you press the door
unlock button again or door lock but-
ton on the transmitter or smart key,
the headlights will turn off immedi-
ately.
You can activate or deactivate the
headlamp welcome fuction. Refer to
“User setting” in this chapter. Static bending light (if equipped)
Whilst driving the corner, for your
sight and safety, the static bending
light turns on automatically. The sys-
tem will operate automatically as fol-
lows:
When vehicle speed is under
10km/h and steering wheel angle
approximately 80 degrees.
When vehicle speed is over 10km/h and steering wheel angle
approximately 35 degrees.
When the vehicle is at a standstill.
When moving rearwards with one of the above conditions satisfied the lights will light up the oppositedirection. Daytime running light (if equipped)
Daytime Running Lights (DRL) can
make it easier for others to see the
front of your vehicle during the day.
DRL can be helpful in many different
driving conditions, and it is especially
helpful after dawn and before sunset.
The DRL system will turn off when:
1. The front fog light or headlight (low
beam) switch is ON.
2. The engine is OFF.
Page 219 of 723
4123
Features of your vehicle
They will self-cancel after a turn is
completed. If the indicator continues
to flash after a turn, manually return
the lever to the OFF position.
To signal a lane change, move the
turn signal lever slightly and hold it in
position (B). The lever will return tothe OFF position when released.
If an indicator stays on and does not
flash or if it flashes abnormally, one of
the turn signal bulbs may be burnedout and will require replacement.One-touch lane change function
To activate an one-touch lane
change function, move the turn sig-
nal lever slightly and then release it.
The lane change signals will blink 3,
5 or 7 times.
You can choose one-touch lane
change blinking function in “One
touch turn lamp” of “User setting”.
Refer to “User setting” in chapter 4.
✽✽NOTICE
If an indicator flash is abnormally
quick or slow, bulb may be burned
out or have a poor electrical connec-
tion in the circuit.
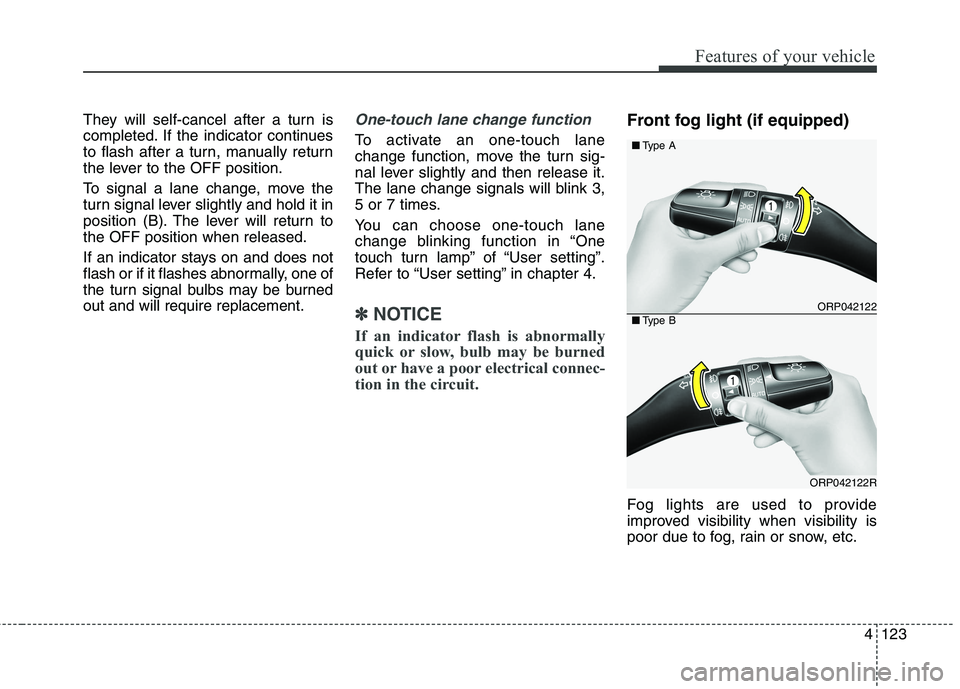
Front fog light (if equipped)
Fog lights are used to provide
improved visibility when visibility is
poor due to fog, rain or snow, etc.
ORP042122
ORP042122R
■ Type A
■Type B
Page 220 of 723
Features of your vehicle
124
4
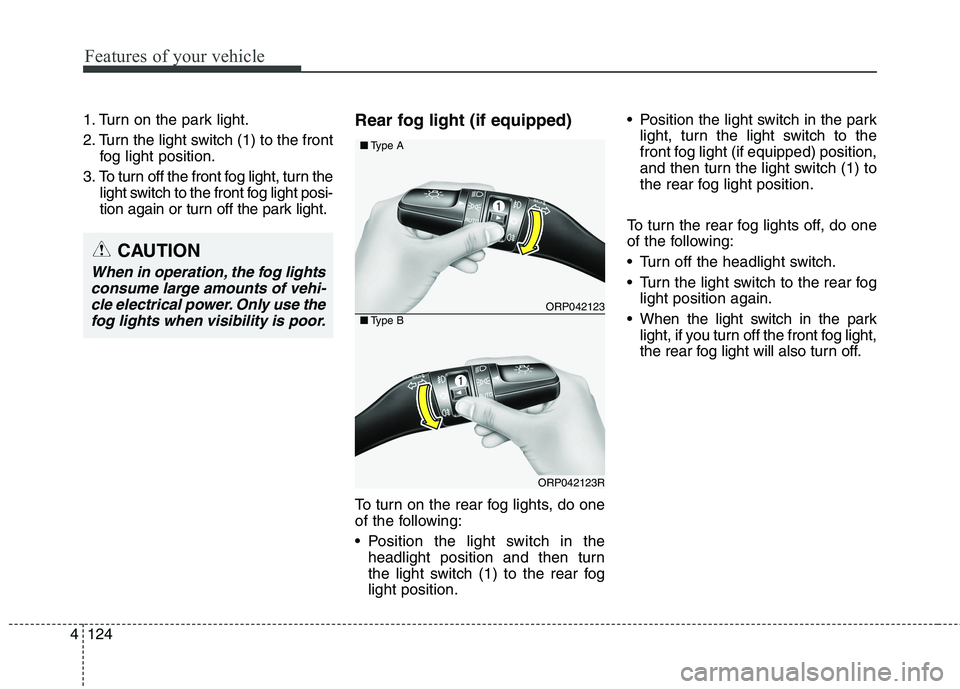
1. Turn on the park light.
2. Turn the light switch (1) to the front
fog light position.
3. To turn off the front fog light, turn the light switch to the front fog light posi-
tion again or turn off the park light. Rear fog light (if equipped)
To turn on the rear fog lights, do one
of the following:
Position the light switch in the
headlight position and then turn
the light switch (1) to the rear foglight position. Position the light switch in the park
light, turn the light switch to the
front fog light (if equipped) position,
and then turn the light switch (1) to
the rear fog light position.
To turn the rear fog lights off, do one
of the following:
Turn off the headlight switch.
Turn the light switch to the rear fog light position again.
When the light switch in the park light, if you turn off the front fog light,
the rear fog light will also turn off.
ORP042123
ORP042123R
■Type A
■Type B
CAUTION
When in operation, the fog lights
consume large amounts of vehi-cle electrical power. Only use the fog lights when visibility is poor.
Page 511 of 723
Driving your vehicle
76
6
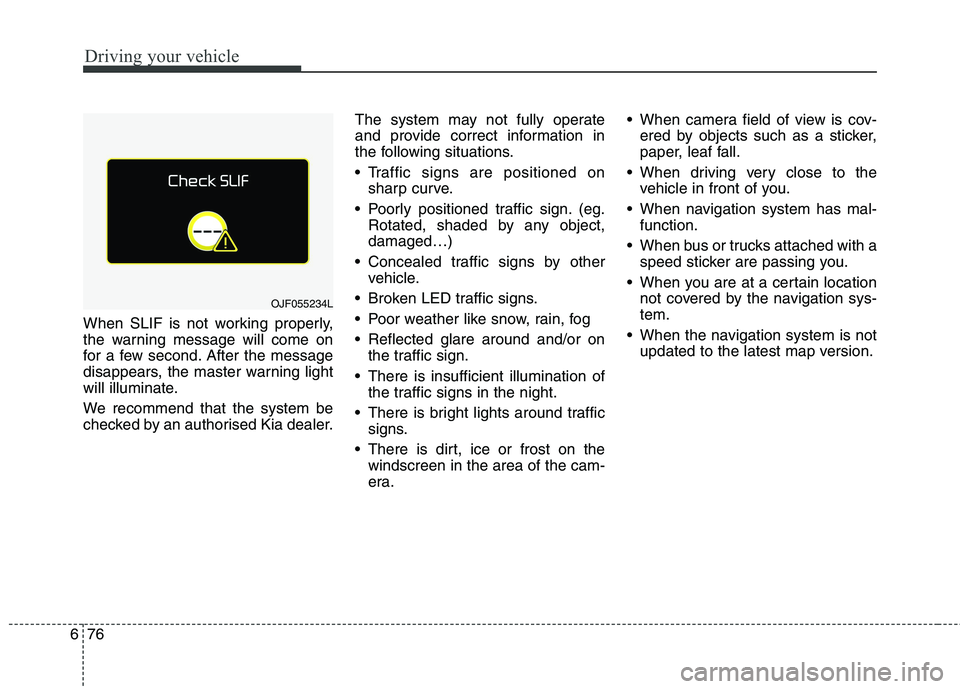
When SLIF is not working properly,
the warning message will come on
for a few second. After the message
disappears, the master warning light
will illuminate.
We recommend that the system be
checked by an authorised Kia dealer. The system may not fully operate
and provide correct information in
the following situations.
Traffic signs are positioned on
sharp curve.
Poorly positioned traffic sign. (eg. Rotated, shaded by any object, damaged…)
Concealed traffic signs by other vehicle.
Broken LED traffic signs.
Poor weather like snow, rain, fog
Reflected glare around and/or on the traffic sign.
There is insufficient illumination of the traffic signs in the night.
There is bright lights around traffic signs.
There is dirt, ice or frost on the windscreen in the area of the cam-
era. When camera field of view is cov-
ered by objects such as a sticker,
paper, leaf fall.
When driving very close to the vehicle in front of you.
When navigation system has mal- function.
When bus or trucks attached with a speed sticker are passing you.
When you are at a certain location not covered by the navigation sys-tem.
When the navigation system is not updated to the latest map version.
OJF055234L
Page 516 of 723

681
Driving your vehicle
The LDWS does not operate when:
The driver turns on the turn signalor hazard warning flasher to
change lane.
Driving on the lane line.
✽✽ NOTICE
To change lane, operate the turn sig-
nal switch, then change the lane.
The LDWS may not warn you
even if the vehicle leaves the
lane, or may warn you even if
the vehicle does not leave thelane when:
The lane is not visible due to snow, rain, stain, a puddle or many other
things.
The brightness of the outside changes suddenly.
Not turning on the headlight even at night or in the tunnel.
Difficult to distinguish the colour of the lane from the road.
Driving on a steep grade or a curve.
Light reflects from the water on the road.
The lens or windscreen is stained with foreign matter.
The sensor can not detect the lane because of fog, heavy rain or
heavy snow.
The surrounding temperature of the inside rear view mirror is high
due to a direct ray of light.
The lane is very wide or narrow. The lane line is damaged or indis-
tinct.
The shadow is on the lane line by a median strip.
There is a mark similar to a lane line.
There is a boundary structure.
The distance from vehicle ahead is very short or the vehicle ahead
hides the lane line.
The vehicle shakes heavily.
The lane number increases or decreases or the lane lines are
crossing complicatedly.
Putting something on the dash- board.
Driving with the sun in front of you.
Driving in areas under construc- tion.
The lane line is more than two in either side (Left/Right).
Page 652 of 723
865
Maintenance
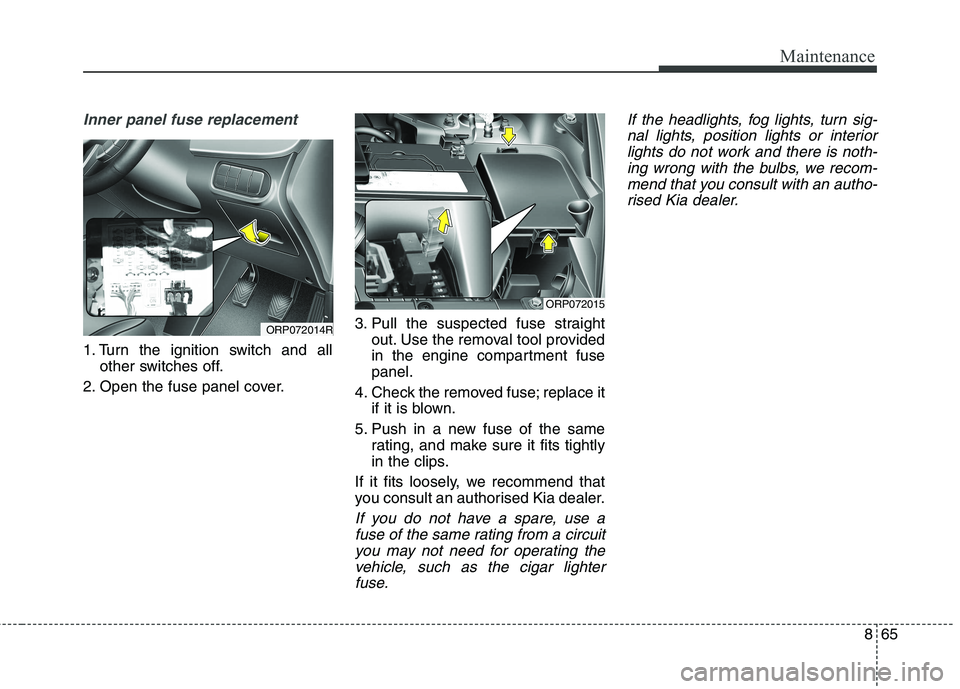
Inner panel fuse replacement
1. Turn the ignition switch and allother switches off.
2. Open the fuse panel cover. 3. Pull the suspected fuse straight
out. Use the removal tool provided
in the engine compartment fusepanel.
4. Check the removed fuse; replace it if it is blown.
5. Push in a new fuse of the same rating, and make sure it fits tightly
in the clips.
If it fits loosely, we recommend that
you consult an authorised Kia dealer.
If you do not have a spare, use a fuse of the same rating from a circuityou may not need for operating the vehicle, such as the cigar lighterfuse. If the headlights, fog lights, turn sig-
nal lights, position lights or interior lights do not work and there is noth-ing wrong with the bulbs, we recom-mend that you consult with an autho- rised Kia dealer.
ORP072014R
ORP072015