2017 KIA CARENS RHD engine overheat
[x] Cancel search: engine overheatPage 542 of 723

6107
Driving your vehicle
When you are ready to leave after
parking on a hill
1.With the manual transaxle inNeutral or automatic transaxle /
dual clutch transmission in P
(Park), apply your brakes and hold
the brake pedal down whilst you:
and
2.Slowly remove your foot from the brake pedal.
3.Drive slowly until the trailer is clear of the chocks.
4.Stop and have someone pick up and store the chocks. Maintenance when trailer tow- ing
Your vehicle will need service more
often when you regularly pull a trail-
er. Important items to pay particularattention to include engine oil,
transaxle fluid, axle lubricant and
cooling system fluid. Brake condition
is another important item to frequent-
ly check. Each item is covered in this
manual, and the Index will help you
find them quickly. If you’re trailering, it
is a good idea to review these sec-
tions before you start your trip.
Do not forget to also maintain your
trailer and hitch. Follow the mainte-nance schedule that accompanied
your trailer and check it periodically.
Preferably, conduct the check at the
start of each day’s driving. Most
importantly, all hitch nuts and boltsshould be tight.CAUTION
Due to higher load during
trailer usage, overheatingmight occur in hot days or during uphill driving. If thecoolant gauge indicates over-heating, switch off the air con- ditioner and stop the vehiclein a safe area to cool down theengine.
When towing check transaxle fluid more frequently.
If your vehicle is not equipped with an air conditioner, youshould install a condenser fanto improve engine perform-ance when towing a trailer.
Page 551 of 723

What to do in an emergency
Road warning . . . . . . . . . . . . . . . . . . . . . . . . . . . . . . 7-2• Hazard warning flasher . . . . . . . . . . . . . . . . . . . . . . . 7-2
In case of an emergency whilst driving . . . . . . . . . 7-3
. . . . . . . . . . . . . . 7-3
. . . . . . . . . . . . . . . . . . . . 7-3
If the engine does not start . . . . . . . . . . . . . . . . . . . 7-4 . . . . 7-4
. . . . 7-4
Emergency starting . . . . . . . . . . . . . . . . . . . . . . . . . 7-5
. . . . . . . . . . . . . . . . . . . . . . . . . . . . . . . . 7-7
If the engine overheats . . . . . . . . . . . . . . . . . . . . . . . 7-8
Tyre Pressure Monitoring System (TPMS) . . . . . . 7-9 . . . . . . . . . . . . . . . . . . . . . . 7-10
malfunction indicator . . . . . . . . . . . . . . . . . . . . . . . . 7-12
If you have a flat tyre (with spare tyre) . . . . . . . . 7-15 . . . . . . . . . . . . . . . . . . . . . . . . . . . . . . . 7-15
. . . . . . . . . . . 7-16
. . . . . . . . . . . . . . . . . . . . . . . . . . . . . . 7-17
. . . . . . . . . . . . . . . . . . . . . . . . . . . . . . . . . . . 7-24
. . . . . . . . . . 7-25 If you have a flat tyre (with tyre mobility kit). . . 7-26
. . . . . . . . . . . . . . . . . . . . . . . . . . . . . . . . . 7-26
. . . . . 7-27
. . . . . . . . . . . . . 7-28
. . . . . . . . . . . . . 7-30
. . . . . 7-31
. . . . . . . . . . . . . . . . . . . . . . . . . . . . . . . 7-31
Towing . . . . . . . . . . . . . . . . . . . . . . . . . . . . . . . . . . . 7-32 . . . . . . . . . . . . . . . . . . . . . . . . . . . . . . . 7-32
. . . . . . . . . . . . . . . . . . . . . . . 7-33
. . . . . . . . . . . . . . . . . . . . . . . . . . . . 7-34
Emergency Commodity . . . . . . . . . . . . . . . . . . . . . 7-37 . . . . . . . . . . . . . . . . . . . . . . . . . . . . . 7-37
. . . . . . . . . . . . . . . . . . . . . . . . . . . . 7-37
7
Page 557 of 723

77
What to do in an emergency
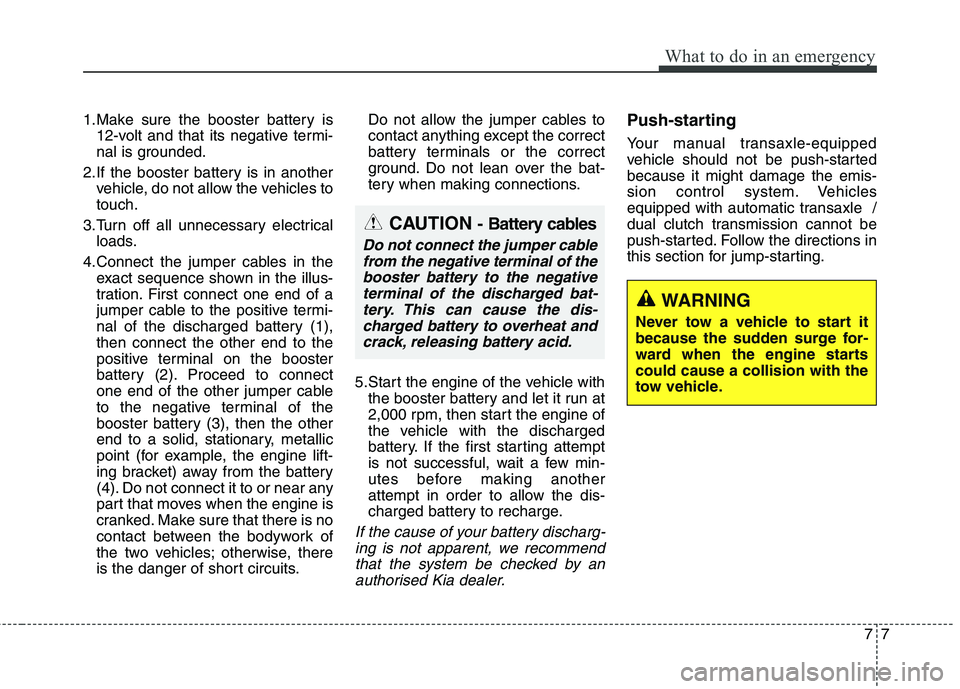
1.Make sure the booster battery is12-volt and that its negative termi-
nal is grounded.
2.If the booster battery is in another vehicle, do not allow the vehicles totouch.
3.Turn off all unnecessary electrical loads.
4.Connect the jumper cables in the exact sequence shown in the illus-
tration. First connect one end of a
jumper cable to the positive termi-
nal of the discharged battery (1),then connect the other end to the
positive terminal on the booster
battery (2). Proceed to connect
one end of the other jumper cable
to the negative terminal of the
booster battery (3), then the other
end to a solid, stationary, metallic
point (for example, the engine lift-
ing bracket) away from the battery
(4). Do not connect it to or near any
part that moves when the engine is
cranked. Make sure that there is no
contact between the bodywork of
the two vehicles; otherwise, there
is the danger of short circuits. Do not allow the jumper cables to
contact anything except the correct
battery terminals or the correct
ground. Do not lean over the bat-
tery when making connections.
5.Start the engine of the vehicle with the booster battery and let it run at
2,000 rpm, then start the engine of
the vehicle with the discharged
battery. If the first starting attempt
is not successful, wait a few min-
utes before making another
attempt in order to allow the dis-
charged battery to recharge.
If the cause of your battery discharg-
ing is not apparent, we recommendthat the system be checked by an authorised Kia dealer.
Push-starting
Your manual transaxle-equipped
vehicle should not be push-startedbecause it might damage the emis-
sion control system. Vehicles
equipped with automatic transaxle /
dual clutch transmission cannot be
push-started. Follow the directions in
this section for jump-starting.
CAUTION - Battery cables
Do not connect the jumper cable
from the negative terminal of thebooster battery to the negative terminal of the discharged bat-tery. This can cause the dis-charged battery to overheat and crack, releasing battery acid.
WARNING
Never tow a vehicle to start it
because the sudden surge for-
ward when the engine startscould cause a collision with the
tow vehicle.
Page 558 of 723

What to do in an emergency
8
7
IF THE ENGINE OVERHEATS
If your temperature gauge indicates
overheating, you will experience a
loss of power, or hear loud pinging or
knocking, the engine is probably too
hot. If this happens, you should:
1.Pull off the road and stop as soon as it is safe to do so.
2.Place the shift lever in P (automat- ic transaxle / dual clutch transmis-
sion) or neutral (manual transaxle)
and set the parking brake. If the air
conditioning is on, turn it off.
3.If engine coolant is running out under the vehicle or steam is com-ing out from the bonnet, stop the
engine. Do not open the bonnet until
the coolant has stopped running or
the steaming has stopped. If there is
no visible loss of engine coolant and
no steam, leave the engine running
and check to be sure the engine
cooling fan is operating. If the fan is
not running, turn the engine off.
4.Check to see if the water pump drive belt is missing. If it is not miss-
ing, check to see that it is tight. If the drive belt seems to be satis-
factory, check for coolant leaking
from the radiator, hoses or under
the vehicle. (If the air conditioning
had been in use, it is normal for
cold water to be draining from it
when you stop).
5.If the water pump drive belt is bro- ken or engine coolant is leakingout, stop the engine immediately
and we recommend that you call
an authorised Kia dealer. 6.If you cannot find the cause of the
overheating, wait until the engine
temperature has returned to nor-
mal. Then, if coolant has been lost,carefully add coolant to the reser-
voir to bring the fluid level in the
reservoir up to the halfway mark.
7.Proceed with caution, keeping alert for further signs of overheat-
ing. If overheating happens again,
we recommend that you call an
authorised Kia dealer.
CAUTION
Serious loss of coolant indi-
cates there is a leak in the cool-ing system and we recommend that the system be checked byan authorised Kia dealer.
When the engine overheats from low engine coolant, sud-denly adding engine coolant may cause cracks in theengine. To prevent damage,add engine coolant slowly in small quantities.
WARNING
Whilst the engine is running,
keep hair, hands and clothing
away from moving parts suchas the fan and drive belts to pre-
vent injury.
WARNING
Do not remove the radiator cap
when the engine is hot. This can
allow coolant to blow out of theopening and cause serious
burns.
Page 581 of 723

731
What to do in an emergency
Notes on the safe use of the
Tyre Mobility Kit
Park your car at the side of theroad so that you can work with the
TMK away from moving traffic.
Place your warning triangle in a
prominent place to make passing
vehicles aware of your location.
To be sure your vehicle will not move, even when you're on fairly
level ground, always set your park-
ing brake.
Only use the TMK for sealing/infla- tion passenger car tyres. Do not
use on motorcycles, bicycles or
any other type of tyres.
Do not remove any foreign objects- such as nails or screws -that have
penetrated the tyre.
Before using the TMK, read the precautionary advice printed onthe sealant bottle!
Provided the car is outdoors, leave the engine running. Otherwise
operating the compressor may
eventually drain the car battery. Never leave the TMK unattended
whilst it is being used.
Do not leave the compressor run- ning for more than 10 min. at a time
or it may overheat.
Do not use the TMK if the ambient temperature is below -30°C (-22°F).
When the tyre and wheel are dam- aged, do not use Tyre Mobility Kit
for your safety. Technical Data
System voltage: DC 12 V
Working voltage: DC 10 - 15 V
Amperage rating: max. 15 A
Suitable for use at temperatures:
-30 ~ +70°C (-22 ~ +158°F)
Max. working pressure: 6 bar (87 psi)
Size
Compressor: 170 x 150 x 60 mm (6.7 x 5.9 x 2.4 in.)
Sealant bottle: 85 x 77 ø mm (3.3 x 3.0 ø in.)
Compressor weight: 0.8 kg (1.8 lbs)
Sealant volume: 200 ml (12.2 cu. in.)
❈ Sealant and spare parts can be obtained and replaced at an
authorised vehicle or tyre dealer.
Empty sealant bottles may be dis-
posed of at home. Liquid residuefrom the sealant should be dis-
posed of by your vehicle or tyredealer or in accordance with local
waste disposal regulations.
Page 621 of 723

Maintenance
34
8
ENGINE COOLANT
The high-pressure cooling system
has a reservoir filled with year-round
antifreeze coolant. The reservoir is
filled at the factory.
Check the antifreeze protection and
coolant concentration level at least
once a year, at the beginning of the
winter season, and before travelling
to a colder climate. Checking the coolant level
(Continued)
When you are sure all the pressure has been released,
press down on the cap, using
a thick towel, and continue
turning counterclockwise to
remove it.
Even if the engine is not oper- ating, do not remove the radi-ator cap or the drain plugwhilst the engine and radiator
are hot. Hot coolant and
steam may still blow out
under pressure, causing seri-
ous injury.
WARNING
Removing radiatorcap
Never attempt to remove the radiator cap whilst the engine
is operating or hot. Doing somight lead to cooling system
and engine damage and could
result in serious personal
injury from escaping hotcoolant or steam.
Turn the engine off and wait until it cools down. Use
extreme care when removing
the radiator cap. Wrap a thick
towel around it, and turn it
counterclockwise slowly to
the first stop. Step back whilst
the pressure is released fromthe cooling system.
(Continued)
CAUTION
When the engine overheatsfrom low engine coolant, sud-denly adding engine coolantmay cause cracks in theengine. To prevent damage, add engine coolant slowly insmall quantities.
Do not drive with no engine coolant. It may cause waterpump failure and engine seizure, etc.
Page 717 of 723

I5
Index
Fuel filler lid ..................................................................4-41
Closing the fuel filler lid ............................................4-41
Opening the fuel filler lid ..........................................4-41
Fuel Filter ......................................................................8-40 Draining water from fuel filter ..................................8-40
Fuel requirements ............................................................1-3 Diesel engine ................................................................1-6
Petrol engine ................................................................1-3
Fuses ..............................................................................8-63 Fuse/relay panel description ......................................8-69
Gross vehicle weight........................................................9-3
How to use this manual ..................................................1-2
If the engine does not start ..............................................7-4 If engine doesn't turn over or turns over slowly ..........7-4
If engine turns over normally but does not start ..........7-4
If the engine overheats ....................................................7-8
If you have a flat tyre (with spare tyre) ........................7-15 Changing tyres ..........................................................7-17
EC Declaration of Conformity for Jack......................7-25
Jack and tools ..............................................................7-15
Jack label ....................................................................7-24
Removing and storing the spare tyre ........................7-16
If you have a flat tyre (with tyre mobility kit) ..............7-26 Checking the tyre inflation pressure ..........................7-30
Components of the Tyre Mobility Kit (TMK) ............7-27
Distributing the sealant ..............................................7-30
Introduction ................................................................7-26
Notes on the safe use of the Tyre Mobility Kit ..........7-31
Technical Data ............................................................7-31
Using the Tyre Mobility Kit (TMK) ..........................7-28
In case of an emergency whilst driving ..........................7-3 If engine stalls whilst driving ......................................7-3
If the engine stalls at a crossroad or crossing ..............7-3
If you have a flat tyre whilst driving ............................7-3
Instrument cluster ..........................................................4-57 Gauges ........................................................................4-60
Instrument Cluster Control ........................................4-58
LCD Display Control ..................................................4-59
Transaxle Shift Indicator ............................................4-64
Instrument panel overview ..............................................2-5
Interior features............................................................4-172 Air ventilation seat ....................................................4-176
Ashtray ......................................................................4-172
AUX, USB and iPod ................................................4-180
Bottle holder ............................................................4-174
F
H
G
I