2017 KIA CARENS RHD ECO mode
[x] Cancel search: ECO modePage 176 of 723
Features of your vehicle
80
4
Choose the average fuel reset mode
you prefer with in "User settings" of
the "LCD Display" as below ;
- OFF (manual reset)
The average fuel economy will not
reset automatically.
To clear the average fuel economy
manually, press the RESET button
" " on the steering wheel for more
than 1 second when the average fuel
economy is displayed.
- After Ignition (automatic reset) The average fuel economy will reset
4 hours after the engine is turned off.
- After refuelling (automatic reset) The average fuel economy will reset
to zero (---) when the vehicle speed
exceeds 1 km/h after refuelling
more than 6 litres.✽✽ NOTICE
The average fuel economy is not dis-
played for more accurate calculation
if the vehicle does not drive more
than 10 seconds or 50 meters (0.03
miles) since the ignition switch or
Engine Start/Stop button is turned
to ON.Instant Fuel Economy (3)
This mode displays the instant fuel economy during the last few sec-
onds when the vehicle speed ismore than 10 km/h (6.2 MPH).
- Fuel economy range: 0.0 ~ 20.0L/100km or 0.0 ~ 50.0 MPG
Page 188 of 723
Features of your vehicle
92
4
Auto stop indicator
(if equipped)
This indicator will illuminate when the engine enters the Idle Stop mode ofthe ISG (Idle Stop and Go) system.
When the automatic starting occurs, the auto stop indicator on the cluster
will blink for 5 seconds.
For more details, refer to the ISG (Idle Stop and Go) system in chapter 6.
✽✽ NOTICE
When the engine automatically starts
by the ISG system, some warning
lights (ABS, ESC, ESC OFF, EPS or
Parking brake warning light) may
turn on for a few seconds.
This happens because of the low bat-
tery voltage. It does not mean the
system is malfunctioning.
Immobiliser Indicator Light (Without Smart Key) (if equipped)
This indicator light illuminates:
When the vehicle detects the immobiliser in your key properly
whilst the ignition switch is ON.
- At this time, you can start theengine.
- The indicator light goes off after starting the engine.
This indicator light blinks:
When there is a malfunction with the immobiliser system.
In this case, we recommend that
you have the vehicle inspected by
an authorised Kia dealer.
Immobiliser Indicator
Light (With Smart Key) (if equipped)
This indicator light illuminates for up
to 30 seconds:
When the vehicle detects the smart key in the vehicle properly
whilst the Engine Start/Stop Button
is ACC or ON.
- At this time, you can start theengine.
- The indicator light goes off after starting the engine.
This indicator light blinks for a few
seconds:
When the smart key is not in the vehicle.
- At this time, you can not start theengine.
Page 207 of 723

4111
Features of your vehicle
1. Activate Smart Parking AssistSystem
Press the Smart Parking AssistSystem button (the button indicator will illuminate).
The Parking Assist System will be activated (the button indicator willilluminate).
A warning sound will be heard if an obstacle is detected.
Press the Smart Parking Assist System button again for more than
2 seconds to turn off the system.
The Smart Parking Assist System defaults to the OFF position when-
ever the ignition switch is turned on.
2. Select parking assist mode
Select the parking assist mode bypressing the Smart Parking Assist
System button with the shift lever in
N (Neutral) or D(Drive) and the
brake pedal depressed.
The right side parallel mode is selected automatically when the
Smart Parking Assist System is
activated.
To select the left side parallel mode press the Smart Parking Assist
System button once more.
If the button is pressed again, the system will turn off.
3. Search for parking space
Slowly drive forward maintainingthe distance of approximately 50cm ~ 150cm (19.6in.~59.0in.) with the
parked vehicles. The side sensors
will search for a parking space.
If the vehicle speed is over 30km/h (18.6mph), a message will appearto notify to reduce speed.
If the vehicle speed is over 40km/h (24.8mph), the system will cancel.ORP046103RORP046333L/ORP046334L
■
Right side
- parallel mode ■
Left side
-parallel modeORP046335L/ORP046336L
■
Right side
- parallel mode ■
Left side
-parallel mode
Page 226 of 723
Features of your vehicle
130
4
When there is a problem with the
motor to operate the wiper blades,
the wiper blades will stop and acti-
vate the Fail Safety Function in the
ignition switch ON position or whilst
driving. Fail Safety Function will
operate as follows:
- HI or Mode 2 (5 minutes) �LO or
Mode 1 (5 minutes) �INT or Mode
--- (5 minutes) �OFF or O (Stop) In a rainy day if the windscreen glass
gets dry when driving through a long
tunnel, the wiping velocity mayreduce to protect the motor and
blade. It will return to its normal state,after passing through the tunnel.
In case of overload the wiper motor that the function adjusts speed auto-
matically in vehicle. This feature pre-
vents damage to the wiper motor and
blade. In case of removal overload
conditions, it will return to its normal
position. By the pressure of the wind
at high speed wiper blades can be
moved upwards. This prevents dam-
age due to wiper motor overload bythe pressure of the wind.
Operating the wiper blade and wiper
switch operates normally, it will
return to its normal position.CAUTION
If wipers do not return to normal
position, you should remove thewax, water repellent, oil and other debris into S and then checkwiper operation again.
CAUTION
After remove the overload con-dition, if the problem of wiperblades or operating the motor remains, we recommend thatthe system be checked by anauthorised Kia dealer.
❈
❈ Overload condition
- In a rainy day when driving through a long tunnel
- When wax car wash
- Water-repellent coating (coated glass)
- Cleaning the windscreen cleaners
- Excessive blade wear etc.
Page 244 of 723
Features of your vehicle
148
4
When using the air conditioning
system, you may notice clear water
dripping (or even puddling) on the
ground under the passenger side
of the vehicle. This is a normal sys-
tem operation characteristic.
Operating the air conditioning sys- tem in the recirculated air position
provides maximum cooling, how-
ever, continual operation in this
mode may cause the air inside the
vehicle to become stale.
During cooling operation, you may occasionally notice a misty air flow
because of rapid cooling and
humid air intake. This is a normal
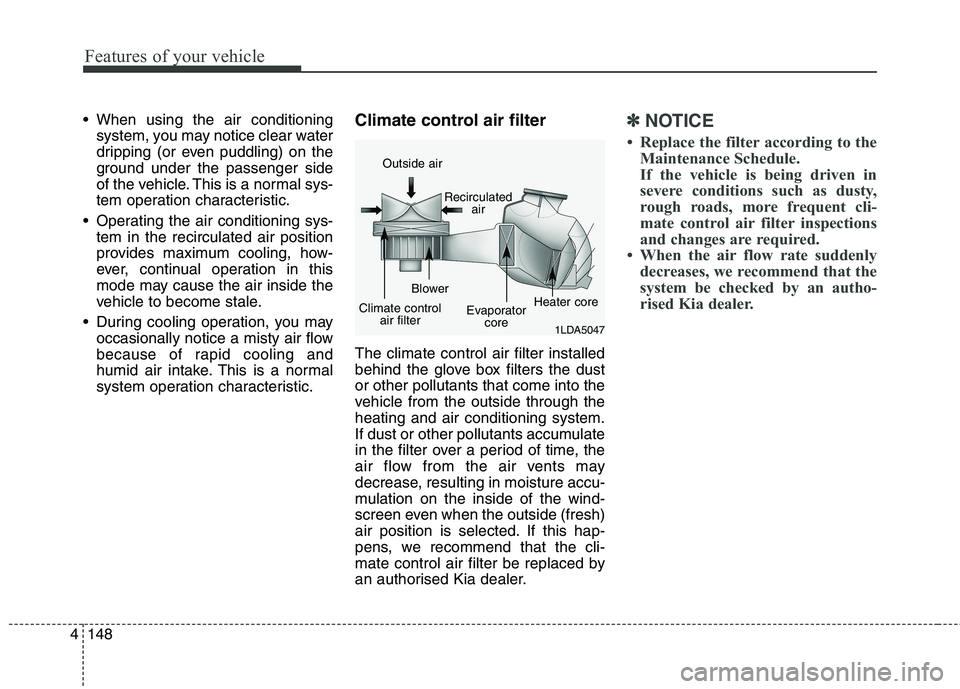
system operation characteristic. Climate control air filter The climate control air filter installed
behind the glove box filters the dustor other pollutants that come into the
vehicle from the outside through theheating and air conditioning system.
If dust or other pollutants accumulate
in the filter over a period of time, the
air flow from the air vents may
decrease, resulting in moisture accu-
mulation on the inside of the wind-
screen even when the outside (fresh)
air position is selected. If this hap-
pens, we recommend that the cli-
mate control air filter be replaced by
an authorised Kia dealer.✽✽
NOTICE
Replace the filter according to the Maintenance Schedule.
If the vehicle is being driven in
severe conditions such as dusty,
rough roads, more frequent cli-
mate control air filter inspections
and changes are required.
When the air flow rate suddenly decreases, we recommend that the
system be checked by an autho-
rised Kia dealer.
1LDA5047
Outside air
Recirculatedair
Climate control air filter Blower
Evaporatorcore Heater core
Page 252 of 723
Features of your vehicle
156
4
Adjusting the driver and passenger
side temperature individually
Press the "SYNC" button again to
adjust the driver and passenger
side temperature individually. The
illumination of button turns off.
Operate the driver side tempera- ture control knob to adjust the driv-
er side temperature.
Operate the passenger side tem- perature control knob to adjust the
passenger side temperature. Temperature conversion
You can switch the temperature
mode between Centigrade to
Fahrenheit as follows:
Whilst pressing the OFF button,
press the AUTO button for 3 seconds
or more.
The display will change from
Centigrade to Fahrenheit, or from
Fahrenheit to Centigrade.
✽✽
NOTICE
If the battery has been discharged or disconnected, the temperature
mode display will reset to
Centigrade.
If you re-connect the battery after it has been completely discharged
or after it has been disconnected
from the vehicle, the system will
be initiated and the display will
first show 22°C on the screen
which is the initial setting.
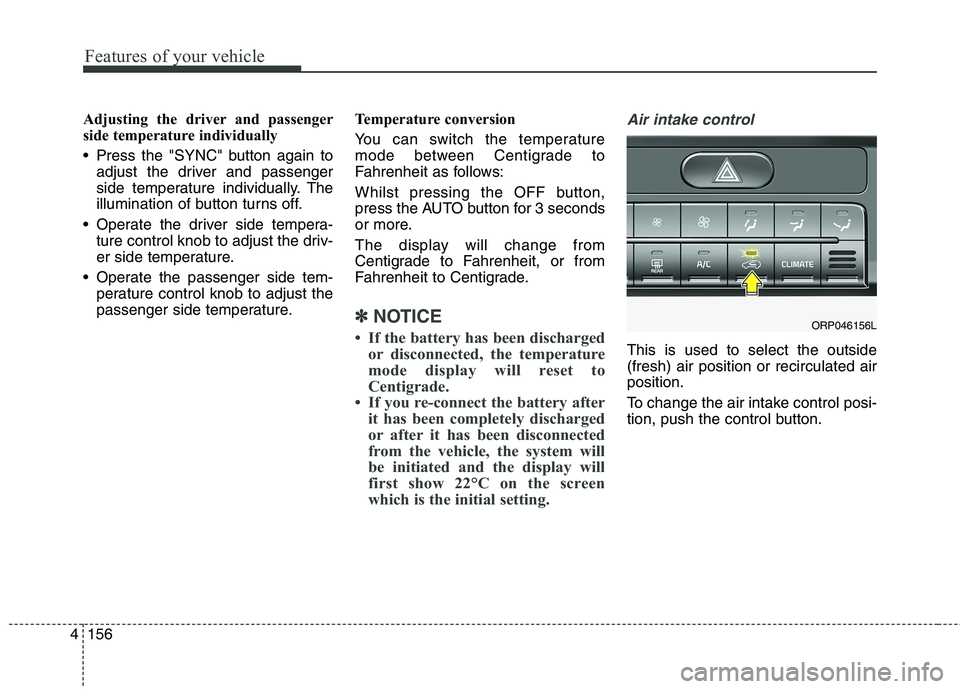
Air intake control
This is used to select the outside (fresh) air position or recirculated airposition.
To change the air intake control posi-
tion, push the control button.
ORP046156L
Page 257 of 723
4161
Features of your vehicle
Air conditioning system operation tips
If the vehicle has been parked indirect sunlight during hot weather,
open the windows for a short time
to let the hot air inside the vehicle
escape.
Use air conditioning to reduce humidity and moisture inside the
vehicle on rainy or humid days.
During air conditioning system operation, you may occasionallynotice a slight change in enginespeed as the air conditioning com-
pressor cycles. This is a normal
system operation characteristic.
Use the air conditioning system every month only for a few minutes
to ensure maximum system per-
formance. When using the air conditioning
system, you may notice clear water
dripping (or even puddling) on the
ground under the passenger side
of the vehicle. This is a normal sys-
tem operation characteristic.
Operating the air conditioning sys- tem in the recirculated air position
provides maximum cooling, how-
ever, continual operation in this
mode may cause the air inside the
vehicle to become stale.
During cooling operation, you may occasionally notice a misty air flow
because of rapid cooling and
humid air intake. This is a normal
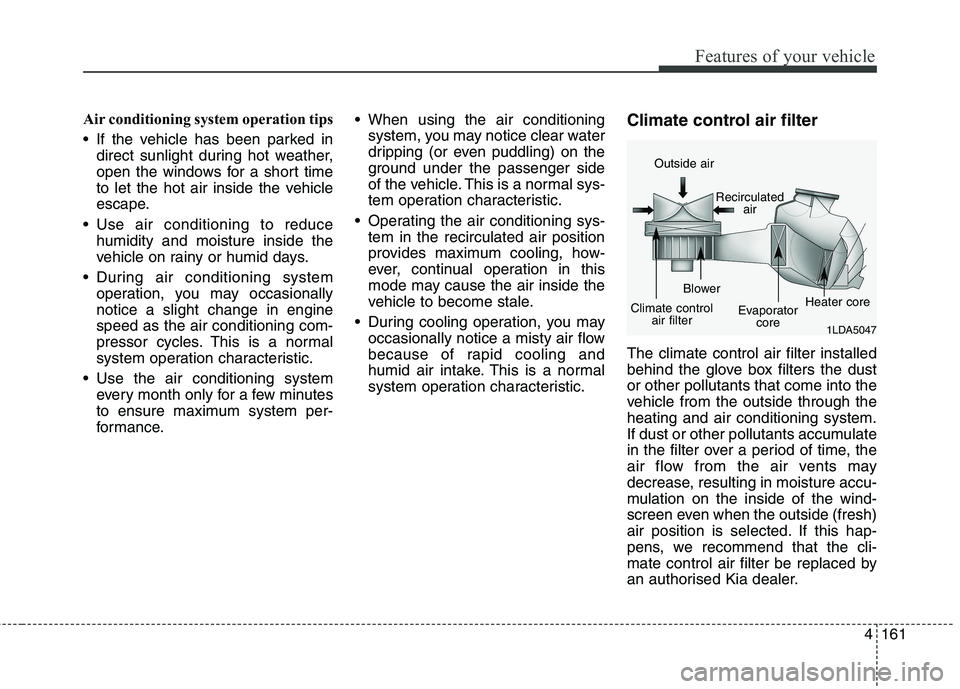
system operation characteristic. Climate control air filter The climate control air filter installed
behind the glove box filters the dustor other pollutants that come into the
vehicle from the outside through theheating and air conditioning system.
If dust or other pollutants accumulate
in the filter over a period of time, the
air flow from the air vents may
decrease, resulting in moisture accu-
mulation on the inside of the wind-
screen even when the outside (fresh)
air position is selected. If this hap-
pens, we recommend that the cli-
mate control air filter be replaced by
an authorised Kia dealer.
1LDA5047
Outside air
Recirculatedair
Climate control air filter Blower
Evaporatorcore Heater core
Page 284 of 723

Audio system
Audio System . . . . . . . . . . . . . . . . . . . . . . . . . . . . . . 5-2 Antenna . . . . . . . . . . . . . . . . . . . . . . . . . . . . . . . . . . . . . 5-2
Audio remote control . . . . . . . . . . . . . . . . . . . . . . . . . . 5-3
How vehicle audio works . . . . . . . . . . . . . . . . . . . . . . . 5-4
Caring for disc . . . . . . . . . . . . . . . . . . . . . . . . . . . . . . . . 5-6
Audio (Without Touch Screen) . . . . . . . . . . . . . . . 5-13 Feature of Your Audio. . . . . . . . . . . . . . . . . . . . . . . . . 5-15
Setup (for RDS model) . . . . . . . . . . . . . . . . . . . . . . . . 5-21
Setup . . . . . . . . . . . . . . . . . . . . . . . . . . . . . . . . . . . . . . . 5-30
Radio (for RDS model) . . . . . . . . . . . . . . . . . . . . . . . . 5-39
Radio . . . . . . . . . . . . . . . . . . . . . . . . . . . . . . . . . . . . . . . 5-41
Media Mode . . . . . . . . . . . . . . . . . . . . . . . . . . . . . . . . . 5-43
Bluetooth ®
Wireless Technology audio . . . . . . . . . . . 5-50
Phone . . . . . . . . . . . . . . . . . . . . . . . . . . . . . . . . . . . . . . 5-51
Voice Command . . . . . . . . . . . . . . . . . . . . . . . . . . . . . . 5-57
Audio (With Touch Screen) . . . . . . . . . . . . . . . . . . 5-64 Feature of Your Audio. . . . . . . . . . . . . . . . . . . . . . . . . 5-65
Radio Mode (for RDS model) . . . . . . . . . . . . . . . . . . 5-72
Radio Mode . . . . . . . . . . . . . . . . . . . . . . . . . . . . . . . . . 5-76
Media Mode . . . . . . . . . . . . . . . . . . . . . . . . . . . . . . . . . 5-78
Bluetooth ®
Wireless Technology ( Bluetooth®
Wireless
Technology equipped model) . . . . . . . . . . . . . . . . . 5-105
Bluetooth ®
Wireless Technology (for RDS,
Bluetooth ®
Wireless Technology equipped model) 5-106
Voice Recognition . . . . . . . . . . . . . . . . . . . . . . . . . . . 5-126 Setup (for RDS model) . . . . . . . . . . . . . . . . . . . . . . . 5-134
Setup . . . . . . . . . . . . . . . . . . . . . . . . . . . . . . . . . . . . . . 5-143
Rear View Camera . . . . . . . . . . . . . . . . . . . . . . . . . . 5-150
APPENDIX . . . . . . . . . . . . . . . . . . . . . . . . . . . . . . . . 5-151
5