2017 JEEP GRAND CHEROKEE navigation system
[x] Cancel search: navigation systemPage 76 of 372

INSTRUMENT CLUSTER
DISPLAY
Your vehicle may be equipped with an instru-
ment cluster display, which offers useful in-
formation to the driver. With the ignition in
the STOP/OFF position (and the key removed,
for vehicles with mechanical key), opening/
closing of a door will activate the display for
viewing, and display the total miles or kilo-
meters in the odometer. Your instrument
cluster display is designed to display impor-
tant information about your vehicle’s systems
and features. Using a driver interactive dis-
play located on the instrument panel, your
instrument cluster display can show you how
systems are working and give you warnings
when they aren’t. The steering wheel
mounted controls allow you to scroll through
and enter the main menus and submenus.
You can access the specific information you
want and make selections and adjustments.
Instrument Cluster Display Location and
Controls
The instrument cluster display is located in
the center of the instrument cluster.1. The top line where reconfigurable tell-
tales, compass direction, outside tem-
perature, Time, Range MPG or Trip are
displayed
2. The main display area where the menus and pop up messages are displayed
3. The lower line where reconfigurable tell- tales, menu name and menu page are
displayed • Push the
up
arrow button to scroll
upward through the main menus (Speed-
ometer, MPH/km/h, Vehicle Info, Terrain,
Driver Assist, Fuel Economy, Trip A, Trip B,
Stop/Start, Audio, Navigation, Stored
Messages, Screen Setup and Speed Warn-
ing).
• Push the down
arrow button to scroll
downward through the main menu and
submenus (Speedometer, MPH/km/h, Ve-
hicle Info, Terrain, Driver Assist, Fuel
Economy, Trip A, Trip B, Stop/Start, Audio,
Navigation, Stored Messages, Screen
Setup and Speed Warning).
Instrument Cluster Display
Instrument Cluster Display Controls
GETTING TO KNOW YOUR INSTRUMENT PANEL
74
Page 288 of 372

Dual Video Screen..............326
Blu-ray Disc Player .............326
Play Video Games ..............328
NAVIGATION.............. .328
Changing The Navigation Voice Prompt
Volume....................328
Finding Points Of Interest .........329
Finding A Place By Spelling The Name .329
One-Step Voice Destination Entry . . . .329
Setting Your Home Location ........329
Go Home ...................330
Adding A Stop ................330
Taking A Detour ...............330
UCONNECT PHONE ..........331
Operation...................331
Uconnect Phone Features .........331
General Information .............332
Uconnect Phone (Bluetooth Hands Free
Calling) ....................332 Pairing (Wirelessly Connecting) Your Mobile
Phone To The Uconnect System
.....332
Common Phone Commands
(Examples) ..................336
Mute (Or Unmute) Microphone During
Call ......................336
Transfer Ongoing Call Between Handset And
Vehicle ....................336
Phonebook ..................336
Voice Command Tips ............336
Changing The Volume ...........336
Using Do Not Disturb ...........336
Incoming Text Messages .........337
Voice Text Reply (Not Compatible With
iPhone) ....................338
Helpful Tips And Common Questions To
Improve Bluetooth Performance With Your
Uconnect System ..............339
UCONNECT VOICE RECOGNITION
QUICKTIPS ...............340
Introducing Uconnect ...........340 Get Started
.................340
Basic Voice Commands ...........341
Radio .....................342
Media .....................342
Phone .....................342
Voice Text Reply ..............343
Climate (8.4/8.4 NAV) ...........344
Navigation (8.4/8.4 NAV) .........344
Uconnect Access — If Equipped
(8.4/8.4 NAV) ................345
Register (8.4/8.4 NAV) ...........345
Vehicle Health Alert .............346
Mobile App (8.4/8.4 NAV) .........346
Voice Texting (8.4/8.4 NAV) ........347
Yelp (8.4/8.4 NAV) .............348
SiriusXM Travel Link (8.4/8.4 NAV — US
Market Only) .................348
Siri Eyes Free — If Equipped .......348
Do Not Disturb ................350
Additional Information ...........351
MULTIMEDIA
286
Page 294 of 372
Uconnect Access enhances your ownership
and driving experience by connecting your
vehicle to an operable 1X (voice/data) or 3G
(data) network. When connected to an oper-
able 1X (voice/data) or 3G (data) network,
you can:
• Place a call to a local 9-1-1 Operator foremergency assistance.
• Remotely lock/unlock your doors and start your vehicle from virtually anywhere, using
the Uconnect Access App from your de-
vice. You can also do so by logging into
your owner site, or by calling Uconnect
Access Care when your vehicle has an
operable 1X (voice/data) or 3G (data) net-
work connection. Services can only be
used where coverage is available; see cov-
erage map for details.
• Turn your vehicle into a 3G Wi-Fi Hotspot and connect your devices to the internet.
• Receive text or email notifications if your vehicle's security alarm goes off.
• Receive stolen vehicle assistance, using GPS technology to help authorities locate
your vehicle if it is stolen. • Listen to your text messages or send free-
form text messages with your voice while
keeping your hands on the wheel, using
the Voice Texting feature. Requires a de-
vice that supports Bluetooth Message Ac-
cess Profile (MAP).
• Search for places to eat, shop, relax and play with Yelp, using your voice or on-
screen menu. Then navigate to them
(navigation standard on Uconnect
8.4 NAV, optional on Uconnect 8.4).
• Get operator assistance using the ASSIST button on your interior rearview mirror.
Before you drive, familiarize yourself with the
easy-to-use Uconnect Access services.
1. The ASSIST and 9-1-1 buttons are lo- cated on your rearview mirror. The ASSIST
button is used for contacting Roadside
Assistance, Vehicle Care and Uconnect
Access Care. The 9-1-1 button connects
you to emergency services. NOTE:
Vehicles sold in Canada and Mexico DO
NOT have 9-1-1 call system capabilities.
9-1-1 or other emergency line operators in
Canada and Mexico may not answer or
respond to 9-1-1 system calls.
2. The Uconnect “Apps
” button is lo-
cated in the center of the menu bar of the
radio touchscreen. This is where you can
manage your Apps and purchase 3G Wi-Fi
on demand.
3. The Uconnect Voice Command and Uconnect Phone buttons are located on
the left side of your steering wheel. These
buttons let you use your voice to give
commands, make phone calls, send and
receive text messages hands-free, enter
navigation destinations, and control your
radio and media devices.
Included Trial Period For New Vehicles
Your new vehicle may come with an included
trial period for use of the Uconnect Access
Services starting at the date of vehicle pur-
chase (date based on vehicle sales notifica-
tion from your dealer). To activate the trial, you
must first register with Uconnect Access. After
MULTIMEDIA
292
Page 298 of 372
4. Select your preferred Navigation App toroute a path to your vehicle.
Send & Go
The Send & Go feature of the Uconnect
Access Mobile App allows you to search for a
destination on your mobile device and then
send the route to your vehicle’s native navi-
gation system.
To send a navigation route to your vehicle:
1. Press the “Location tab on the UconnectAccess Mobile App bottom bar. 2. Either type in the destination you would
like to navigate to, or search through one
of the categories provided.
3. Select the destination you want to route to from the list that appears.
4. Press the “Send To Vehicle” button, and then confirm the destination by pressing
“Yes,” to send the navigation route to the
Uconnect Navigation in your vehicle. 5. Finally, confirm the route inside your ve-
hicle by pressing the “Go Now” option on
the pop-up that appears on the touch-
screen, when the vehicle is started.Renewing Subscriptions And Purchasing
3G Wi-Fi Hotspot (Uconnect 8.4/8.4 NAV,
U.S. 48 Contiguous States, Alaska And
Hawaii)
Subscriptions, and 3G Wi-Fi Hotspot, can be
purchased from the Uconnect Store within
your vehicle, and online at Mopar Owner
MULTIMEDIA
296
Page 330 of 372
Play Video Games
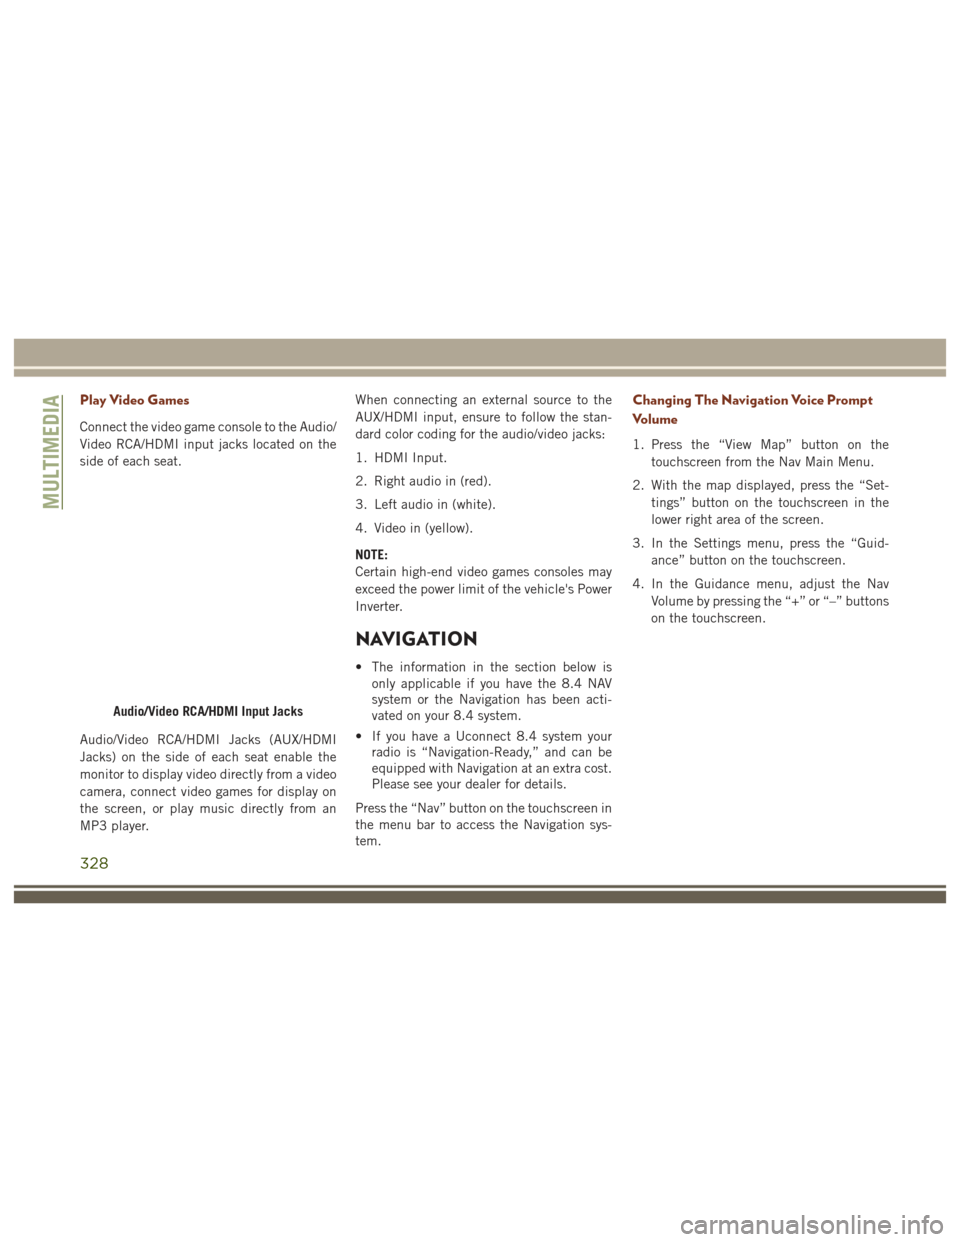
Connect the video game console to the Audio/
Video RCA/HDMI input jacks located on the
side of each seat.
Audio/Video RCA/HDMI Jacks (AUX/HDMI
Jacks) on the side of each seat enable the
monitor to display video directly from a video
camera, connect video games for display on
the screen, or play music directly from an
MP3 player.When connecting an external source to the
AUX/HDMI input, ensure to follow the stan-
dard color coding for the audio/video jacks:
1. HDMI Input.
2. Right audio in (red).
3. Left audio in (white).
4. Video in (yellow).
NOTE:
Certain high-end video games consoles may
exceed the power limit of the vehicle's Power
Inverter.
NAVIGATION
• The information in the section below is
only applicable if you have the 8.4 NAV
system or the Navigation has been acti-
vated on your 8.4 system.
• If you have a Uconnect 8.4 system your radio is “Navigation-Ready,” and can be
equipped with Navigation at an extra cost.
Please see your dealer for details.
Press the “Nav” button on the touchscreen in
the menu bar to access the Navigation sys-
tem.
Changing The Navigation Voice Prompt
Volume
1. Press the “View Map” button on the touchscreen from the Nav Main Menu.
2. With the map displayed, press the “Set- tings” button on the touchscreen in the
lower right area of the screen.
3. In the Settings menu, press the “Guid- ance” button on the touchscreen.
4. In the Guidance menu, adjust the Nav Volume by pressing the “+” or “–” buttons
on the touchscreen.
Audio/Video RCA/HDMI Input Jacks
MULTIMEDIA
328
Page 331 of 372
Finding Points Of Interest
• From the main Navigation menu, press the“Where To?” button on the touchscreen,
then press the “Points of Interest” button
on the touchscreen. • Select a Category and then a subcategory,
if necessary.
• Select your destination and press the “Yes” button on the touchscreen.
Finding A Place By Spelling The Name
• From the Main Navigation Menu press the“Where to?” button on the touchscreen,
press the “Points of Interest” button on
the touchscreen, then press the “Spell
Name” button on the touchscreen.
• Enter the name of your destination.
• Press the “List” button on the touch- screen.
• Select your destination and press the “Yes” button on the touchscreen.
One-Step Voice Destination Entry
• Enter a navigation destination without tak-ing your hands off the wheel.
• Just push the Uconnect Voice Command
button on the steering wheel, wait
for the beep and say something like, "Find
Address 800 Chrysler Drive Auburn Hills
MI." NOTE:
Destination entry is not available while your
vehicle is in motion. However, you can also
use Voice Commands to enter an address
while moving. Refer to “Uconnect Voice Rec-
ognition Quick Tips” within this chapter for
further information.
Setting Your Home Location
• Press the “Nav” button on the touch-
screen in the menu bar to access the
Navigation system and the Main Naviga-
tion menu.
• Press the “Where To?” button on the touchscreen, then press the “Go Home”
button on the touchscreen.
• You may enter your address directly, use your current location as your home ad-
dress, or choose from recently found loca-
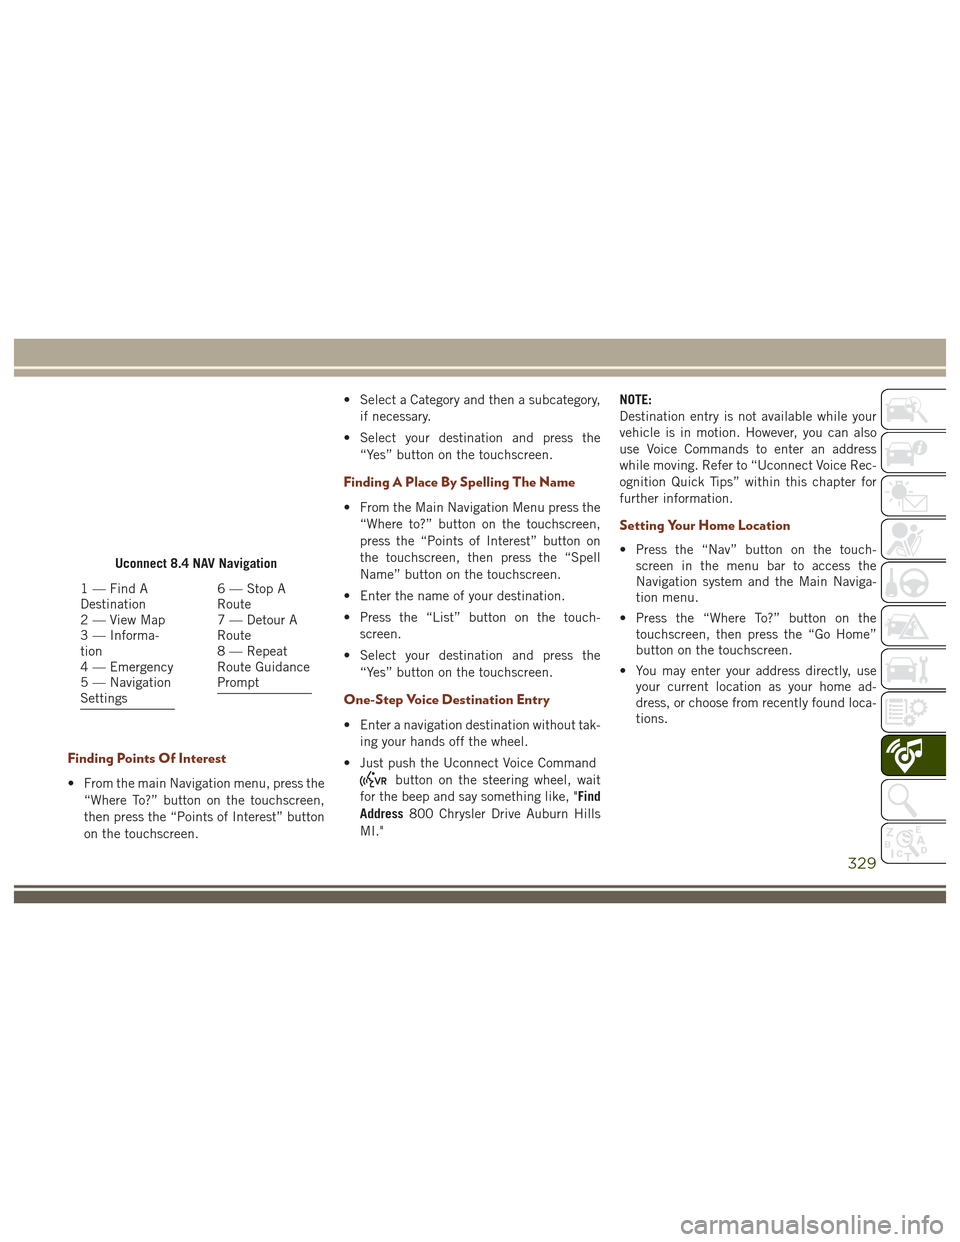
tions.Uconnect 8.4 NAV Navigation
1 — Find A
Destination
2 — View Map
3 — Informa-
tion
4 — Emergency
5 — Navigation
Settings6 — Stop A
Route
7 — Detour A
Route
8 — Repeat
Route Guidance
Prompt
329
Page 332 of 372
• To delete your Home location (or othersaved locations) so you can save a new
Home location, press the “Where To?”
button on the touchscreen from the Main
Navigation menu, then press the “Go
Home” button on the touchscreen, and in
the Yes screen press the “Options” button
on the touchscreen. In the Options menu
press the “Clear Home” button on the
touchscreen. Set a new Home location by
following the previous instructions.
Go Home
• A Home location must be saved in thesystem. From the Main Navigation menu,
press the “Where To?” button on the
touchscreen, then press the “Go Home”
button on the touchscreen.
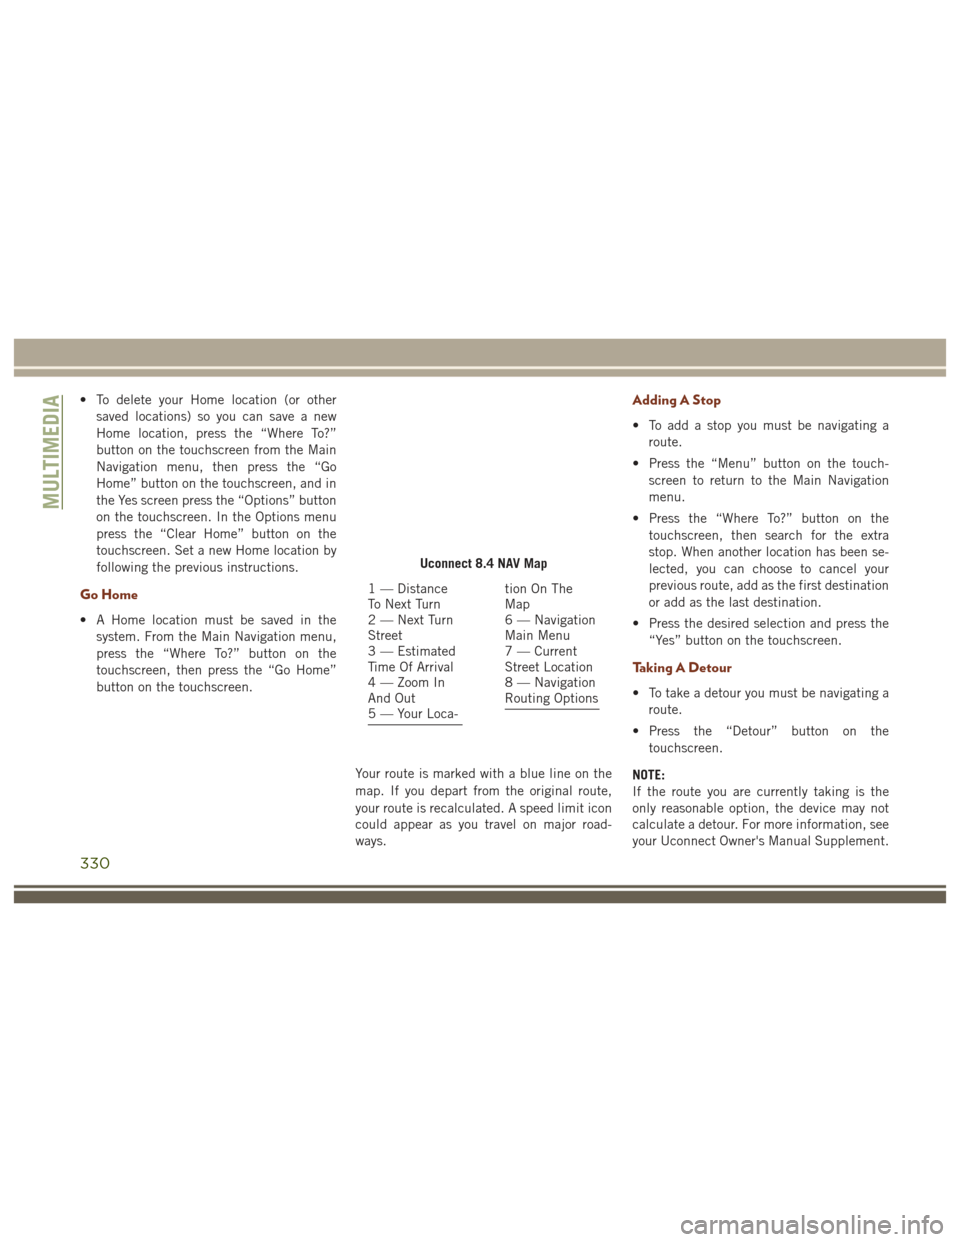
Your route is marked with a blue line on the
map. If you depart from the original route,
your route is recalculated. A speed limit icon
could appear as you travel on major road-
ways.
Adding A Stop
• To add a stop you must be navigating aroute.
• Press the “Menu” button on the touch- screen to return to the Main Navigation
menu.
• Press the “Where To?” button on the touchscreen, then search for the extra
stop. When another location has been se-
lected, you can choose to cancel your
previous route, add as the first destination
or add as the last destination.
• Press the desired selection and press the “Yes” button on the touchscreen.
Taking A Detour
• To take a detour you must be navigating aroute.
• Press the “Detour” button on the touchscreen.
NOTE:
If the route you are currently taking is the
only reasonable option, the device may not
calculate a detour. For more information, see
your Uconnect Owner's Manual Supplement.
Uconnect 8.4 NAV Map
1 — Distance
To Next Turn
2 — Next Turn
Street
3 — Estimated
Time Of Arrival
4 — Zoom In
And Out
5 — Your Loca-tion On The
Map
6 — Navigation
Main Menu
7 — Current
Street Location
8 — Navigation
Routing Options
MULTIMEDIA
330
Page 346 of 372
4. Turn on “Show Notifications.”
TIP:Voice Text Reply is not compatible with
iPhone, but if your vehicle is equipped with
Siri Eyes Free, you can use your voice to send
a text message.
Climate (8.4/8.4 NAV)
Too hot? Too cold? Adjust vehicle tempera-
tures hands-free and keep everyone comfort-
able while you keep moving ahead. (If vehicle
is equipped with climate control.)
Push the VR button
. After the beep, say
one of the following commands:
• Set driver temperature to 70degrees
• Set passenger temperature to 70degrees
TIP: Voice Command for Climate may only be
used to adjust the interior temperature of
your vehicle. Voice Command will not work to
adjust the heated seats or steering wheel (if
equipped).
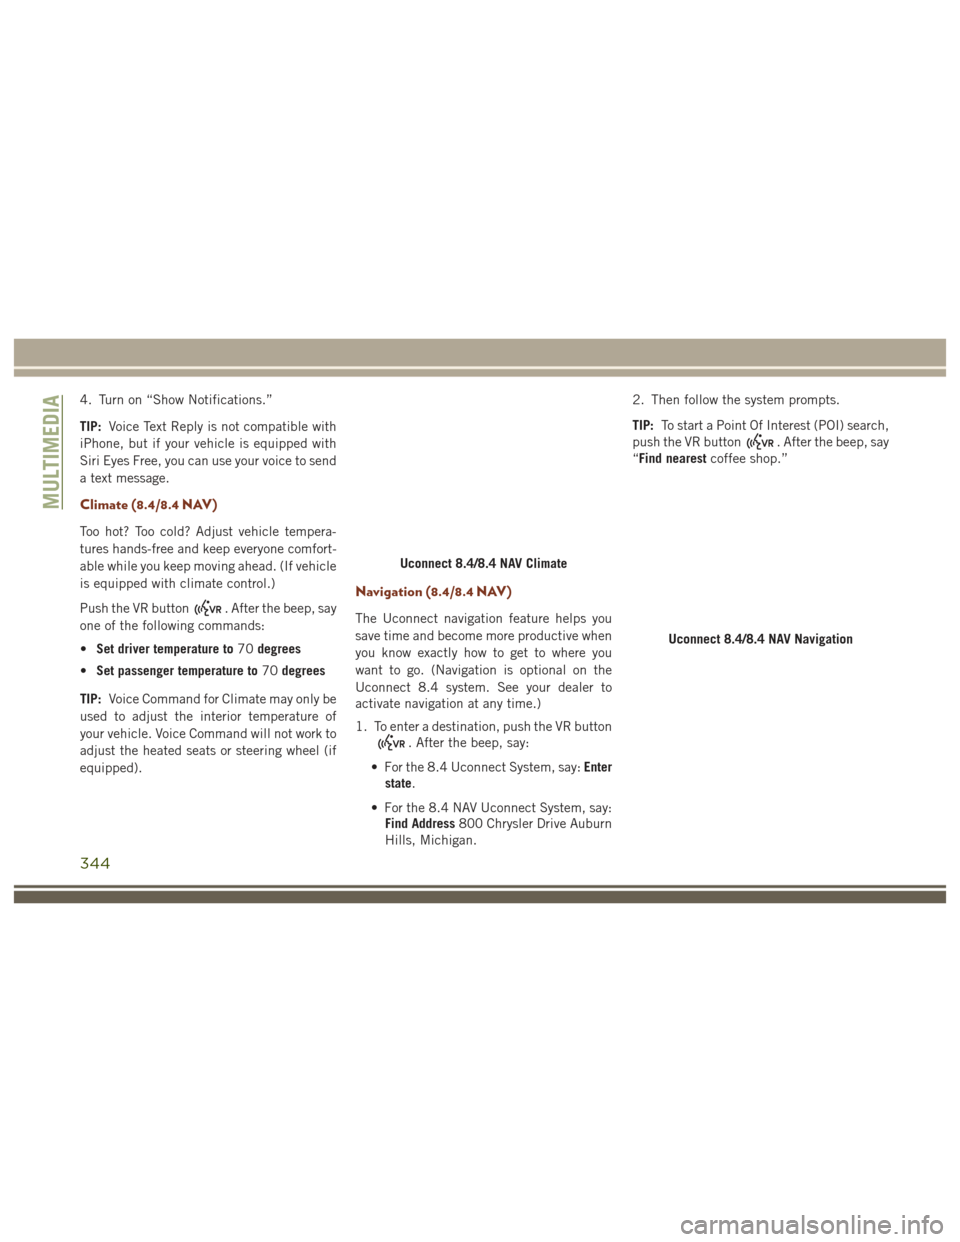
Navigation (8.4/8.4 NAV)
The Uconnect navigation feature helps you
save time and become more productive when
you know exactly how to get to where you
want to go. (Navigation is optional on the
Uconnect 8.4 system. See your dealer to
activate navigation at any time.)
1. To enter a destination, push the VR button
. After the beep, say:
• For the 8.4 Uconnect System, say: Enter
state.
• For the 8.4 NAV Uconnect System, say: Find Address 800 Chrysler Drive Auburn
Hills, Michigan. 2. Then follow the system prompts.
TIP:
To start a Point Of Interest (POI) search,
push the VR button
. After the beep, say
“Find nearest coffee shop.”
Uconnect 8.4/8.4 NAV Climate
Uconnect 8.4/8.4 NAV Navigation
MULTIMEDIA
344