2017 JEEP GRAND CHEROKEE rear view mirror
[x] Cancel search: rear view mirrorPage 13 of 372

GETTING TO KNOW YOUR VEHICLE
KEYS .....................13
KeyFob.....................13
IGNITIONSWITCH............14
Models With Keyless Enter-N-Go — Passive
Entry.......................14
Vehicle On Message.............15
REMOTE STARTING SYSTEM — IF
EQUIPPED .................16
General Information.............16
SENTRYKEY................17
Irregular Operation..............17
VEHICLE SECURITY ALARM — IF
EQUIPPED .................17
To Arm The System .............18
To Disarm The System ............18
DOORS....................19
Manual Door Locks ..............19
Power Door Locks ..............20
Keyless Enter-N-Go — Passive Entry . . .20
Locking The Doors With One Or More Door
Open ......................23 Auto Relocking
................23
Child-Protection Door Lock System — Rear
Doors ......................23
SEATS.....................24
Manual Seat Adjustment ..........24
Power Adjustment Front ...........25
Manual Adjustment Rear ..........25
Memory Seat ..................27
Heated/Ventilated Seats ...........27
HEADRESTRAINTS...........29
Front Adjustment...............30
Front Removal .................31
Rear Adjustment ...............32
STEERING WHEEL ............32
Adjustment...................32
Heated Steering Wheel ............33
MIRRORS..................34
Interior Mirror .................34
Exterior Mirrors ................35
EXTERIORLIGHTS............37
Headlight Switch ...............37 Headlights
...................37
Daytime Running Lights ...........38
High Beams ..................38
Flash-To-Pass .................38
Automatic Lighting ..............38
Parking Lights And Panel Lights .....39
Headlight Delay ................39
Fog Lights ...................39
Turn Signals ..................39
Lane Change Assist .............40
INTERIORLIGHTS............40
Courtesy Interior Lights ...........40
WIPER/WASHER............40
Front Wipers..................40
Rain Sensor ..................41
Rear Wiper ...................42
HEADLIGHT WASHERS — IF
EQUIPPED .................42
CLIMATECONTROLS..........43
Overview....................43
GETTING TO KNOW YOUR VEHICLE
11
Page 36 of 372

based on environmental temperatures. The
heated steering wheel can shut off early or
may not turn on when the steering wheel is
already warm.
The heated steering wheel control button is
located within the Uconnect system. You can
gain access to the control button through the
climate screen or the controls screen.
• Press the heated steering wheel button
once to turn the heating element ON.
• Press the heated steering wheel button
a second time to turn the heating
element OFF.
NOTE:
The engine must be running for the heated
steering wheel to operate.
Vehicles Equipped With Remote Start
On models that are equipped with remote
start, the heated steering wheel can be pro-
grammed to come on during a remote start
through the Uconnect system. Refer to
“Uconnect Settings” in “Multimedia” in the
Owner’s Manualat
www.jeep.com/en/owners/manuals/ for fur-
ther information.
WARNING!
• Persons who are unable to feel pain to the skin because of advanced age,
chronic illness, diabetes, spinal cord in-
jury, medication, alcohol use, exhaus-
tion, or other physical conditions must
exercise care when using the steering
wheel heater. It may cause burns even at
low temperatures, especially if used for
long periods.
• Do not place anything on the steering
wheel that insulates against heat, such
as a blanket or steering wheel covers of
any type and material. This may cause
the steering wheel heater to overheat.
MIRRORS
Interior Mirror
Manual Mirror
The mirror head can be adjusted up, down,
left, and right for various drivers. The mirror
should be adjusted to center on the view
through the rear window. Headlight glare from vehicles behind you can
be reduced by moving the small control under
the mirror to the night position (toward the
rear of the vehicle). The mirror should be
adjusted while set in the day position (toward
the windshield).
Electrochromatic Mirror
The mirror head can be adjusted up, down,
left, and right for various drivers. The mirror
should be adjusted to center on the view
through the rear window.
This mirror automatically adjusts for head-
light glare from vehicles behind you.
Adjusting Rearview Mirror
GETTING TO KNOW YOUR VEHICLE
34
Page 37 of 372

NOTE:
The Electrochromatic Mirror feature is dis-
abled when the vehicle is in reverse gear to
improve rear view viewing.
You can turn the feature on or off by pushing
the button at the base of the mirror. A light in
the button will illuminate to indicate when
the dimming feature is activated.CAUTION!
To avoid damage to the mirror during
cleaning, never spray any cleaning solu-
tion directly onto the mirror. Apply the
solution onto a clean cloth and wipe the
mirror clean.
Exterior Mirrors
Power Mirrors
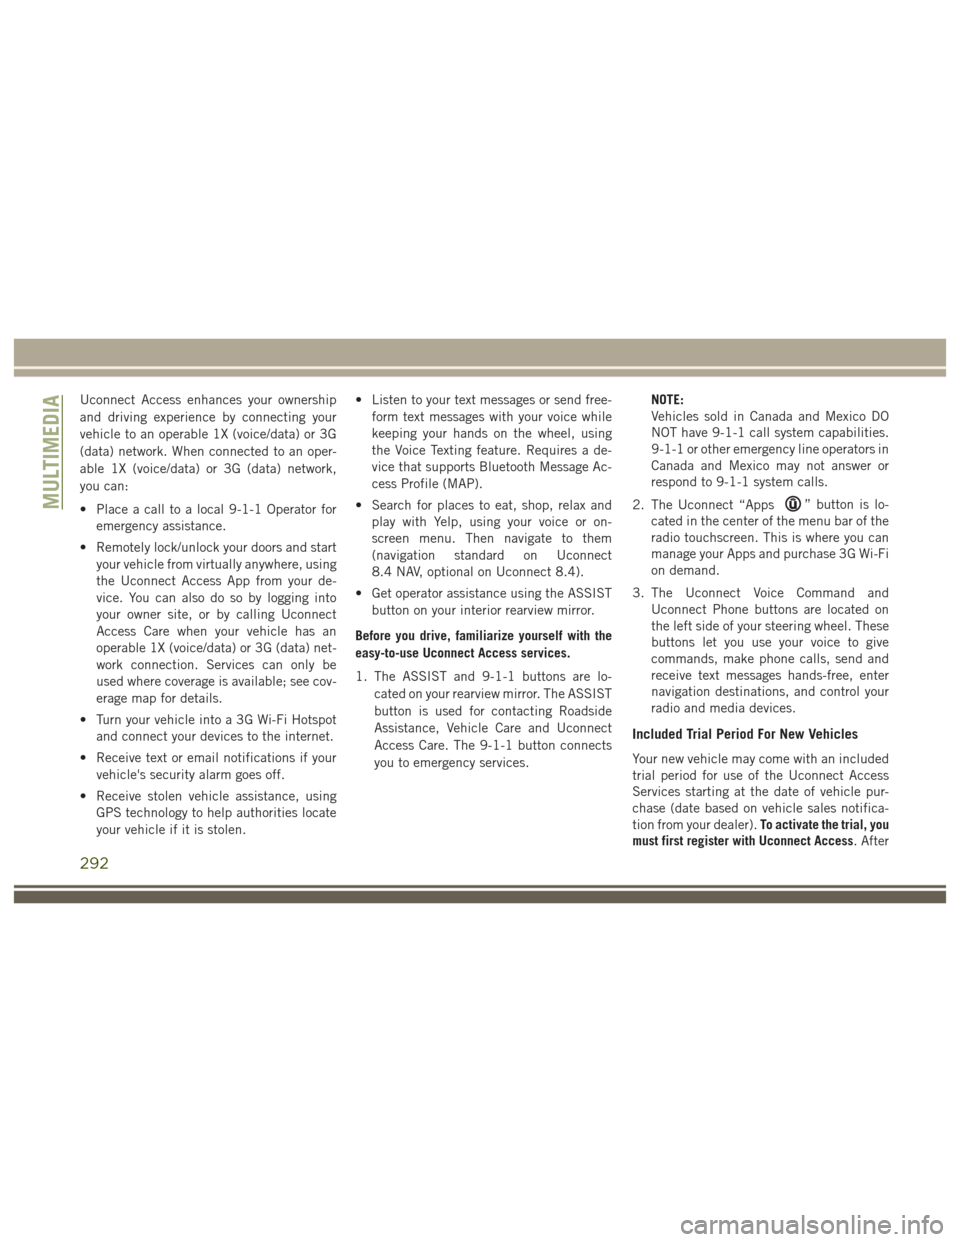
The power mirror switch is located on the
driver's side door trim panel.
The power mirror controls consist of mirror
select buttons and a four-way mirror control
switch. To adjust a mirror, push the mirror
select button for the mirror that you want to
adjust. Using the mirror control switch, push
on any of the four arrows for the direction that
you want the mirror to move.Power mirror preselected positions can be
controlled by the optional Memory Seat Fea-
ture. Refer to “Memory Seats” in this chapter
for further information.
Automatic Dimming Mirror Button
Power Mirror Controls
1 — Mirror Direction Control
2 — Mirror Selection
35
Page 40 of 372

Daytime Running Lights
The Daytime Running Lights (low intensity)
come on whenever the engine is running, and
the transmission is not in the PARK position.
The lights will remain on until the ignition is
switched to the OFF or ACC position or the
parking brake is engaged.
The Daytime Running Lights (bright inten-
sity) come on whenever the engine is run-
ning, and the transmission is not in the PARK
position. The lights will remain on until the
ignition is switched to the OFF or ACC posi-
tion or the parking brake is engaged.
NOTE:
• If a turn signal is activated, the DRL lampon the same side of the vehicle will turn off
for the duration of the turn signal activa-
tion. Once the turn signal is no longer
active, the DRL lamp will illuminate.
• The DRL function may be disabled through the Uconnect system. Refer to
“Uconnect Settings” in “Multimedia” for
further information.
The headlight switch must be used for normal
nighttime driving.
High Beams
Push the multifunction lever toward the in-
strument panel to switch the headlights to
high beams. Pulling the multifunction back
toward the steering wheel will turn the low
beams back on, or shut the high beams off.
Flash-To-Pass
You can signal another vehicle with your
headlights by partially pulling the multifunc-
tion lever toward the steering wheel. This will
cause the high beam headlights to turn on
until the lever is released.
Automatic Lighting
The Automatic High Beam Headlamp Control
system provides increased forward lighting at
night by automating high beam control
through the use of a digital camera mounted
on the inside rearview mirror. This camera
detects vehicle specific light and automati-
cally switches from high beams to low beams
until the approaching vehicle is out of view. NOTE:
• The Automatic High Beam Headlamp Con-
trol can be turned on or off using the
Uconnect System. Refer to “Uconnect
Settings” in “Multimedia” in the Owner’s
Manual at
www.jeep.com/en/owners/manuals/ for
further information.
• Broken, muddy, or obstructed headlights and taillights of vehicles in the field of
view will cause headlights to remain on
longer (closer to the vehicle). Also, dirt,
film, and other obstructions on the wind-
shield or camera lens will cause the sys-
tem to function improperly.
• To opt out of the Advanced Auto High- Beam Sensitivity Control (default) and en-
ter Reduced High-Beam Sensitivity Con-
trol (not recommended), toggle highbeam
lever 6 full on/off cycles within 10 sec-
onds of ignition ON. System will return to
default setting upon ignition off.GETTING TO KNOW YOUR VEHICLE
38
Page 105 of 372

• Vehicle is shifted to PARK.
Disabling SSC
SSC will deactivate and be disabled if any of
the following conditions occur:
• The driver pushes the SSC switch.
• The driveline is shifted out of 4WD LowRange.
• The parking brake is applied.
• Driver door opens.
• The vehicle is driven greater than 20 mph (32 km/h) for greater than 70 seconds.
• The vehicle is driven greater than 40 mph (64 km/h) (SSC exits immediately).
Feedback To The Driver:
The instrument cluster has an SSC icon and
the SSC switch has an LED which offer feed-
back to the driver about the state SSC is in.
• The cluster icon and switch lamp will illuminate and remain on solid when SSC
is enabled or activated. This is the normal
operating condition for SSC. • The cluster icon and switch lamp will flash
for several seconds then extinguish when
the driver pushes the SSC switch but en-
able conditions are not met.
• The cluster icon and switch lamp will flash for several seconds then extinguish when
SSC disables due to excess speed.
• The cluster icon and switch lamp will flash then extinguish when SSC deactivates due
to overheated brakes.
WARNING!
SSC is only intended to assist the driver in
controlling vehicle speed when driving in
off road conditions. The driver must re-
main attentive to the driving conditions
and is responsible for maintaining a safe
vehicle speed.
AUXILIARY DRIVING
SYSTEMS
Blind Spot Monitoring
The Blind Spot Monitoring (BSM) system
uses two radar-based sensors, located inside
the rear bumper fascia, to detect Highway
licensable vehicles (automobiles, trucks, mo-
torcycles etc.) that enter the blind spot zones
from the rear/front/side of the vehicle.
The BSM detection zone covers approxi-
mately one lane width on both sides of the
vehicle 12 ft (3.8 m). The zone length starts
at the outside rear view mirror and extends
approximately 10 ft (3 m) beyond the rear
bumper of the vehicle. The BSM system
monitors the detection zones on both sides of
the vehicle when the vehicle speed reaches
approximately 6 mph (10 km/h) or higher and
will alert the driver of vehicles in these areas.
103
Page 106 of 372

When the vehicle is started, the BSM warning
light will momentarily illuminate in both out-
side rear view mirrors to let the driver know
that the system is operational. The BSM
system sensors operate when the vehicle is in
any forward gear or REVERSE and enters
stand by mode when the vehicle is in PARK.
The BSM warning light, located in the out-
side mirrors, will illuminate if a vehicle
moves into a blind spot zone.The BSM system can also be configured to
sound an audible (chime) alert and mute the
radio to notify you of objects that have en-
tered the detection zones.
Rear Cross Path (RCP)
The Rear Cross Path (RCP) feature is in-
tended to aid the driver when backing out of
parking spaces where the vision of oncoming
vehicles may be blocked. Proceed slowly and
cautiously out of the parking space until the rear end of the vehicle is exposed. The RCP
system will then have a clear view of the cross
traffic and if an oncoming vehicle is de-
tected, will alert the driver. When RCP is on
and the vehicle is in REVERSE, the driver is
alerted using both the visual and audible
alarms, including reducing the radio volume.
Refer to “Blind Spot Monitoring” in “Safety”
in the Owner's Manual at
www.jeep.com/en/owners/manuals/ for more
information.
Modes Of Operation
Three selectable modes of operation are
available in the Uconnect System. Refer to
“Uconnect Settings/Customer Programmable
Features” in “Multimedia” for further infor-
mation.
Blind Spot Alert Lights Only
When operating in Blind Spot Alert mode, the
BSM system will provide a visual alert in the
appropriate side view mirror based on a de-
tected object. However, when the system is
operating in Rear Cross Path (RCP) mode, the
Rear Detection Zones
Blind Spot Warning Light
SAFETY
104
Page 294 of 372

Uconnect Access enhances your ownership
and driving experience by connecting your
vehicle to an operable 1X (voice/data) or 3G
(data) network. When connected to an oper-
able 1X (voice/data) or 3G (data) network,
you can:
• Place a call to a local 9-1-1 Operator foremergency assistance.
• Remotely lock/unlock your doors and start your vehicle from virtually anywhere, using
the Uconnect Access App from your de-
vice. You can also do so by logging into
your owner site, or by calling Uconnect
Access Care when your vehicle has an
operable 1X (voice/data) or 3G (data) net-
work connection. Services can only be
used where coverage is available; see cov-
erage map for details.
• Turn your vehicle into a 3G Wi-Fi Hotspot and connect your devices to the internet.
• Receive text or email notifications if your vehicle's security alarm goes off.
• Receive stolen vehicle assistance, using GPS technology to help authorities locate
your vehicle if it is stolen. • Listen to your text messages or send free-
form text messages with your voice while
keeping your hands on the wheel, using
the Voice Texting feature. Requires a de-
vice that supports Bluetooth Message Ac-
cess Profile (MAP).
• Search for places to eat, shop, relax and play with Yelp, using your voice or on-
screen menu. Then navigate to them
(navigation standard on Uconnect
8.4 NAV, optional on Uconnect 8.4).
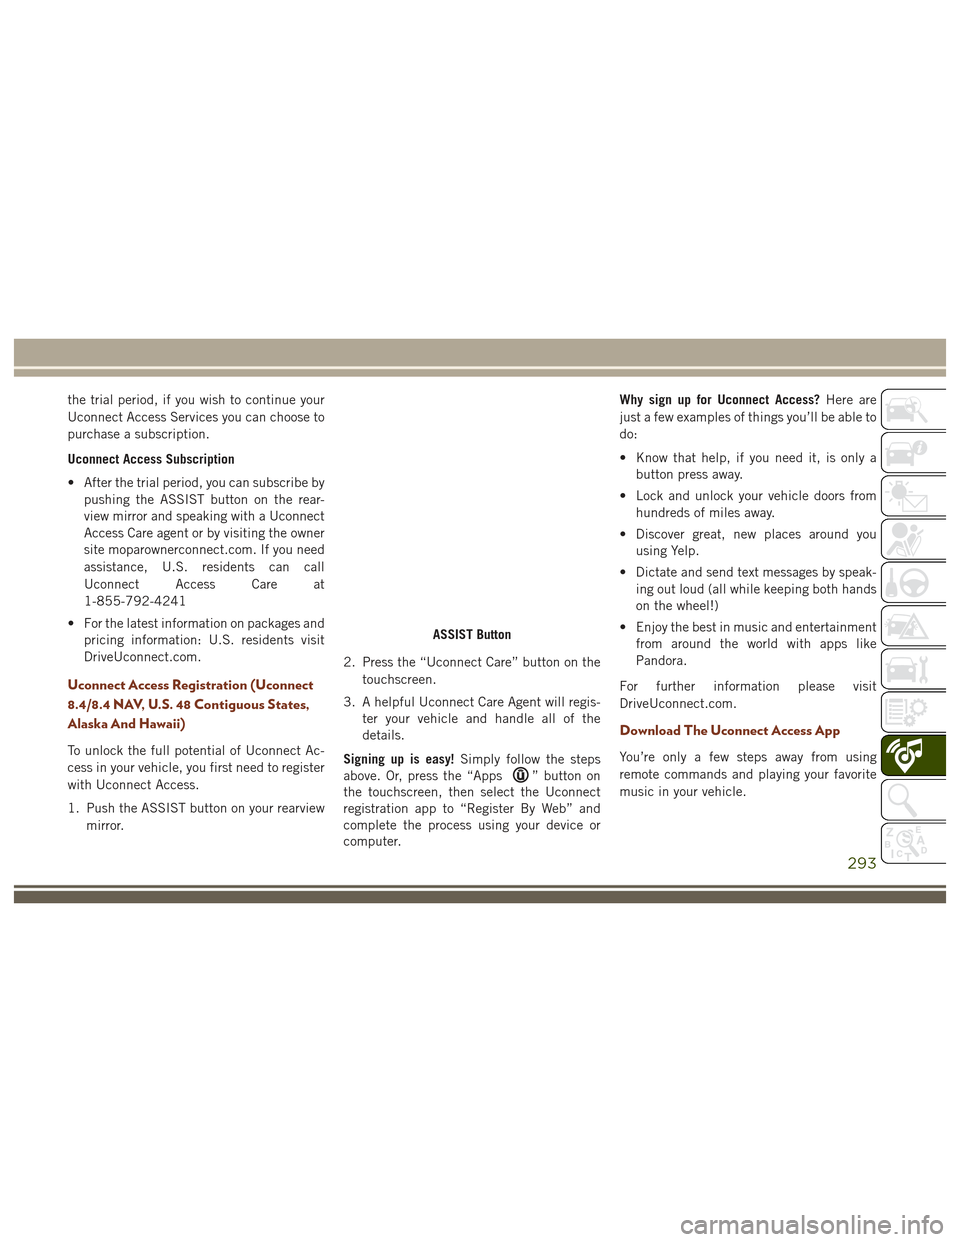
• Get operator assistance using the ASSIST button on your interior rearview mirror.
Before you drive, familiarize yourself with the
easy-to-use Uconnect Access services.
1. The ASSIST and 9-1-1 buttons are lo- cated on your rearview mirror. The ASSIST
button is used for contacting Roadside
Assistance, Vehicle Care and Uconnect
Access Care. The 9-1-1 button connects
you to emergency services. NOTE:
Vehicles sold in Canada and Mexico DO
NOT have 9-1-1 call system capabilities.
9-1-1 or other emergency line operators in
Canada and Mexico may not answer or
respond to 9-1-1 system calls.
2. The Uconnect “Apps
” button is lo-
cated in the center of the menu bar of the
radio touchscreen. This is where you can
manage your Apps and purchase 3G Wi-Fi
on demand.
3. The Uconnect Voice Command and Uconnect Phone buttons are located on
the left side of your steering wheel. These
buttons let you use your voice to give
commands, make phone calls, send and
receive text messages hands-free, enter
navigation destinations, and control your
radio and media devices.
Included Trial Period For New Vehicles
Your new vehicle may come with an included
trial period for use of the Uconnect Access
Services starting at the date of vehicle pur-
chase (date based on vehicle sales notifica-
tion from your dealer). To activate the trial, you
must first register with Uconnect Access. After
MULTIMEDIA
292
Page 295 of 372

the trial period, if you wish to continue your
Uconnect Access Services you can choose to
purchase a subscription.
Uconnect Access Subscription
• After the trial period, you can subscribe bypushing the ASSIST button on the rear-
view mirror and speaking with a Uconnect
Access Care agent or by visiting the owner
site moparownerconnect.com. If you need
assistance, U.S. residents can call
Uconnect Access Care at
1-855-792-4241
• For the latest information on packages and pricing information: U.S. residents visit
DriveUconnect.com.
Uconnect Access Registration (Uconnect
8.4/8.4 NAV, U.S. 48 Contiguous States,
Alaska And Hawaii)
To unlock the full potential of Uconnect Ac-
cess in your vehicle, you first need to register
with Uconnect Access.
1. Push the ASSIST button on your rearview
mirror. 2. Press the “Uconnect Care” button on the
touchscreen.
3. A helpful Uconnect Care Agent will regis- ter your vehicle and handle all of the
details.
Signing up is easy! Simply follow the steps
above. Or, press the “Apps
” button on
the touchscreen, then select the Uconnect
registration app to “Register By Web” and
complete the process using your device or
computer. Why sign up for Uconnect Access?
Here are
just a few examples of things you’ll be able to
do:
• Know that help, if you need it, is only a button press away.
• Lock and unlock your vehicle doors from hundreds of miles away.
• Discover great, new places around you using Yelp.
• Dictate and send text messages by speak- ing out loud (all while keeping both hands
on the wheel!)
• Enjoy the best in music and entertainment from around the world with apps like
Pandora.
For further information please visit
DriveUconnect.com.
Download The Uconnect Access App
You’re only a few steps away from using
remote commands and playing your favorite
music in your vehicle.
ASSIST Button
293