Page 182 of 744

3-95
Convenient features of your vehicle
3
LCD Display
LCD display control
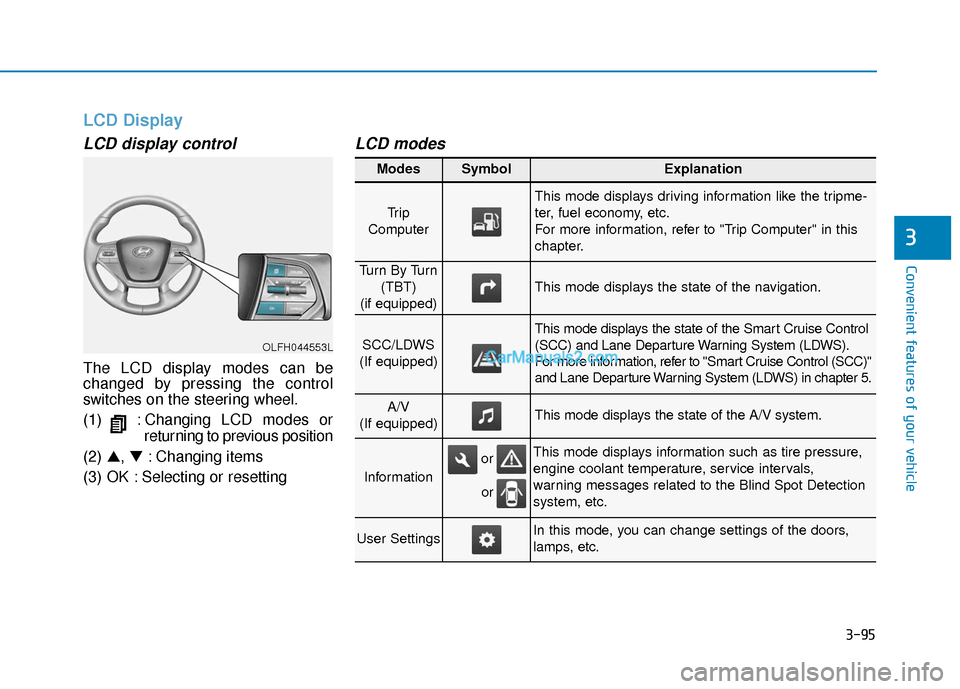
The LCD display modes can be
changed by pressing the control
switches on the steering wheel.
(1) : Changing LCD modes orreturning to previous position
(2) ▲, ▼: Changing items
(3) OK : Selecting or resetting
LCD modes
OLFH044553L
Modes SymbolExplanation
Tr i p
Computer
This mode displays driving information like the tripme-
ter, fuel economy, etc.
For more information, refer to "Trip Computer" in this
chapter.
Tu r n B y Tu r n (TBT)
(if equipped)
This mode displays the state of the navigation.
SCC/LDWS
(If equipped)
This mode displays the state of the Smart Cruise Control
(SCC) and Lane Departure Warning System (LDWS).
For more information, refer to "Smart Cruise Control (SCC)"
and Lane Departure Warning System (LDWS) in chapter 5.
A/V
(If equipped)This mode displays the state of the A/V system.
Information
This mode displays information such as tire pressure,
engine coolant temperature, service intervals,
warning messages related to the Blind Spot Detection
system, etc.
User SettingsIn this mode, you can change settings of the doors,
lamps, etc.
or
or
Page 190 of 744
3-103
Convenient features of your vehicle
3
ItemsExplanation
Seat Easy Access
The seat easy access function is deactivated.
- When you turn off the engine, the driver’s seat will automatically move rearward short (Normal)or long (Extended) for you to enter or exit the vehicle more comfortably.
- If you change the Engine Start/Stop button from OFF position to the ACC, ON, or START posi- tion, the driver’s seat will return to the original position.
For more information, refer to “Driver Position Memory System” in this chapter.
ItemsExplanation
Service Interval The service interval function is deactivated.
Service interval Seat / Steering
Page 193 of 744
3-106
Convenient features of your vehicle
Information
If “Sunroof Open” warning message is
displayed in the cluster, the Driving
Information message may not be dis-
played.
Trip modes
To change the trip mode, toggle
"▲, ▼" switch on the steering wheel.
Trip A/B
Tripmeter (1)
The tripmeter is the total driving
distance since the last tripmeter
reset.
To reset the tripmeter, press the [OK] button on the steering wheel
for more than 1 second when the
tripmeter is displayed.
i
[A/B]
TRIP A/B
Total Range (plug-in hybrid)
FUEL ECONOMY
Digital Speedometer
Driving style
Energy flow
OLFH045558N
Page 194 of 744

3-107
Convenient features of your vehicle
3
Average Vehicle Speed (2)
The average vehicle speed is cal-culated by the total driving dis-
tance and driving time since the
last average vehicle speed reset.
To reset the average vehicle speed, press the [OK] button on the steer-
ing wheel for more than 1 second
when the average vehicle speed is
displayed.
Information
• The average vehicle speed is not dis- played, when the vehicle drives
shorter than 0.19 miles (300 meters)
or less than 10 seconds after turning
ON the Engine Start/Stop button.
• The average vehicle speed will con- tinue to be calculated and will start
to decrease if the vehicle is stopped
while the engine is still running (for
example, when the vehicle is in traf-
fic or stopped at a stop light.)
Timer (3)
The timer is the total driving timesince the last timer reset.
To reset the timer , press the [OK]
button on the steering wheel for
more than 1 second when the timer
is displayed.
Information
The timer will continue to be counted
while the engine is still running (for
example, when the vehicle is in traffic
or stopped at a stop light.)
Fuel economy
Range/Total Range (1)
The range is the estimated distance
the vehicle can be driven with the
remaining fuel in the fuel tank.
If the estimated distance is below
1 mi. (1 km), the trip computer will
display “---” as the range.
i
i
OLFH045437N
■ Hybrid
Page 195 of 744

3-108
Convenient features of your vehicle
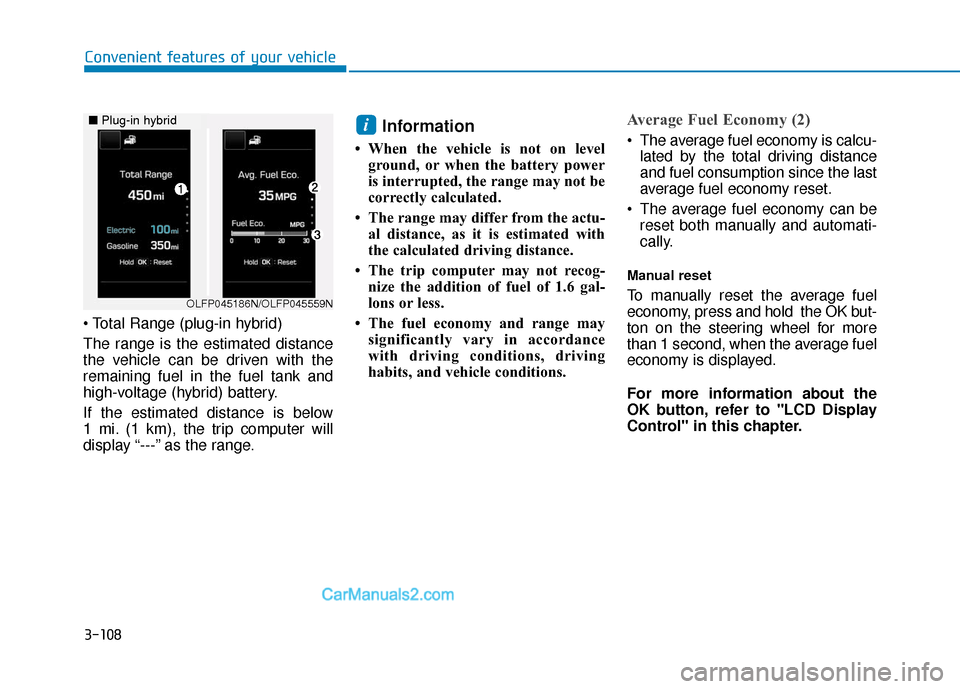
The range is the estimated distance
the vehicle can be driven with the
remaining fuel in the fuel tank and
high-voltage (hybrid) battery.
If the estimated distance is below
1 mi. (1 km), the trip computer will
display “---” as the range.
Information
• When the vehicle is not on level ground, or when the battery power
is interrupted, the range may not be
correctly calculated.
• The range may differ from the actu- al distance, as it is estimated with
the calculated driving distance.
• The trip computer may not recog- nize the addition of fuel of 1.6 gal-
lons or less.
• The fuel economy and range may significantly vary in accordance
with driving conditions, driving
habits, and vehicle conditions.
Average Fuel Economy (2)
The average fuel economy is calcu-lated by the total driving distance
and fuel consumption since the last
average fuel economy reset.
The average fuel economy can be reset both manually and automati-
cally.
Manual reset
To manually reset the average fuel
economy, press and hold the OK but-
ton on the steering wheel for more
than 1 second, when the average fuel
economy is displayed.
For more information about the
OK button, refer to "LCD Display
Control" in this chapter.
i
OLFP045186N/OLFP045559N
■ Plug-in hybrid
Page 197 of 744
3-110
Convenient features of your vehicle
Driving style
The Driving Style will display whenyou are in ECO mode as selected
by the DRIVE MODE button.
When the SPORT or NORMAL
mode is selected for your driving,
each driving category will be dis-
played with “--”.
To reset the driving style, press the [OK] button on the steering wheel
for more than 1 second when the
driving style is displayed.
Hybrid system energy flow
The hybrid system informs the drivers
its energy flow in various operating
modes. The energy flow can have up
to 11 different modes during driving.
Vehicle Stop
The vehicle is stopped.
(No energy flow)
OLFH044212N
OLFH044214N
Page 208 of 744

3-121
Convenient features of your vehicle
3
Battery saver function
The purpose of this feature is to pre-
vent the battery from being dis-
charged. The system automatically
turns off the parking lamp when the
driver turns the engine off and opens
the driver-side door.
With this feature, the parking lamps
will turn off automatically if the driver
parks on the side of road at night.
If necessary, to keep the lamps on
when the engine is turned off, perform
the following:
1) Open the driver-side door.
2) Turn the parking lamps OFF andON again using the light switch on
the steering column.
Headlamp delay function (if equipped)
If engine Start/Stop button is in the
ACC or OFF position with the head-
lamps ON, the headlamps (and/or
parking lamps) remain on for about 5
minutes. However, if the driver’s door
is opened and closed, the headlamps
are turned off after 15 seconds.
However, with the engine off if the dri-
ver’s door is opened and closed, the
headlamps (and/or parking lamps)
are turned off after 15 seconds.
The headlamps (and/or parking
lamps) can be turned off by pressing
the lock button on the smart key
twice or turning the light switch to the
OFF or AUTO position. However, if
you turn the light switch to the AUTO
position when it is dark outside, the
headlamps will not be turned off.
You can activate or deactivate the
Headlamp Delay function from the
User Settings Mode (Light) on the
LCD display.
For more information, refer to the
"LCD Display" section in this
chapter. If the driver gets out of the vehicle
through other doors (except dri-
ver’s door), the battery saver func-
tion does not operate and the
headlamp delay function does not
turn off automatically. Therefore, It
causes the battery to be dis-
charged. In this case, make sure
to turn off the lamp before getting
out of the vehicle.
NOTICE
Page 246 of 744

3-159
Convenient features of your vehicle
3
Clock
With Audio system
Whenever the battery terminals or
related fuses are disconnected, you
must reset the time.
To set the time:Engine Start/Stop button must be in
the ACC or ON position.
• H (Hour, 1)
Each time you press the "H" button,
the clock will change backward by
one hour. Pressing and holding the
"H" button will change the clock
backward continuously.
Release the button at the desired time.
• M (Minute, 2)
Each time you press the "M" button ,
the clock will change backward by
one minute. Pressing and holding the
"M" button will change the clock
backward continuously.
Release the button at the desired time.
• Display conversion
To change the 12 hour format to the
24 hour format, press the "H" and
"M" button simultaneously for more
than 4 seconds.
For example, if the "H" and "M" but-
ton is pressed when the time is 10:15
p.m., the display will change to 22:15
With Navigation system
You can set the clock by using the
Navigation system.
Do not adjust the clock while
driving, you may lose your
steering control and cause an
accident that results in severe
personal injury or death.
WARNING
OLF044237
OLF044238