2017 Hyundai Sonata turn signal bulb
[x] Cancel search: turn signal bulbPage 199 of 563
3-114
Convenient features of your vehicle
Turn signals and lane changesignals
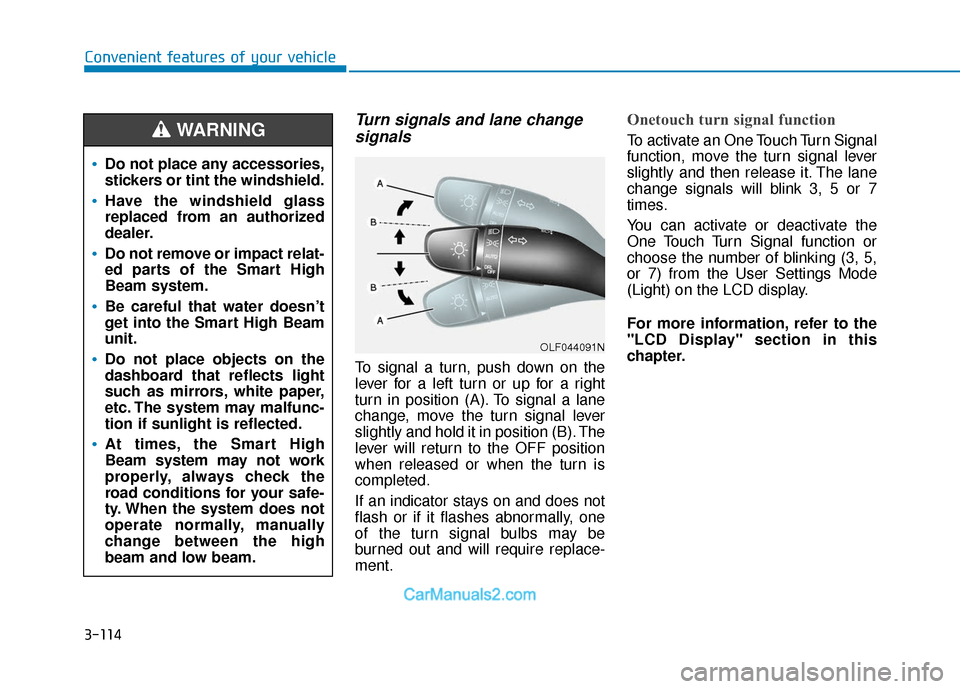
To signal a turn, push down on the
lever for a left turn or up for a right
turn in position (A). To signal a lane
change, move the turn signal lever
slightly and hold it in position (B). The
lever will return to the OFF position
when released or when the turn is
completed.
If an indicator stays on and does not
flash or if it flashes abnormally, one
of the turn signal bulbs may be
burned out and will require replace-
ment.
Onetouch turn signal function
To activate an One Touch Turn Signal
function, move the turn signal lever
slightly and then release it. The lane
change signals will blink 3, 5 or 7
times.
You can activate or deactivate the
One Touch Turn Signal function or
choose the number of blinking (3, 5,
or 7) from the User Settings Mode
(Light) on the LCD display.
For more information, refer to the
"LCD Display" section in this
chapter.
OLF044091N
Do not place any accessories,
stickers or tint the windshield.
Have the windshield glass
replaced from an authorized
dealer.
Do not remove or impact relat-
ed parts of the Smart High
Beam system.
Be careful that water doesn’t
get into the Smart High Beam
unit.
Do not place objects on the
dashboard that reflects light
such as mirrors, white paper,
etc. The system may malfunc-
tion if sunlight is reflected.
At times, the Smart High
Beam system may not work
properly, always check the
road conditions for your safe-
ty. When the system does not
operate normally, manually
change between the high
beam and low beam.
WARNING
Page 447 of 563

7
Wiper Blades.........................................................7-36
Blade Inspection ..............................................................7-36
Blade Replacement .........................................................7-36
Battery...................................................................7-38
For Best Battery Service ..............................................7-39
Battery Recharging ........................................................7-39
Reset features .................................................................7-40
Tires and Wheels .................................................7-41
Tire Care ........................................................................\
....7-41
Recommended Cold Tire Inflation Pressures ...........7-42
Check Tire Inflation Pressure ......................................7-43
Tire Rotation...................................................................\
..7-44
Wheel Alignment and Tire Balance ............................7-45
Tire Replacement ............................................................7-45
Wheel Replacement ........................................................7-46
Tire Traction .....................................................................7-4\
6
Tire Maintenance ............................................................7-47
Tire Sidewall Labeling ....................................................7-47
Tire Terminology and Definitions................................7-51
All Season Tires ...............................................................7-54
Summer Tires ...................................................................7-54
Snow Tires ........................................................................\
7-54
Radial-Ply Tires ...............................................................7-55
Low Aspect Ratio Tires..................................................7-55
Fuses ......................................................................7-\
57
Instrument Panel Fuse Replacement..........................7-58
Engine Compartment Panel Fuse Replacement.......7-59
Fuse/Relay Panel Description ......................................7-61
Light Bulbs ............................................................7-69
Headlamp, Position Lamp, Turn Signal Lamp and
Side Marker Light Bulb Replacement ........................7-70
Side Repeater Lamp Replacement ..............................7-75
Rear Combination Light Bulb Replacement ..............7-76
High Mounted Stop Lamp .............................................7-79
License Plate Light Bulb Replacement ......................7-80
Interior Light Bulb Replacement .................................7-80
Appearance Care..................................................7-82
Exterior Care ....................................................................7-82\
Interior Care .....................................................................7-8\
7
Emission Control System ....................................7-90
Crankcase Emission Control System ..........................7-90
Evaporative Emission Control System Including
Onboard Refueling Vapor Recovery (ORVR)............7-90
Exhaust Emission Control System ..............................7-91
California Perchlorate Notice.............................7-94
Page 515 of 563
7-70
Maintenance
Headlamp, Position Lamp,
Turn Signal Lamp and
Side Marker Light Bulb
Replacement
Type A
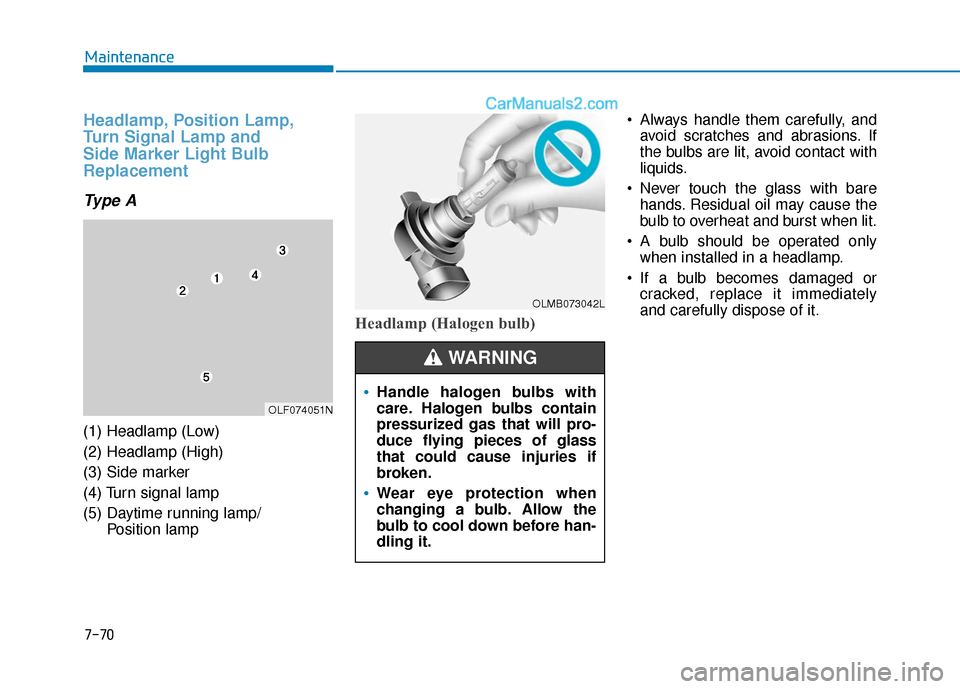
(1) Headlamp (Low)
(2) Headlamp (High)
(3) Side marker
(4) Turn signal lamp
(5) Daytime running lamp/ Position lamp
Headlamp (Halogen bulb)
Always handle them carefully, andavoid scratches and abrasions. If
the bulbs are lit, avoid contact with
liquids.
Never touch the glass with bare hands. Residual oil may cause the
bulb to overheat and burst when lit.
A bulb should be operated only when installed in a headlamp.
If a bulb becomes damaged or cracked, replace it immediately
and carefully dispose of it.
OLF074051N
OLMB073042L
Handle halogen bulbs with
care. Halogen bulbs contain
pressurized gas that will pro-
duce flying pieces of glass
that could cause injuries if
broken.
Wear eye protection when
changing a bulb. Allow the
bulb to cool down before han-
dling it.
WARNING
Page 516 of 563
7-71
7
Maintenance
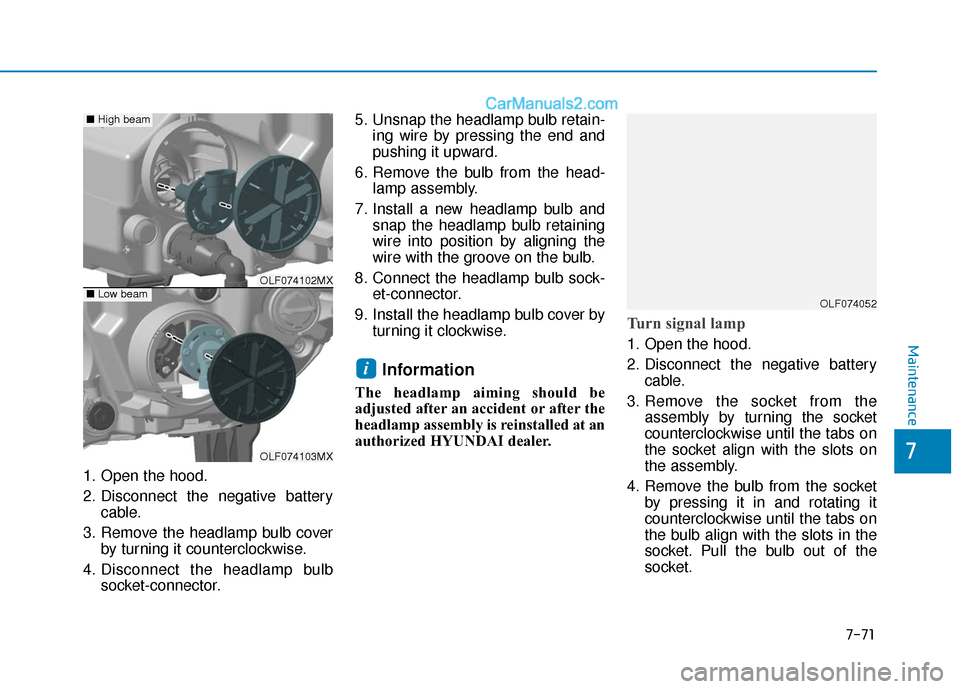
1. Open the hood.
2. Disconnect the negative batterycable.
3. Remove the headlamp bulb cover by turning it counterclockwise.
4. Disconnect the headlamp bulb socket-connector. 5. Unsnap the headlamp bulb retain-
ing wire by pressing the end and
pushing it upward.
6. Remove the bulb from the head- lamp assembly.
7. Install a new headlamp bulb and snap the headlamp bulb retaining
wire into position by aligning the
wire with the groove on the bulb.
8. Connect the headlamp bulb sock- et-connector.
9. Install the headlamp bulb cover by turning it clockwise.
Information
The headlamp aiming should be
adjusted after an accident or after the
headlamp assembly is reinstalled at an
authorized HYUNDAI dealer.
Turn signal lamp
1. Open the hood.
2. Disconnect the negative batterycable.
3. Remove the socket from the assembly by turning the socket
counterclockwise until the tabs on
the socket align with the slots on
the assembly.
4. Remove the bulb from the socket by pressing it in and rotating it
counterclockwise until the tabs on
the bulb align with the slots in the
socket. Pull the bulb out of the
socket.
i
OLF074102MX
OLF074103MX
■Low beam
■High beam
OLF074052
Page 518 of 563
7-73
7
Maintenance
Type B
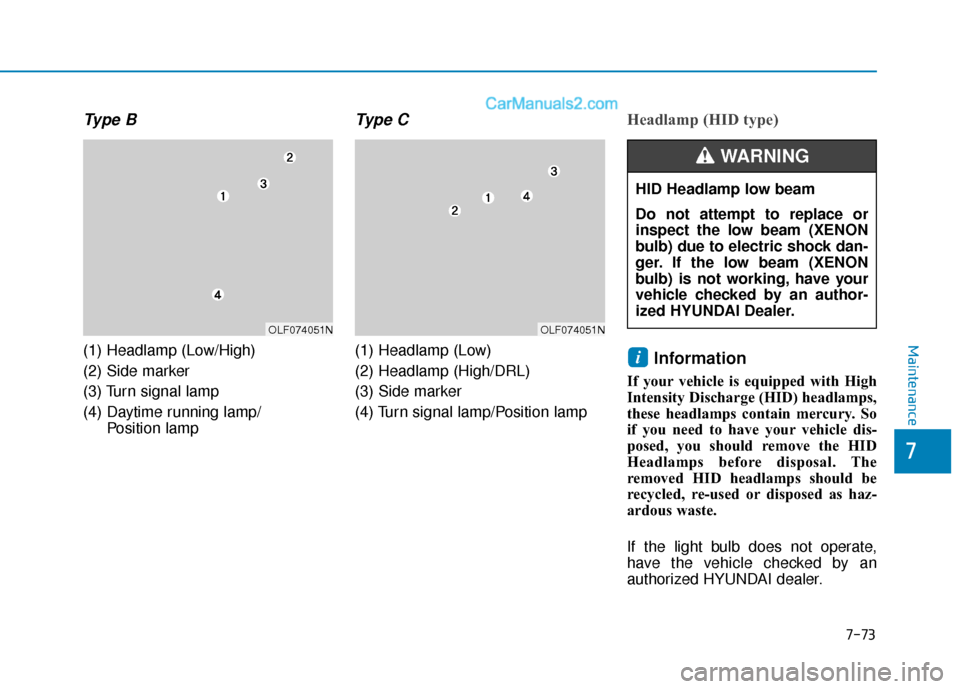
(1) Headlamp (Low/High)
(2) Side marker
(3) Turn signal lamp
(4) Daytime running lamp/ Position lamp
Type C
(1) Headlamp (Low)
(2) Headlamp (High/DRL)
(3) Side marker
(4) Turn signal lamp/Position lamp
Headlamp (HID type)
Information
If your vehicle is equipped with High
Intensity Discharge (HID) headlamps,
these headlamps contain mercury. So
if you need to have your vehicle dis-
posed, you should remove the HID
Headlamps before disposal. The
removed HID headlamps should be
recycled, re-used or disposed as haz-
ardous waste.
If the light bulb does not operate,
have the vehicle checked by an
authorized HYUNDAI dealer.
i
OLF074051NOLF074051N
HID Headlamp low beam
Do not attempt to replace or
inspect the low beam (XENON
bulb) due to electric shock dan-
ger. If the low beam (XENON
bulb) is not working, have your
vehicle checked by an author-
ized HYUNDAI Dealer.
WARNING
Page 519 of 563
7-74
Maintenance
Information
HID lamps have superior perform-
ance vs. halogen bulbs.
HID lamps are estimated by the man-
ufacturer to last twice as long or
longer than halogen bulbs depending
on their frequency of use. They will
probably require replacement at some
point in the life of the vehicle. Cycling
the headlamps on and off more than
typical use will shorten HID lamps
life. HID lamps do not fail in the same
manner as halogen incandescent
lamps. If a headlamp goes out after a
period of operation but will immedi-
ately relight when the headlamp
switch is cycled it is likely the HID
lamp needs to be replaced. HID light-
ing components are more complex
than conventional halogen bulbs thus
have higher replacement cost.
The headlamp aiming should be
adjusted after an accident or after
the headlamp assembly is rein-
stalled at an authorized HYUNDAI
dealer.
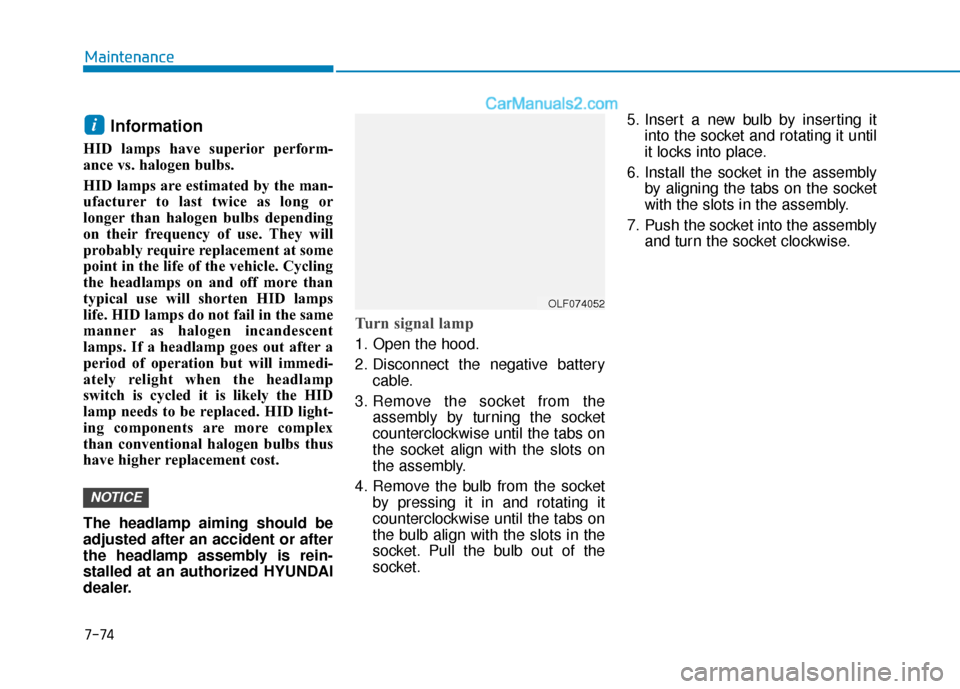
Turn signal lamp
1. Open the hood.
2. Disconnect the negative batterycable.
3. Remove the socket from the assembly by turning the socket
counterclockwise until the tabs on
the socket align with the slots on
the assembly.
4. Remove the bulb from the socket by pressing it in and rotating it
counterclockwise until the tabs on
the bulb align with the slots in the
socket. Pull the bulb out of the
socket. 5. Insert a new bulb by inserting it
into the socket and rotating it until
it locks into place.
6. Install the socket in the assembly by aligning the tabs on the socket
with the slots in the assembly.
7. Push the socket into the assembly and turn the socket clockwise.
NOTICE
i
OLF074052
Page 521 of 563
7-76
Maintenance
Rear Combination Light Bulb
Replacement
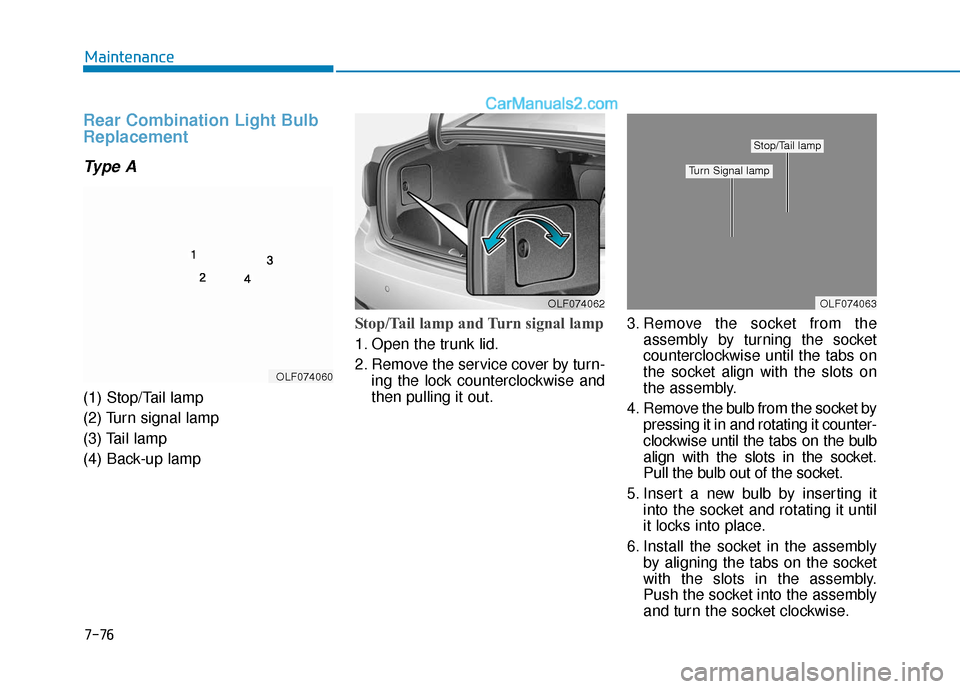
Type A
(1) Stop/Tail lamp
(2) Turn signal lamp
(3) Tail lamp
(4) Back-up lamp
Stop/Tail lamp and Turn signal lamp
1. Open the trunk lid.
2. Remove the service cover by turn-ing the lock counterclockwise and
then pulling it out. 3. Remove the socket from the
assembly by turning the socket
counterclockwise until the tabs on
the socket align with the slots on
the assembly.
4. Remove the bulb from the socket by pressing it in and rotating it counter-
clockwise until the tabs on the bulb
align with the slots in the socket.
Pull the bulb out of the socket.
5. Insert a new bulb by inserting it into the socket and rotating it until
it locks into place.
6. Install the socket in the assembly by aligning the tabs on the socket
with the slots in the assembly.
Push the socket into the assembly
and turn the socket clockwise.
OLF074063OLF074062
Stop/Tail lamp
Turn Signal lamp
OLF074060
Page 522 of 563
7-77
7
Maintenance
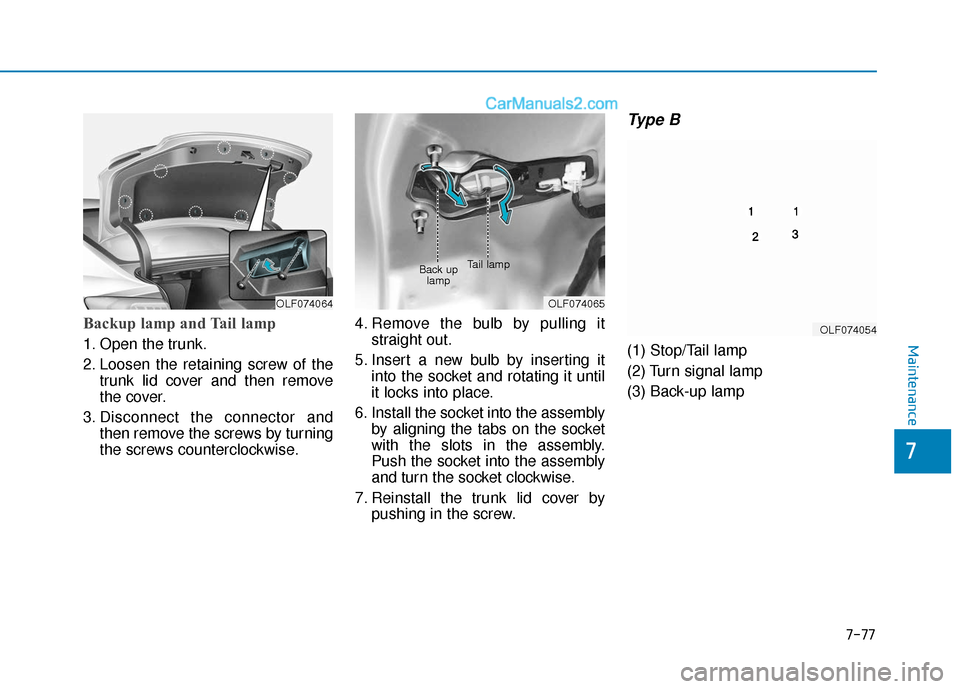
Backup lamp and Tail lamp
1. Open the trunk.
2. Loosen the retaining screw of thetrunk lid cover and then remove
the cover.
3. Disconnect the connector and then remove the screws by turning
the screws counterclockwise. 4. Remove the bulb by pulling it
straight out.
5. Insert a new bulb by inserting it into the socket and rotating it until
it locks into place.
6. Install the socket into the assembly by aligning the tabs on the socket
with the slots in the assembly.
Push the socket into the assembly
and turn the socket clockwise.
7. Reinstall the trunk lid cover by pushing in the screw.
Type B
(1) Stop/Tail lamp
(2) Turn signal lamp
(3) Back-up lamp
OLF074065OLF074064
Back uplamp Tail lamp
OLF074054