2017 Hyundai Sonata Hybrid page 7
[x] Cancel search: page 7Page 4 of 562

F4
INTRODUCTION
Congratulations, and thank you for choosing HYUNDAI. We are pleased to welcome you to the growing number of
discriminating people who drive HYUNDAIS. We are very proud of the advanced engineering and high-quality
construction of each HYUNDAI we build.
Your Owner's Manual will introduce you to the features and operation of your new HYUNDAI. To become familiar with
your new HYUNDAI, so that you can fully enjoy it, read this Owner's Manual carefully before driving your new vehicle.
This manual contains important safety information and instructions intended to familiarize you with your vehicle's
controls and safety features so you can safely operate your vehicle.
This manual also contains information on maintenance designed to enhance safe operation of the vehicle. It is
recommended that all service and maintenance on your car be performed by an authorized HYUNDAI dealer.
HYUNDAI dealers are prepared to provide high-quality service, maintenance and any other assistance that may be
required.
This Owner's Manual should be considered a permanent part of your vehicle, and should be kept in the vehicle so
you can refer to it at any time. The manual should stay with the vehicle if you sell it to provide the next owner with
important operating, safety and maintenance information.
HYUNDAI MOTOR AMERICA
Copyright 2016 HYUNDAI Motor America. All rights reserved. No part of this publication may be reproduced, stored
in any retrieval system or transmitted in any form or by any means without the prior written permission of HYUNDAI
Motor America.Severe engine and transmission damage may result from the use of poor quality fuels and lubricants that
do not meet HYUNDAI specifications. You must always use high quality fuels and lubricants that meet the
specifications listed on Page 8-6 in the Vehicle Specifications section of the Owner's Manual.
CAUTION
Page 6 of 562

F6
Introduction
We want to help you get the greatest
possible driving pleasure from your
vehicle. Your Owner’s Manual can
assist you in many ways. To gain an
overview of the contents of your
Owner’s Manual, use the Table of
Contents in the front of the manual.
The first page of each Chapter
includes a detailed Table of Contents
of the Topics in that Chapter.
To quickly locate information about
your vehicle, use the Index in the
back of the manual. It is an alphabet-
ical list of what is in this manual and
the page number where it can be
found.
For your convenience, we have
incorporated tabs on the right-hand
page edges. These tabs are coded
with the Chapter titles to assist you
with navigating through the manual.Your safety, and the safety of others,
is very important. This Owner’s
Manual provides you with many safe-
ty precautions and operating proce-
dures. This information alerts you to
potential hazards that may hurt you
or others, as well as damage to your
vehicle.
Safety messages found on vehicle
labels and in this manual describe
these hazards and what to do to
avoid or reduce the risks.
Warnings and instructions contained
in this manual are for your safety.
Failure to follow safety warnings and
instructions can lead to serious injury
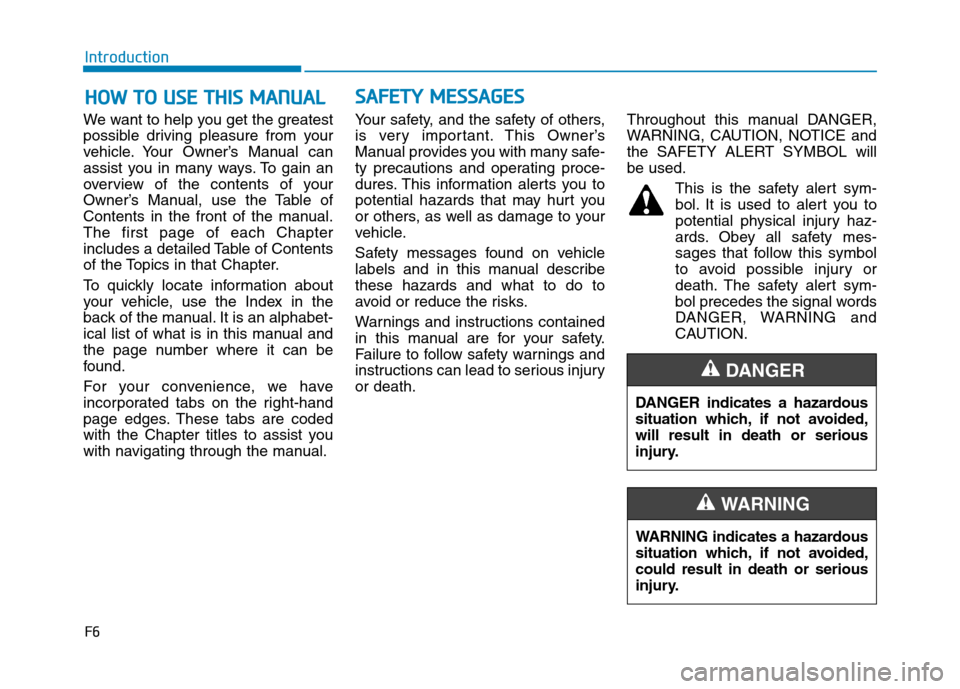
or death.Throughout this manual DANGER,
WARNING, CAUTION, NOTICE and
the SAFETY ALERT SYMBOL will
be used.
This is the safety alert sym-
bol. It is used to alert you to
potential physical injury haz-
ards. Obey all safety mes-
sages that follow this symbol
to avoid possible injury or
death. The safety alert sym-
bol precedes the signal words
DANGER, WARNING and
CAUTION.
H HO
OW
W
T
TO
O
U
US
SE
E
T
TH
HI
IS
S
M
MA
AN
NU
UA
AL
L
DANGER indicates a hazardous
situation which, if not avoided,
will result in death or serious
injury.
DANGER
WARNING indicates a hazardous
situation which, if not avoided,
could result in death or serious
injury.
WARNING
S SA
AF
FE
ET
TY
Y
M
ME
ES
SS
SA
AG
GE
ES
S
Page 73 of 562

2-44
Safety system of your vehicle
5. Remove as much slack from the belt as possible by pushing down
on the child restraint system while
feeding the shoulder belt back into
the retractor.
6. Push and pull on the child restraint system to confirm that the seat
belt is holding it firmly in place. If it
is not, release the seat belt and
repeat steps 2 through 6.
7. Double check that the retractor is in the “Automatic Locking” mode
by attempting to pull more of the
seat belt out of the retractor. If you
cannot, the retractor is in the
“Automatic Locking” mode.
If your CRS manufacturer instructs or
recommends you to use a tether
anchor with the lap/shoulder belt,
refer to the previous pages for more
information. When the seat belt is allowed to
retract to its fully stowed position,
the retractor will automatically
switch from the “Automatic
Locking” mode to the emergency
lock mode for normal adult usage.
To remove the child restraint, press
the release button on the buckle and
then pull the lap/shoulder belt out of
the restraint and allow the seat belt
to retract fully.
NOTICE
If the retractor is not in the
“Automatic Locking” mode, the
child restraint can move when
your vehicle turns or stops sud-
denly. A child can be seriously
injured or killed if the child
restraint is not properly anchored
in the car, including manually
pulling the seat belt all the way
out to shift the rectractor to the
“Automatic Locking” mode.
WARNING
Page 167 of 562

3-70
Convenient features of your vehicle
LCD Display Control
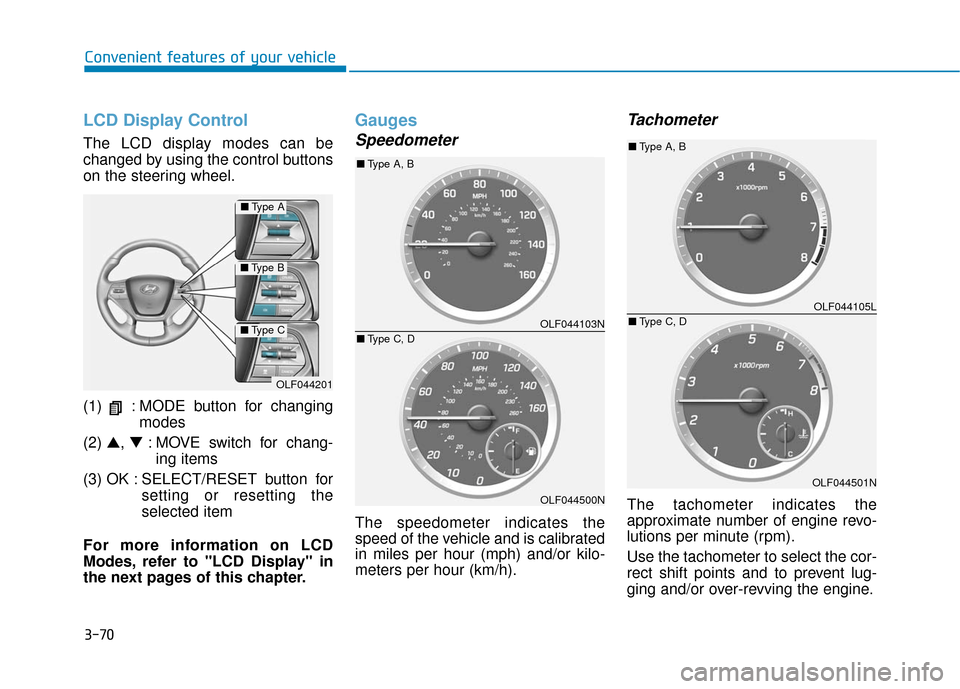
The LCD display modes can be
changed by using the control buttons
on the steering wheel.
(1) : MODE button for changingmodes
(2) ▲, ▼: MOVE switch for chang-
ing items
(3) OK : SELECT/RESET button for setting or resetting the
selected item
For more information on LCD
Modes, refer to "LCD Display" in
the next pages of this chapter.
Gauges
Speedometer
The speedometer indicates the
speed of the vehicle and is calibrated
in miles per hour (mph) and/or kilo-
meters per hour (km/h).
Tachometer
The tachometer indicates the
approximate number of engine revo-
lutions per minute (rpm).
Use the tachometer to select the cor-
rect shift points and to prevent lug-
ging and/or over-revving the engine.
OLF044201
■ Type A
■Type B
■Type COLF044103N
OLF044500N
■Type A, B
■ Type C, D
OLF044105L
OLF044501N
■Type A, B
■ Type C, D
Page 172 of 562

3-75
Convenient features of your vehicle
3
LCD Modes
L
LC
C D
D
D
D I
IS
S P
P L
LA
A Y
Y
Modes SymbolDescription
Trip Computer
This mode displays information related to driving such as tripmeter, fuel
economy, etc.
For more information, refer to "Trip Computer" in this chapter.
Turn By Turn (TBT)
(if equipped)This mode displays the state of the navigation.
SCC/LDWS
(If equipped)
This mode displays the state of the Smart Cruise Control (SCC) and Lane Departure Warning System (LDWS).
For more information, refer to "Smart Cruise Control (SCC)" and
Lane Departure Warning System (LDWS) in chapter 5.
A/V
(If equipped)This mode displays the state of the A/V system.
InformationThis mode displays information such as tire pressure, service intervals, warning messages related to the Smart Cruise Control, etc.
User SettingsOn this mode, you can change settings of the doors, lamps, etc.
For more information on controlling the LCD Modes, refer to "LCD Display Control" in the previous pages of
this chapter.
or or
Page 264 of 562

4-4
MODE (3)
Press the MODE button to select
Radio, XM, Disc, or AUX.
Information
Detailed information for audio control
buttons are described in the following
pages in this chapter.
Audio (Display Audio) / Video /
Navigation System (AVN)
Detailed information for the AVN sys-
tem is described in a separately sup-
plied manual.
Bluetooth®Wireless
Technology Hands-Free
You can use the phone wirelessly by
using the
Bluetooth®Wireless
Technology.
(1) Call / Answer button
(2) Call end button (3) Microphone
Detailed information for the
Bluetooth®Wireless Technology
hands-free is described in the follow-
ing pages in this chapter or in the
manual supplied separately.
i
Multimedia System
OLF044242N
OLF044276
Page 297 of 562
![Hyundai Sonata Hybrid 2017 Owners Manual 4-37
Multimedia System
4
Pairing through [PHONE]
Setup
Press the key Select
[Phone] Select [Pair Phone]
Select TUNE knob
1.The following steps are the sameas those described in the section
"When No Hyundai Sonata Hybrid 2017 Owners Manual 4-37
Multimedia System
4
Pairing through [PHONE]
Setup
Press the key Select
[Phone] Select [Pair Phone]
Select TUNE knob
1.The following steps are the sameas those described in the section
"When No](/manual-img/35/19638/w960_19638-296.png)
4-37
Multimedia System
4
Pairing through [PHONE]
Setup
Press the key Select
[Phone] Select [Pair Phone]
Select TUNE knob
1.The following steps are the sameas those described in the section
"When No Devices have been
Paired" on the previous page.
Information
•Bluetooth®Wireless Technology fea-
tures supported within the vehicle
are as follows. Some features may
not be supported depending on your
Bluetooth
®Wireless Technology
device.
- Outgoing/Incoming Handsfree calls (Continued)(Continued)
- Operations during a call (Switch toPrivate, Switch to call waiting, MIC
on/off)
- Downloading Call History
- Downloading Mobile Contacts
- Bluetooth
®Wireless Technology
device auto connection
- Bluetooth Audio Streaming
• Up to five Bluetooth
®Wireless
Technology devices can be paired to
the Car Handsfree system.
• Only one Bluetooth
®Wireless
Technology device can be connected
at a time.
• Other devices cannot be paired while a Bluetooth
®Wireless
Technology device is connected.
• Only Bluetooth
®Wireless
Technology Handsfree and
Bluetooth audio related features are
supported.
• Bluetooth related operations are possible only within devices that
support Handsfree or audio fea-
tures, such as a Bluetooth
®Wireless
Technology mobile phone or a
Bluetooth audio device.
(Continued)(Continued)
• If a connected Bluetooth
®Wireless
Technology device becomes discon-
nected due to being out of communi-
cation range, turning the device
OFF, or a Bluetooth
®Wireless
Technology communication error,
corresponding Bluetooth
®Wireless
Technology devices are automatical-
ly searched and reconnected.
• If the system becomes unstable due to communication errors between
the car Handsfree and the
Bluetooth
®Wireless Technology
device, reset the device by turning
off and back on again. Upon reset-
ting Bluetooth
®Wireless Technology
device, the system will be restored.
• After pairing is complete, a contacts download request is sent once to the
mobile phone. Some mobile phones
may require confirmation upon
receiving a download request,
ensure your mobile phone accepts
the connection. Refer to your
phones user’s manual for additional
information regarding phone pair-
ing and connections.
i
SETUP
Page 335 of 562

5-15
Driving your vehicle
5
The indicator in the instrument clus-
ter displays the shift lever position
when the ignition switch is in the ON
position.
P (Park)
Always come to a complete stop
before shifting into P (Park).
To shift from P (Park), you must
depress firmly on the brake pedal
and make sure your foot is off the
accelerator pedal.
If you have done all of the above and
still cannot shift the lever out of P
(Park), see "Shift-Lock Release" on
page 5-25.
The shift lever must be in P (Park)
before turning the engine off.
To reduce the risk of serious
injury or death:
ALWAYS check the surround-
ing areas near your vehicle for
people, especially children,
before shifting a vehicle into
D (Drive) or R (Reverse).
Before leaving the driver's
seat, always make sure the
shift lever is in the P (Park)
position, then set the parking
brake, and place the ignition
switch in the LOCK/OFF posi-
tion. Unexpected and sudden
vehicle movement can occur
if these precautions are not
followed.
When using Manual shift
mode, do not use engine brak-
ing (shifting from a high gear
to lower gear) rapidly on slip-
pery roads. The vehicle may
slip causing an accident.
WARNING
Shifting into P (Park) while the
vehicle is in motion may
cause you to lose control of
the vehicle.
After the vehicle has stopped,
always make sure the shift
lever is in P (Park), apply the
parking brake, and turn the
engine off.
Do not use the P (Park) posi-
tion in place of the parking
brake.
WARNING