2017 Hyundai Santa Fe Sport length
[x] Cancel search: lengthPage 50 of 614

Safety features of your vehicle
28
3
*1Warning pattern repeats 11 times
with an interval of 24 seconds. If
the driver's seat belt is buckled, the
light will stop within 6 seconds and
chime will stop immediately.
*
2The light will stop within 6 seconds
and chime will stop immediately.
Seat belt - Driver's 3-point system with emergency locking retractor
To fasten your seat belt:
To fasten your seat belt, pull it out of
the retractor and insert the metal tab
(1) into the buckle (2). There will be
an audible "click" when the tab locks
into the buckle. The seat belt automatically adjusts to
the proper length only after the lap
belt portion is adjusted manually so
that it fits snugly around your hips. If
you lean forward in a slow, easy
motion, the belt will extend and let
you move around. If there is a sud-
den stop or impact, however, the belt
will lock into position. It will also lock
if you try to lean forward too quickly.
If you are not able to pull out the seat
belt from the retractor, firmly pull the
belt out and release it. Then you will
be able to pull the belt out smoothly.
B180A01NF-1
ConditionsWarning Pattern
Seat BeltVehicle
SpeedLight-BlinkChime-Sound
Unbuckled6 seconds
Buckled6 secondsNone
Buckled →
Unbuckled
Below 3 mph (5 km/h)6 secondsNone
3 mph~6 mph6 seconds
Above 6 mph (10 km/h)6 sec. on / 24 sec. off (11 times)
Unbuckled
Above 6 mph(10 km/h)
↓
Below 3 mph (5 km/h)
6 seconds *1
↓
Stop *
2
Page 52 of 614
Safety features of your vehicle
30
3
Seat belts - Front passenger and
rear seat 3-point system withcombination locking retractor
To fasten your seat belt:
Combination retractor type seat belts
are installed in the rear seat positions
to help accommodate the installation
of child restraint systems. Although a
combination retractor is also installed
in the front passenger seat position, it
is strongly recommended that children
always be seated in the rear seat.
NEVER place any infant restraint sys-
tem in the front seat of the vehicle.
This type of seat belt combines the
features of both an emergency lock-
ing retractor seat belt and an auto-
matic locking retractor seat belt. To
fasten your seat belt, pull it out of the
retractor and insert the metal tab into
the buckle. There will be an audible
"click" when the tab locks into the
buckle. When not securing a child
restraint, the seat belt operates in the
same way as the driver's seat belt
(Emergency Locking Retractor Type).
It automatically adjusts to the proper
length only after the lap belt portion of
the seat belt is adjusted manually so
that it fits snugly around your hips. When the seat belt is fully extended
from the retractor to allow the instal-
lation of a child restraint system, the
seat belt operation changes to allow
the belt to retract, but not to extend
(Automatic Locking Retractor Type).
Refer to “Using a child restraint sys-
tem” in this section.
To convert from the automatic lock-
ing feature to the emergency locking
operation mode, allow the unbuckled
seat belt to fully retract.
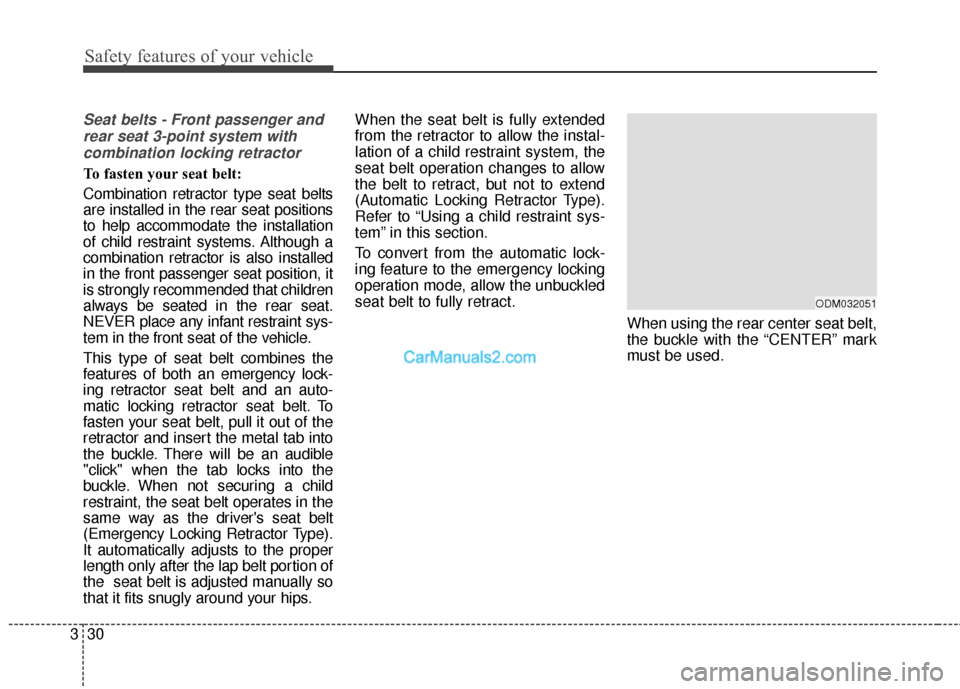
When using the rear center seat belt,
the buckle with the “CENTER” mark
must be used.
ODM032051
Page 277 of 614
Features of your vehicle
180
4
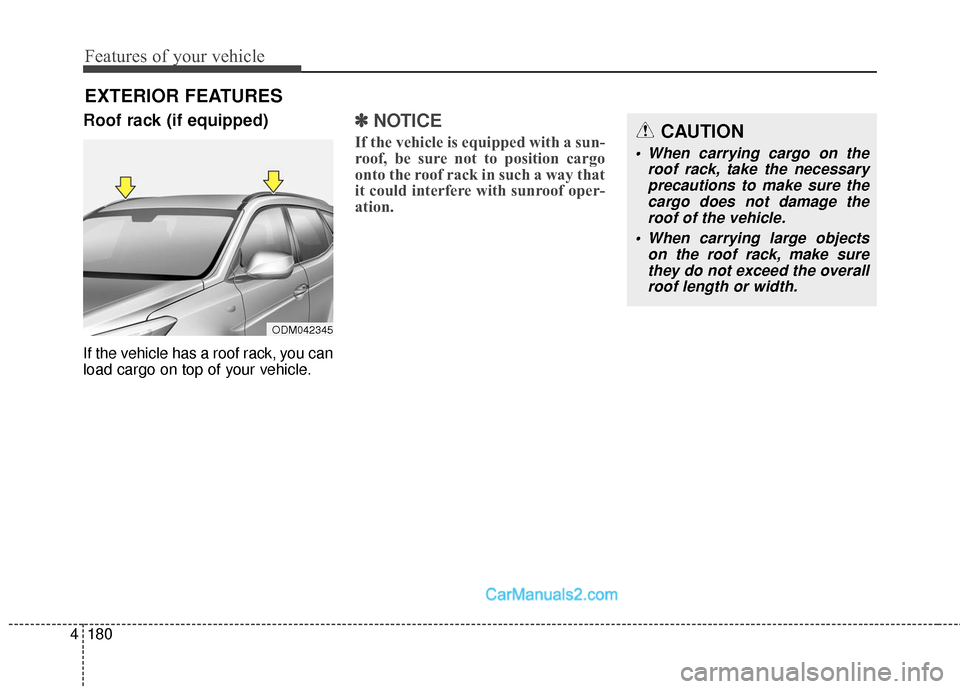
Roof rack (if equipped)
If the vehicle has a roof rack, you can
load cargo on top of your vehicle.
✽ ✽
NOTICE
If the vehicle is equipped with a sun-
roof, be sure not to position cargo
onto the roof rack in such a way that
it could interfere with sunroof oper-
ation.
EXTERIOR FEATURES
CAUTION
When carrying cargo on the
roof rack, take the necessaryprecautions to make sure thecargo does not damage theroof of the vehicle.
When carrying large objects on the roof rack, make surethey do not exceed the overallroof length or width.
ODM042345
Page 291 of 614
Features of your vehicle
194
4
(Continued)
• Some iPod®products may not
sync with the System depending
on the version. If the Media is
removed before the Media is rec-
ognized, then the system may not
properly restore the previously
operated mode. (iPad
®charging is
not supported.)
• Use an iPod
®cable shorter than 1
meter in length such as the one
originally supplied with a new
iPod
®, longer cables may lead to
the audio system not recognizing
the iPod
®.
✽ ✽ NOTICE - Using the
Bluetooth®Wireless
Technology Audio
Mode
• Bluetooth®Wireless Technology
Audio Mode can be used only
when a Bluetooth
®Wireless
Technology phone has been con-
nected.
• Bluetooth
®Wireless Technology
Audio Mode will not be available
when connecting mobile phones
that do not support this feature.
• If a Bluetooth
®Wireless
Technology Phone is being used to
play music and receives an incom-
ing or outgoing phone call, then
the music will stop.
• Moving the Track up/down while playing Bluetooth
®Wireless
Technology audio mode may
result in pop noises with some
mobile phones.
• Bluetooth
®Wireless Technology
streaming audio may not be sup-
ported in some mobile phones. (Continued)(Continued)
• When returning to Bluetooth
®
Wireless Technology Audio mode
after ending a call, the mode may
not automatically restart in some
mobile phones.
• Receiving an incoming call or making an outgoing call while
playing Bluetooth
®Wireless
Technology Audio may result in
audio interference.
Page 370 of 614
529
Driving your vehicle
When the ECO mode is activated:
The acceleration response may beslightly reduced as the accelerator
pedal is depressed moderately.
The air conditioner performance may be limited.
The shift pattern of the automatic transaxle may change.
The engine noise may get louder.
The above situations are normal
conditions when the ECO mode is
activated to improve fuel efficiency.
Limitations of the ECO mode operation:
If the following conditions occur while
the ECO mode is operating, fuel effi-
ciency may decrease even though
there is no change in the ECO indi-
cator.
When the coolant temperature is low:
Fuel efficiency may decrease until
engine temperature reaches nor-
mal.
When driving up a hill: Fuel efficiency may decrease to
gain performance when driving
uphill because engine torque is
restricted.
When using the automatic transaxle manual shift mode:
Fuel efficiency may decrease
according to the shift location.
When the accelerator pedal is deeply depressed for a few sec-
onds:
Fuel efficiency may decrease,
judging that the driver wants to
speed up.
SPORT mode
SPORT mode managesthe driving dynamics by
automatically adjusting the
steering wheel, engine
and transaxle system to
optimize performance.
When the SPORT mode is select- ed by pressing the DRIVE MODE
button, the SPORT indicator (yel-
low color) will illuminate.
Restarting of the engine in the SPORT mode resets the DRIVE
mode to the NORMAL mode. Thus,
when necessary, reselect the
SPORT mode.
When the SPORT mode is activat- ed:
- The RPM (revolutions per min-utes) level is maintained over a
certain length of time, even after
releasing the accelerator pedal.
- When accelerating, up-shifting timing is delayed.
✽ ✽ NOTICE
In the SPORT mode, the fuel effi-
ciency may decrease.
Page 457 of 614
Driving your vehicle
116
5
Driving with a trailer
Towing a trailer requires a certain
amount of experience. Before setting
out for the open road, you must get to
know your trailer. Acquaint yourself
with the feel of handling and braking
with the added weight of the trailer.
And always keep in mind that the
vehicle you are driving is now a good
deal longer and not nearly so respon-
sive as your vehicle is by itself.
Before you start, check the trailer
hitch and platform, safety chains,
electrical connector(s), lights, tires
and mirror adjustment. If the trailer
has electric brakes, start your vehicle
and trailer moving and then apply the
trailer brake controller by hand to be
sure the brakes are working. This lets
you check your electrical connection
at the same time.
During your trip, check occasionally
to be sure that the load is secure,
and that the lights and any trailer
brakes are still working.
Following distance
Stay at least twice as far behind the
vehicle ahead as you would when
driving your vehicle without a trailer.
This can help you avoid situations
that require heavy braking and sud-
den turns.
Passing
You’ll need more passing distance
up ahead when you’re towing a trail-
er. And, because of the increased
vehicle length, you’ll need to go
much farther beyond the passed
vehicle before you can return to your
lane. Due to the added load to the
engine when going uphill the vehicle
may also take longer to pass than it
would on flat ground.
Backing up
Hold the bottom of the steering wheel
with one hand. Then, to move the trail-
er to the left, just move your hand to
the left. To move the trailer to the right,
move your hand to the right. Always
back up slowly and, if possible, have
someone guide you.
Making turns
When you’re turning with a trailer,
make wider turns than normal. Do
this so your trailer won’t strike soft
shoulders, curbs, road signs, trees,
or other objects near the edge of the
road. Avoid jerky or sudden maneu-
vers. Signal well in advance before
turning or lane changes.
Page 592 of 614
Specifications, Consumer information, Reporting safety defects
28
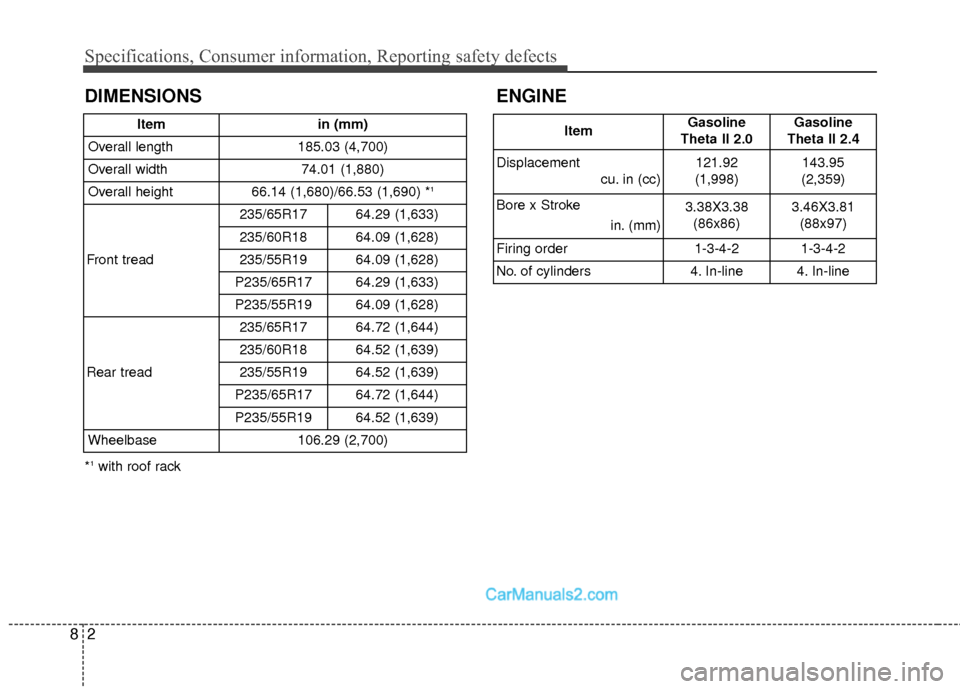
DIMENSIONS
Itemin (mm)
Overall length 185.03 (4,700)
Overall width 74.01 (1,880)
Overall height 66.14 (1,680)/66.53 (1,690) *
1
Front tread235/65R17 64.29 (1,633)
235/60R1864.09 (1,628)
235/55R1964.09 (1,628)
P235/65R1764.29 (1,633)
P235/55R1964.09 (1,628)
Rear tread
235/65R1764.72 (1,644)
235/60R18 64.52 (1,639)
235/55R19 64.52 (1,639)
P235/65R17 64.72 (1,644)
P235/55R19 64.52 (1,639)
Wheelbase 106.29 (2,700)
ItemGasoline
Theta II 2.0 Gasoline
Theta II 2.4
Displacement cu. in (cc)
121.92
(1,998) 143.95
(2,359)
Bore x Stroke in. (mm)
3.38X3.38(86x86) 3.46X3.81
(88x97)
Firing order
1-3-4-2 1-3-4-2
No. of cylinders
4. In-line 4. In-line
ENGINE
*1with roof rack