Page 7 of 614
1
2
3
4
5
6
7
8I
IntroductionHow to use this manual / Fuel requirements / Vehicle break-in process / Vehicle handling instructions /Vehicle data collection and event data recorders
Your vehicle at a glance
Exterior overview / Interior overview / Instrument panel overview / Engi\
ne compartment
Safety features of your vehicle
Seats / Seat belts / Child restraint system / Air bag
Features of your vehicleKeys / Door locks / Liftgate (Tailgate) / Windows / Hood / Fuel filler lid / Panoramic sunroof / Steering wheel /
Mirrors / Instrument cluster / Lighting / Wipers & Washers / Climate control system / Multimedia system / Etc.
Driving your vehicleBefore driving / Engine start/stop button / Transaxle / All Wheel Drive (AWD) / Brake system /
Cruise control system / Active ECO system / Winter driving / Vehicle load limit / Etc.
What to do in an emergencyRoad warning / Emergency while driving / Emergency starting / Engine overheat / TPMS / Flat tire / Towing / Etc.
MaintenanceEngine compartment / Maintenance service / Engine oil / Engine coolant /\
Brake fluid / Washer fluid /
Parking brake / Air cleaner / Wiper blades / Battery / Tire and wheels / Fuses / Light bulbs / Etc.
Specifications, Consumer information and Reporting safety defects
Index
table of contents
Page 21 of 614
27
Your vehicle at a glance
ENGINE COMPARTMENT
OAN077003N
❈The actual shape may differ from the illustration. 1. Engine coolant reservoir....................7-29
2. Engine oil filler cap ............................7-26
3. Brake fluid reservoir ..........................7-31
4. Air cleaner ........................................7-34
5. Fuse box ............................................7-68
6. Negative battery terminal ..................7-41
7. Positive battery terminal ....................7-41
8. Radiator cap ......................................7-30
9. Engine oil dipstick..............................7-26
10. Windshield washer fluid reservoir....7-33
■
Gasoline 2.4L GDI
Page 22 of 614
Your vehicle at a glance
82
OAN077004N
❈The actual shape may differ from the illustration. 1. Engine coolant reservoir....................7-29
2. Engine oil filler cap ............................7-26
3. Brake fluid reservoir ..........................7-31
4. Air cleaner ........................................7-34
5. Fuse box ............................................7-68
6. Negative battery terminal ..................7-41
7. Positive battery terminal ....................7-41
8. Radiator cap ......................................7-30
9. Engine oil dipstick..............................7-26
10. Windshield washer fluid reservoir....7-33
■
Gasoline 2.0L TURBO GDI
Page 143 of 614
Features of your vehicle
46
4
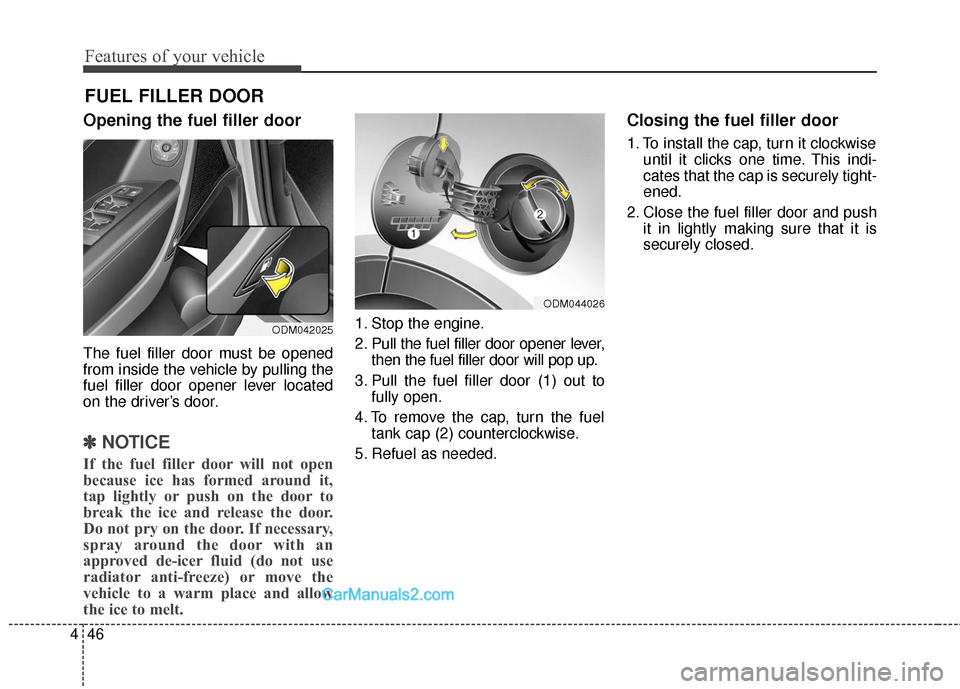
Opening the fuel filler door
The fuel filler door must be opened
from inside the vehicle by pulling the
fuel filler door opener lever located
on the driver’s door.
✽ ✽
NOTICE
If the fuel filler door will not open
because ice has formed around it,
tap lightly or push on the door to
break the ice and release the door.
Do not pry on the door. If necessary,
spray around the door with an
approved de-icer fluid (do not use
radiator anti-freeze) or move the
vehicle to a warm place and allow
the ice to melt.
1. Stop the engine.
2. Pull the fuel filler door opener lever,
then the fuel filler door will pop up.
3. Pull the fuel filler door (1) out to fully open.
4. To remove the cap, turn the fuel tank cap (2) counterclockwise.
5. Refuel as needed.
Closing the fuel filler door
1. To install the cap, turn it clockwise until it clicks one time. This indi-
cates that the cap is securely tight-
ened.
2. Close the fuel filler door and push it in lightly making sure that it is
securely closed.
FUEL FILLER DOOR
ODM042025
ODM044026
Page 181 of 614
Features of your vehicle
84
4
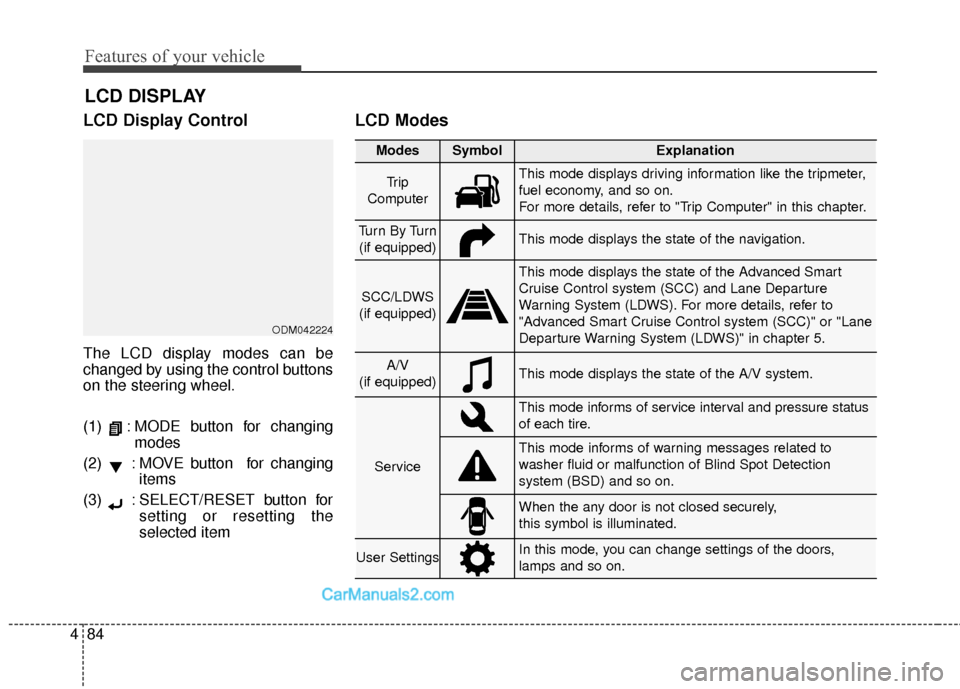
LCD Display Control
The LCD display modes can be
changed by using the control buttons
on the steering wheel.
(1) : MODE button for changing
modes
(2) : MOVE button for changing items
(3) : SELECT/RESET button for setting or resetting the
selected item
LCD Modes
LCD DISPLAY
Modes SymbolExplanation
Tr i p
ComputerThis mode displays driving information like the tripmeter,
fuel economy, and so on.
For more details, refer to "Trip Computer" in this chapter.
Tu r n B y Tu r n (if equipped)This mode displays the state of the navigation.
SCC/LDWS
(if equipped)
This mode displays the state of the Advanced Smart
Cruise Control system (SCC) and Lane Departure
Warning System (LDWS). For more details, refer to
"Advanced Smart Cruise Control system (SCC)" or "Lane
Departure Warning System (LDWS)" in chapter 5.
A/V
(if equipped)This mode displays the state of the A/V system.
Service
This mode informs of service interval and pressure status
of each tire.
This mode informs of warning messages related to
washer fluid or malfunction of Blind Spot Detection
system (BSD) and so on.
When the any door is not closed securely,
this symbol is illuminated.
User SettingsIn this mode, you can change settings of the doors,
lamps and so on.
ODM042224
Page 184 of 614
487
Features of your vehicle
Service in OFF
If the service interval is not set,
"Service in OFF" message is dis-
played on the LCD display.
✽ ✽NOTICE
If any of the following conditions
occur, the mileage and days may be
incorrect.
- The battery cable is disconnected.
- The fuse switch is turned off.
- The battery is discharged.
Master Warning Mode
(if equipped)
This warning light informs the driv-
er the following situations :
- Low washer fluid (if equipped).
- Blind Spot Detection (BSD) mal-function (if equipped).
- Lane Departure warning system (LDWS) malfunction (if
equipped).
- Smart cruise control system (SCC) malfunction (if equipped).
- Service reminder and so on.
The Master Warning Light illumi-
nates when more than one of the
above warning situations occur. At
this time, the LCD Modes Icon will
change from ( ) to ( ).
If the warning situation is solved, the
master warning light will be turned
off and the LCD Modes Icon will be
changed back to its previous icon
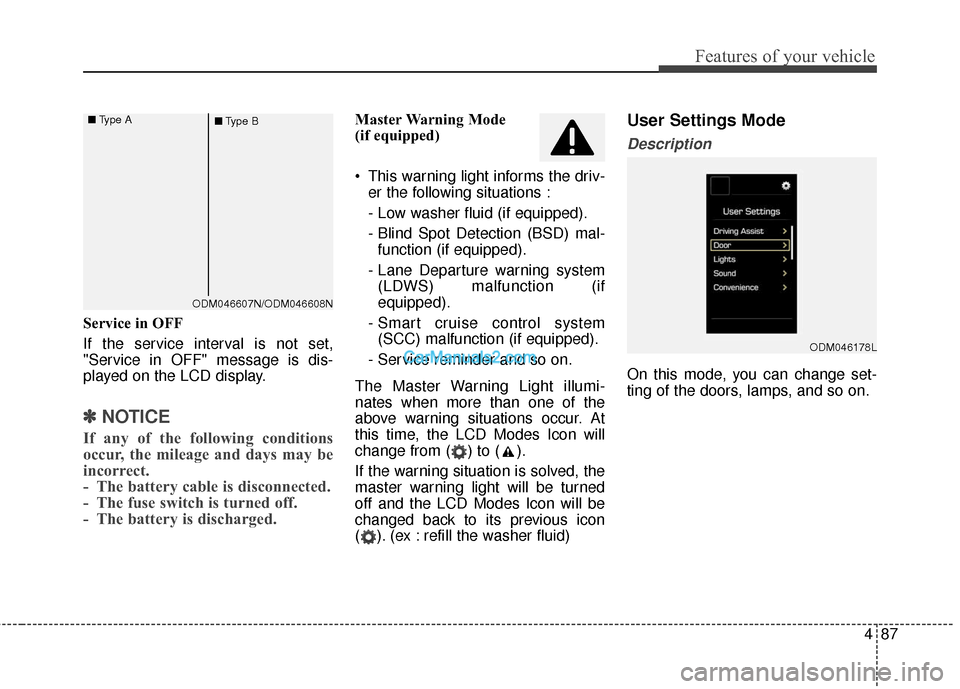
( ). (ex : refill the washer fluid)User Settings Mode
Description
On this mode, you can change set-
ting of the doors, lamps, and so on.
ODM046178L
ODM046607N/ODM046608N
■
Type A
■Type B
Page 195 of 614
Features of your vehicle
98
4
Low Washer Fluid (if equipped)
This warning message illuminates
on the service reminder menu if
the washer fluid level in the reser-
voir is nearly empty.
It means that you should refill the washer fluid.
Low Fuel
This warning message illuminatesif the fuel tank is nearly empty.
- When the low fuel level warninglight illuminates.
- When the trip computer displays "--- mile (or km)" as distance to
empty.
Add fuel as soon as possible.
Engine has overheated
This warning message illuminates when the engine coolant tempera-
ture is above 248°F (120°C).
It means that the engine is over- heating and may become damaged.
If your vehicle is overheated, refer to
"Overheating" in chapter 6.
ODM046631L/ODM046632L
■
Type A
■Type BODM046657L/ODM046658L
■
Type A
■Type BODM046653L/ODM046654L
■
Type A
■Type B
Page 205 of 614
Features of your vehicle
108
4
Parking Brake & Brake
Fluid Warning Light
This warning light illuminates:
Once you set the ignition switch or Engine Start/Stop Button to the ON
position.
- It illuminates for approximately 3seconds
- It remains on if the parking brake is applied.
When the parking brake is applied.
When the brake fluid level in the reservoir is low.
- If the warning light illuminateswith the parking brake released, it
indicates the brake fluid level in
reservoir is low. If the brake fluid level in the reservoir
is low:
1. Drive carefully to the nearest safe
location and stop your vehicle.
2. With the engine stopped, check the brake fluid level immediately
and add fluid as required (For
more details, refer to "Brake Fluid"
in chapter 7).
Then check all brake components for fluid leaks. If any leak on the
brake system is still found, the
warning light remains on, or the
brakes do not operate properly, do
not drive the vehicle.
In this case, have your vehicle
towed to an authorized HYUNDAI
dealer and inspected. Dual-diagonal braking system
Your vehicle is equipped with dual-
diagonal braking systems. This
means you still have braking on two
wheels even if one of the dual sys-
tems should fail.
With only one of the dual systems
working, more than normal pedal
travel and greater pedal pressure are
required to stop the vehicle.
Also, the vehicle will not stop in as
short a distance with only a portion
of the brake system working.
If the brakes fail while you are driv-
ing, shift to a lower gear for addition-
al engine braking and stop the vehi-
cle as soon as it is safe to do so.