2017 Hyundai Santa Fe lock
[x] Cancel search: lockPage 146 of 569
443
Features of your vehicle
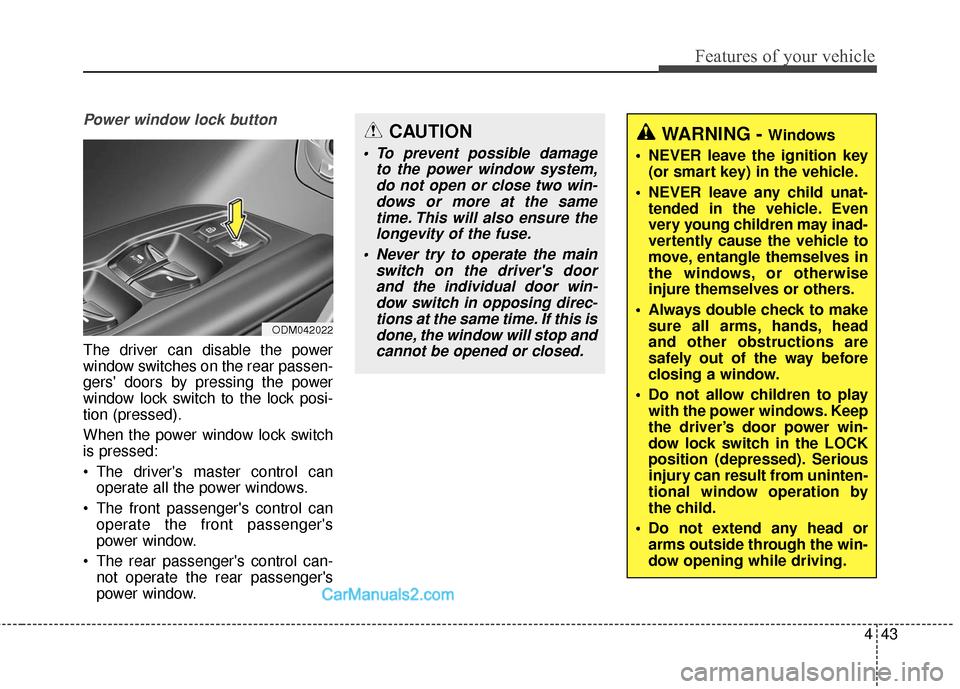
Power window lock button
The driver can disable the power
window switches on the rear passen-
gers' doors by pressing the power
window lock switch to the lock posi-
tion (pressed).
When the power window lock switch
is pressed:
The driver's master control canoperate all the power windows.
The front passenger's control can operate the front passenger's
power window.
The rear passenger's control can- not operate the rear passenger's
power window.
CAUTION
To prevent possible damage to the power window system,do not open or close two win-dows or more at the sametime. This will also ensure thelongevity of the fuse.
Never try to operate the main switch on the driver's doorand the individual door win-dow switch in opposing direc-tions at the same time. If this isdone, the window will stop andcannot be opened or closed.
WARNING - Windows
NEVER leave the ignition key (or smart key) in the vehicle.
NEVER leave any child unat- tended in the vehicle. Even
very young children may inad-
vertently cause the vehicle to
move, entangle themselves in
the windows, or otherwise
injure themselves or others.
Always double check to make sure all arms, hands, head
and other obstructions are
safely out of the way before
closing a window.
Do not allow children to play with the power windows. Keep
the driver’s door power win-
dow lock switch in the LOCK
position (depressed). Serious
injury can result from uninten-
tional window operation by
the child.
Do not extend any head or arms outside through the win-
dow opening while driving.
ODM042022
Page 148 of 569
445
Features of your vehicle
Closing the hood
1. Before closing the hood, check thefollowing:
ment must be correctly installed.
bustible material must be
removed from the engine com-
partment.
2. Lower the hood halfway and push down to securely lock in place.WARNING
Before closing the hood,ensure that all obstructions
are removed from the hood
opening. Closing the hood
with an obstruction present in
the hood opening may result
in property damage or severe
personal injury.
Do not leave gloves, rags or any other combustible materi-
al in the engine compartment.
Doing so may cause a heat-
induced fire.
Always double check to be sure that the hood is firmly
latched before driving away. If
it is not latched, the hood
could open while the vehicle
is being driven, causing a
total loss of visibility, which
might result in an accident.
Do not move the vehicle with the hood in the raised posi-
tion, as vision is obstructed
and the hood could fall or be
damaged.
Page 149 of 569
Features of your vehicle
46
4
Opening the fuel filler lid
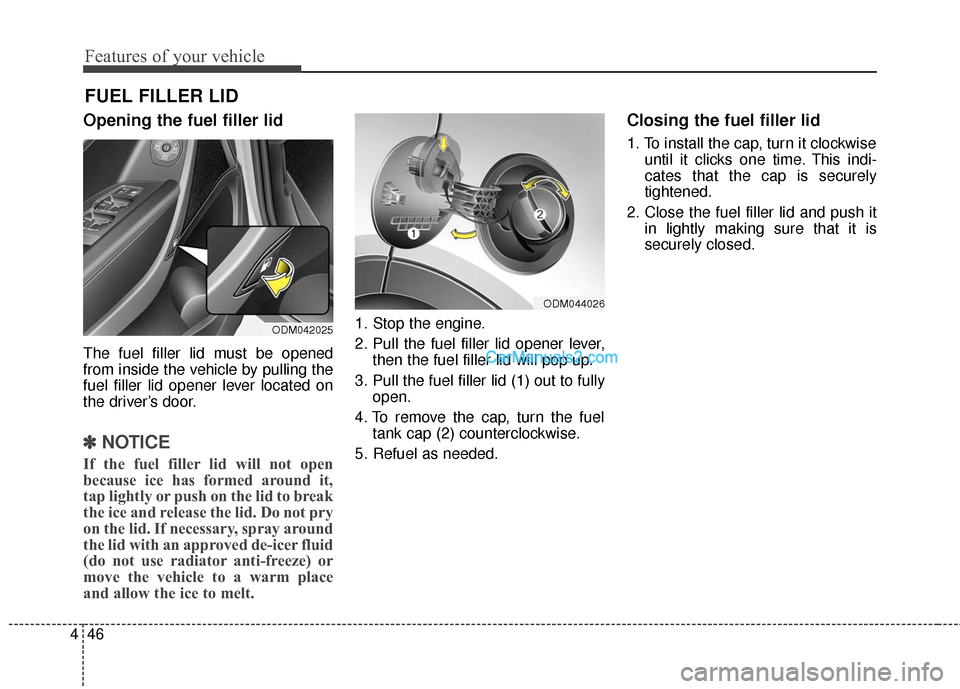
The fuel filler lid must be opened
from inside the vehicle by pulling the
fuel filler lid opener lever located on
the driver’s door.
✽ ✽
NOTICE
If the fuel filler lid will not open
because ice has formed around it,
tap lightly or push on the lid to break
the ice and release the lid. Do not pry
on the lid. If necessary, spray around
the lid with an approved de-icer fluid
(do not use radiator anti-freeze) or
move the vehicle to a warm place
and allow the ice to melt.
1. Stop the engine.
2. Pull the fuel filler lid opener lever,
then the fuel filler lid will pop up.
3. Pull the fuel filler lid (1) out to fully open.
4. To remove the cap, turn the fuel tank cap (2) counterclockwise.
5. Refuel as needed.
Closing the fuel filler lid
1. To install the cap, turn it clockwise until it clicks one time. This indi-
cates that the cap is securely
tightened.
2. Close the fuel filler lid and push it in lightly making sure that it is
securely closed.
FUEL FILLER LID
ODM042025
ODM044026
Page 153 of 569
Features of your vehicle
50
4
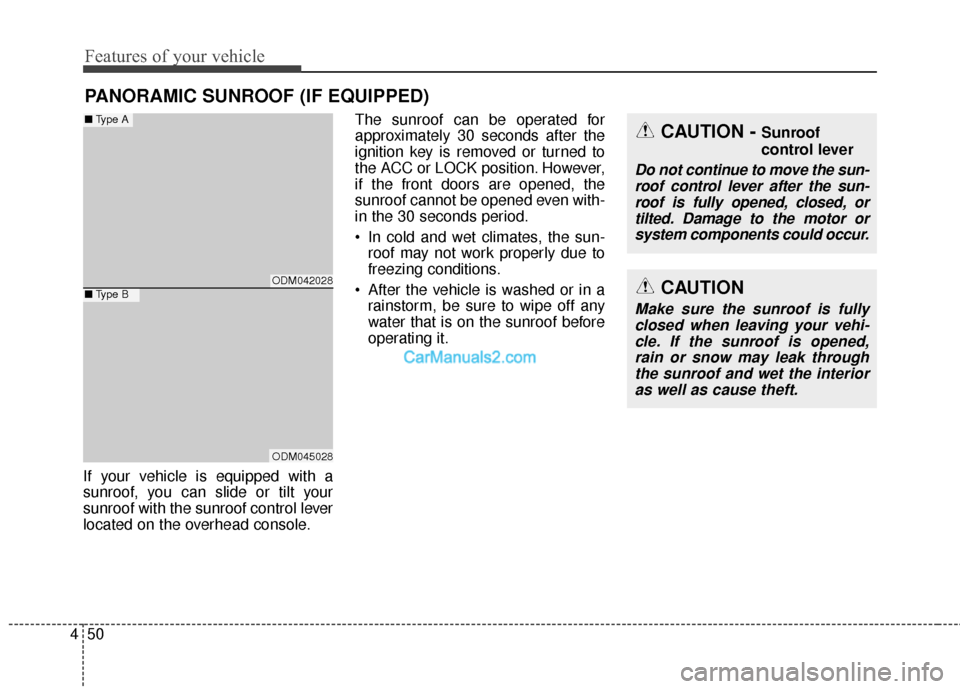
If your vehicle is equipped with a
sunroof, you can slide or tilt your
sunroof with the sunroof control lever
located on the overhead console. The sunroof can be operated for
approximately 30 seconds after the
ignition key is removed or turned to
the ACC or LOCK position. However,
if the front doors are opened, the
sunroof cannot be opened even with-
in the 30 seconds period.
In cold and wet climates, the sun-
roof may not work properly due to
freezing conditions.
After the vehicle is washed or in a rainstorm, be sure to wipe off any
water that is on the sunroof before
operating it.
PANORAMIC SUNROOF (IF EQUIPPED)
CAUTION - Sunroof
control lever
Do not continue to move the sun-roof control lever after the sun-roof is fully opened, closed, ortilted. Damage to the motor orsystem components could occur.
CAUTION
Make sure the sunroof is fullyclosed when leaving your vehi-cle. If the sunroof is opened,rain or snow may leak throughthe sunroof and wet the interioras well as cause theft.
ODM042028
ODM045028
■ Type A
■Type B
Page 159 of 569
Features of your vehicle
56
4
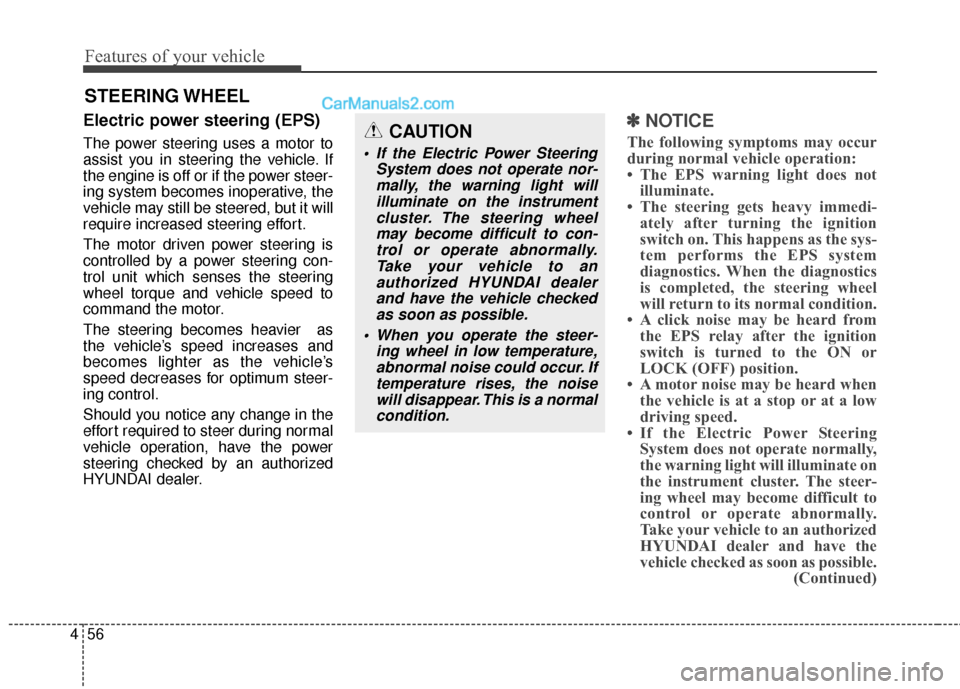
Electric power steering (EPS)
The power steering uses a motor to
assist you in steering the vehicle. If
the engine is off or if the power steer-
ing system becomes inoperative, the
vehicle may still be steered, but it will
require increased steering effort.
The motor driven power steering is
controlled by a power steering con-
trol unit which senses the steering
wheel torque and vehicle speed to
command the motor.
The steering becomes heavier as
the vehicle’s speed increases and
becomes lighter as the vehicle’s
speed decreases for optimum steer-
ing control.
Should you notice any change in the
effort required to steer during normal
vehicle operation, have the power
steering checked by an authorized
HYUNDAI dealer.
✽ ✽
NOTICE
The following symptoms may occur
during normal vehicle operation:
• The EPS warning light does not
illuminate.
• The steering gets heavy immedi- ately after turning the ignition
switch on. This happens as the sys-
tem performs the EPS system
diagnostics. When the diagnostics
is completed, the steering wheel
will return to its normal condition.
• A click noise may be heard from the EPS relay after the ignition
switch is turned to the ON or
LOCK (OFF) position.
• A motor noise may be heard when the vehicle is at a stop or at a low
driving speed.
• If the Electric Power Steering System does not operate normally,
the warning light will illuminate on
the instrument cluster. The steer-
ing wheel may become difficult to
control or operate abnormally.
Take your vehicle to an authorized
HYUNDAI dealer and have the
vehicle checked as soon as possible. (Continued)
STEERING WHEEL
CAUTION
If the Electric Power Steering
System does not operate nor-mally, the warning light willilluminate on the instrumentcluster. The steering wheelmay become difficult to con-trol or operate abnormally.Take your vehicle to anauthorized HYUNDAI dealerand have the vehicle checkedas soon as possible.
When you operate the steer- ing wheel in low temperature,abnormal noise could occur. Iftemperature rises, the noisewill disappear. This is a normalcondition.
Page 160 of 569
457
Features of your vehicle
(Continued)
• Some noises may be heard whenoperating the steering in low tem-
peratures. When the temperature
rises, the noise will disappear. This
is a normal condition.
• The steering effort may become heavy when the charging system
warning light comes on.Tilt & telescopic steering
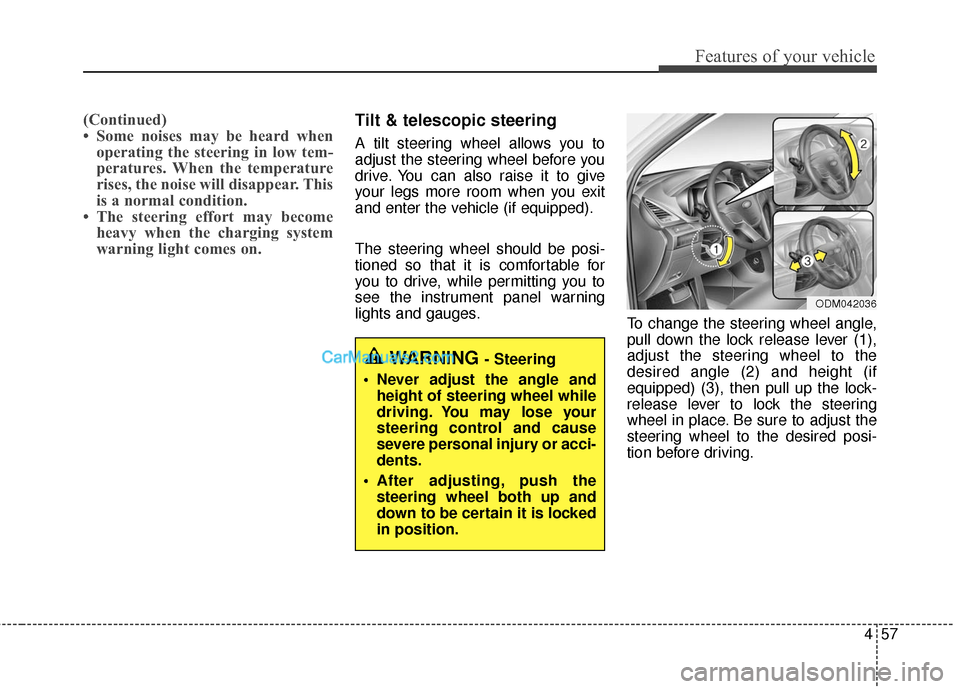
A tilt steering wheel allows you to
adjust the steering wheel before you
drive. You can also raise it to give
your legs more room when you exit
and enter the vehicle (if equipped).
The steering wheel should be posi-
tioned so that it is comfortable for
you to drive, while permitting you to
see the instrument panel warning
lights and gauges. To change the steering wheel angle,
pull down the lock release lever (1),
adjust the steering wheel to the
desired angle (2) and height (if
equipped) (3), then pull up the lock-
release lever to lock the steering
wheel in place. Be sure to adjust the
steering wheel to the desired posi-
tion before driving.
WARNING - Steering
Never adjust the angle and height of steering wheel while
driving. You may lose your
steering control and cause
severe personal injury or acci-
dents.
After adjusting, push the steering wheel both up and
down to be certain it is locked
in position.
ODM042036
Page 166 of 569
463
Features of your vehicle
To adjust the Zone setting:
1. Determine the desired ZoneNumber based upon your current
location on the Zone Map.
2. Press and hold the button for 6 seconds, the current Zone
Number will appear on the display.
3. Pressing and holding the button again will cause the numbers to
increment (Note: they will repeat
…13, 14, 15, 1, 2, …). Releasing
the button when the desired Zone
Number appears on the display
will set the new Zone.
4. Within about 5 seconds the com- pass will start displaying a com-
pass heading again.
There are some conditions that can
cause changes to the vehicle mag-
nets, such as installing a ski rack or
a CB antenna. Body repair work on
the vehicle can also cause changes
to the vehicle's magnetic field. In
these situations, the compass will
need to be re-calibrated to quickly
correct for these changes. To re-cali-
brate the compass: 1. Press and hold the button for
more than 9 seconds. When the
compass memory is cleared a "C"
will appear in the display.
2. To calibrate the compass, drive the vehicle in 2 complete circles at
less than 5 mph (8 km/h). Integrated HomeLink®Wireless
Control System
The HomeLink
®Wireless Control
System provides a convenient way to
replace up to three hand-held radio-
frequency (RF) transmitters with a
single built-in device. This innovative
feature will learn the radio frequency
codes of most current transmitters to
operate devices such as gate opera-
tors, garage door openers, entry
door locks, security systems, even
home lighting. Both standard and
rolling code-equipped transmitters
can be programmed by following the
outlined procedures. Additional
HomeLink
®information can be found
at: www.homelink.com or by calling
1-800-355-3515.
Page 169 of 569
Features of your vehicle
66
4
4. Firmly press, hold for 5 seconds
and release the programmed
HomeLink
®button up to two sepa-
rate times to activate the door. If
the door does not activate, press
and hold the just-trained
HomeLink
®button and observe
the indicator light.
stantly, programming is complete
and your device should activate
when the HomeLink
®button is
pressed and released.
for 2 seconds and then turns to a
constant light, continue with
"Programming" steps 5-7 to
complete the programming of a
rolling code equipped device
(most commonly a garage door
opener).
5. At the garage door opener receiv- er (motor-head unit) in the garage,
locate the "leam" or "smart" but-
ton. This can usually be found
where the hanging antenna wire is
attached to the motor-head unit. 6. Firmly press and release the
"leam" or "smart" button. (The
name and color of the button vary
by manufacturer). There are 30
seconds to initiate step 7.
7. Return to the vehicle and firmly press, hold for 2 seconds and
release the programmed
HomeLink
®button. Repeat the
"press/hold/release" sequence a
second time, and, depending on
the brand of the garage door
opener (or other rolling code
equipped device), repeat this
sequence a third time to complete
the programming process.
HomeLink
®should now activate your
rolling code equipped device. Gate operator & Canadian pro-
gramming
During programming, your handheld
transmitter may automatically stop
transmitting. Continue to press the
Integrated HomeLink
®Wireless
Control System button (note steps 2
through 3 in the Programming por-
tion of this document) while you
press and re-press ("cycle") your
handheld transmitter every two sec-
onds until the frequency signal has
been learned. The indicator light will
flash slowly and then rapidly after
several seconds upon successful
training.
Operating HomeLink
®
To operate, simply press and release
the programmed HomeLink®button.
Activation will now occur for the
trained device (i.e. garage door
opener, gate operator, security sys-
tem, entry door lock, home/office
lighting, etc.). For convenience, the
hand-held transmitter of the device
may also be used at any time.