2017 HYUNDAI IX20 battery replacement
[x] Cancel search: battery replacementPage 85 of 456
47
Features of your vehicle
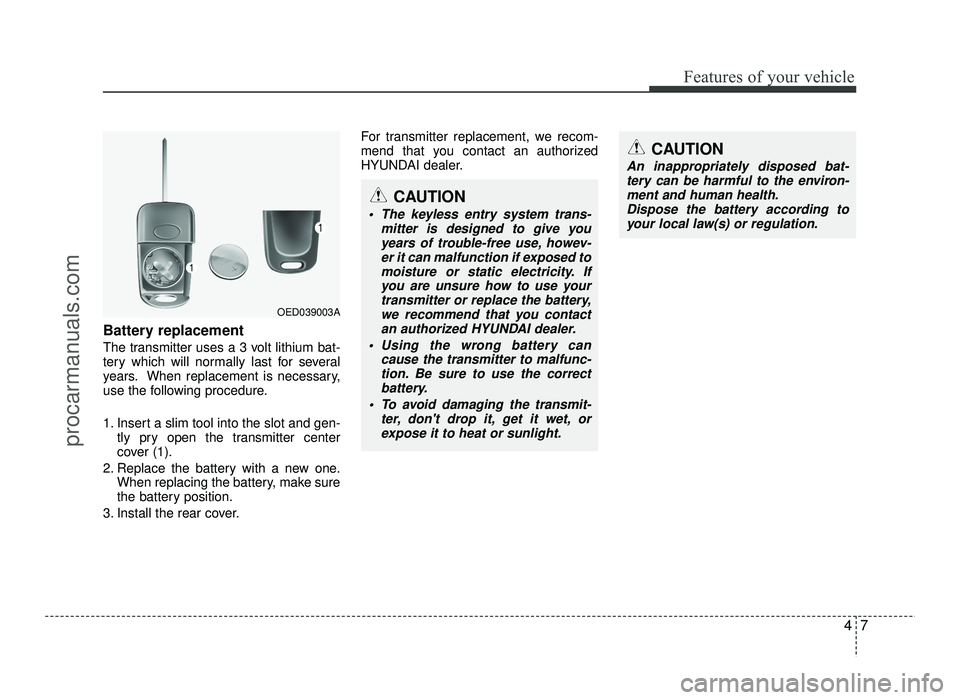
Battery replacement
The transmitter uses a 3 volt lithium bat-
tery which will normally last for several
years. When replacement is necessary,
use the following procedure.
1. Insert a slim tool into the slot and gen-tly pry open the transmitter center
cover (1).
2. Replace the battery with a new one. When replacing the battery, make sure
the battery position.
3. Install the rear cover. For transmitter replacement, we recom-
mend that you contact an authorized
HYUNDAI dealer.
CAUTION
The keyless entry system trans-
mitter is designed to give you
years of trouble-free use, howev-er it can malfunction if exposed to
moisture or static electricity. If you are unsure how to use yourtransmitter or replace the battery,
we recommend that you contactan authorized HYUNDAI dealer.
Using the wrong battery can cause the transmitter to malfunc-tion. Be sure to use the correct
battery.
To avoid damaging the transmit- ter, don't drop it, get it wet, or
expose it to heat or sunlight.
CAUTION
An inappropriately disposed bat-tery can be harmful to the environ-ment and human health.
Dispose the battery according to your local law(s) or regulation.
OED039003A
procarmanuals.com
Page 88 of 456
Features of your vehicle
10
4
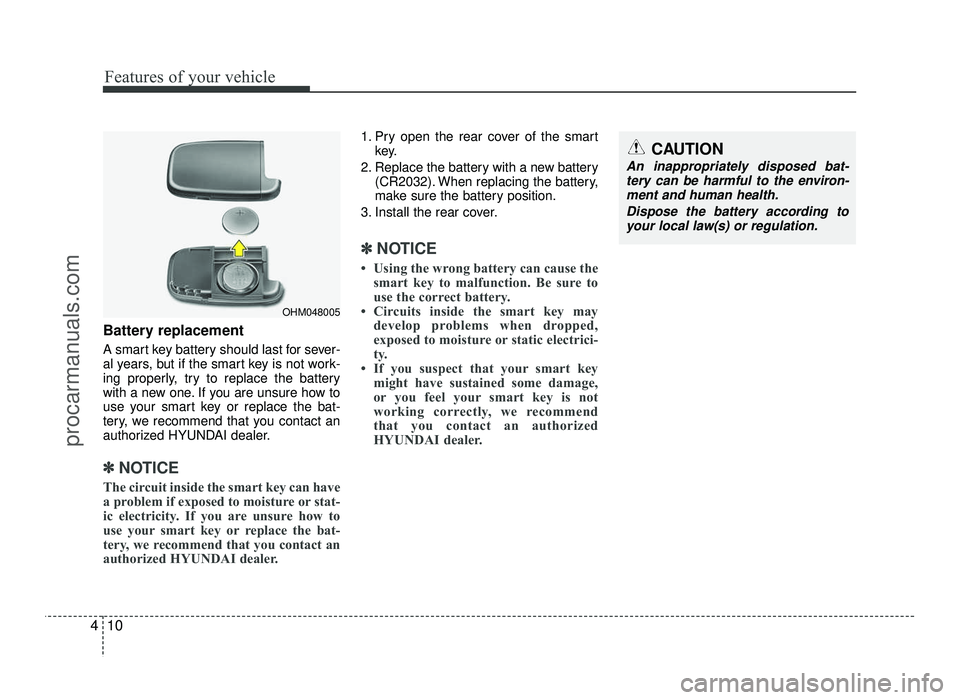
Battery replacement
A smart key battery should last for sever-
al years, but if the smart key is not work-
ing properly, try to replace the battery
with a new one. If you are unsure how to
use your smart key or replace the bat-
tery, we recommend that you contact an
authorized HYUNDAI dealer.
✽✽
NOTICE
The circuit inside the smart key can have
a problem if exposed to moisture or stat-
ic electricity. If you are unsure how to
use your smart key or replace the bat-
tery, we recommend that you contact an
authorized HYUNDAI dealer.
1. Pry open the rear cover of the smart key.
2. Replace the battery with a new battery (CR2032). When replacing the battery,
make sure the battery position.
3. Install the rear cover.
✽✽ NOTICE
Using the wrong battery can cause the smart key to malfunction. Be sure to
use the correct battery.
Circuits inside the smart key may develop problems when dropped,
exposed to moisture or static electrici-
ty.
If you suspect that your smart key might have sustained some damage,
or you feel your smart key is not
working correctly, we recommend
that you contact an authorized
HYUNDAI dealer.
OHM048005
CAUTION
An inappropriately disposed bat-
tery can be harmful to the environ-ment and human health.
Dispose the battery according toyour local law(s) or regulation.
procarmanuals.com
Page 302 of 456

What to do in an emergency
6
6
Jump starting procedure 1. Make sure the booster battery is 12-
volt and that its negative terminal is
grounded.
2. If the booster battery is in another vehicle, do not allow the vehicles comein contact.
3. Turn off all unnecessary electrical loads.
4. Connect the jumper cables in the exact sequence shown in the illustration.First connect one end of a jumper
cable to the positive terminal of the
discharged battery (1), then connect
the other end to the positive terminal
on the booster battery (2).
5. Proceed to connect one end of the other jumper cable to the negative ter-
minal of the booster battery (3), then
the other end to a solid, stationary,
metallic point (for example, the engine
lifting bracket) away from the battery
(4). Do not connect it to or near any
part that moves when the engine is
cranked.
Do not allow the jumper cables to con-
tact anything except the correct bat-
tery terminals or the correct ground.
Do not lean over the battery when
making connections. 6. Start the engine of the vehicle with the
booster battery and let it run at 2,000
rpm, then start the engine of the vehi-
cle with the discharged battery.
If the cause of your battery discharging is
not apparent, we recommend that the
system be checked by an authorizedHYUNDAI dealer.
CAUTION - Battery cables
Do not connect the jumper cable
from the negative terminal of thebooster battery to the negative ter-
minal of the discharged battery. This can cause the discharged bat-tery to overheat and crack, releas-
ing battery acid.CAUTION -AGM battery (if equipped)
Absorbent Glass Matt (AGM) bat-
teries are maintenance-free andwe recommend that the system
be serviced by an authorizedHYUNDAI dealer. For charging
your AGM battery, use only fullyautomatic battery chargers that
are specially developed for AGM batteries.
When replacing the AGM battery, we recommend that you use partsfor replacement from an author-ized HYUNDAI dealer.
Do not open or remove the cap on top of the battery. This may cause
leaks of internal electrolyte thatcould result in severe injury.
If the AGM battery is reconnected or replaced, ISG function will notoperate immediately.
If you want to use the ISG func-tion, the battery sensor needs tobe calibrated for approximately 4
hours with the ignition off.
procarmanuals.com
Page 389 of 456

Maintenance
50
7
Battery recharging
Your vehicle has a maintenance-free,
calcium-based battery.
If the battery becomes discharged in a
short time (because, for example, the
headlights or interior lights were left on
while the vehicle was not in use),
recharge it by slow charging (trickle)
for 10 hours.
If the battery gradually discharges because of high electric load while the
vehicle is being used, recharge it at 20-
30A for two hours.
WARNING - Recharging
battery
When recharging the battery,
observe the following precautions:
The battery must be removed from the vehicle and placed in an area with good ventilation.
Do not allow cigarettes, sparks, or flame near the battery.
Watch the battery during charg- ing, and stop or reduce the charg-
ing rate if the battery cells begin
gassing (boiling) violently or if
the temperature of the electrolyte
of any cell exceeds 49°C (120°F).
Wear eye protection when check- ing the battery during charging.
Disconnect the battery charger in the following order.
1. Turn off the battery charger main switch.
2. Unhook the negative clamp from the negative battery terminal.
3. Unhook the positive clamp from the positive battery terminal.CAUTION - AGM battery (if equipped)
Absorbent Glass Matt (AGM) bat-
teries are maintenance-free andwe recommend that the system
be serviced by an authorizedHYUNDAI dealer. For chargingyour AGM battery, use only fully
automatic battery chargers that are specially developed for AGM
batteries.
When replacing the AGM battery, we recommend that you use parts
for replacement from an author-ized HYUNDAI dealer.
Do not open or remove the cap on top of the battery. This may causeleaks of internal electrolyte that
could result in severe injury.
If the AGM battery is reconnected or replaced, ISG function will not
operate immediately.
If you want to use the ISG func-tion, the battery sensor needs to
be calibrated for approximately 4hours with the ignition off.
procarmanuals.com
Page 402 of 456
763
Maintenance
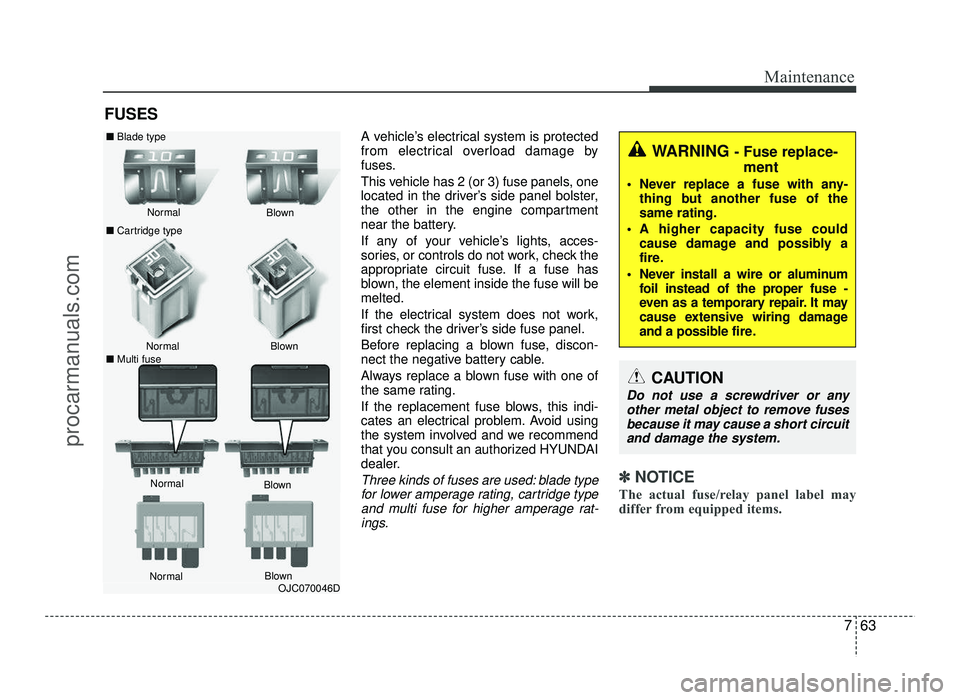
FUSESA vehicle’s electrical system is protected
from electrical overload damage by
fuses.
This vehicle has 2 (or 3) fuse panels, one
located in the driver’s side panel bolster,
the other in the engine compartment
near the battery.
If any of your vehicle’s lights, acces-
sories, or controls do not work, check the
appropriate circuit fuse. If a fuse has
blown, the element inside the fuse will bemelted.
If the electrical system does not work,
first check the driver’s side fuse panel.
Before replacing a blown fuse, discon-
nect the negative battery cable.
Always replace a blown fuse with one of
the same rating.
If the replacement fuse blows, this indi-
cates an electrical problem. Avoid using
the system involved and we recommend
that you consult an authorized HYUNDAI
dealer.
Three kinds of fuses are used: blade typefor lower amperage rating, cartridge type
and multi fuse for higher amperage rat-ings.✽✽ NOTICE
The actual fuse/relay panel label may
differ from equipped items.
WARNING - Fuse replace-
ment
Never replace a fuse with any- thing but another fuse of the same rating.
A higher capacity fuse could cause damage and possibly a
fire.
Never install a wire or aluminum foil instead of the proper fuse -
even as a temporary repair. It may
cause extensive wiring damage
and a possible fire.
CAUTION
Do not use a screwdriver or any
other metal object to remove fusesbecause it may cause a short circuit
and damage the system.
OJC070046D
Normal
Normal
■ Cartridge type
■ Multi fuse Blown
Blown
Normal Blown
■
Blade type
Normal Blown
procarmanuals.com
Page 404 of 456
765
Maintenance
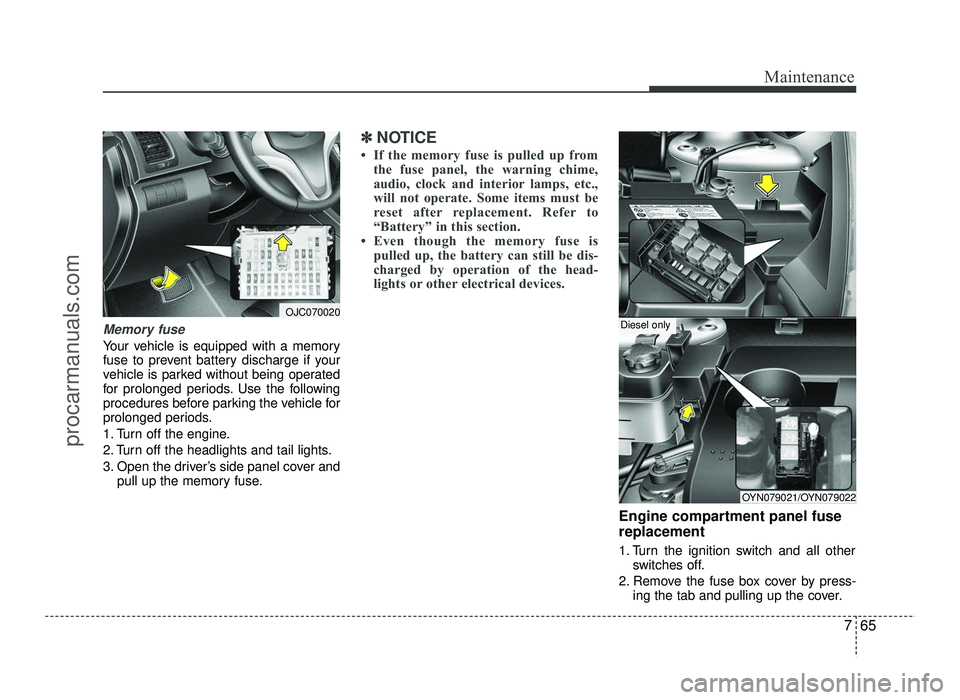
Memory fuse
Your vehicle is equipped with a memory
fuse to prevent battery discharge if your
vehicle is parked without being operated
for prolonged periods. Use the following
procedures before parking the vehicle for
prolonged periods.
1. Turn off the engine.
2. Turn off the headlights and tail lights.
3. Open the driver’s side panel cover andpull up the memory fuse.
✽✽ NOTICE
If the memory fuse is pulled up from the fuse panel, the warning chime,
audio, clock and interior lamps, etc.,
will not operate. Some items must be
reset after replacement. Refer to
“Battery” in this section.
Even though the memory fuse is pulled up, the battery can still be dis-
charged by operation of the head-
lights or other electrical devices.
Engine compartment panel fuse replacement
1. Turn the ignition switch and all other switches off.
2. Remove the fuse box cover by press- ing the tab and pulling up the cover.
OJC070020
OYN079021/OYN079022
Diesel only
procarmanuals.com
Page 447 of 456
Index
2
I
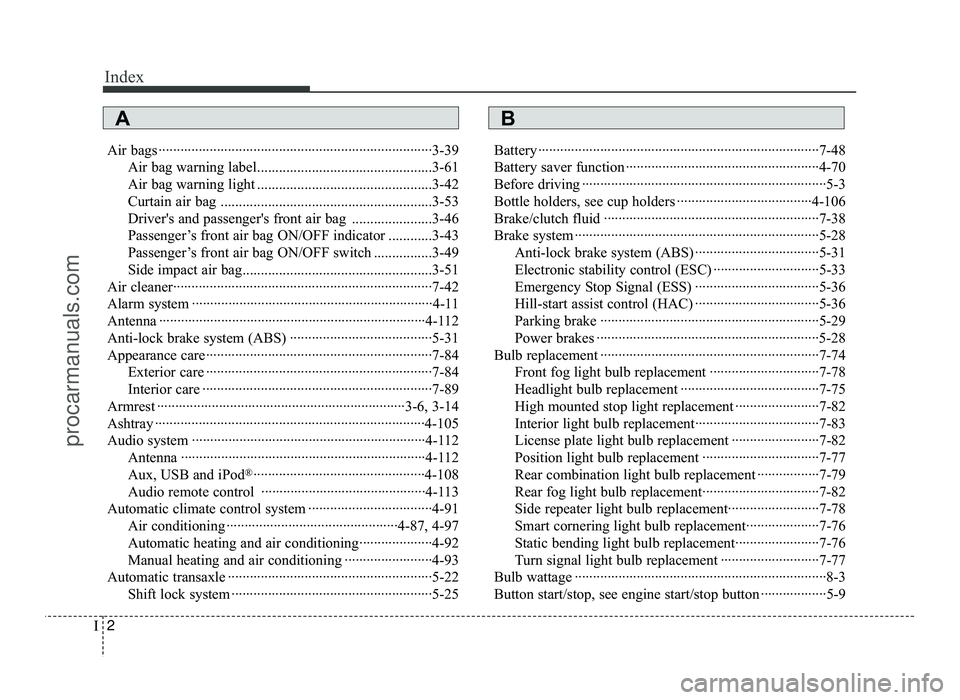
Air bags ···········································································3-39
Air bag warning label................................................3-61
Air bag warning light ................................................3-42
Curtain air bag ..........................................................3-53
Driver's and passenger's front air bag ......................3-46
Passenger’s front air bag ON/OFF indicator ............3-43
Passenger’s front air bag ON/OFF switch ................3-49
Side impact air bag....................................................3-51
Air cleaner·······································································7-42
Alarm system ··································································4-11
Antenna ·········································································4-112
Anti-lock brake system (ABS) ·······································5-31
Appearance care······························································7-84 Exterior care ······························································7-84
Interior care ·······························································7-89
Armrest ····································································3-6, 3-14
Ashtray ··········································································4-105
Audio system ································································4-112 Antenna ···································································4-112
Aux, USB and iPod ®
···············································4-108
Audio remote control ·············································4-113
Automatic climate control system ··································4-91 Air conditioning ···············································4-87, 4-97
Automatic heating and air conditioning····················4-92
Manual heating and air conditioning ························4-93
Automatic transaxle ························································5-22 Shift lock system ·······················································5-25 Battery ·············································································7-48
Battery saver function ·····················································4-70
Before driving ···································································5-3
Bottle holders, see cup holders ·····································4-106
Brake/clutch fluid ···························································7-38
Brake system ···································································5-28
Anti-lock brake system (ABS) ··································5-31
Electronic stability control (ESC) ·····························5-33
Emergency Stop Signal (ESS) ··································5-36
Hill-start assist control (HAC) ··································5-36
Parking brake ····························································5-29
Power brakes ·····························································5-28
Bulb replacement ····························································7-74 Front fog light bulb replacement ······························7-78
Headlight bulb replacement ······································7-75
High mounted stop light replacement ·······················7-82
Interior light bulb replacement··································7-83
License plate light bulb replacement ························7-82
Position light bulb replacement ································7-77
Rear combination light bulb replacement ·················7-79
Rear fog light bulb replacement································7-82
Side repeater light bulb replacement·························7-78
Smart cornering light bulb replacement····················7-76
Static bending light bulb replacement·······················7-76
Turn signal light bulb replacement ···························7-77
Bulb wattage ·····································································8-3
Button start/stop, see engine start/stop button ··················5-9
AB
procarmanuals.com
Page 452 of 456
I7
Index
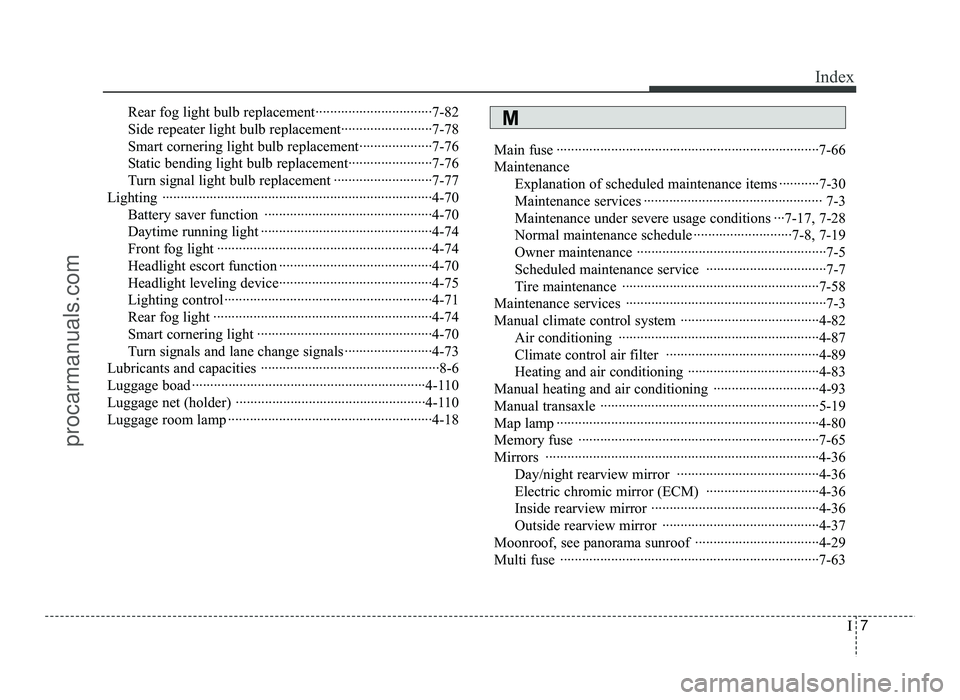
Rear fog light bulb replacement································7-82
Side repeater light bulb replacement·························7-78
Smart cornering light bulb replacement····················7-76
Static bending light bulb replacement·······················7-76
Turn signal light bulb replacement ···························7-77
Lighting ··········································································4-70 Battery saver function ··············································4-70
Daytime running light ···············································4-74
Front fog light ···························································4-74
Headlight escort function ··········································4-70
Headlight leveling device··········································4-75
Lighting control·························································4-71
Rear fog light ····························································4-74
Smart cornering light ················································4-70
Turn signals and lane change signals ························4-73
Lubricants and capacities ·················································8-6
Luggage boad ································································4-110
Luggage net (holder) ····················································4-110
Luggage room lamp ························································4-18 Main fuse ········································································7-66
Maintenance
Explanation of scheduled maintenance items ···········7-30Maintenance services ················································· 7-3
Maintenance under severe usage conditions ···7-17, 7-28 Normal maintenance schedule ···························7-8, 7-19
Owner maintenance ····················································7-5
Scheduled maintenance service ·································7-7
Tire maintenance ······················································7-58
Maintenance services ·······················································7-3
Manual climate control system ······································4-82 Air conditioning ·······················································4-87
Climate control air filter ··········································4-89
Heating and air conditioning ····································4-83
Manual heating and air conditioning ·····························4-93
Manual transaxle ····························································5-19
Map lamp ········································································4-80
Memory fuse ··································································7-65
Mirrors ···········································································4-36 Day/night rearview mirror ·······································4-36
Electric chromic mirror (ECM) ·······························4-36
Inside rearview mirror ··············································4-36
Outside rearview mirror ···········································4-37
Moonroof, see panorama sunroof ··································4-29
Multi fuse ·······································································7-63M
procarmanuals.com