2017 HYUNDAI IX20 mirror
[x] Cancel search: mirrorPage 146 of 456
Features of your vehicle
68
4
REARVIEW CAMERA (IF EQUIPPED)
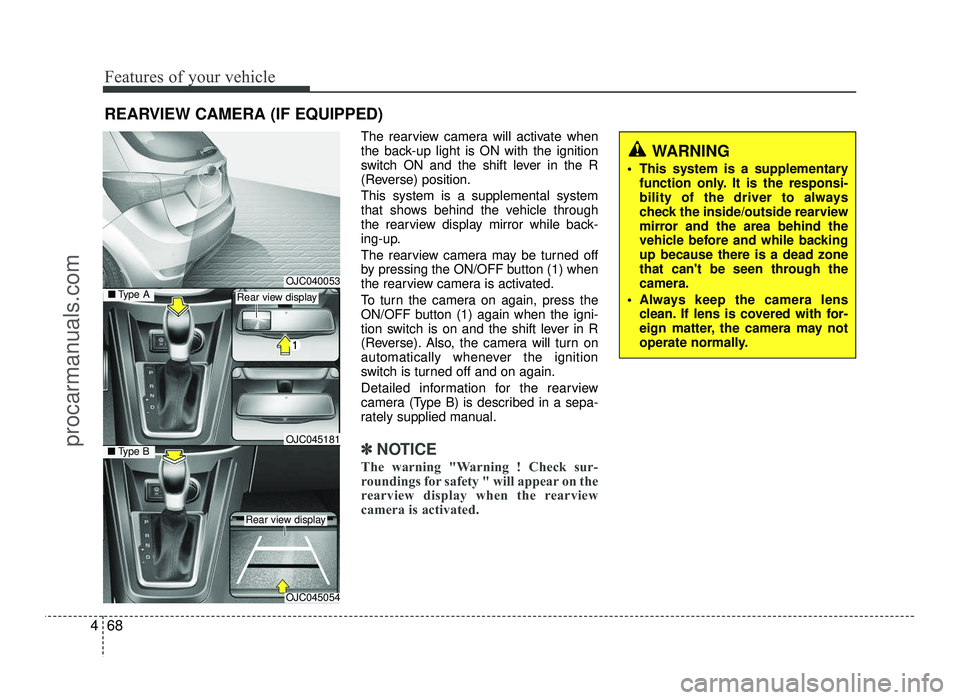
The rearview camera will activate when
the back-up light is ON with the ignition
switch ON and the shift lever in the R
(Reverse) position. This system is a supplemental system
that shows behind the vehicle through
the rearview display mirror while back-
ing-up.
The rearview camera may be turned off
by pressing the ON/OFF button (1) when
the rearview camera is activated.
To turn the camera on again, press the
ON/OFF button (1) again when the igni-
tion switch is on and the shift lever in R
(Reverse). Also, the camera will turn on
automatically whenever the ignition
switch is turned off and on again.
Detailed information for the rearview
camera (Type B) is described in a sepa-
rately supplied manual.
✽✽NOTICE
The warning "Warning ! Check sur-
roundings for safety " will appear on the
rearview display when the rearview
camera is activated.
WARNING
This system is a supplementary function only. It is the responsi-
bility of the driver to always
check the inside/outside rearview
mirror and the area behind the
vehicle before and while backingup because there is a dead zone
that can't be seen through thecamera.
Always keep the camera lens clean. If lens is covered with for-
eign matter, the camera may not
operate normally.
OJC040053
OJC045054
■Type BOJC045181
■Type ARear view display
Rear view display
procarmanuals.com
Page 159 of 456
481
Features of your vehicle
✽✽NOTICE
If you want to defrost and defog the
front windshield, refer to “Windshield
defrosting and defogging” in this sec-
tion.
Rear window defroster
The defroster heats the window to
remove frost, fog and thin ice from the
interior and exterior of the rear window,
while engine is running.
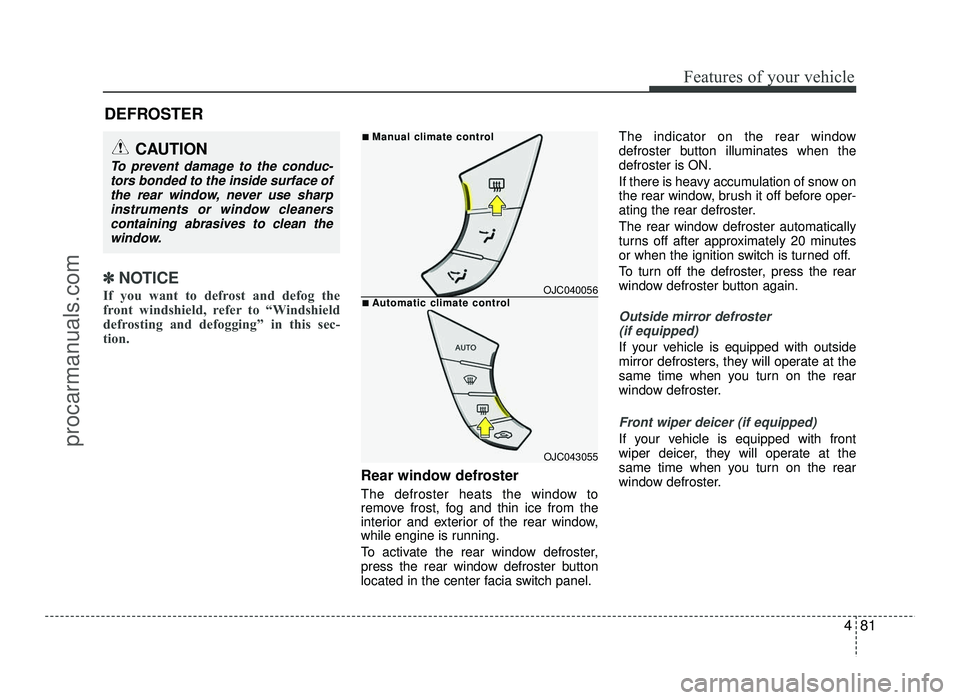
To activate the rear window defroster,
press the rear window defroster button
located in the center facia switch panel. The indicator on the rear window
defroster button illuminates when thedefroster is ON.
If there is heavy accumulation of snow on
the rear window, brush it off before oper-
ating the rear defroster.
The rear window defroster automatically
turns off after approximately 20 minutes
or when the ignition switch is turned off.
To turn off the defroster, press the rear
window defroster button again.
Outside mirror defroster
(if equipped)
If your vehicle is equipped with outside
mirror defrosters, they will operate at the
same time when you turn on the rear
window defroster.
Front wiper deicer (if equipped)
If your vehicle is equipped with front
wiper deicer, they will operate at the
same time when you turn on the rear
window defroster.
DEFROSTER
CAUTION
To prevent damage to the conduc-
tors bonded to the inside surface ofthe rear window, never use sharp
instruments or window cleanerscontaining abrasives to clean thewindow.
OJC040056
OJC043055
■
ManManual cual climate contrlimate controlol
■AAutomatic cutomatic climate contrlimate controlol
procarmanuals.com
Page 178 of 456
Features of your vehicle
100
4
For maximum defrosting, set the tem-
perature control to the extreme
right/hot position and the fan speedcontrol to the highest speed.
If warm air to the floor is desired while defrosting or defogging, set the modeto the floor-defrost position.
Before driving, clear all snow and ice from the windshield, rear window, out-
side rear view mirrors, and all side win-
dows.
Clear all snow and ice from the hood and air inlet in the cowl grill to improveheater and defroster efficiency and to
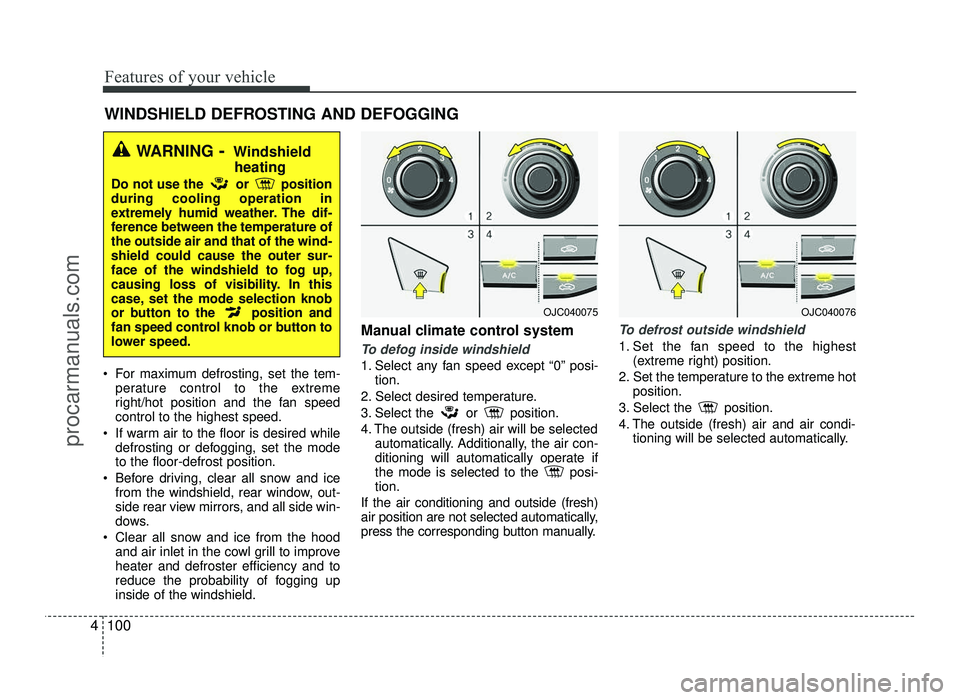
reduce the probability of fogging upinside of the windshield. Manual climate control system
To defog inside windshield
1. Select any fan speed except “0” posi-
tion.
2. Select desired temperature.
3. Select the or position.
4. The outside (fresh) air will be selected automatically. Additionally, the air con-
ditioning will automatically operate if
the mode is selected to the posi-tion.
If the air conditioning and outside (fresh)
air position are not selected automatically,
press the corresponding button manually.
To defrost outside windshield
1. Set the fan speed to the highest (extreme right) position.
2. Set the temperature to the extreme hot position.
3. Select the position.
4. The outside (fresh) air and air condi- tioning will be selected automatically.
WINDSHIELD DEFROSTING AND DEFOGGING
WARNING - Windshield
heating
Do not use the or position during cooling operation in
extremely humid weather. The dif-
ference between the temperature ofthe outside air and that of the wind-shield could cause the outer sur-
face of the windshield to fog up,
causing loss of visibility. In this
case, set the mode selection knob
or button to the position and
fan speed control knob or button to
lower speed.
OJC040075OJC040076
procarmanuals.com
Page 181 of 456
4103
Features of your vehicle
✽✽NOTICE
While using the cooling function, a small
amount of condensed moisture could
damage pieces of paper.
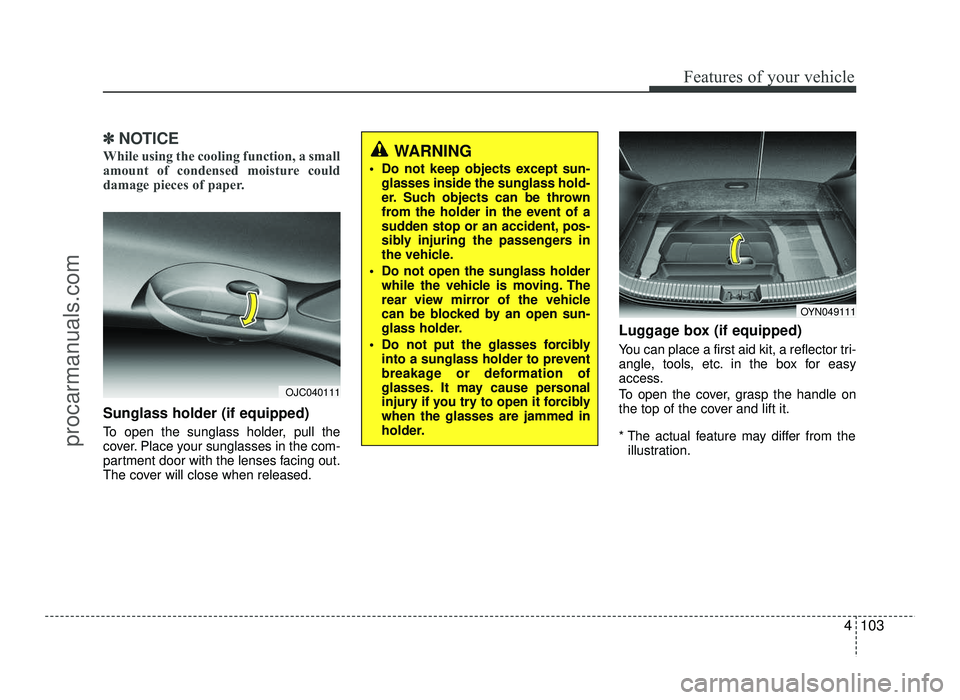
Sunglass holder (if equipped)
To open the sunglass holder, pull the
cover. Place your sunglasses in the com-
partment door with the lenses facing out.
The cover will close when released. Luggage box (if equipped)
You can place a first aid kit, a reflector tri-
angle, tools, etc. in the box for easy
access.
To open the cover, grasp the handle on
the top of the cover and lift it.
* The actual feature may differ from the
illustration.
OJC040111
OYN049111
WARNING
Do not keep objects except sun- glasses inside the sunglass hold-
er. Such objects can be thrown
from the holder in the event of a
sudden stop or an accident, pos-
sibly injuring the passengers in
the vehicle.
Do not open the sunglass holder while the vehicle is moving. The
rear view mirror of the vehicle
can be blocked by an open sun-
glass holder.
Do not put the glasses forcibly into a sunglass holder to prevent
breakage or deformation of
glasses. It may cause personal
injury if you try to open it forciblywhen the glasses are jammed in
holder.
procarmanuals.com
Page 185 of 456
4107
Features of your vehicle
Sunvisor
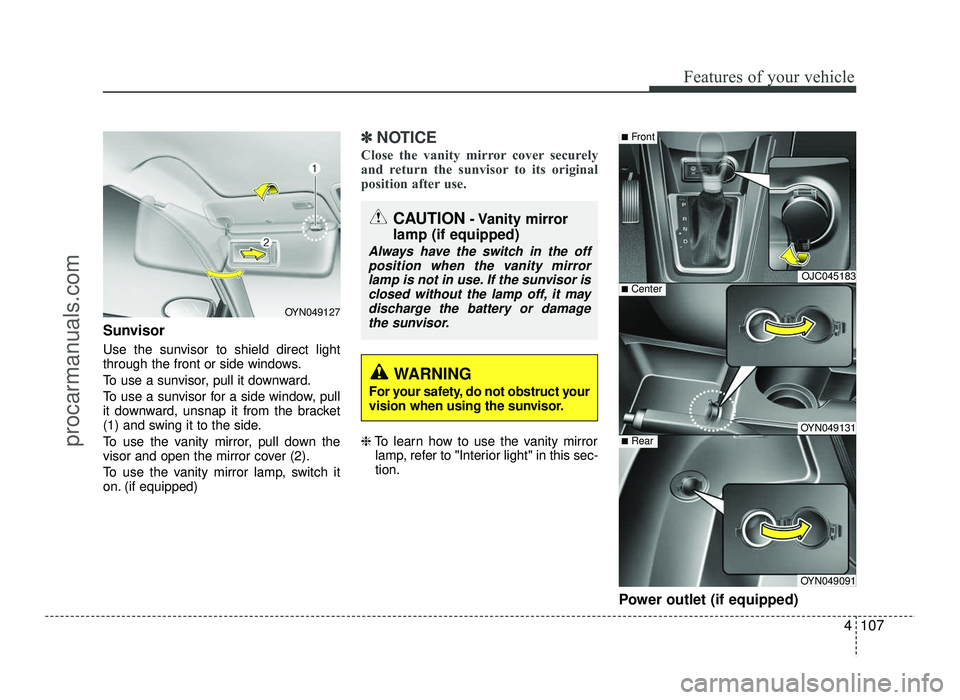
Use the sunvisor to shield direct light
through the front or side windows.
To use a sunvisor, pull it downward.
To use a sunvisor for a side window, pull
it downward, unsnap it from the bracket
(1) and swing it to the side.
To use the vanity mirror, pull down the
visor and open the mirror cover (2).
To use the vanity mirror lamp, switch it
on. (if equipped)
✽✽NOTICE
Close the vanity mirror cover securely
and return the sunvisor to its original
position after use.
❈ To learn how to use the vanity mirror
lamp, refer to "Interior light" in this sec- tion.
Power outlet (if equipped)
CAUTION- Vanity mirror
lamp (if equipped)
Always have the switch in the off position when the vanity mirror lamp is not in use. If the sunvisor is
closed without the lamp off, it may discharge the battery or damagethe sunvisor.
OJC045183
OYN049131
OYN049091
■ Center
■Front
■Rear
OYN049127
WARNING
For your safety, do not obstruct your
vision when using the sunvisor.
procarmanuals.com
Page 234 of 456
Before entering vehicle
• Be sure that all windows, outside mir-ror(s), and outside lights are clean.
Check the condition of the tires.
Check under the vehicle for any sign of leaks.
Be sure there are no obstacles behind you if you intend to back up. Necessary inspections
Fluid levels, such as engine oil, engine
coolant, brake fluid, and washer fluid
should be checked on a regular basis,
with the exact interval depending on the
fluid. Further details are provided in sec-
tion 7, “Maintenance”.
Before starting
Close and lock all doors.
Position the seat so that all controls are
easily reached.
Adjust the inside and outside rearview mirrors.
Be sure that all lights work.
Check all gauges.
Check the operation of warning lights when the ignition switch is turned to the ON position.
Release the parking brake and make sure the brake warning light goes out.
For safe operation, be sure you are famil-
iar with your vehicle and its equipment.
53
Driving your vehicle
BEFORE DRIVING
WARNING
All passengers must be properly
belted whenever the vehicle is mov-
ing. Refer to “Seat belts” in section
3 for more information on their
proper use.
WARNING
Always check the surrounding
areas near your vehicle for people,
especially children, before putting a
car into D (Drive) or R (Reverse).
WARNING
Driving while distracted can result
in a loss of vehicle control, that
may lead to an accident, severe
personal injury, and death. The dri-
ver’s primary responsibility is in
the safe and legal operation of a
vehicle, and use of any handheld
devices, other equipment, or vehi-
cle systems which take the driver’s
eyes, attention and focus away
from the safe operation of a vehicle
or which are not permissible by law
should never be used during oper-
ation of the vehicle.
procarmanuals.com
Page 280 of 456
549
Driving your vehicle
✽✽NOTICE
The ESC system (if equipped) should be
turned OFF prior to rocking the vehicle.
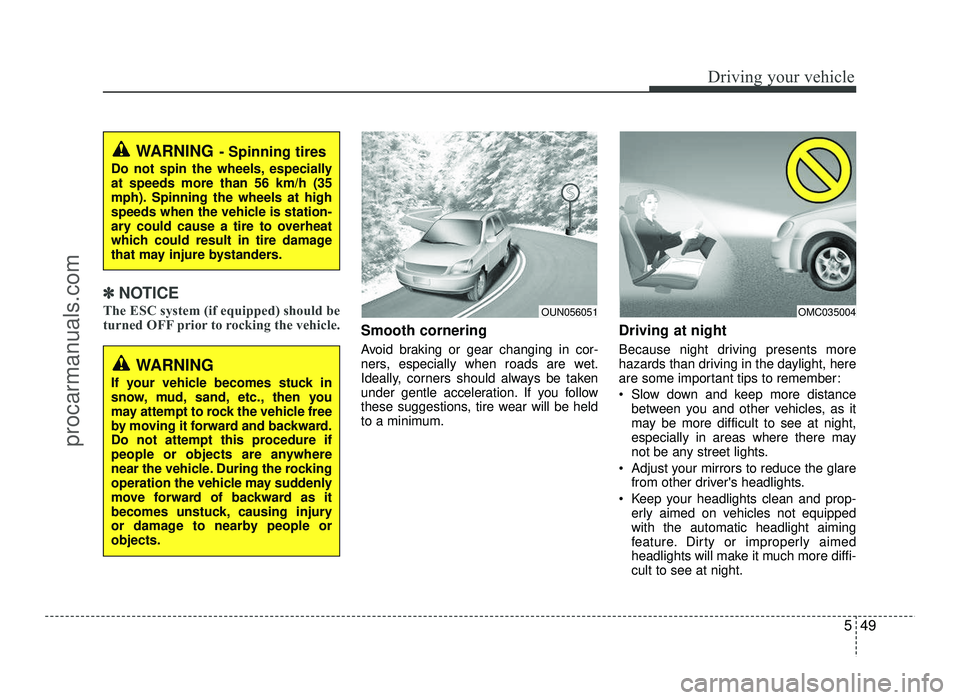
Smooth cornering
Avoid braking or gear changing in cor-
ners, especially when roads are wet.
Ideally, corners should always be taken
under gentle acceleration. If you follow
these suggestions, tire wear will be held
to a minimum. Driving at night
Because night driving presents more
hazards than driving in the daylight, here
are some important tips to remember:
Slow down and keep more distance
between you and other vehicles, as it
may be more difficult to see at night,
especially in areas where there may
not be any street lights.
Adjust your mirrors to reduce the glare from other driver's headlights.
Keep your headlights clean and prop- erly aimed on vehicles not equippedwith the automatic headlight aiming
feature. Dirty or improperly aimed
headlights will make it much more diffi-cult to see at night.
WARNING - Spinning tires
Do not spin the wheels, especially at speeds more than 56 km/h (35
mph). Spinning the wheels at high
speeds when the vehicle is station-
ary could cause a tire to overheat
which could result in tire damage
that may injure bystanders.
WARNING
If your vehicle becomes stuck in
snow, mud, sand, etc., then you
may attempt to rock the vehicle free
by moving it forward and backward.
Do not attempt this procedure if
people or objects are anywhere
near the vehicle. During the rocking
operation the vehicle may suddenly
move forward of backward as it
becomes unstuck, causing injury
or damage to nearby people orobjects.
OUN056051OMC035004
procarmanuals.com
Page 290 of 456
559
Driving your vehicle
Safety chains
You should always attach chains
between your vehicle and your trailer.
Cross the safety chains under the tongue
of the trailer so that the tongue will not
drop to the road if it becomes separatedfrom the hitch.
Instructions about safety chains may be
provided by the hitch manufacturer or by
the trailer manufacturer. Follow the man-
ufacturer’s recommendation for attaching
safety chains. Always leave just enough
slack so you can turn with your trailer.
And, never allow safety chains drag on
the ground.Trailer brakes
If your trailer is equipped with a braking
system, make sure it conforms to your
country’s regulations and that it is prop-
erly installed and operating correctly.
If your trailer weighs more than the max-
imum trailer weight without trailer brakes
loaded, then it needs its own brakes and
they must be adequate. Be sure to read
and follow the instructions for the trailer
brakes so you’ll be able to install, adjust
and maintain them properly.
Don’t tap into your vehicle's brake sys-
tem. Driving with a trailer
Towing a trailer requires a certain
amount of experience. Before setting out
for the open road, you must get to know
your trailer. Acquaint yourself with the
feel of handling and braking with the
added weight of the trailer. And always
keep in mind that the vehicle you are
driving is now a good deal longer and not
nearly so responsive as your vehicle is
by itself.
Before you start, check the trailer hitch
and platform, safety chains, electrical
connector(s), lights, tires and mirror
adjustment. If the trailer has electric
brakes, start your vehicle and trailer mov-
ing and then apply the trailer brake con-
troller by hand to be sure the brakes are
working. This lets you check your electri-
cal connection at the same time.
During your trip, check occasionally to be
sure that the load is secure, and that the
lights and trailer brakes are still working.
WARNING
- Trailer brakes
Do not use a trailer with its own
brakes unless you are absolutely
certain that you have properly set
up the brake system. This is not a
task for amateurs. Use an experi-
enced, competent trailer shop for
this work.
procarmanuals.com