Page 459 of 553
7-38
Maintenance
When you do not use the vehiclefor a long time in a low tempera-
ture area, disconnect the battery
and keep it indoors.
Always charge the battery fully to prevent battery case damage
in low temperature areas.
For best battery service
Keep the battery securely mounted.
Keep the battery top clean and dry.
Keep the terminals and connec-tions clean, tight, and coated with
petroleum jelly or terminal grease.
Rinse any spilled acid from the bat- tery immediately with a solution of
water and baking soda.
Battery capacity label
❈ The actual battery label in the vehicle
may differ from the illustration.
1. AGM60L-DIN : The HYUNDAI model name of battery
2. 12V : The nominal voltage
3. 60Ah(20HR) : The nominal capacity (in Ampere hours)
4. 100RC : The nominal reserve capacity (in min.)
5. 640CCA : The cold-test current in amperes by SAE
6. 512A : The cold-test current in amperes by EN
NOTICE
OAE076016OLMB073072
■
Example
Page 460 of 553

7-39
7
Maintenance
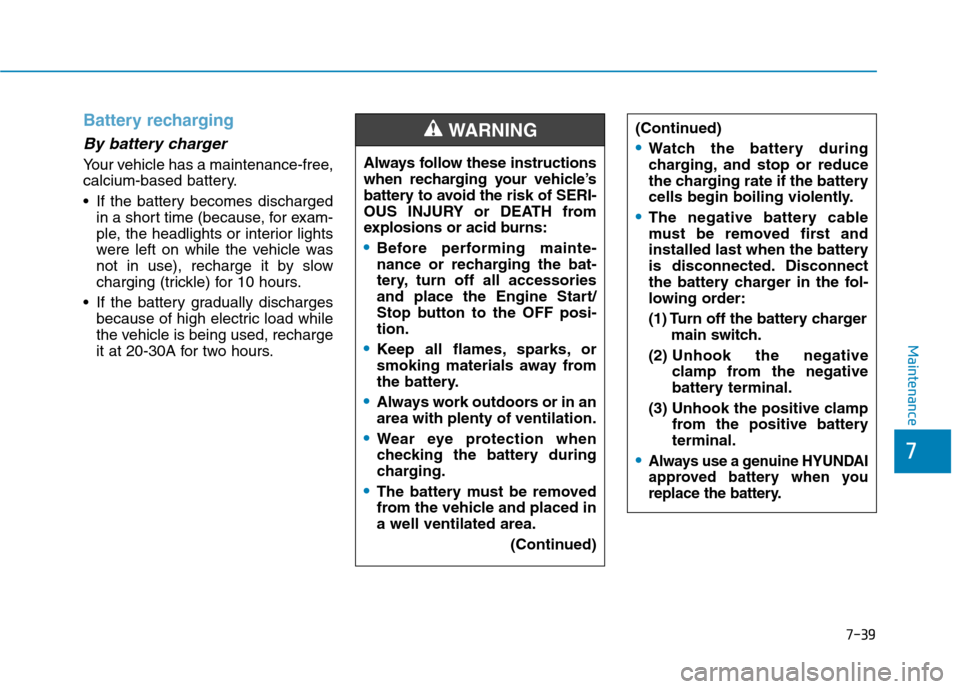
Battery recharging
By battery charger
Your vehicle has a maintenance-free,
calcium-based battery.
If the battery becomes dischargedin a short time (because, for exam-
ple, the headlights or interior lights
were left on while the vehicle was
not in use), recharge it by slow
charging (trickle) for 10 hours.
If the battery gradually discharges because of high electric load while
the vehicle is being used, recharge
it at 20-30A for two hours. Always follow these instructions
when recharging your vehicle’s
battery to avoid the risk of SERI-
OUS INJURY or DEATH from
explosions or acid burns:
Before performing mainte-
nance or recharging the bat-
tery, turn off all accessories
and place the Engine Start/
Stop button to the OFF posi-tion.
Keep all flames, sparks, or
smoking materials away from
the battery.
Always work outdoors or in an area with plenty of ventilation.
Wear eye protection when
checking the battery during
charging.
The battery must be removed
from the vehicle and placed ina well ventilated area.
(Continued)
WARNING (Continued)
Watch the battery during
charging, and stop or reduce
the charging rate if the battery
cells begin boiling violently.
The negative battery cable
must be removed first and
installed last when the battery
is disconnected. Disconnect
the battery charger in the fol-
lowing order:
(1) Turn off the battery chargermain switch.
(2) Unhook the negative
clamp from the negative
battery terminal.
(3) Unhook the positive clamp from the positive batteryterminal.
Always use a genuine HYUNDAI
approved battery when you
replace the battery.
Page 461 of 553
7-40
Maintenance
By jump starting
After a jump start from a good bat-
tery, drive the vehicle for 20-30 min-
utes before it is shutoff. The vehicle
may not restart if you shut it off
before the battery had a chance to
adequately recharge. See “Jump
Starting” in chapter 6 for more infor-
mation on jump starting procedures.Information An inappropriately disposedbattery can be harmful to
the environment and human
health.
Dispose the battery according to your
local law(s) or regulation.
Reset features
Some items need to be reset after
the battery has been discharged or
the battery has been disconnected.
See chapter 3 for:
Power Windows
Trip Computer
Climate Control System
Clock
Audio System
Sunroof
Driver Position Memory System
i
Page 473 of 553

7-52
MaintenanceF
F UU SSEE SS
A vehicle’s electrical system is pro-
tected from electrical overload dam-
age by fuses.
This vehicle has 2 (or 3) fuse panels,
one located in the driver’s side panel
bolster, the other in the engine com-
partment.
If any of your vehicle’s lights, acces-
sories, or controls do not work, check
the appropriate circuit fuse. If a fuse
has blown, the element inside the
fuse will be melted or broken.
If the electrical system does not
work, first check the driver’s side
fuse panel. Before replacing a blown
fuse, turn the engine and all switches
off, and then disconnect the negative
battery cable. Always replace a
blown fuse with one of the same rat-ing.
If the replacement fuse blows, this indi-
cates an electrical problem. Avoid
using the system involved and immedi-
ately consult an authorized HYUNDAI
dealer. Information
Three kinds of fuses are used: blade
type for lower amperage rating, car-
tridge type, and multi fuse for higher
amperage ratings.i
Normal
■
Blade type
■ Cartridge type Blown
Normal Blown
Normal Blown
OLF074075 Do not use a screwdriver or any
other metal object to remove
fuses because it may cause a
short circuit and damage thesystem.
CAUTION
NEVER replace a fuse with any-
thing but another fuse of thesame rating.
A higher capacity fuse could
cause damage and possibly
cause a fire.
Do not install a wire or alu-
minum foil instead of the
proper fuse - even as a tem-
porary repair. It may cause
extensive wiring damage and
possibly a fire.
WARNING
Normal
Blown
■ Multi fuse
Page 476 of 553

7-55
7
Maintenance
4. Check the removed fuse; replace itif it is blown. To remove or insert
the fuse, use the fuse puller in the
engine compartment fuse panel.
5. Push in a new fuse of the same rating, and make sure it fits tightly
in the clips. If it fits loosely, consult
an authorized HYUNDAI dealer.
After checking the fuse panel in
the engine compartment, securely
install the fuse panel cover. You
may hear a clicking sound if the
cover is securely latched. If it is
not securely latched, electrical
failure may occur from water con-tact.Main fuse
The electronic system may not func-
tion correctly even when the fuses
located in the engine compartment
and instrument panel are not discon-
nected. In such case, the cause of
the problem may be disconnection ofthe main fuse (BFT type), which is
located inside the positive battery
terminal (+) cap. Since the main fuse
is designed more intricately than
other parts, we recommend you visit
the nearest HYUNDAI dealer. Information
After inspection always securely
install the battery cap. If it is not
securely latched, electrical failure may
occur from water contact.
Multi fuse
If the multi fuse is blown, it must be
removed as follows:
1. Turn the vehicle off.
2. Disconnect the negative battery cable.
3. Remove the fuse panel cover by pressing the tab and pulling it up.
4. Remove the nuts shown in the pic- ture above.
5. Replace the fuse with a new one of the same rating.
6. Reinstall in the reverse order of removal.
Information
If the multi fuse is blown, consult an
authorized HYUNDAI dealer.
i
i
NOTICE
OAE076021OAE076022
Page 480 of 553
7-59
7
Maintenance
Fuse NameSymbolFuse RatingCircuit Protected
Power WindowLeft-handLH25APower Window (LH) Relay, Power Window Main Switch,
Passenger Power Window Switch (RHD), Rear Power Window Switch (LH),
Driver Safety Power Window Module (RHD), Passenger Power Window Switch (LHD)
Button Start 227.5AImmobilizer Module, Smart Key Control Module, Start/Stop Button Switch
Brake SwitchBRAKE
S WITCH7.5AStop Lamp Switch, Smart Key Control Module
Air conditioner7.5AIonizer, A/C Control Module, Electronic A/C Compressor, E/R Junction Block
Washer15AMultifunction Switch
Seat Heater RearRR25ARear Seat Warmer Module
Battery
Management SystemBATTERYMANAG-EMENT10ABMS Control Module
Power Seat DriverDRV30ADriver Seat Manual Switch
AMPAMP30AAMP
AMSAM S30ABattery Sensor
Module 1MODULE110ADriver Power Outside Mirror, Passenger Power Outside Mirror
Door Lock20ADoor Lock/Unlock Relay, ICM Relay Box (Dead Lock Relay)
Instrument panel fuse panel
Page 486 of 553
7-65
7
Maintenance
TypeSymbolFuse RatingCircuit Protected
Fuse
S310AFuel Pump Relay, Camshaft Position Sensor #1 (Intake), Camshaft Position Sensor #2
(Exhaust), Oil Control Valve #1 (Intake), Oil Control Valve #2 (Exhaust)
BATTERYC/FAN15AEngine Room Junction Block
FUEL
PUMP20AFuel Pump Relay
20AHorn Relay
Engine compartment fuse panel
Page 489 of 553

7-68
Maintenance
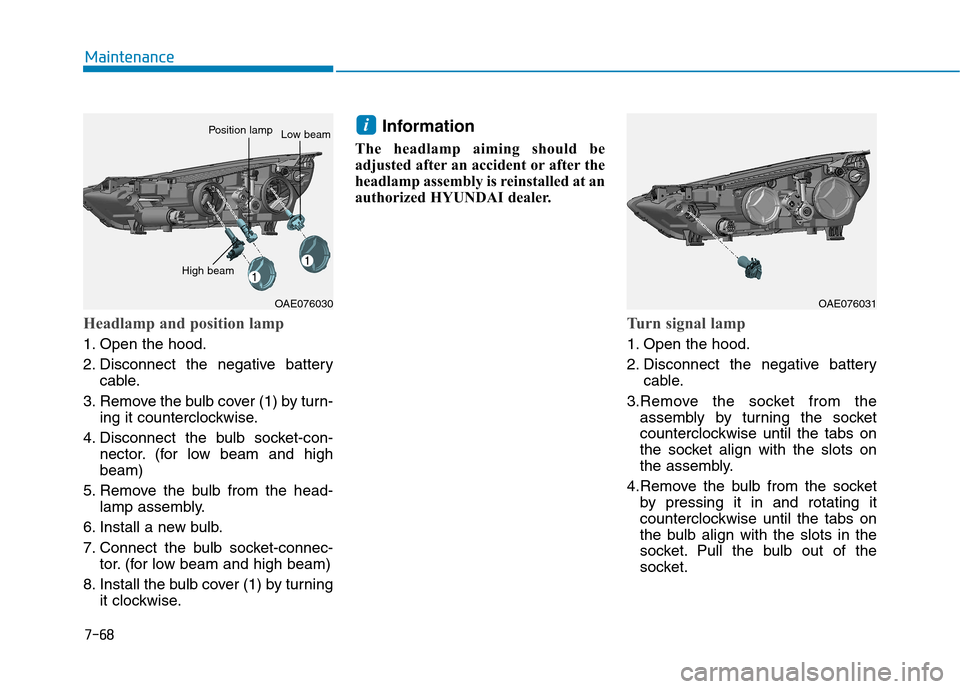
Headlamp and position lamp
1. Open the hood.
2. Disconnect the negative batterycable.
3. Remove the bulb cover (1) by turn- ing it counterclockwise.
4. Disconnect the bulb socket-con- nector. (for low beam and high beam)
5. Remove the bulb from the head- lamp assembly.
6. Install a new bulb.
7. Connect the bulb socket-connec- tor. (for low beam and high beam)
8. Install the bulb cover (1) by turning it clockwise. Information
The headlamp aiming should be
adjusted after an accident or after the
headlamp assembly is reinstalled at an
authorized HYUNDAI dealer.
Turn signal lamp
1. Open the hood.
2. Disconnect the negative battery cable.
3.Remove the socket from the assembly by turning the socket
counterclockwise until the tabs on
the socket align with the slots on
the assembly.
4.Remove the bulb from the socket by pressing it in and rotating it
counterclockwise until the tabs on
the bulb align with the slots in the
socket. Pull the bulb out of the
socket.
i
OAE076030
High beam
Position lampLow beam
OAE076031