Page 219 of 582
3-50
Convenient features of your vehicle
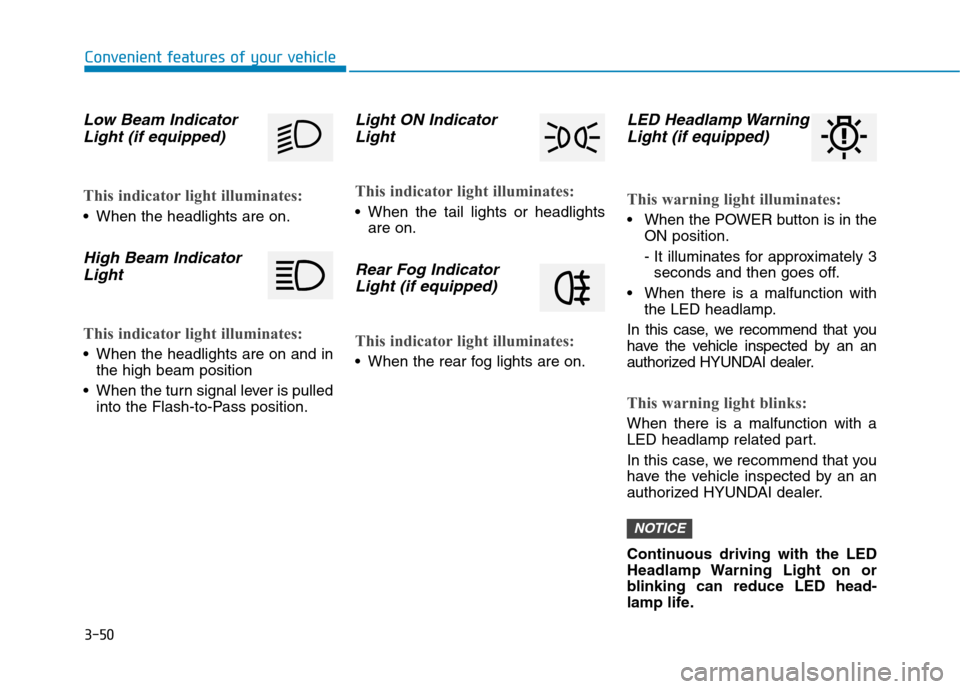
Low Beam IndicatorLight (if equipped)
This indicator light illuminates:
When the headlights are on.
High Beam Indicator
Light
This indicator light illuminates:
When the headlights are on and in the high beam position
When the turn signal lever is pulled into the Flash-to-Pass position.
Light ON Indicator
Light
This indicator light illuminates:
When the tail lights or headlights are on.
Rear Fog Indicator
Light (if equipped)
This indicator light illuminates:
When the rear fog lights are on.
LED Headlamp WarningLight (if equipped)
This warning light illuminates:
When the POWER button is in the ON position.
- It illuminates for approximately 3seconds and then goes off.
When there is a malfunction with the LED headlamp.
In this case, we recommend that you
have the vehicle inspected by an an
authorized HYUNDAI dealer.
This warning light blinks:
When there is a malfunction with a
LED headlamp related part.
In this case, we recommend that you
have the vehicle inspected by an an
authorized HYUNDAI dealer.
Continuous driving with the LED
Headlamp Warning Light on or
blinking can reduce LED head-
lamp life.
NOTICE
Page 247 of 582
3-78
Convenient features of your vehicle
Position lamp position ( )
The position lamp, license plate lamp
and instrument panel lamp are turnedON.
Headlamp position ( )
The headlamp, position lamp, license
plate lamp and instrument panel
lamp are turned ON.
Information
The POWER button must be in the
ON position to turn on the headlamp.
High beam operation
To turn on the high beam headlamp,
push the lever away from you. The
lever will return to its original position. The high beam indicator will light when the headlamp high beams are
switched on.
i
OAE046468L
OAE046469L
■ Type A
■Type BOAE046466L
OAE046467L
■Type A
■Type BOAE046452L
OAE046453L
■Type A
■Type B
Page 248 of 582
3-79
Convenient features of your vehicle
3
To turn off the high beam headlamp,
pull the lever towards you. The low
beams will turn on.To flash the high beam headlamp,
pull the lever towards you, then
release the lever. The high beams
will remain ON as long as you hold
the lever towards you.Turn signals and lane changesignals
To signal a turn, push down on the
lever for a left turn or up for a right
turn in position (A). To signal a lane
change, move the turn signal leverslightly and hold it in position (B).
Do not use high beam when there
are other vehicles approaching
you. Using high beam couldobstruct the other driver's vision.
WARNING
OAE046454L
OAE046455L
■
Type A
■Type B
OAE046456L
OAE046457L
■
Type A
■ Type B
Page 251 of 582
3-82
Convenient features of your vehicle
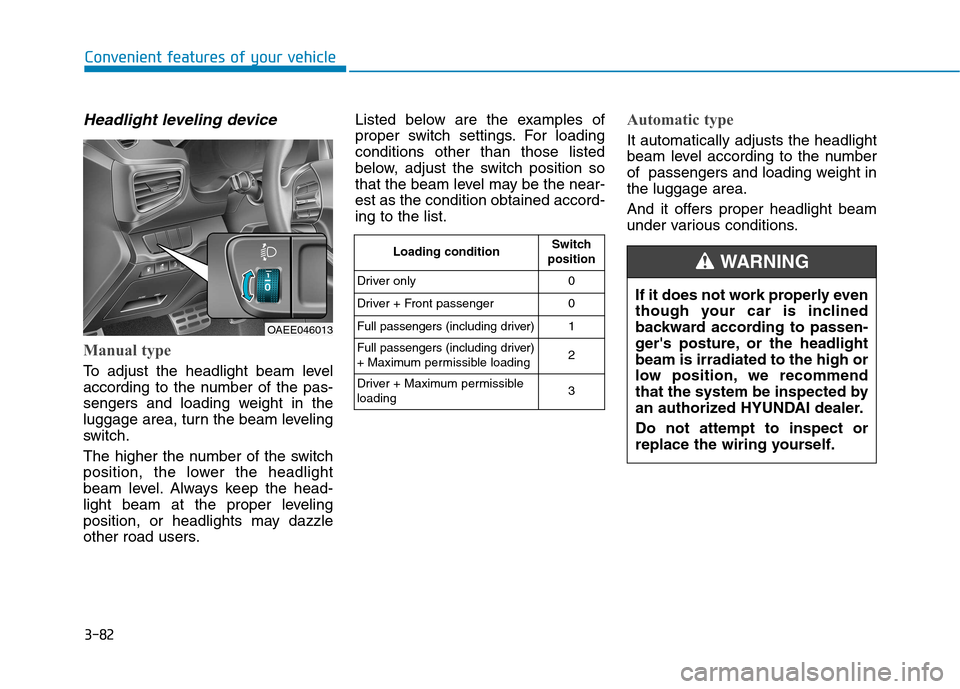
Headlight leveling device
Manual type
To adjust the headlight beam level
according to the number of the pas-
sengers and loading weight in the
luggage area, turn the beam leveling
switch.
The higher the number of the switch
position, the lower the headlight
beam level. Always keep the head-
light beam at the proper leveling
position, or headlights may dazzle
other road users.Listed below are the examples of
proper switch settings. For loadingconditions other than those listed
below, adjust the switch position so
that the beam level may be the near-est as the condition obtained accord-ing to the list.
Automatic type
It automatically adjusts the headlight
beam level according to the number
of passengers and loading weight inthe luggage area.
And it offers proper headlight beam
under various conditions.
OAEE046013
Loading condition
Switch
position
Driver only 0
Driver + Front passenger 0
Full passengers (including driver) 1
Full passengers (including driver)
+ Maximum permissible loading 2
Driver + Maximum permissibleloading 3
If it does not work properly even
though your car is inclined
backward according to passen-
ger's posture, or the headlightbeam is irradiated to the high or
low position, we recommend
that the system be inspected by
an authorized HYUNDAI dealer. Do not attempt to inspect or
replace the wiring yourself.
WARNING
Page 253 of 582
3-84
Convenient features of your vehicle
Interior lights
Do not use the interior lights for
extended periods when the vehi-
cle is turned off or the battery will
discharge.
Interior lamp AUTO cut
The interior lamps will automatically
go off approximately 20 minutes after
the vehicle is turned off and the
doors closed. If a door is opened, the
lamp will go off 40 minutes after the
vehicle is turned off. If the doors are
locked by the smart key and the vehi-
cle enters the armed stage of the
theft alarm system, the lamps will go
off five seconds later.
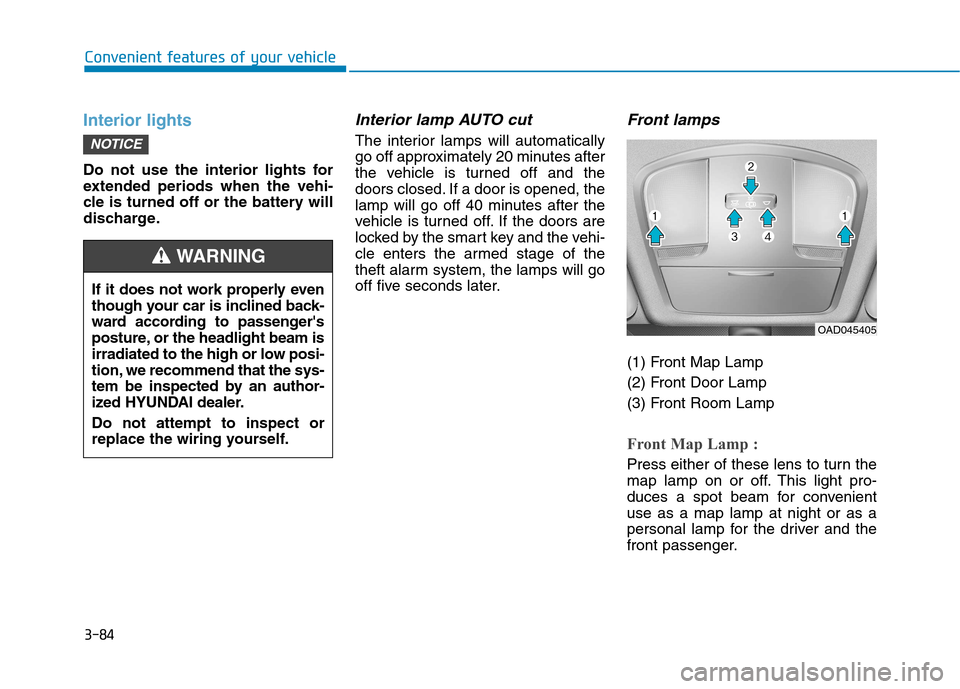
Front lamps
(1) Front Map Lamp
(2) Front Door Lamp
(3) Front Room Lamp
Front Map Lamp :
Press either of these lens to turn the
map lamp on or off. This light pro-
duces a spot beam for convenientuse as a map lamp at night or as a
personal lamp for the driver and the
front passenger.
NOTICE
If it does not work properly even
though your car is inclined back-
ward according to passenger's
posture, or the headlight beam is
irradiated to the high or low posi-
tion, we recommend that the sys-
tem be inspected by an author-
ized HYUNDAI dealer. Do not attempt to inspect or
replace the wiring yourself.
WARNING
OAD045405
Page 524 of 582
7-58
Maintenance
Headlamp, position lamp,
turn signal lamp bulb replace-ment
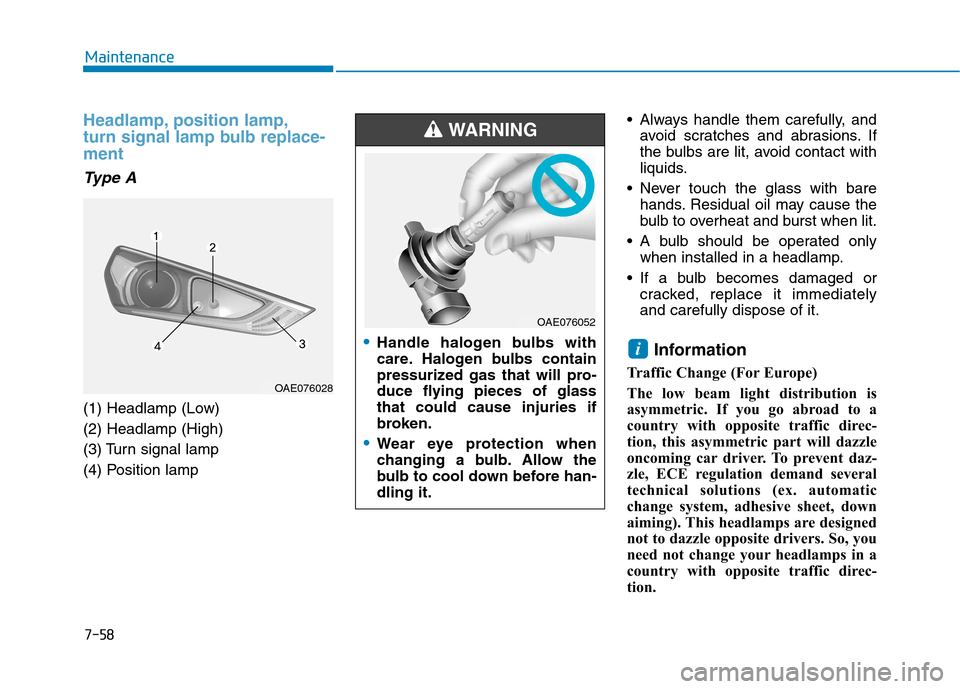
Type A
(1) Headlamp (Low) (2) Headlamp (High)
(3) Turn signal lamp
(4) Position lamp Always handle them carefully, and
avoid scratches and abrasions. If
the bulbs are lit, avoid contact with
liquids.
Never touch the glass with bare hands. Residual oil may cause the
bulb to overheat and burst when lit.
A bulb should be operated only when installed in a headlamp.
If a bulb becomes damaged or cracked, replace it immediatelyand carefully dispose of it.
Information
Traffic Change (For Europe)
The low beam light distribution is
asymmetric. If you go abroad to a
country with opposite traffic direc-
tion, this asymmetric part will dazzle
oncoming car driver. To prevent daz-
zle, ECE regulation demand several
technical solutions (ex. automatic
change system, adhesive sheet, down
aiming). This headlamps are designed
not to dazzle opposite drivers. So, you
need not change your headlamps in a
country with opposite traffic direc-
tion.
i
OAE076028
Handle halogen bulbs with
care. Halogen bulbs contain
pressurized gas that will pro-
duce flying pieces of glassthat could cause injuries if
broken.
Wear eye protection when
changing a bulb. Allow the
bulb to cool down before han-dling it.
WARNING
OAE076052
Page 525 of 582
7-59
7
Maintenance
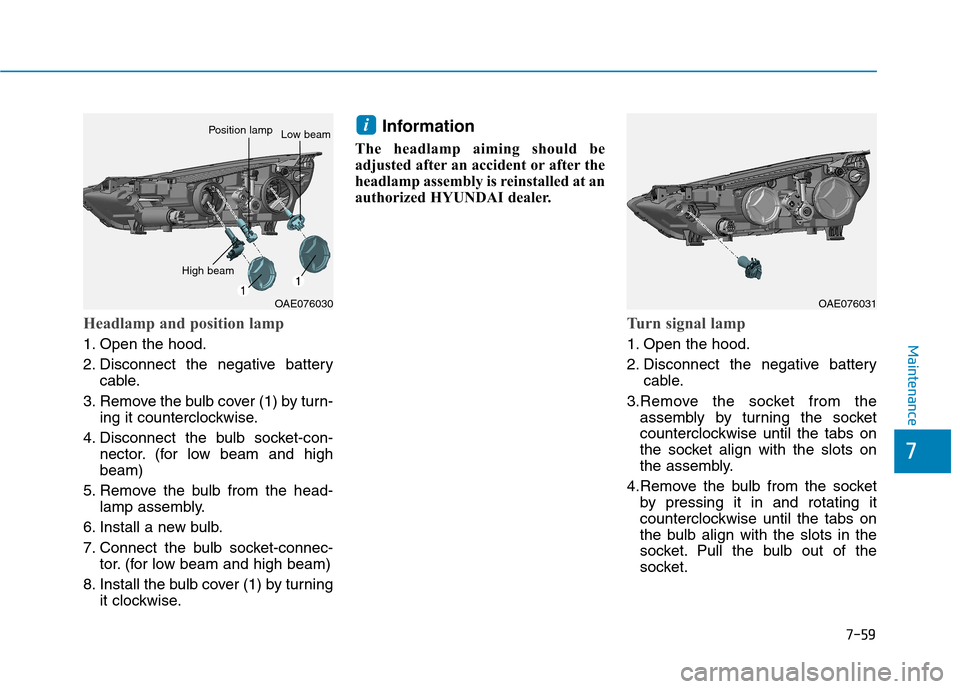
Headlamp and position lamp
1. Open the hood.
2. Disconnect the negative batterycable.
3. Remove the bulb cover (1) by turn- ing it counterclockwise.
4. Disconnect the bulb socket-con- nector. (for low beam and high beam)
5. Remove the bulb from the head- lamp assembly.
6. Install a new bulb.
7. Connect the bulb socket-connec- tor. (for low beam and high beam)
8. Install the bulb cover (1) by turning it clockwise. Information
The headlamp aiming should be
adjusted after an accident or after the
headlamp assembly is reinstalled at an
authorized HYUNDAI dealer.
Turn signal lamp
1. Open the hood.
2. Disconnect the negative battery cable.
3.Remove the socket from the assembly by turning the socket
counterclockwise until the tabs on
the socket align with the slots on
the assembly.
4.Remove the bulb from the socket by pressing it in and rotating it
counterclockwise until the tabs on
the bulb align with the slots in the
socket. Pull the bulb out of the
socket.
i
OAE076030
High beam
Position lampLow beam
OAE076031
Page 528 of 582
7-62
Maintenance
Headlamp aiming (For Europe)
Headlamp aiming
1. Inflate the tires to the specifiedpressure and remove any loads
from the vehicle except the driver,
spare tire, and tools.
2. The vehicle should be placed on a flat floor.
3. Draw vertical lines (Vertical lines passing through respective head
lamp centers) and a horizontal line
(Horizontal line passing throughcenter of head lamps) on thescreen. 4. With the headlamp and battery in
normal condition, aim the head-
lamps so the brightest portion falls
on the horizontal and vertical
lines.
5. To aim the low beam left or right, turn the driver clockwise or coun-
terclockwise. To aim the low beam
up or down, turn the driver clock-
wise or counterclockwise.
To aim the high beam up or down,turn the driver clockwise or coun-
terclockwise.
A B
B
A
OAE076056L/OAEE076049L
■ Without headlight leveling device
OAE076057L/OAEE076050L
■With headlight leveling device