Page 574 of 659

7-61
7
Maintenance
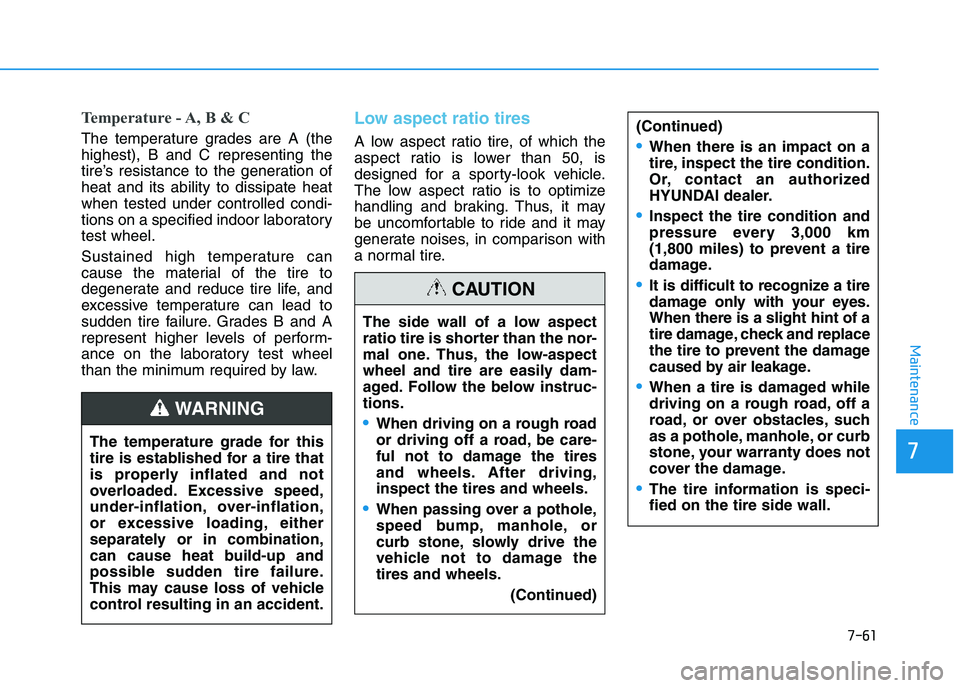
Temperature - A, B & C
The temperature grades are A (the
highest), B and C representing the
tire’s resistance to the generation of
heat and its ability to dissipate heat
when tested under controlled condi-
tions on a specified indoor laboratory
test wheel.
Sustained high temperature can
cause the material of the tire to
degenerate and reduce tire life, and
excessive temperature can lead to
sudden tire failure. Grades B and A
represent higher levels of perform-
ance on the laboratory test wheel
than the minimum required by law.
Low aspect ratio tires
A low aspect ratio tire, of which the
aspect ratio is lower than 50, is
designed for a sporty-look vehicle.
The low aspect ratio is to optimize
handling and braking. Thus, it may
be uncomfortable to ride and it may
generate noises, in comparison with
a normal tire.
The temperature grade for this
tire is established for a tire that
is properly inflated and not
overloaded. Excessive speed,
under-inflation, over-inflation,
or excessive loading, either
separately or in combination,
can cause heat build-up and
possible sudden tire failure.
This may cause loss of vehicle
control resulting in an accident.
WARNING
The side wall of a low aspect
ratio tire is shorter than the nor-
mal one. Thus, the low-aspect
wheel and tire are easily dam-
aged. Follow the below instruc-
tions.
When driving on a rough road
or driving off a road, be care-
ful not to damage the tires
and wheels. After driving,
inspect the tires and wheels.
When passing over a pothole,
speed bump, manhole, or
curb stone, slowly drive the
vehicle not to damage the
tires and wheels. (Continued)
CAUTION
(Continued)
When there is an impact on a
tire, inspect the tire condition.
Or, contact an authorized
HYUNDAI dealer.
Inspect the tire condition and
pressure every 3,000 km
(1,800 miles) to prevent a tire
damage.
It is difficult to recognize a tire
damage only with your eyes.
When there is a slight hint of a
tire damage, check and replace
the tire to prevent the damage
caused by air leakage.
When a tire is damaged while
driving on a rough road, off a
road, or over obstacles, such
as a pothole, manhole, or curb
stone, your warranty does not
cover the damage.
The tire information is speci-
fied on the tire side wall.
Page 575 of 659

7-62
Maintenance
F
F U
U S
S E
E S
S
A vehicle’s electrical system is pro-
tected from electrical overload dam-
age by fuses.
This vehicle has 2 (or 3) fuse panels,
one located in the driver’s side panel
bolster, the other in the engine com-
partment.
If any of your vehicle’s lights, acces-
sories, or controls do not work, check
the appropriate circuit fuse. If a fuse
has blown, the element inside the
fuse will be melted or broken.
If the electrical system does not
work, first check the driver’s side
fuse panel. Before replacing a blown
fuse, turn the engine and all switches
off, and then disconnect the negative
battery cable. Always replace a
blown fuse with one of the same rat-
ing.
If the replacement fuse blows, this indi-
cates an electrical problem. Avoid
using the system involved and immedi-
ately consult an authorized HYUNDAI
dealer.Information
Three kinds of fuses are used: blade
type for lower amperage rating, car-
tridge type, and multi fuse for higher
amperage ratings.
Do not use a screwdriver or any
other metal object to remove
fuses because it may cause a
short circuit and damage the sys-
tem.
NOTICE
i
Normal
■
Blade type
■ Cartridge type Blown
Normal Blown
Normal Blown
OLF074075
NEVER replace a fuse with any-
thing but another fuse of the
same rating.
A higher capacity fuse could
cause damage and possibly
cause a fire.
Do not install a wire or alu-
minum foil instead of the
proper fuse - even as a tem-
porary repair. It may cause
extensive wiring damage and
possibly a fire.
WARNING
Normal Blown
■ Multi fuse
Page 576 of 659

7-63
7
Maintenance
Instrument panel fuse replace-
ment
1. Turn the vehicle off.
2. Turn all other switches OFF.
3. Open the fuse panel cover.
4. Refer to the label on the inside ofthe fuse panel cover to locate the
suspected fuse location. 5. Pull the suspected fuse straight
out. Use the removal tool provided
in the engine compartment fuses
panel.
6. Check the removed fuse; replace it if it is blown. Spare fuses are pro-
vided in the instrument panel fuse
panels (or in the engine compart-
ment fuse panel).
7. Push in a new fuse of the same rating, and make sure it fits tightly
in the clips. If it fits loosely, consult
an authorized HYUNDAI dealer. In an emergency, if you do not have
a spare fuse, use a fuse of the same
rating from a circuit you may not
need for operating the vehicle, such
as the cigarette lighter fuse.
If the headlamps or other electrical
components do not work and the
fuses are OK, check the fuse panel
in the engine compartment. If a fuse
is blown, it must be replaced with the
same rating.
OPD076034
OPD076035
Page 581 of 659

7-68
Maintenance
Driver's side fuse Panel
Fuse No.Fuse NameSymbolFuse RatingCircuit Protected
F13INTERIORLAMP7.5AWireless Charger, Vanity Lamp LH/RH, Room Lamp, Overhead Console Lamp,
Personal Lamp LH/RH, Rain Sensor, Ignition Key Ill. & Door Warning Switch,
Glove Box Lamp, Luggage Lamp
F14MEMORY 2MEMORY27.5AMTS E-Call Module
F16MEMORY 1MEMORY110ADriver/Passenger Door Module, Driver IMS Module, BCM, A/C Control Module,
Instrument Cluster, Auto Light & Photo Sensor,
ICM Relay Box (Outside Mirror Folding/Unfolding Relay)
F19MODULE 6 MODULE67.5ASmart Key Control Module, BCM
F20MDPS17.5AMDPS Unit
F21MODULE 1MODULE17.5AHazard Switch, Center Door Lock Switch, Active Air Flap Unit,
Driver/Passenger Door Module, Driver/Passenger Power Outside Mirror,
Driver/Passenger Smart Key Outside Handle, Data Link Connector
F22MODULE 7MODULE77.5AFront Seat Warmer Control Module, Front Air Ventilation Seat Control Module, Nozzle
Heater
F23AIRBAG
INDICATORIND7.5AInstrument Cluster, Center Door Lock Switch
F24BRAKE
SWITCHBRAKE
S WITCH7.5ASmart Key Control Module, Stop Lamp Switch
F25START7.5AWithout Smart Key : ICM Relay Box (Burglar Alarm Relay),
With Smart Key : Transaxle Range Switch, Smart Key Control Module, ECM/PCM,
Engine Room Junction Block (RLY.4)"
F26CLUSTERCLUSTER7.5AInstrument Cluster
Page 598 of 659

7-85
7
Maintenance
L
L I
I G
G H
H T
T
B
B U
U L
L B
B S
S
Consult an authorized HYUNDAI
dealer to replace most vehicle light
bulbs. It is difficult to replace vehicle
light bulbs because other parts of the
vehicle must be removed before you
can get to the bulb. This is especially
true for removing the headlamp
assembly to get to the bulb(s).
Removing/installing the headlamp
assembly can result in damage to
the vehicle. Be sure to replace the burned-out
bulb with one of the same wattage
rating. Otherwise, it may cause
damage to the fuse or electric
wiring system.
Information
After heavy driving, rain or washing,
headlamp and tail lamp lenses could
appear frosty. This condition is caused
by the temperature difference between
the lamp inside and outside. This is
similar to the condensation on your
windows inside your vehicle during the
rain and doesn’t indicate a problem
with your vehicle. If the water leaks
into the lamp bulb circuitry, we rec-
ommend that the system be checked
by an authorized HYUNDAI dealer.
Information
The headlamp aiming should be adjust-
ed after an accident or after the head-
lamp assembly is reinstalled at an
authorized HYUNDAI dealer.
Information - Traffic Change
(for Europe)
The low beam light distribution is
asymmetric. If you go abroad to a coun-
try with opposite traffic direction, this
asymmetric part will dazzle oncoming
car driver. To prevent dazzle, ECE reg-
ulation demand several technical solu-
tions (ex. automatic change system,
adhesive sheet, down aiming). These
headlamps are designed not to dazzle
opposite drivers. So, you need not
change your headlamps in a country
with opposite traffic direction.i
i
i
NOTICE
Prior to working on the light,
firmly apply the parking brake,
ensure that the ignition switch is
in the LOCK/OFF position and
turn off the lights to avoid sud-
den movement of the vehicle and
burning your fingers or receiving
an electric shock.
WARNING
Page 599 of 659
7-86
Maintenance
Headlamp, static bending lamp,
position lamp, turn signal lamp
and daytime running light bulb
replacement
Ty p e A
(1) Headlamp (High)/Position lamp
(2) Headlamp (Low)
(3) Turn signal lamp
(4) Daytime running light (if equipped) Always handle them carefully, and
avoid scratches and abrasions. If
the bulbs are lit, avoid contact with
liquids.
Never touch the glass with bare hands. Residual oil may cause the
bulb to overheat and burst when lit.
A bulb should be operated only when installed in a headlamp.
If a bulb becomes damaged or cracked, replace it immediately
and carefully dispose of it.
OPDE076092
Handle halogen bulbs with
care. Halogen bulbs contain
pressurized gas that will pro-
duce flying pieces of glass that
could cause injuries if broken.
Wear eye protection when
changing a bulb. Allow the bulb
to cool down before handling it.
WARNING
OLMB073042L
Page 601 of 659

7-88
Maintenance
5.Insert a new bulb by inserting it into the socket and rotating it until it
locks into place.
6.Install the socket in the assembly by aligning the tabs on the socket
with the slots in the assembly.
7.Push the socket into the assembly and turn the socket clockwise.
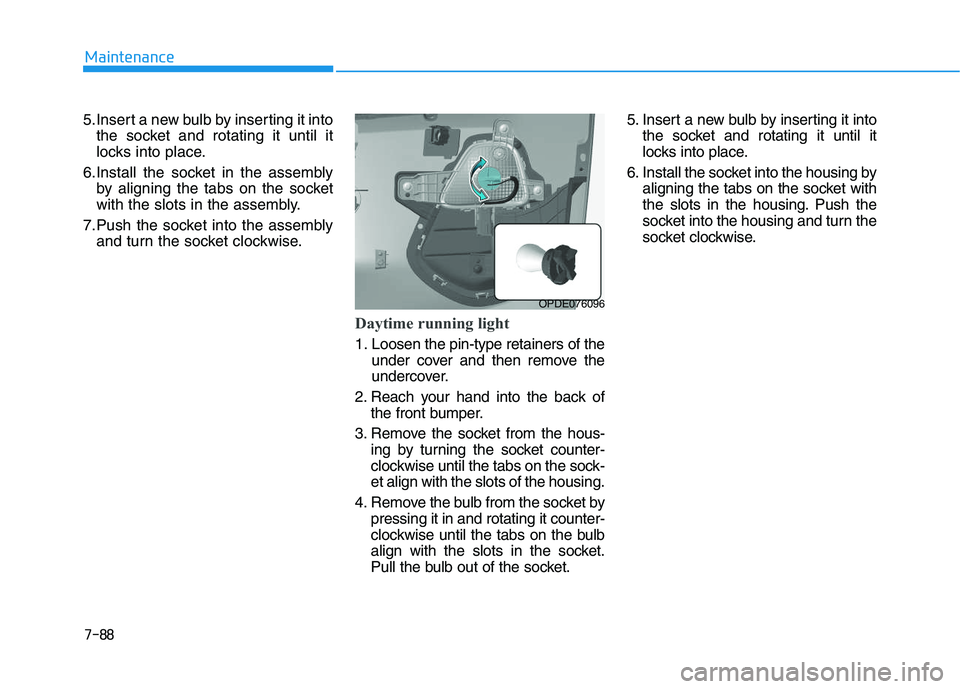
Daytime running light
1. Loosen the pin-type retainers of the under cover and then remove the
undercover.
2. Reach your hand into the back of the front bumper.
3. Remove the socket from the hous- ing by turning the socket counter-
clockwise until the tabs on the sock-
et align with the slots of the housing.
4. Remove the bulb from the socket by pressing it in and rotating it counter-
clockwise until the tabs on the bulb
align with the slots in the socket.
Pull the bulb out of the socket. 5. Insert a new bulb by inserting it into
the socket and rotating it until it
locks into place.
6. Install the socket into the housing by aligning the tabs on the socket with
the slots in the housing. Push the
socket into the housing and turn the
socket clockwise.
OPDE076096
Page 602 of 659
7-89
7
Maintenance
Type B
(1) Headlamp (High)
(2) Headlamp (Low)
(3) Turn signal lamp
(4) Position lamp & Daytime running light
(5) Static bending light
• Always handle them carefully, andavoid scratches and abrasions. If
the bulbs are lit, avoid contact with
liquids.
Never touch the glass with bare hands. Residual oil may cause the
bulb to overheat and burst when lit. A bulb should be operated only
when installed in a headlamp.
If a bulb becomes damaged or cracked, replace it immediately
and carefully dispose of it.
Headlamp lamp and static bending
light
1. Open the hood.
OPDE076076
■
High/Low beam
High
Low
OPDE076090
■
Static bending light
OPD076042Handle halogen bulbs with
care. Halogen bulbs contain
pressurized gas that will pro-
duce flying pieces of glass that
could cause injuries if broken.
Wear eye protection when
changing a bulb. Allow the bulb
to cool down before handling it.
WARNING
OLMB073042L