2017 HYUNDAI ELANTRA SE reset
[x] Cancel search: resetPage 198 of 586
3-104
Automatic reset
To reset the average fuel economy
automatically whenever refueling,
select the "After refueling" mode in
User Setting menu of the LCD display
(Refer to "LCD Display" ).
Under "After refueling" mode, the
average fuel economy will be cleared
to zero (----) when the vehicle speed
exceeds 1 mph (1 km/h) after refuel-
ing more than 1~2 gallons (3~6
liters).
Information
The vehicle must be driven for a min-
imum of 0.19 mile (0.3 km) since the
last ignition key cycle before the aver-
age fuel economy will be recalculated.
Instant Fuel Economy (3)
This mode displays the instanta-
neous fuel economy while driving
when the vehicle speed is greater
than 6.2 mph (10 km/h).
- Fuel economy range: 0 ~ 50 MPG or 0 ~ 30 L/100km
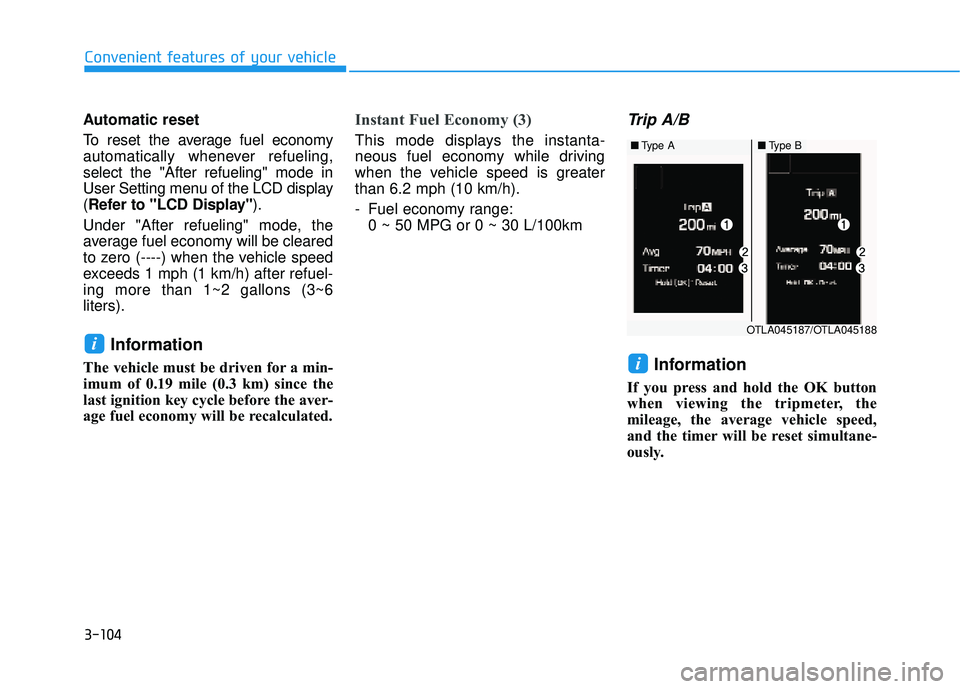
Trip A/B
Information
If you press and hold the OK button
when viewing the tripmeter, the
mileage, the average vehicle speed,
and the timer will be reset simultane-
ously.
i
i
Convenient features of your vehicle
OTLA045187/OTLA045188
■ Type A■Type B
Page 199 of 586
3-105
Convenient features of your vehicle
Tripmeter (1)
The tripmeter is the total drivingdistance since the last tripmeter
reset.
- Distance range:0.0 ~ 9999.9 mi. or km
To reset the tripmeter, press the OK button on the steering wheel
for more than 1 second when the
tripmeter is displayed.
Average Vehicle Speed (2)
The average vehicle speed is cal-culated by the total driving dis-
tance and driving time since the
last average vehicle speed reset.
- Speed range:0~160 MPH or 0~240 km/h
To reset the average vehicle speed, press the OK button on the
steering wheel for more than 1
second when the average vehicle
speed is displayed.
Information
• The average vehicle speed is not dis-played if the driving distance has
been less than 0.19 miles (300
meters) since the ignition switch or
the Engine Start/Stop button was
turned to ON.
• The average vehicle speed will con- tinue to be calculated and will start
to decrease if the vehicle is stopped
while the engine is still running (for
example, when the vehicle is in traf-
fic or stopped at a stop light.)
Elapsed Time (3)
The elapsed time is the total driv-ing time since the last elapsed time
reset.
- Time range (hh:mm):00:00 ~ 99:59
To reset the elapsed time, press the OK button on the steering wheel for
more than 1 second when the
elapsed time is displayed.
Information
The elapsed time will continue to be
counted while the engine is still run-
ning (for example, when the vehicle is
in traffic or stopped at a stop light.)
i
i
3
Page 233 of 586
3-139
Convenient features of your vehicle
3
Adjusting the driver and passen-
ger side temperature individually
Press the "SYNC" button again to
operate the driver and passenger
side temperature individually. The
button indicator will turn off.
Temperature conversion
If the battery has been discharged or
disconnected, the temperature mode
display will reset to Fahrenheit.
To change the temperature unit from
°F to °C or °C to °F:
- On the instrument cluster, go toUser Settings Mode ➝ Other
Features ➝Temperature Unit.
- Press the AUTO button for 3 sec- onds while pressing the OFF button.
(Automatic climate control system)
Both the temperature unit on the
cluster LCD display and climate con-
trol screen will change.
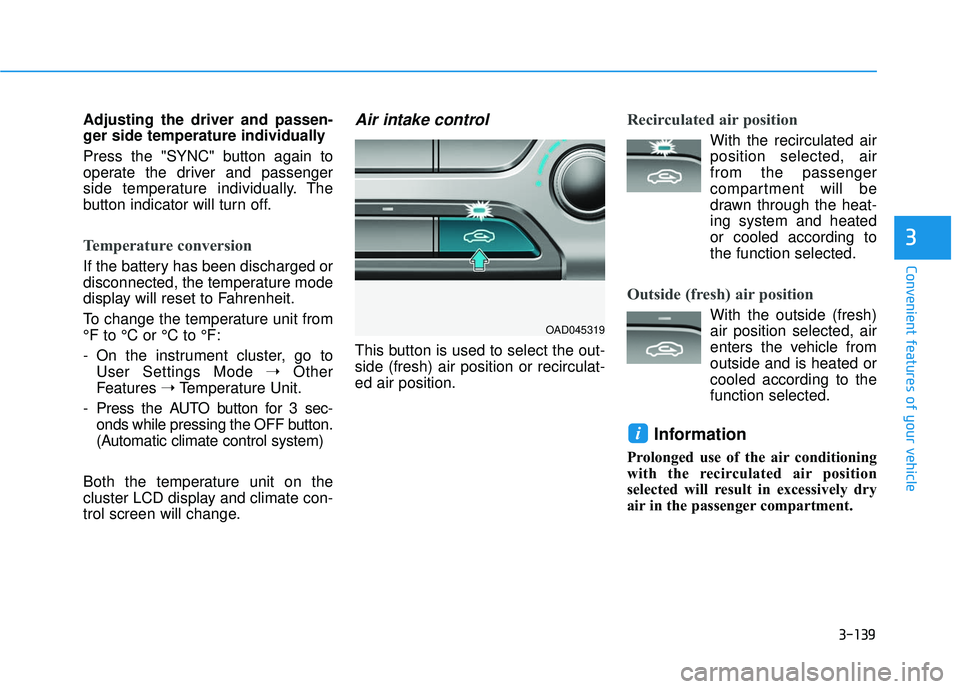
Air intake control
This button is used to select the out-
side (fresh) air position or recirculat-
ed air position.
Recirculated air position
With the recirculated air position selected, air
from the passenger
compartment will be
drawn through the heat-
ing system and heated
or cooled according to
the function selected.
Outside (fresh) air position
With the outside (fresh) air position selected, air
enters the vehicle from
outside and is heated or
cooled according to the
function selected.
Information
Prolonged use of the air conditioning
with the recirculated air position
selected will result in excessively dry
air in the passenger compartment.
i
OAD045319
Page 241 of 586
3-147
Convenient features of your vehicle
3
Defogging logic (if equipped)
To reduce the probability of fogging
up the inside of the windshield, the
air intake or air conditioning are con-
trolled automatically according to
certain conditions such as or
position. To cancel or return the
defogging logic, do the following.
Manual climate control system
1. Turn the ignition switch to the ONposition.
2. Press the defroster button ( ).
3. Press the air intake control button at least 5 times within 10 seconds.
The indicator on the air 3 seconds
immediately blinks 3 times with 0.5
seconds of interval. It indicates that
the defogging logic is canceled or
returned to the programmed status.
If the battery has been discharged or
disconnected, it resets to the defog
logic status.
Automatic climate control system
1. Turn the ignition switch to the ON position.
2. Press the defroster button ( ).
3. While pressing the air conditioning button (A/C), press the air intake
control button at least 5 times with-
in 3 seconds.
The climate control information
screen will blink 3 times with 0.5 sec-
onds of interval. It indicates that the
defogging logic is canceled or
returned to the programmed status.
If the battery has been discharged or
disconnected, it resets to the defog
logic status.
Page 242 of 586
3-148
Convenient features of your vehicle
Auto Defogging System (Only
for Automatic Climate Control
System, if equipped)
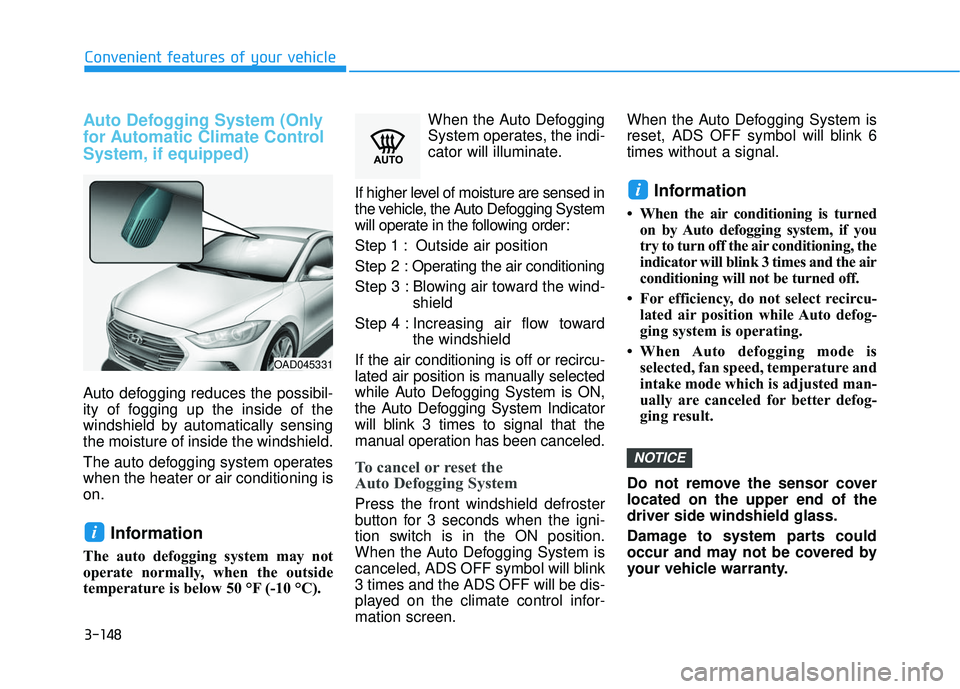
Auto defogging reduces the possibil-
ity of fogging up the inside of the
windshield by automatically sensing
the moisture of inside the windshield.
The auto defogging system operates
when the heater or air conditioning is
on.
Information
The auto defogging system may not
operate normally, when the outside
temperature is below 50 °F (-10 °C).When the Auto Defogging
System operates, the indi-
cator will illuminate.
If higher level of moisture are sensed in
the vehicle, the Auto Defogging System
will operate in the following order:
Step 1 : Outside air position
Step 2 : Operating the air conditioning
Step 3 : Blowing air toward the wind- shield
Step 4 : Increasing air flow toward the windshield
If the air conditioning is off or recircu-
lated air position is manually selected
while Auto Defogging System is ON,
the Auto Defogging System Indicator
will blink 3 times to signal that the
manual operation has been canceled.
To cancel or reset the
Auto Defogging System
Press the front windshield defroster
button for 3 seconds when the igni-
tion switch is in the ON position.
When the Auto Defogging System is
canceled, ADS OFF symbol will blink
3 times and the ADS OFF will be dis-
played on the climate control infor-
mation screen. When the Auto Defogging System is
reset, ADS OFF symbol will blink 6
times without a signal.
Information
• When the air conditioning is turned
on by Auto defogging system, if you
try to turn off the air conditioning, the
indicator will blink 3 times and the air
conditioning will not be turned off.
• For efficiency, do not select recircu- lated air position while Auto defog-
ging system is operating.
• When Auto defogging mode is selected, fan speed, temperature and
intake mode which is adjusted man-
ually are canceled for better defog-
ging result.
Do not remove the sensor cover
located on the upper end of the
driver side windshield glass.
Damage to system parts could
occur and may not be covered by
your vehicle warranty.
NOTICE
i
i
OAD045331
Page 243 of 586
3-149
Convenient features of your vehicle
3
C
CL
LI
IM
M A
AT
TE
E
C
C O
O N
NT
TR
R O
O L
L
A
A D
DD
DI
IT
T I
IO
O N
NA
AL
L
F
F E
E A
A T
TU
U R
RE
ES
S
(
( I
IF
F
E
E Q
Q U
UI
IP
P P
PE
ED
D )
)
Automatic Ventilation
(if equipped)
When the ignition switch is in the ON
position or when the engine is run-
ning and temperature is below 59°F
(15°C) with the recirculated air posi-
tion selected more than five minutes,
the air intake position will automati-
cally change to the outside (fresh) air
position.
To cancel or reset the Automatic
Ventilation
When the air conditioning system is
on, select Face Level mode and
while pressing the A/C button, press
the recirculated air position button
five times within three seconds.
Sunroof Inside Air
Recirculation (if equipped)
When the heater or air conditioning
system is on with the sunroof
opened, the outside (fresh) air posi-
tion will be automatically selected. At
this time, if you press the recirculated
air position button, the recirculated
air position will be selected but will
change back to the outside (fresh) air
position after 3 minutes.
When the sunroof is closed, the air
intake position will return to the orig-
inal position that was selected.
Page 255 of 586
4-3
Multimedia System
4
Do not clean the inside of therear glass window with a cleaner
or scraper to remove foreign
deposits as this may cause dam-
age to the antenna elements.
Avoid adding metallic coatings to the rear glass window. These
can degrade AM and FM broad-
cast signals.
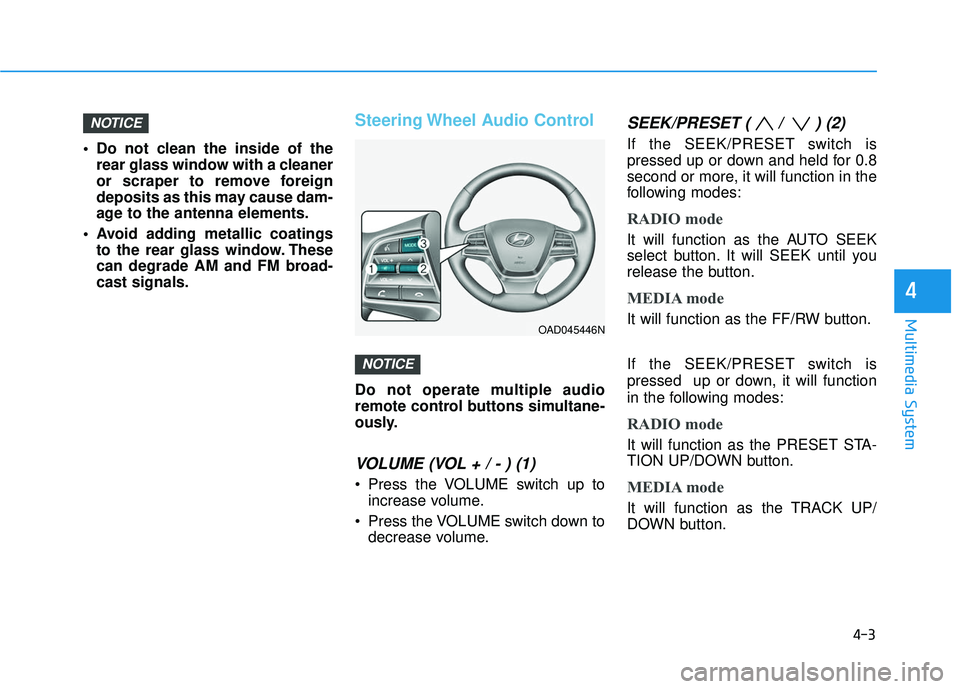
Steering Wheel Audio Control
Do not operate multiple audio
remote control buttons simultane-
ously.
VOLUME (VOL + / - ) (1)
Press the VOLUME switch up toincrease volume.
Press the VOLUME switch down to decrease volume.
SEEK/PRESET ( / ) (2)
If the SEEK/PRESET switch is
pressed up or down and held for 0.8
second or more, it will function in the
following modes:
RADIO mode
It will function as the AUTO SEEK
select button. It will SEEK until you
release the button.
MEDIA mode
It will function as the FF/RW button.
If the SEEK/PRESET switch is
pressed up or down, it will function
in the following modes:
RADIO mode
It will function as the PRESET STA-
TION UP/DOWN button.
MEDIA mode
It will function as the TRACK UP/
DOWN button.
NOTICE
NOTICE
OAD045446N
Page 266 of 586
(Continued)
• If your iPhone
®is connected to both
the Bluetooth®Wireless Technology
and USB, the sound may not be
properly played. In your iPhone
®,
select the Dock c onnector or
Bluetooth
®Wireless Technology to
change the sound output (source).
• iPod mode cannot be operated when the iPod
®cannot be recognized due
to versions that do not support com-
munication protocols.
• For fifth generation iPod
®Nano
devices, the iPod®may not be recog-
nized when the battery level is low.
Please charge the iPod
®for use.
• Search/play orders shown within the iPod
®device may differ with the
orders shown within the audio sys-
tem.
• If the iPod
®malfunctions due to an
iPod®device defect, reset the iPod®
and try again. (To learn more, refer to
your iPod®manual)
(Continued) (Continued)
• Some iPod
®s may not sync with the
System depending on its version. If
the Media is removed before the
Media is recognized, then the sys-
tem may not properly restore the
previously operated mode. (iPad
®
charging is not supported.)
Information - Using the AUX
device
• If an external device connector is connected with the AUX terminal,
then AUX mode will automatically
operate. Once the connector is dis-
connected, the previous mode will
be restored.
• AUX mode can be used only when an external audio player (cam-
corder, in-car DVD player, etc.) has
been connected.
• The AUX volume can be controlled separately from other audio modes.
• Connecting a connector jack to the AUX terminal without an external
device will convert the system to
AUX mode, but only output noise.
When an external device is not
being used, also remove the connec-
tor jack.
• When the external device power is connected to the power jack, play-
ing the external device may output
noise. In such cases, disconnect the
power connection before use.
• Fully insert the AUX cable to the AUX jack upon use.i
4-14
Multimedia System