2017 HYUNDAI ELANTRA SE ESP
[x] Cancel search: ESPPage 61 of 586
2-36
Safety system of your vehicle
Child restraint system (CRS)
Infants and younger children must be
restrained in an appropriate rear-fac-
ing or forward-facing CRS that has
first been properly secured to the
rear seat of the vehicle. Read and
comply with the instructions for
installation and use provided by the
manufacturer of the child restraint.
Selecting a Child Restraint
System (CRS)
When selecting a CRS for your child,
always:
Make sure the CRS has a labelcertifying that it meets applicable
Federal Motor Vehicle Safety
Standards (FMVSS 213).
Select a child restraint based on your child’s height and weight. The
required label or the instructions
for use typically provide this infor-
mation.
Select a child restraint that fits the vehicle seating position where it
will be used.
Read and comply with the warn- ings and instructions for installation
and use provided with the child
restraint system.
(Continued)Always follow the child
restraint system manufactur-
er's instructions for installa-
tion and use.
Always properly restrain your
child in the child restraint.
If the vehicle head restraint
prevents proper installation of
a child seat (as described in
the child restraint system
manual), the head restraint of
the respective seating posi-
tion shall be readjusted or
entirely removed.
Do not use an infant carrier or
a child safety seat that
"hooks" over a seatback, it
may not provide adequate
protection in an accident.
After an accident, have a
HYUNDAI dealer check the
child restraint system, seat
belts, tether anchors and
lower anchors.
An improperly secured child
restraint can increase the risk
of SERIOUS INJURY or DEATH
in an accident. Always take the
following precautions when
using a child restraint system:
NEVER install a child or infant
restraint in the front passen-
ger's seat.
Always properly secure the
child restraint to a rear seat of
the vehicle.
(Continued)
WARNING
Page 63 of 586
2-38
Safety system of your vehicle
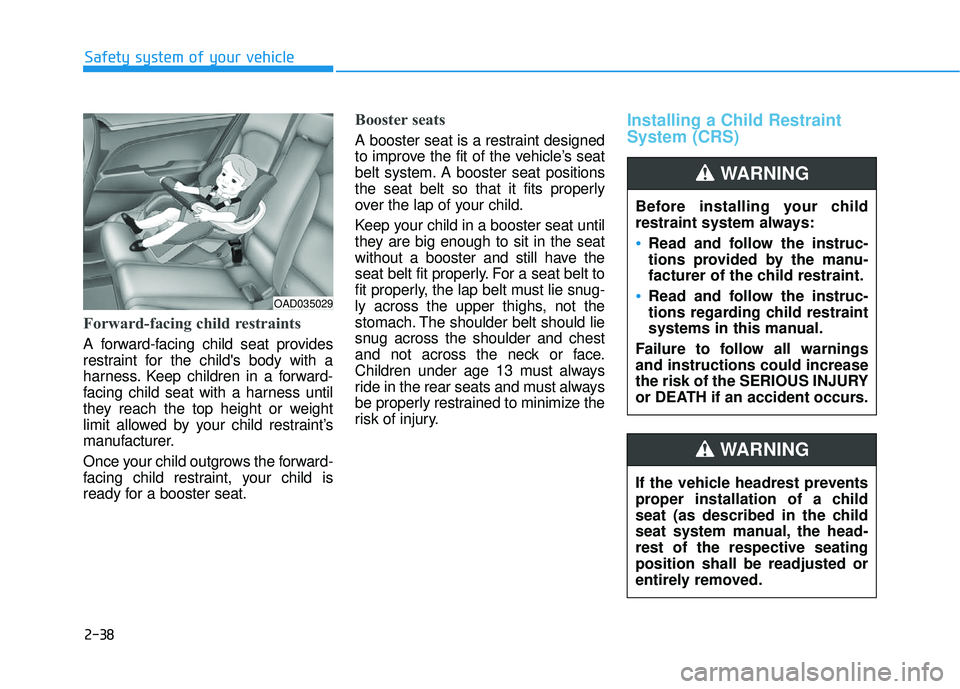
Forward-facing child restraints
A forward-facing child seat provides
restraint for the child's body with a
harness. Keep children in a forward-
facing child seat with a harness until
they reach the top height or weight
limit allowed by your child restraint’s
manufacturer.
Once your child outgrows the forward-
facing child restraint, your child is
ready for a booster seat.
Booster seats
A booster seat is a restraint designed
to improve the fit of the vehicle’s seat
belt system. A booster seat positions
the seat belt so that it fits properly
over the lap of your child.
Keep your child in a booster seat until
they are big enough to sit in the seat
without a booster and still have the
seat belt fit properly. For a seat belt to
fit properly, the lap belt must lie snug-
ly across the upper thighs, not the
stomach. The shoulder belt should lie
snug across the shoulder and chest
and not across the neck or face.
Children under age 13 must always
ride in the rear seats and must always
be properly restrained to minimize the
risk of injury.
Installing a Child Restraint
System (CRS)
Before installing your child
restraint system always:
Read and follow the instruc-
tions provided by the manu-
facturer of the child restraint.
Read and follow the instruc-
tions regarding child restraint
systems in this manual.
Failure to follow all warnings
and instructions could increase
the risk of the SERIOUS INJURY
or DEATH if an accident occurs.
WARNING
If the vehicle headrest prevents
proper installation of a child
seat (as described in the child
seat system manual, the head-
rest of the respective seating
position shall be readjusted or
entirely removed.
WARNING
OAD035029
Page 78 of 586

2-53
Safety system of your vehicle
2
During a frontal collision, sensors will
detect the vehicle's deceleration. If
the rate of deceleration is high
enough, the control unit will inflate
the front air bags.
The front air bags help protect the
driver and front passenger by
responding to frontal impacts in
which seat belts alone cannot pro-
vide adequate restraint. When need-
ed, the side air bags help provide
protection in the event of a side
impact or rollover.
Air bags are activated (able toinflate if necessary) only when the
ignition switch is in the ON position.
Air bags inflate in the event of cer- tain frontal or side collisions to help
protect the occupants from serious
physical injury.
Generally, air bags are designed to inflate based upon the severity of a
collision, its direction, etc. These
two factors determine whether the
sensors produce an electronic
deployment/inflation signal. Air bag deployment depends on a
number of factors including vehicle
speed, angles of impact and the
density and stiffness of the vehicles
or objects which your vehicle
impacts during a collision. The
determining factors are not limited
to those mentioned above.
The front air bags will completely inflate and deflate in an instant. It is
virtually impossible for you to see
the air bags inflate during an acci-
dent. It is much more likely that you
will simply see the deflated air bags
hanging out of their storage com-
partments after the collision.
In addition to inflating in certain side collisions, vehicles equipped
with a rollover sensor, side and
curtain air bags will inflate if the
sensing system detects a rollover.
When a rollover is detected, side
and curtain air bags will remain
inflated longer to help provide pro-
tection from ejection, especially
when used in conjunction with the
seat belts. To help provide protection, the air
bags must inflate rapidly. The speed
of air bag inflation is a consequence
of extremely short time in which to
inflate the air bag between the
occupant and the vehicle structures
before the occupant impacts those
structures. This speed of inflation
reduces the risk of serious or life-
threatening injuries and is thus a
necessary part of air bag design.
However, the rapid air bag inflation
can also cause injuries which can
include facial abrasions, bruises
and broken bones because the
inflation speed also causes the air
bags to expand with a great deal of
force.
There are even circumstances under which contact with the air
bag can cause fatal injuries, espe-
cially if the occupant is positioned
excessively close to the air bag.
Page 100 of 586
3-6
Mechanical key
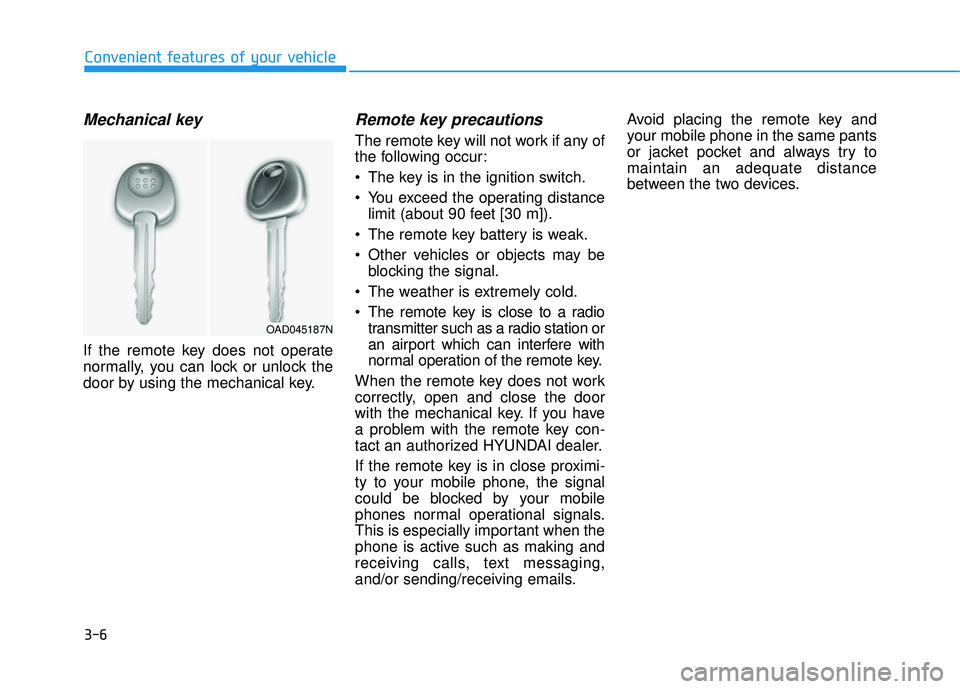
If the remote key does not operate
normally, you can lock or unlock the
door by using the mechanical key.
Remote key precautions
The remote key will not work if any of
the following occur:
The key is in the ignition switch.
You exceed the operating distancelimit (about 90 feet [30 m]).
The remote key battery is weak.
Other vehicles or objects may be blocking the signal.
The weather is extremely cold.
The remote key is close to a radio transmitter such as a radio station or
an airport which can interfere with
normal operation of the remote key.
When the remote key does not work
correctly, open and close the door
with the mechanical key. If you have
a problem with the remote key con-
tact an authorized HYUNDAI dealer.
If the remote key is in close proximi-
ty to your mobile phone, the signal
could be blocked by your mobile
phones normal operational signals.
This is especially important when the
phone is active such as making and
receiving calls, text messaging,
and/or sending/receiving emails. Avoid placing the remote key and
your mobile phone in the same pants
or jacket pocket and always try to
maintain an adequate distance
between the two devices.
Convenient features of your vehicle
OAD045187N
Page 101 of 586
3-7
Convenient features of your vehicle
Information
This device complies with Part 15 of
the FCC rules.
Operation is subject to the following
three conditions:
1. This device may not cause harmfulinterference, and
2. This device must accept any interfer- ence received, including interference
that may cause undesired operation.
3. Changes or modifications not expressly approved by the party
responsible for compliance could
void the user’s authority to operate
the device.
Keep the remote key away from
electromagnetic materials that
blocks electromagnetic waves to
the key surface.
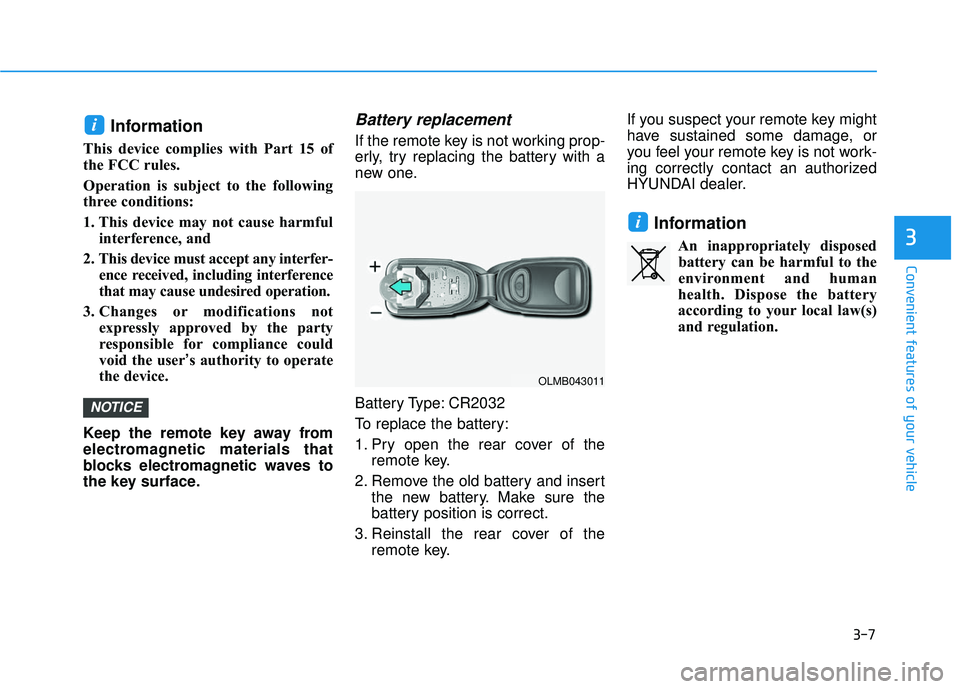
Battery replacement
If the remote key is not working prop-
erly, try replacing the battery with a
new one.
Battery Type: CR2032
To replace the battery:
1. Pry open the rear cover of the remote key.
2. Remove the old battery and insert the new battery. Make sure the
battery position is correct.
3. Reinstall the rear cover of the remote key. If you suspect your remote key might
have sustained some damage, or
you feel your remote key is not work-
ing correctly contact an authorized
HYUNDAI dealer.
Information
An inappropriately disposed
battery can be harmful to the
environment and human
health. Dispose the battery
according to your local law(s)
and regulation.
i
NOTICE
i
3
OLMB043011
Page 105 of 586
3-11
Convenient features of your vehicle
3
Smart key precautions
The smart key will not work if any of
the following occur:
The smart key is close to a radiotransmitter such as a radio station
or an airport which can interfere
with normal operation of the trans-
mitter.
The smart key is near a mobile two way radio system or a cellular
phone.
Another vehicle’s smart key is being operated close to your vehicle.
When the smart key does not work
correctly, open and close the door
with the mechanical key. If you have
a problem with the smart key, contact
an authorized HYUNDAI dealer. If the smart key is in close proximity
to your mobile phone, the signal
could be blocked by your mobile
phones normal operational signals.
This is especially important when the
phone is active such as making and
receiving calls, text messaging,
and/or sending/receiving emails.
Avoid placing the smart key and your
mobile phone in the same pants or
jacket pocket and always try to main-
tain an adequate distance between
the two devices.Information
This device complies with Part 15 of
the FCC rules.
Operation is subject to the following
three conditions:
1. This device may not cause harmful
interference, and
2. This device must accept any inter- ference received, including interfer-
ence that may cause undesired
operation.
3. Changes or modifications not expressly approved by the party
responsible for compliance could
void the user’s authority to operate
the device.
i
Keep the smart key away from
electromagnetic materials that
blocks electromagnetic waves
to the key surface.
CAUTION
Page 107 of 586
3-13
Convenient features of your vehicle
3
Do not attempt to alter this system or
add other devices to it. Electrical
problems could result that may make
your vehicle inoperable.
The transponder in your key is an
important part of the immobilizer
system. It is designed to give
years of trouble-free service, how-
ever you should avoid exposure to
moisture, static electricity and
rough handling. Immobilizer sys-
tem malfunction could occur.Information
This device complies with Part 15 of
the FCC rules.
Operation is subject to the following
three conditions:
1. This device may not cause harmfulinterference, and
2. This device must accept any interfer- ence received, including interference
that may cause undesired operation.
3. Changes or modifications not expressly approved by the party
responsible for compliance could
void the user’s authority to operate
the device.
i
NOTICE
In order to prevent theft of your
vehicle, do not leave spare keys
anywhere in your vehicle. Your
immobilizer password is a cus-
tomer unique password and
should be kept confidential.
WARNING
Page 126 of 586

3-32
Convenient features of your vehicle
Erasing HomeLink®buttons
Individual buttons cannot be erased.
However, to erase all three pro-
grammed buttons:
1. Press and hold the two outerHomeLink
®buttons until the indi-
cator light begins to flash after 10
seconds.
2. Release both buttons. Do not hold for longer than 20 seconds.
The Integrated HomeLink
®Wireless
Control System is now in the training
(learn) mode and can be pro-
grammed at any time following the
appropriate steps in the
Programming chapters above.
NVS
®is a registered trademark and
Z-Nav™ is a trademark of the Gentex
Corporation, Zeeland, Michigan.
HomeLink
®is a registered trademark
owned by Johnson Controls,
Incorporated, Milwaukee, Wisconsin.
FCC ID: NZLTLMHL4
IC: 4112A-TLMHL4
Information
This device complies with Part 15 of
the FCC Rules.
Operation is subject to the following
three conditions:
1. This device may not cause harmful interference, and
2. This device must accept any inter- ference received, including interfer-
ence that may cause undesired
operation.
3. The transceiver has been tested and complies with FCC and Industry
Canada rules. Changes or modifica-
tions not expressly approved by the
party responsible for compliance
could void the user’s authority to
operate the device.
Electric chromic mirror (ECM)with compass and HomeLink®
system (for Canada)
Your vehicle may be equipped with a
Gentex Automatic-Dimming Mirror
with a Z-Nav™ Electronic Compass
Display and an Integrated HomeLink
®
Wireless Control System.
During nighttime driving, this feature
will automatically detect and reduce
rearview mirror glare while the com-
pass indicates the direction the vehi-
cle is pointed. The HomeLink
®
Universal Transceiver allows you to
activate your garage door(s), electric
gate, home lighting, etc.
i