Page 105 of 637

3-10
Convenient features of your vehicle
Trunk unlocking
To unlock:
1. Carry the smart key.
2. Either press the trunk handle but-
ton or press the Trunk Unlock but-
ton (3) on the smart key for more
than one second.
3. The hazard warning lights will
blink two times.
Once the trunk is opened and then
closed, the trunk will lock automati-
cally.
Information
After unlocking the trunk, the trunk
will lock automatically after 30 sec-
onds unless the trunk is opened.
Start-up
You can start the engine without
inserting the key.For detailed infor-
mation refer to the Engine
Start/Stop button in chapter 5.
To prevent damaging the smart
key:
• Keep the smart key away from
water or any liquid and fire. If the
inside of the smart key gets
damp (due to drinks or moisture),
or is heated, internal circuit may
malfunction, excluding the car
from the warranty.
• Avoid dropping or throwing the
smart key.
• Protect the smart key from
extreme temperatures.
Mechanical key
If the Smart Key does not operate
normally, you can lock or unlock the
door by using the mechanical key.
Press and hold the release button (1)
and remove the mechanical key (2).
Insert the mechanical key into the
key hole on the door.
To reinstall the mechanical key, put
the key into the hole and push it until
a click sound is heard.
NOTICE
i
OAD045042L
Page 115 of 637

3-20
Convenient features of your vehicle
This system helps to protect your
vehicle and valuables. The horn will
sound and the hazard warning lights
will blink continuously if any of the
following occurs:
- A door is opened without using the
remote key or smart key.
- The trunk is opened without using
the remote key or smart key.
- The engine hood is opened.
The alarm continues for 30 seconds,
then the system resets. To turn off
the alarm, unlock the doors with the
remote key or smart key.
The Theft Alarm System automati-
cally sets 30 seconds after you lock
the doors and the trunk. For the sys-
tem to activate, you must lock the
doors and the trunk from outside the
vehicle with the remote key or smart
key or by pressing the button on the
outside of the door handles with the
smart key in your possession.
The hazard warning lights will blink
and the chime will sound once to
indicate the system is armed.Once the security system is set, open-
ing any door, the trunk, or the hood
without using the remote key or smart
key will cause the alarm to activate.
The Theft Alarm System will not set if
the hood, the trunk, or any door is
not fully closed. If the system will not
set, check the hood, the trunk, or the
doors are fully closed.
Do not attempt to alter this system or
add other devices to it.
Information
• Do not lock the doors until all pas-
sengers have left the vehicle. If the
remaining passenger leaves the
vehicle when the system is armed,
the alarm will be activated.
• If the vehicle is not disarmed with
the remote key or smart key, open
the doors by using the mechanical
key and place the ignition switch in
the ON position (for remote key) or
start the engine (for smart key) and
wait for 30 seconds.
• When the system is disarmed but a
door or trunk is not opened within 30
seconds, the system will be rearmed.
Information
Vehicles equipped with a theft alarm
system will have a label attached to
the vehicle with the following words:
1. WARNING
2. SECURITY SYSTEM
ii
THEFT-ALARM SYSTEM
OJC040170
Page 119 of 637

3-24
Convenient features of your vehicle
Tilt steering / Telescope steering
Information
After adjustment, sometimes the lock-
release lever may not lock the steering
wheel.
It is not a malfunction. This occurs
when two gears are not engaged cor-
rectly. In this case, adjust the steering
wheel again and then lock the steering
wheel.
Pull down the lock-release lever (1) on
the steering wheel column and adjust
the steering wheel angle (2) and posi-
tion (3, if equipped). Move the steer-
ing wheel, so it points toward your
chest, not toward your face.Make sure you can see the instrument
panel warning lights and gauges.
After adjusting, pull up the lock-
release lever (1) to lock the steering
wheel in place. Push the steering
wheel both up and down to be cer-
tain it is locked in position. Always
adjust the position of the steering
wheel before driving.
i
Never adjust the steering wheel
while driving. You may lose
steering control and cause
severe personal injury, death or
accidents.
WARNING
OAD045006
OAD045006R
■Right-hand drive
■Left-hand drive
Page 121 of 637

3-26
Convenient features of your vehicle
MIRRORS
Inside rearview mirror
Before you start driving, adjust the
rearview mirror to the center on the
view through the rear window.
When cleaning the mirror, use a
paper towel or similar material
dampened with glass cleaner. Do
not spray glass cleaner directly on
the mirror as that may cause the
liquid cleaner to enter the mirror
housing.
Day/night rearview mirror
(if equipped)
Make this adjustment before you
start driving and while the day/night
lever is in the day position.
Pull the day/night lever toward you to
reduce glare from the headlights of
the vehicles behind you during night
driving.
Remember that you lose some
rearview clarity in the night position.
NOTICEMake sure your line of sight is
not obstructed. Do not place
objects in the rear seat, cargo
area, or behind the rear head-
rests which could interfere with
your vision through the rear
window.
WARNING
To prevent serious injury during
an accident or deployment of
the air bag, do not modify the
rearview mirror and do not
install a wide mirror.
WARNING
NEVER adjust the mirror while
driving. This may cause loss of
vehicle control resulting in an
accident.
WARNING
OAD045009 DayNight
Page 140 of 637

3-45
Convenient features of your vehicle
3
How to use the Smart Trunk
The trunk can be opened with no-
touch activation satisfying all the
conditions below.
• After 15 seconds when all doors
are closed and locked
• Positioned in the detecting area for
more than 3 seconds.
Information
• The Smart Trunk does not operate
when:
- The smart key is detected within
15 seconds after the doors are
closed and locked, and is continu-
ously detected.
- The smart key is detected within
15 seconds after the doors are
closed and locked, and 1.5 m from
the front door handles. (for vehi-
cles equipped with Welcome Light)
- A door is not locked or closed.
- The smart key is in the vehicle. 1. Setting
To activate the Smart Trunk, go to
User Settings Mode and select
Smart Trunk on the LCD display.
For more details, refer to "LCD
Display" in this chapter.
2. Detect and Alert
If you are positioned in the detecting
area (50 ~100 cm behind the vehi-
cle) carrying a smart key, the hazard
warning lights will blink and chime
will sound for about 3 seconds to
alert you the smart key has been
detected and the trunk will open.
Information
Do not approach the detecting area if
you do not want the trunk to open. If
you have unintentionally entered the
detecting area and the hazard warn-
ing lights and chime starts to operate,
leave the detecting area with the
smart key. The trunk will stay closed.
i
i
OAD045031
Page 141 of 637
3-46
Convenient features of your vehicle
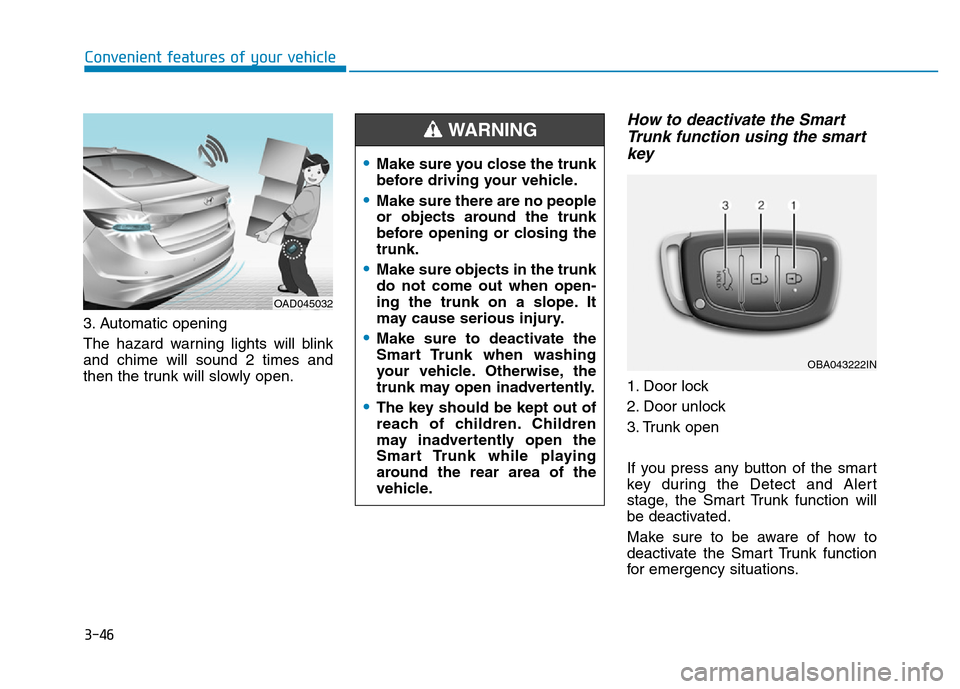
3. Automatic opening
The hazard warning lights will blink
and chime will sound 2 times and
then the trunk will slowly open.
How to deactivate the Smart
Trunk function using the smart
key
1. Door lock
2. Door unlock
3. Trunk open
If you press any button of the smart
key during the Detect and Alert
stage, the Smart Trunk function will
be deactivated.
Make sure to be aware of how to
deactivate the Smart Trunk function
for emergency situations.
OAD045032
•Make sure you close the trunk
before driving your vehicle.
•Make sure there are no people
or objects around the trunk
before opening or closing the
trunk.
•Make sure objects in the trunk
do not come out when open-
ing the trunk on a slope. It
may cause serious injury.
•Make sure to deactivate the
Smart Trunk when washing
your vehicle. Otherwise, the
trunk may open inadvertently.
•The key should be kept out of
reach of children. Children
may inadvertently open the
Smart Trunk while playing
around the rear area of the
vehicle.
WARNING
OBA043222IN
Page 146 of 637
3-51
Convenient features of your vehicle
3
INSTRUMENT CLUSTER
1. Tachometer
2. Speedometer
3. Engine coolant temperature gauge
4. Fuel gauge
5. Warning and indicator lights
6. LCD display (including Trip computer)
OAD045100L
■Conventional cluster
The actual cluster in the vehicle may
differ from the illustration.
For more details, refer to the "Gauges"
in this chapter.
Page 147 of 637
3-52
Convenient features of your vehicle
1. Tachometer
2. Speedometer
3. Engine coolant temperature gauge
4. Fuel gauge
5. Warning and indicator lights
6. LCD display (including Trip computer)
OAD045101L/OAD045102L
The actual cluster in the vehicle may
differ from the illustration.
For more details, refer to the "Gauges"
in this chapter.
■Supervision cluster (Type B)
■Supervision cluster (Type A)

