2017 Hyundai Elantra buttons
[x] Cancel search: buttonsPage 113 of 571
3-21
Convenient features of your vehicle
3
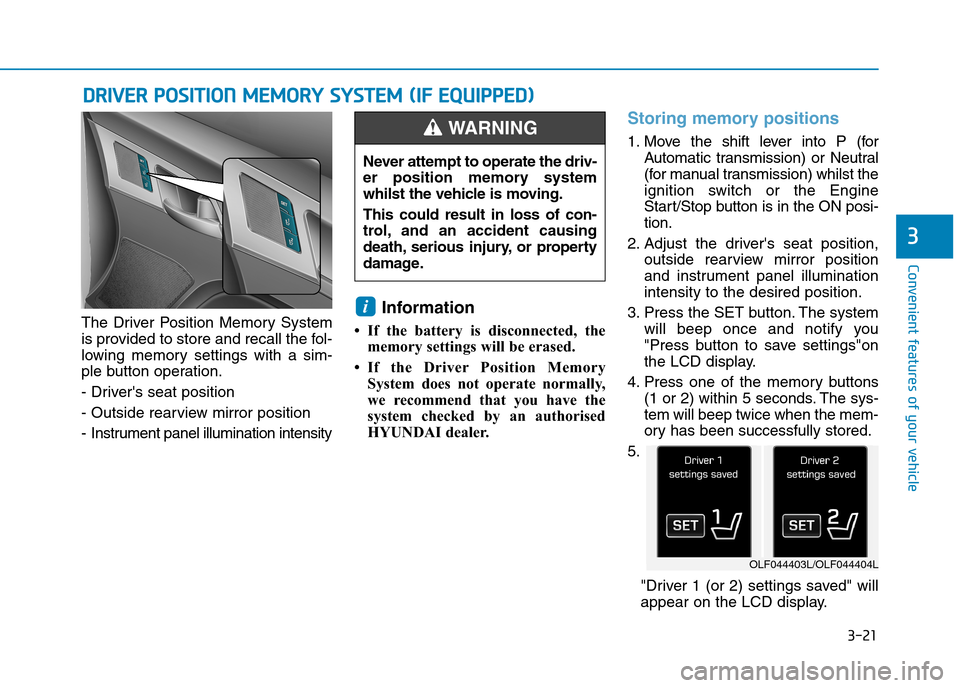
The Driver Position Memory System
is provided to store and recall the fol-
lowing memory settings with a sim-
ple button operation.
- Driver's seat position
- Outside rearview mirror position
- Instrument panel illumination intensity
Information
• If the battery is disconnected, the
memory settings will be erased.
•If the Driver Position Memory
System does not operate normally,
we recommend that you have the
system checked by an authorised
HYUNDAI dealer.
Storing memory positions
1. Move the shift lever into P (for
Automatic transmission) or Neutral
(for manual transmission) whilst the
ignition switch or the Engine
Start/Stop button is in the ON posi-
tion.
2. Adjust the driver's seat position,
outside rearview mirror position
and instrument panel illumination
intensity to the desired position.
3. Press the SET button. The system
will beep once and notify you
"Press button to save settings"on
the LCD display.
4. Press one of the memory buttons
(1 or 2) within 5 seconds. The sys-
tem will beep twice when the mem-
ory has been successfully stored.
5.
"Driver 1 (or 2) settings saved" will
appear on the LCD display.
i
DDRRIIVVEERR PPOOSSIITTIIOONN MMEEMMOORRYY SSYYSSTTEEMM ((IIFF EEQQUUIIPPPPEEDD))
Never attempt to operate the driv-
er position memory system
whilst the vehicle is moving.
This could result in loss of con-
trol, and an accident causing
death, serious injury, or property
damage.
WA R N I N G
OLF044403L/OLF044404L
Page 114 of 571
3-22
Convenient features of your vehicle
Recalling memory position
1. Move the shift lever into P (for
Automatic transmission) or Neutral
(for manual transmission) whilst the
ignition switch or the Engine
Start/Stop button is in the ON posi-
tion.
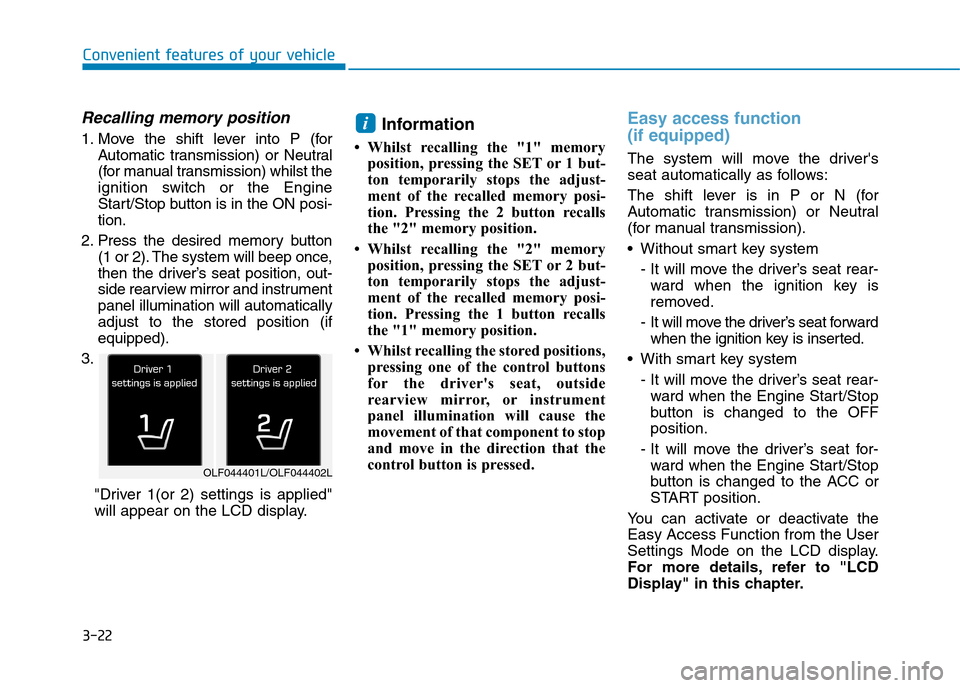
2. Press the desired memory button
(1 or 2). The system will beep once,
then the driver’s seat position, out-
side rearview mirror and instrument
panel illumination will automatically
adjust to the stored position (if
equipped).
3.
"Driver 1(or 2) settings is applied"
will appear on the LCD display.
Information
• Whilst recalling the "1" memory
position, pressing the SET or 1 but-
ton temporarily stops the adjust-
ment of the recalled memory posi-
tion. Pressing the 2 button recalls
the "2" memory position.
• Whilst recalling the "2" memory
position, pressing the SET or 2 but-
ton temporarily stops the adjust-
ment of the recalled memory posi-
tion. Pressing the 1 button recalls
the "1" memory position.
• Whilst recalling the stored positions,
pressing one of the control buttons
for the driver's seat, outside
rearview mirror, or instrument
panel illumination will cause the
movement of that component to stop
and move in the direction that the
control button is pressed.
Easy access function
(if equipped)
The system will move the driver's
seat automatically as follows:
The shift lever is in P or N (for
Automatic transmission) or Neutral
(for manual transmission).
•Without smart key system
- It will move the driver’s seat rear-
ward when the ignition key is
removed.
- It will move the driver’s seat forward
when the ignition key is inserted.
•With smart key system
- It will move the driver’s seat rear-
ward when the Engine Star t/Stop
button is changed to the OFF
position.
- It will move the driver’s seat for-
ward when the Engine Star t/Stop
button is changed to the ACC or
START position.
Yo u c a n a c t i v a t e o r d e a c t i v a t e t h e
Easy Access Function from the User
Settings Mode on the LCD display.
For more details, refer to "LCD
Display" in this chapter.
i
OLF044401L/OLF044402L
Page 172 of 571
3-80
Convenient features of your vehicle
LCD display control
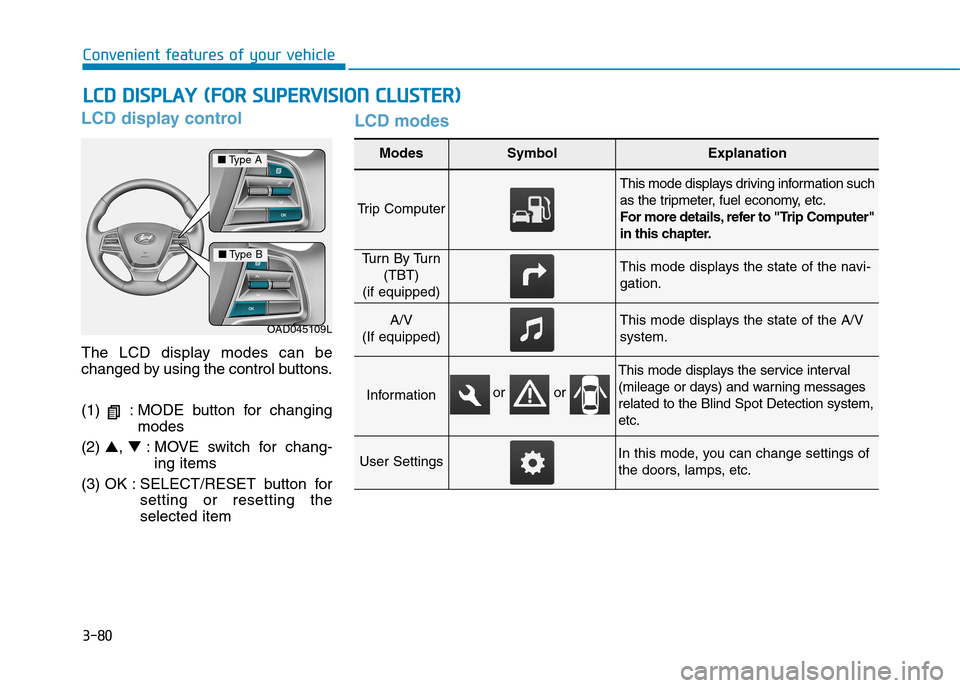
The LCD display modes can be
changed by using the control buttons.
(1) : MODE button for changing
modes
(2) ▲, ▼:MOVE switch for chang-
ing items
(3) OK : SELECT/RESET button for
setting or resetting the
selected item
LCD modes
LLCCDD DDIISSPPLLAAYY ((FFOORR SSUUPPEERRVVIISSIIOONN CCLLUUSSTTEERR))
Modes SymbolExplanation
Tr i p C o m p u t e r
This mode displays driving information such
as the tripmeter, fuel economy, etc.
For more details, refer to "Trip Computer"
in this chapter.
Tu r n B y Tu r n
(TBT)
(if equipped)
This mode displays the state of the navi-
gation.
A/V
(If equipped)
This mode displays the state of the A/V
system.
Information
This mode displays the service interval
(mileage or days) and warning messages
related to the Blind Spot Detection system,
etc.
User SettingsIn this mode, you can change settings of
the doors, lamps, etc.
OAD045109L
■Ty p e A
■Ty p e B
or or
Page 212 of 571
3-120
Convenient features of your vehicle
MMAANNUUAALL CCLLIIMMAATTEE CCOONNTTRROOLL SSYYSSTTEEMM ((IIFF EEQQUUIIPPPPEEDD))
OAD045300
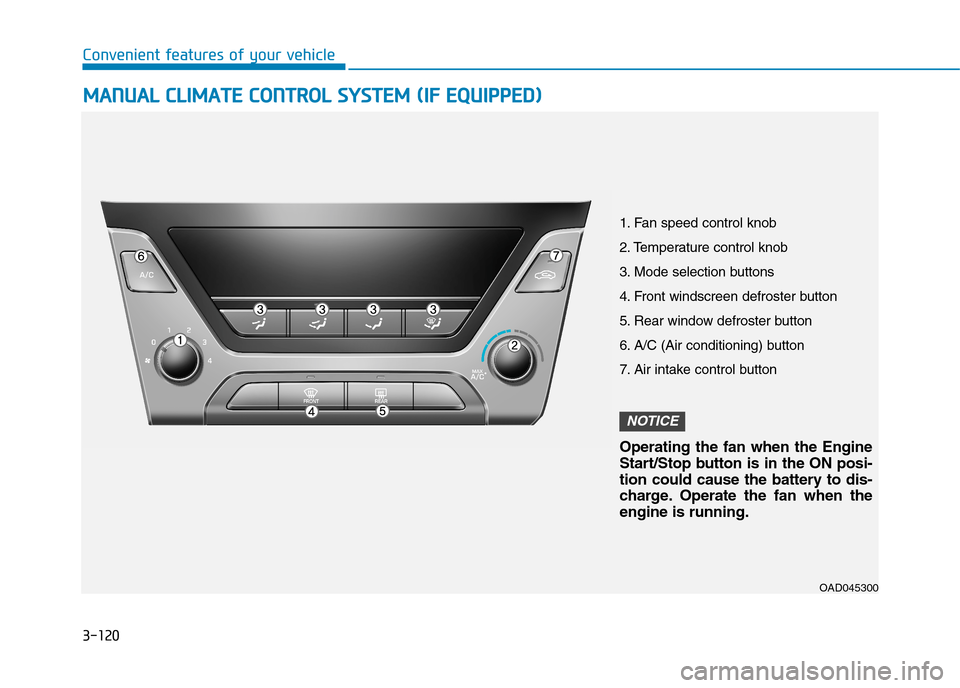
1. Fan speed control knob
2. Temperature control knob
3. Mode selection buttons
4. Front windscreen defroster button
5. Rear window defroster button
6. A/C (Air conditioning) button
7. Air intake control button
Operating the fan when the Engine
Start/Stop button is in the ON posi-
tion could cause the battery to dis-
charge. Operate the fan when the
engine is running.
NOTICE
Page 224 of 571
3-132
Convenient features of your vehicle
Information
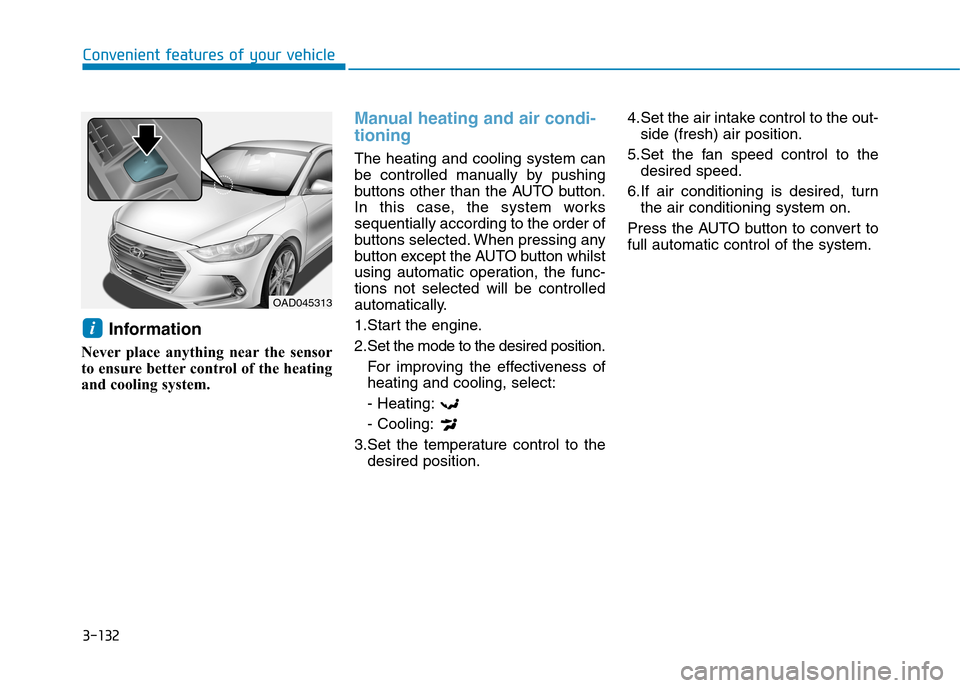
Never place anything near the sensor
to ensure better control of the heating
and cooling system.
Manual heating and air condi-
tioning
The heating and cooling system can
be controlled manually by pushing
buttons other than the AUTO button.
In this case, the system works
sequentially according to the order of
buttons selected. When pressing any
button except the AUTO button whilst
using automatic operation, the func-
tions not selected will be controlled
automatically.
1.Start the engine.
2.Set the mode to the desired position.
For improving the effectiveness of
heating and cooling, select:
- Heating:
- Cooling:
3.Set the temperature control to the
desired position.
4.Set the air intake control to the out-
side (fresh) air position.
5.Set the fan speed control to the
desired speed.
6.If air conditioning is desired, turn
the air conditioning system on.
Press the AUTO button to convert to
full automatic control of the system.
i
OAD045313
Page 230 of 571
3-138
Convenient features of your vehicle
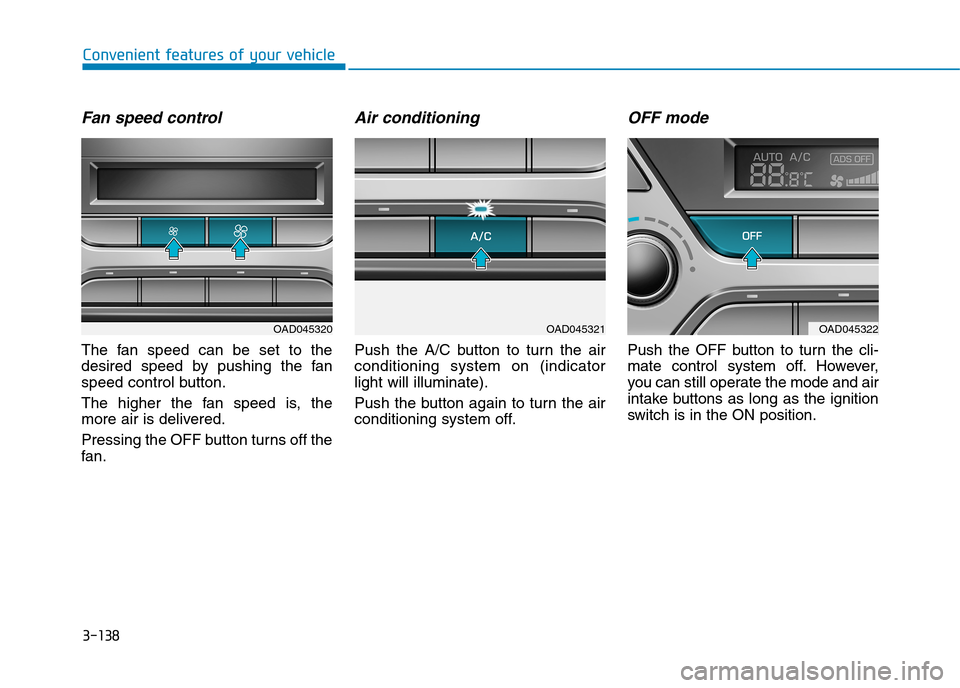
Fan speed control
The fan speed can be set to the
desired speed by pushing the fan
speed control button.
The higher the fan speed is, the
more air is delivered.
Pressing the OFF button turns off the
fan.
Air conditioning
Push the A/C button to turn the air
conditioning system on (indicator
light will illuminate).
Push the button again to turn the air
conditioning system off.
OFF mode
Push the OFF button to turn the cli-
mate control system off. However,
you can still operate the mode and air
intake buttons as long as the ignition
switch is in the ON position.
OAD045320OAD045321OAD045322
Page 253 of 571

Steering wheel audio control
(if equipped)
The steering wheel audio control but-
ton is installed for your convenience.
Do not operate audio remote con-
trol buttons simultaneously.
VOLUME (VOL + / - ) (1)
•Move the VOLUME lever up to
increase volume.
•Move the VOLUME lever down to
decrease volume.
SEEK/PRESET ( / ) (2)
If the SEEK/PRESET lever is moved
up or down and held for 0.8 seconds
or more, it will function in the follow-
ing modes.
RADIO mode
It will function as the AUTO SEEK
select button. It will SEEK until you
release the button.
MEDIA mode
It will function as the FF/REW button.
If the SEEK/PRESET lever is moved
up or down, it will function in the fol-
lowing modes.
RADIO mode
It will function as the PRESET STA-
TION UP/DOWN button.
MEDIA mode
It will function as the TRACK UP/
DOWN button.
MODE ( ) (3)
Press the MODE button to select
Radio, Disc, or AUX.
MUTE ( ) (4)
•Press the button to mute the
sound.
•Press the button again to activate
the sound.
Information
Detailed information for audio control
buttons are described in the following
pages in this chapter.
i
NOTICE
OAD045425
OAD045444L
4-4
Multimedia System
■Ty p e A
■Ty p e B
Page 320 of 571
4-71
Multimedia System
4
(Continued)
• Charging through the USB may not
work for some mobile devices.
• The device may not support normal
operation when using a USB memo-
ry type besides (Metal Cover Type)
USB Memory.
• The device may not support normal
operation when using formats such
as HDD Type, CF, or SD Memory.
• The device will not support files
locked by DRM (Digital Rights
Management.)
• USB memory sticks used by con-
necting an Adaptor (SD Type or CF
Type) may not be properly recog-
nised.
• The device may not operate proper-
ly when using USB HDDs or USBs
subject to connection failures
caused by vehicle vibrations (e.g.
istick type).
(Continued)
(Continued)
• Avoid use of USB mem-
ory products that can
also be used as key
chains or mobile phone
accessories. Use of such products
may cause damage to the USB jack.
• Connecting an MP3 device or phone
through various channels, such as
AUX/BT or Audio/USB mode may
result in pop noises or abnormal
operation.
Information
-Usingthe iPod®Device
• iPod®is a registered trademark of
Apple Inc.
• In order to use the iPod®whilst
operating the buttons, you must use
a dedicated iPod®cable (the cable
that is supplied when purchasing
iPod®/iPhone®products).
•If the iPod®is connected to the vehicle
whilst it is playing, a high pitch sound
could occur for approximately 1-2
seconds immediately after connecting.
If possible, connect the iPod®to the
vehicle with the iPod®stopped/
paused.
• During ACC ON state, connecting
the iPod®through the iPod®cable
will charge the iPod®through the
audio system.
•When connecting with the iPod®
cable, make sure to fully insert the
jack to prevent communication
interference.
(Continued)
i