2017 Hyundai Elantra door lock
[x] Cancel search: door lockPage 136 of 571
3-44
Convenient features of your vehicle
How to use the Smart Boot
The boot can be opened with no-
touch activation when the following
conditions are met:
•After 15 seconds when all doors
are closed and locked.
•Positioned in the detecting area for
more than 3 seconds.
Information
• The Smart Boot does not operate
when:
- The smart key is detected within
15 seconds after the doors are
closed and locked, and is continu-
ously detected.
- The smart key is detected within
15 seconds after the doors are
closed and locked, and 1.5 m from
the front door handles (for vehicles
equipped with a Welcome Light).
- A door is not locked or closed.
- The smart key is in the vehicle.
1. Setting
To a c t i v a t e t h e S m a r t B o o t , g o t o
User Settings Mode and select
Smart Boot on the LCD display.
For more details, refer to "LCD
Display" in this chapter.
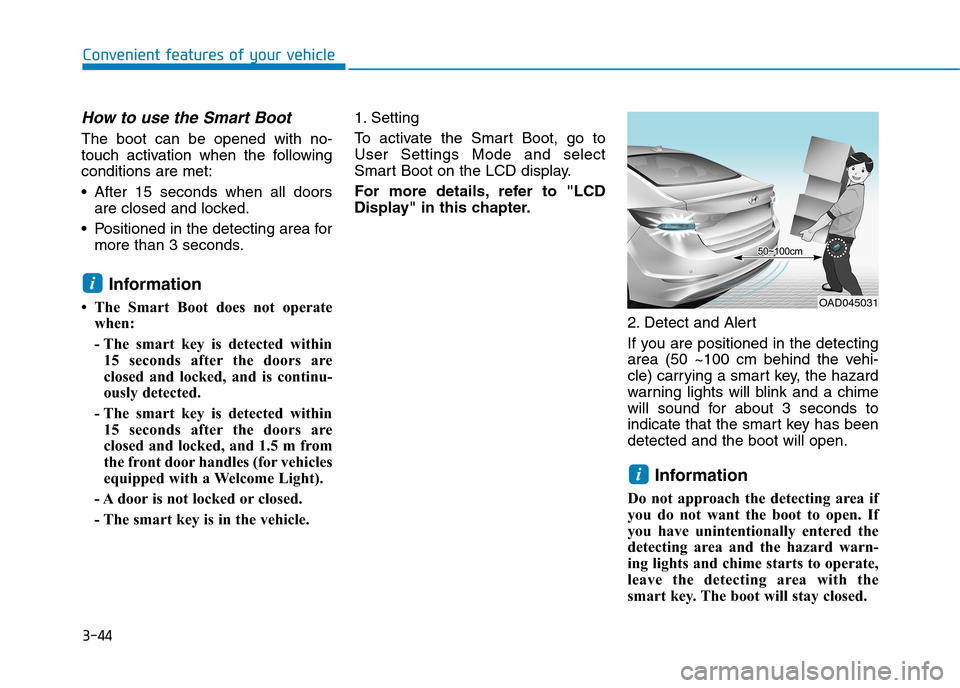
2. Detect and Alert
If you are positioned in the detecting
area (50 ~100 cm behind the vehi-
cle) carrying a smart key, the hazard
warning lights will blink and a chime
will sound for about 3 seconds to
indicate that the smart key has been
detected and the boot will open.
Information
Do not approach the detecting area if
you do not want the boot to open. If
you have unintentionally entered the
detecting area and the hazard warn-
ing lights and chime starts to operate,
leave the detecting area with the
smart key. The boot will stay closed.
i
i
OAD045031
Page 137 of 571
3-45
Convenient features of your vehicle
3
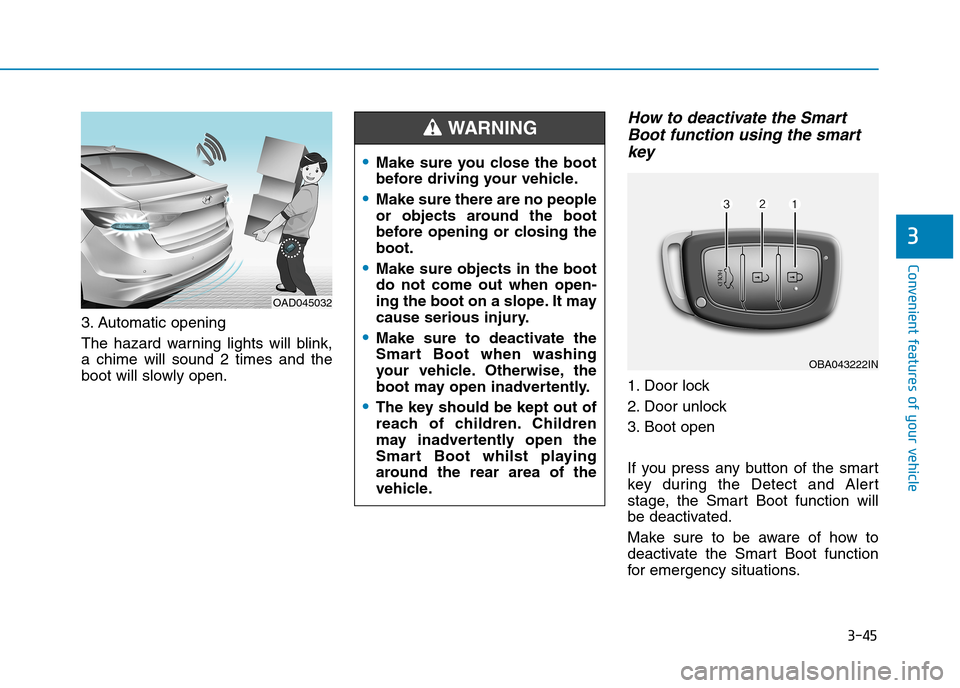
3. Automatic opening
The hazard warning lights will blink,
a chime will sound 2 times and the
boot will slowly open.
How to deactivate the Smart
Boot function using the smart
key
1. Door lock
2. Door unlock
3. Boot open
If you press any button of the smart
key during the Detect and Aler t
stage, the Smart Boot function will
be deactivated.
Make sure to be aware of how to
deactivate the Smart Boot function
for emergency situations.
OAD045032
•Make sure you close the boot
before driving your vehicle.
•Make sure there are no people
or objects around the boot
before opening or closing the
boot.
•Make sure objects in the boot
do not come out when open-
ing the boot on a slope. It may
cause serious injury.
•Make sure to deactivate the
Smart Boot when washing
your vehicle. Otherwise, the
boot may open inadvertently.
•The key should be kept out of
reach of children. Children
may inadvertently open the
Smart Boot whilst playing
around the rear area of the
vehicle.
WA R N I N G
OBA043222IN
Page 138 of 571
3-46
Convenient features of your vehicle
Information
• If you press the door unlock button
(2), the Smart Boot function will be
deactivated temporarily. But, if you
do not open any door for 30 seconds,
the smart boot function will be acti-
vated again.
• If you press the boot open button (3)
for more than 1 second, the boot
opens.
•If you press the doorlock button (1)
or boot open button (3) when the
Smart Boot function is not in the
Detect and Alert stage, the smart boot
function will not be deactivated.
• In case you have deactivated the
Smart Boot function by pressing the
smart key button and opened a
door, the smart boot function can be
activated again by closing and lock-
ing all doors.
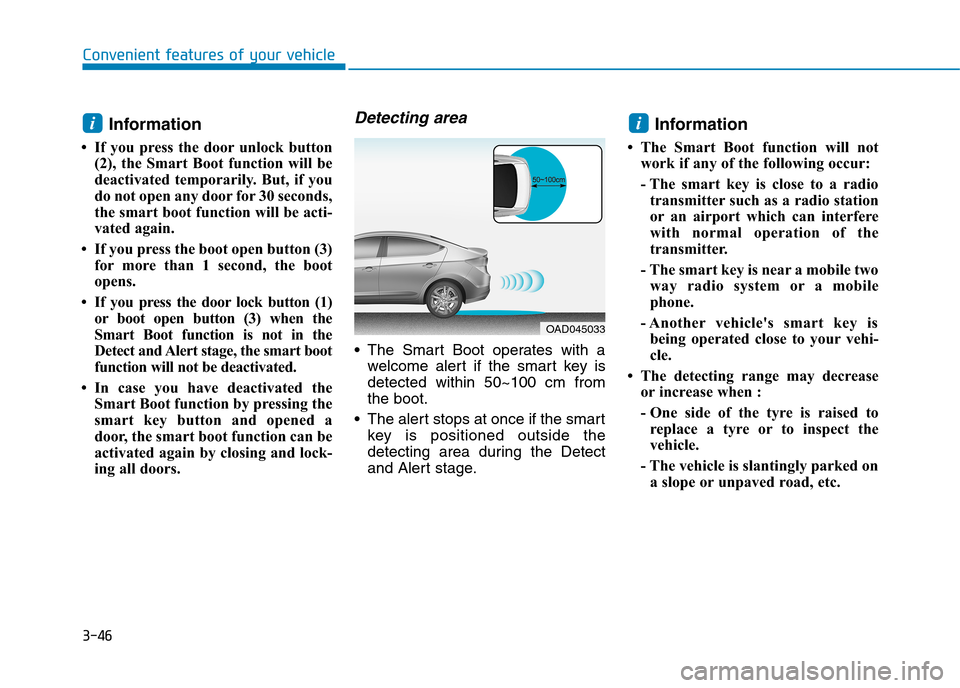
Detecting area
•The Smart Boot operates with a
welcome alert if the smart key is
detected within 50~100 cm from
the boot.
•The alert stops at once if the smart
key is positioned outside the
detecting area during the Detect
and Alert stage.
Information
• The Smart Boot function will not
work if any of the following occur:
- The smart key is close to a radio
transmitter such as a radio station
or an airport which can interfere
with normal operation of the
transmitter.
- The smart key is near a mobile two
way radio system or a mobile
phone.
- Another vehicle's smart key is
being operated close to your vehi-
cle.
• The detecting range may decrease
or increase when :
- One side of the tyre is raised to
replace a tyre or to inspect the
vehicle.
- The vehicle is slantingly parked on
a slope or unpaved road, etc.
ii
OAD045033
Page 139 of 571
3-47
Convenient features of your vehicle
3
Fuel filler door
Opening the fuel filler door
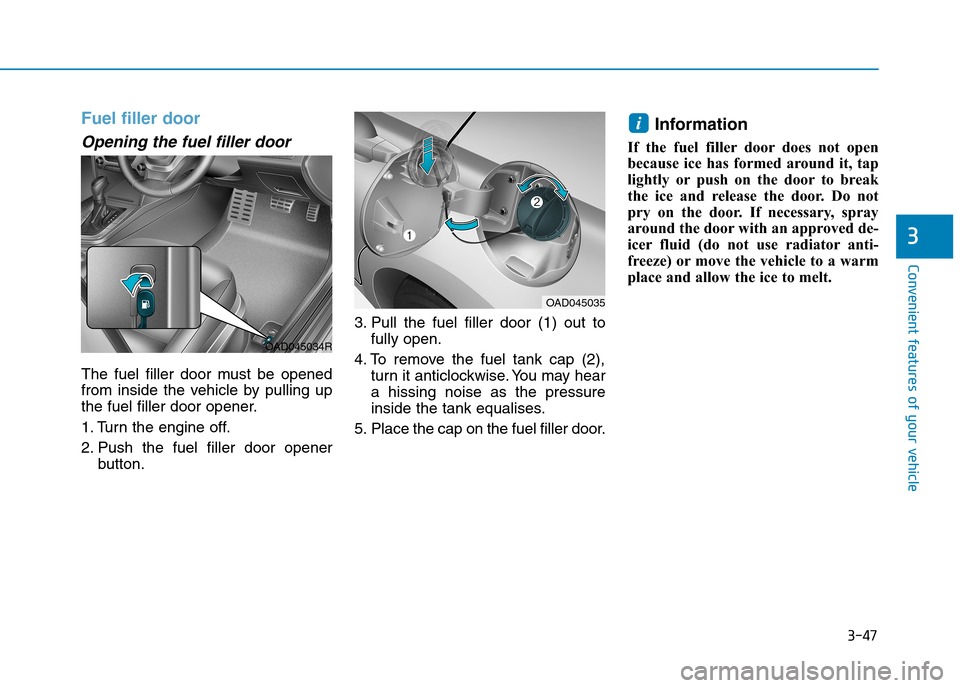
The fuel filler door must be opened
from inside the vehicle by pulling up
the fuel filler door opener.
1. Turn the engine off.
2. Push the fuel filler door opener
button.
3. Pull the fuel filler door (1) out to
fully open.
4. To remove the fuel tank cap (2),
turn it anticlockwise. You may hear
a hissing noise as the pressure
inside the tank equalises.
5. Place the cap on the fuel filler door.
Information
If the fuel filler door does not open
because ice has formed around it, tap
lightly or push on the door to break
the ice and release the door. Do not
pry on the door. If necessary, spray
around the door with an approved de-
icer fluid (do not use radiator anti-
freeze) or move the vehicle to a warm
place and allow the ice to melt.
i
OAD045035
OAD045034R
Page 140 of 571
3-48
Convenient features of your vehicle
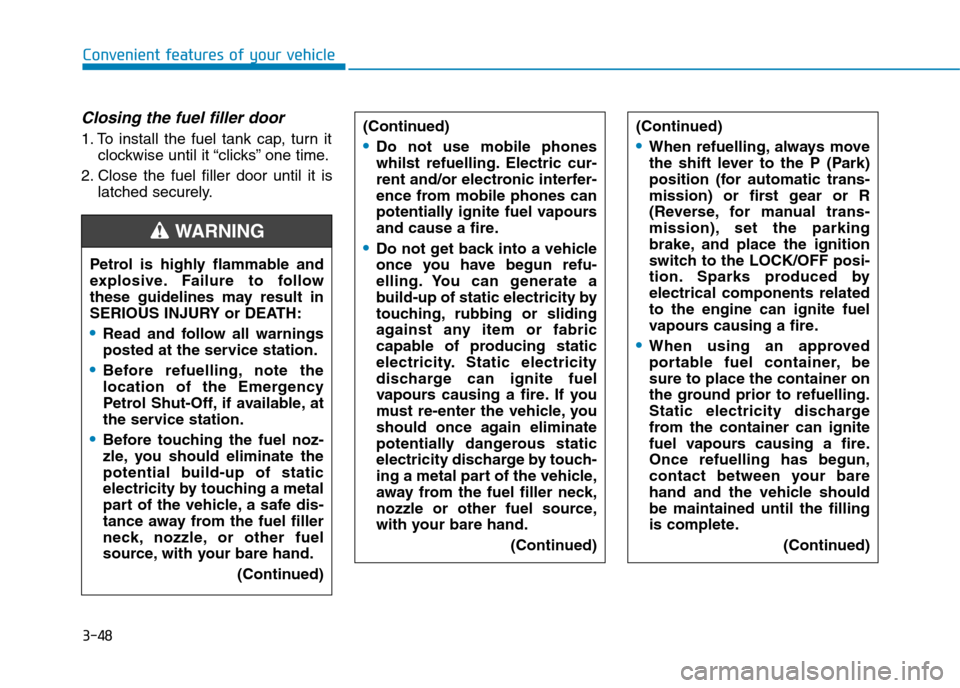
Closing the fuel filler door
1. To install the fuel tank cap, turn it
clockwise until it “clicks” one time.
2. Close the fuel filler door until it is
latched securely.
Petrol is highly flammable and
explosive. Failure to follow
these guidelines may result in
SERIOUS INJURY or DEATH:
•Read and follow all warnings
posted at the service station.
•Before refuelling, note the
location of the Emergency
Petrol Shut-Off, if available, at
the service station.
•Before touching the fuel noz-
zle, you should eliminate the
potential build-up of static
electricity by touching a metal
part of the vehicle, a safe dis-
tance away from the fuel filler
neck, nozzle, or other fuel
source, with your bare hand.
(Continued)
WA R N I N G
(Continued)
•Do not use mobile phones
whilst refuelling. Electric cur-
rent and/or electronic interfer-
ence from mobile phones can
potentially ignite fuel vapours
and cause a fire.
•Do not get back into a vehicle
once you have begun refu-
elling. You can generate a
build-up of static electricity by
touching, rubbing or sliding
against any item or fabric
capable of producing static
electricity. Static electricity
discharge can ignite fuel
vapours causing a fire. If you
must re-enter the vehicle, you
should once again eliminate
potentially dangerous static
electricity discharge by touch-
ing a metal part of the vehicle,
away from the fuel filler neck,
nozzle or other fuel source,
with your bare hand.
(Continued)
(Continued)
•When refuelling, always move
the shift lever to the P (Park)
position (for automatic trans-
mission) or first gear or R
(Reverse, for manual trans-
mission), set the parking
brake, and place the ignition
switch to the LOCK/OFF posi-
tion. Sparks produced by
electrical components related
to the engine can ignite fuel
vapours causing a fire.
•When using an approved
portable fuel container, be
sure to place the container on
the ground prior to refuelling.
Static electricity discharge
from the container can ignite
fuel vapours causing a fire.
Once refuelling has begun,
contact between your bare
hand and the vehicle should
be maintained until the filling
is complete.
(Continued)
Page 165 of 571
3-73
Convenient features of your vehicle
3
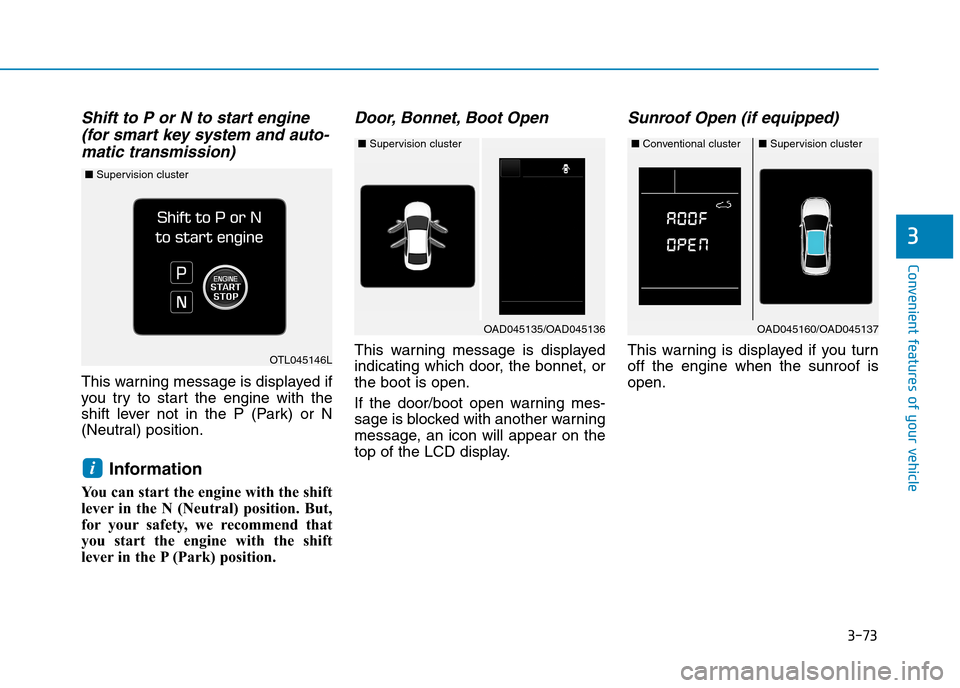
Shift to P or N to start engine
(for smart key system and auto-
matic transmission)
This warning message is displayed if
you try to star t the engine with the
shift lever not in the P (Park) or N
(Neutral) position.
Information
You can start the engine with the shift
lever in the N (Neutral) position. But,
for your safety, we recommend that
you start the engine with the shift
lever in the P (Park) position.
Door, Bonnet, Boot Open
This warning message is displayed
indicating which door, the bonnet, or
the boot is open.
If the door/boot open warning mes-
sage is blocked with another warning
message, an icon will appear on the
top of the LCD display.
Sunroof Open (if equipped)
This warning is displayed if you turn
off the engine when the sunroof is
open.
i
OAD045160/OAD045137
OTL045146L
■Supervision cluster
■Conventional cluster■Supervision cluster
OAD045135/OAD045136
■Supervision cluster
Page 177 of 571
3-85
Convenient features of your vehicle
3
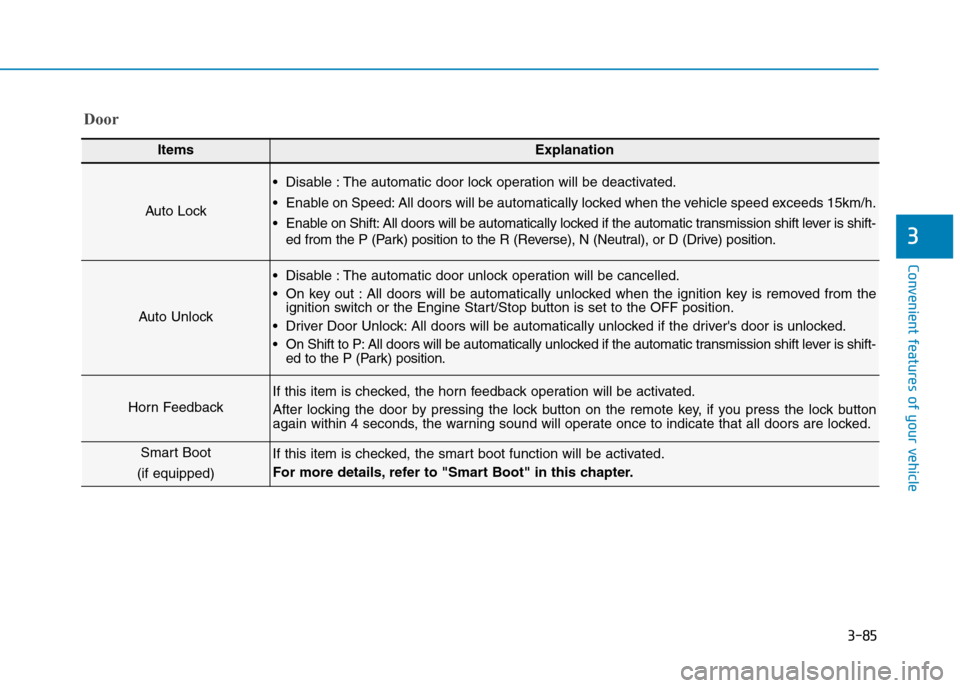
Door
ItemsExplanation
Auto Lock
•Disable :The automatic door lock operation will be deactivated.
•Enable on Speed:All doors will be automatically locked when the vehicle speed exceeds 15km/h.
•Enable on Shift:All doors will be automatically locked if the automatic transmission shift lever is shift-
ed from the P (Park) position to the R (Reverse), N (Neutral), or D (Drive) position.
Auto Unlock
•Disable :The automatic door unlock operation will be cancelled.
•On key out :All doors will be automatically unlocked when the ignition key is removed from theignition switch or the Engine Start/Stop button is set to the OFF position.
•Driver Door Unlock:All doors will be automatically unlocked if the driver's door is unlocked.
•On Shift to P:All doors will be automatically unlocked if the automatic transmission shift lever is shift-ed to the P (Park) position.
Horn Feedback
If this item is checked, the horn feedback operation will be activated.
After locking the door by pressing the lock button on the remote key, if you press the lock buttonagain within 4 seconds, the warning sound will operate once to indicate that all doors are locked.
Smart Boot
(if equipped)
If this item is checked, the smart boot function will be activated.
For more details, refer to "Smart Boot" in this chapter.
Page 195 of 571
3-103
Convenient features of your vehicle
3
Battery saver function
The purpose of this feature is to pre-
vent the batter y from being dis-
charged. The system automatically
turns off the parking lamp when the
driver turns the engine off and opens
the driver-side door.
With this feature, the parking lamps
will turn off automatically if the driver
parks on the side of the road at night.
If necessary, to keep the lamps on
when the engine is turned off, perform
the following:
1) Open the driver-side door.
2) Turn the parking lamps OFF and
ON again using the light switch on
the steering column.
Headlamp delay function
(if equipped)
If you place the ignition switch in the
ACC or OFF position with the head-
lamps ON, the headlamps (and/or
parking lamps) remain on for about 5
minutes. However, with the engine off
if the driver’s door is opened and
closed, the headlamps (and/or park-
ing lamps) are turned off after 15
seconds.
The headlamps (and/or parking
lamps) can be turned off by pressing
the lock button on the smart key
twice or turning the light switch to the
OFF or AUTO position. However, if
you turn the light switch to the AUTO
position when it is dark outside, the
headlamps will not be turned off.
Yo u c a n a c t i v a t e o r d e a c t i v a t e t h e
Headlamp Delay function from the
User Settings Mode on the LCD dis-
play.For more details, refer to
"LCD Display" in this chapter.
If the driver gets out of the vehicle
through other doors (except dri-
ver's door), the battery saver func-
tion does not operate and the
headlamp delay function does not
turn off automatically. Therefore, It
causes the battery to be dis-
charged. In this case, make sure to
turn off the lamp before getting out
of the vehicle.
Daytime running light (DRL)
(if equipped)
The Daytime Running Lights (DRL)
can make it easier for others to see
the front of your vehicle during the
day, especially after dawn and before
sunset.
The DRL system will turn the dedi-
cated lamp OFF when:
1. The headlights or front fog lights
are in the ON position.
2. The engine is turned off.
NOTICE