Page 476 of 571

7-6
Maintenance
Owner maintenance schedule
When you stop for fuel:
•Check the engine oil level.
•Check coolant level in the engine
coolant reservoir.
•Check the windscreen washer fluid
level.
•Check for low or under-inflated
tyres.
Whilst operating your vehicle:
•Note any changes in the sound of
the exhaust or any smell of exhaust
fumes in the vehicle.
•Check for vibrations in the steering
wheel. Notice if there is any
increased steering effort or loose-
ness in the steering wheel, or
change in its straight-ahead position.
•Notice if your vehicle constantly
turns slightly or “pulls” to one side
when travelling on smooth, level
road.
•When stopping, listen and check for
unusual sounds, pulling to one side,
increased brake pedal travel or
“hard-to-push” brake pedal.
•If any slipping or changes in the
operation of your transmission
occurs, check the transmission fluid
level.
•Check the automatic transmission
P (Park) function.
•Check the parking brake.
•Check for fluid leaks under your vehi-
cle (water dripping from the air con-
ditioning system during or after use
is normal).
At least monthly:
•Check coolant level in the engine
coolant reservoir.
•Check the operation of all exterior
lights, including the stoplights, turn
signals and hazard warning flashers.
•Check the inflation pressures of all
tyres including the spare for tyres
that are worn, show uneven wear,
or are damaged.
•Check for loose wheel lug nuts.
Be careful when checking your
engine coolant level when the
engine is hot. This may result in
coolant being blown out of the
opening and cause serious
burns and other injuries.
WA R N I N G
Page 538 of 571
7-68
Maintenance
Information
After heavy rain, or washing, head-
lamp and tail lamp lenses could
appear frosty. This condition is caused
by the temperature difference between
the lamp inside and outside.
This is similar to the condensation on
your windows inside your vehicle
when raining and doesn’t indicate a
problem with your vehicle. If the
water leaks into the lamp bulb circuit-
ry, we recommend that the system be
checked by an authorised HYUNDAI
dealer.
Headlamp, position lamp,
turn signal lamp and fog lamp
light bulb replacement
Ty p e A – S t a n d a rd
(1) Headlamp (Low)
(2) Headlamp (High)
(3) Turn signal lamp
(4) Position lamp
(5) Daytime running lamp (DRL)
(6) Fog lamp (if equipped)
i
OAD075031
OAD075048
■ without fog lamp
■ with fog lamp
Page 540 of 571

7-70
Maintenance
8. Connect the headlamp bulb sock-
et-connector.
9. Install the headlamp bulb cover by
turning it clockwise.
Information
The headlamp aiming should be
adjusted after an accident or after the
headlamp assembly is reinstalled at an
authorised HYUNDAI dealer.
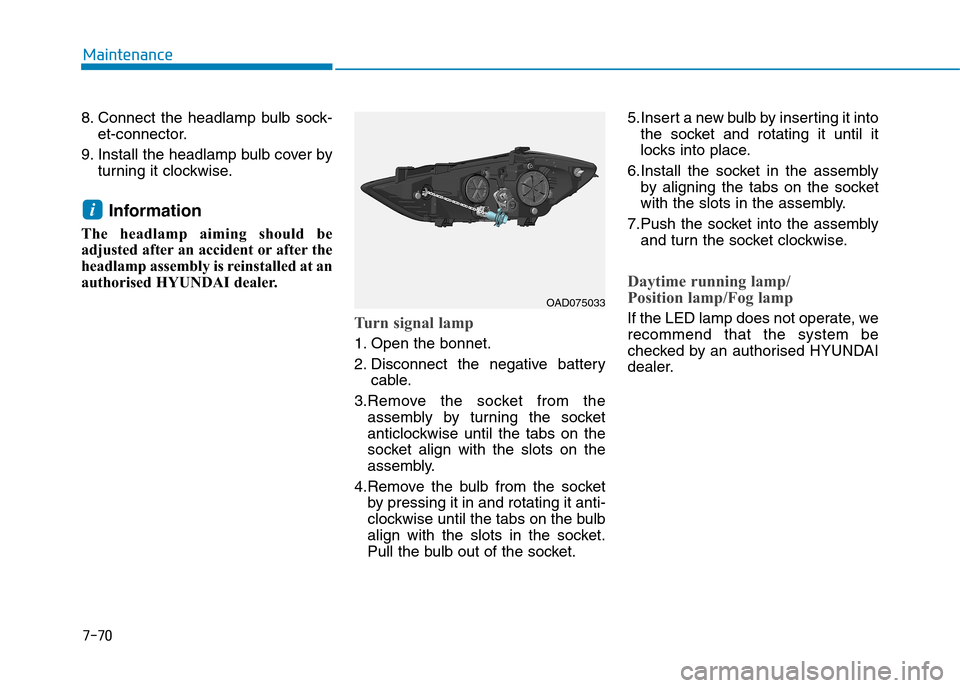
Turn signal lamp
1. Open the bonnet.
2. Disconnect the negative battery
cable.
3.Remove the socket from the
assembly by turning the socket
anticlockwise until the tabs on the
socket align with the slots on the
assembly.
4.Remove the bulb from the socket
by pressing it in and rotating it anti-
clockwise until the tabs on the bulb
align with the slots in the socket.
Pull the bulb out of the socket.
5.Insert a new bulb by inserting it into
the socket and rotating it until it
locks into place.
6.Install the socket in the assembly
by aligning the tabs on the socket
with the slots in the assembly.
7.Push the socket into the assembly
and turn the socket clockwise.
Daytime running lamp/
Position lamp/Fog lamp
If the LED lamp does not operate, we
recommend that the system be
checked by an authorised HYUNDAI
dealer.
i
OAD075033
Page 541 of 571
7-71
7
Maintenance
Ty p e B - L E D D ay t i m e r u n n i n g
lamp
(1) Headlamp (Low)
(2) Headlamp (High)
(3) Turn signal lamp
(4) Position lamp/
Daytime running lamp (DRL)
(5) Fog lamp
Ty p e C - H I D h e a d l a m p
(1) Headlamp (Low)
(2) Headlamp (High)
(3) Turn signal lamp
(4) Position lamp/
Daytime running lamp (DRL)
(5) Fog lamp
Halogen Headlamp
(Type B Low/High, Type C High)OAD075031
OAD075031
OLMB073042L
•Handle halogen bulbs with
care. Halogen bulbs contain
pressurised gas that will pro-
duce flying pieces of glass
that could cause injuries if
broken.
•Wear eye protection when
changing a bulb. Allow the
bulb to cool down before han-
dling it.
WA R N I N G
Page 543 of 571

7-73
7
Maintenance
HID Headlight low beam
(if equipped)
Do not attempt to replace or
inspect the low beam (XENON
bulb) due to electric shock dan-
ger. If the low beam (XENON
bulb) is not working, we recom-
mend that the system be
checked by an authorised
HYUNDAI dealer.
WA R N I N G
HID Headlamp (Type C Low)
If the HID lamp does not operate, we
recommend that the system be
checked by an authorised HYUNDAI
dealer.
Information
HID lamps have superior perform-
ance over halogen bulbs.
HID lamps are estimated by the man-
ufacturer to last twice as long or
longer than halogen bulbs depending
on their frequency of use. They will
probably require replacement at some
point in the life of the vehicle. Cycling
the headlights on and off more than is
typical, will shorten HID lamp life.
HID lamps do not fail in the same
manner as halogen incandescent
lamps. If a headlight goes out after a
period of operation but will immedi-
ately relight when the headlight
switch is cycled it is likely the HID
lamp needs to be replaced. HID light-
ing components are more complex
than conventional halogen bulbs thus
have higher replacement cost.
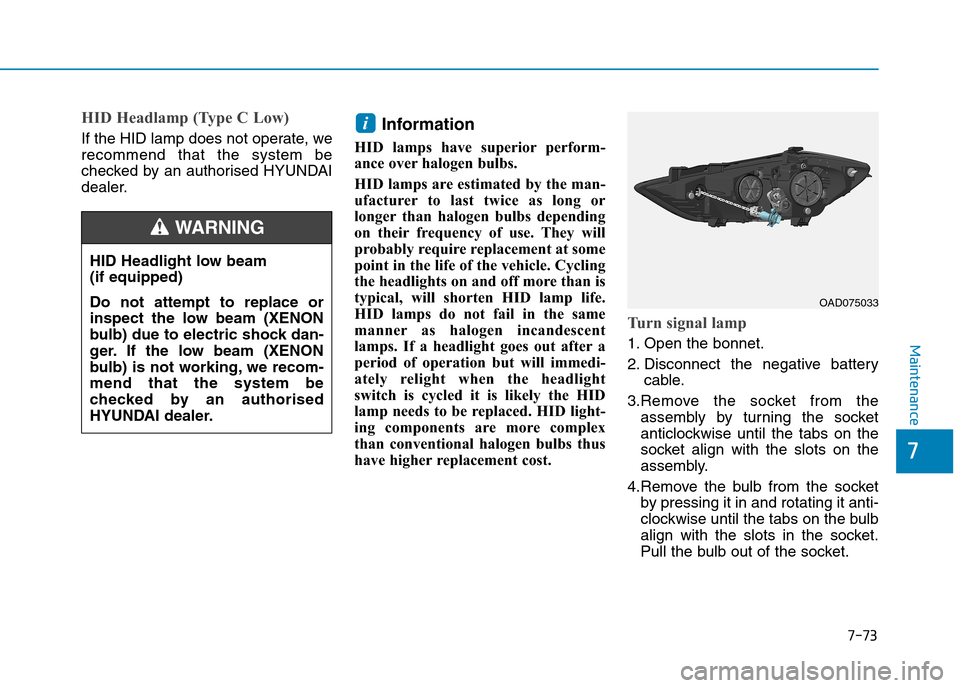
Turn signal lamp
1. Open the bonnet.
2. Disconnect the negative battery
cable.
3.Remove the socket from the
assembly by turning the socket
anticlockwise until the tabs on the
socket align with the slots on the
assembly.
4.Remove the bulb from the socket
by pressing it in and rotating it anti-
clockwise until the tabs on the bulb
align with the slots in the socket.
Pull the bulb out of the socket.
i
OAD075033
Page 545 of 571
7-75
7
Maintenance
Rear combination lamp bulb
replacement
(1) Tail/Stop lamp
(2) Tail lamp
(3) Turn signal lamp
(4) Reverse lamp
(5) Fog lamp (if equipped)
Outside lamp
1.Open the boot lid.
2.Remove the ser vice cover by
pulling out the service cover.
OAD075036
■ Ty p e C ( L E D w i t h f o g l a m p )
OAD075049
OAD075036
■ Ty p e A ( B u l b )
OAD075036
■ Ty p e B ( L E D )
Page 546 of 571
7-76
Maintenance
3.Loosen the assembly retaining
nuts.
4.Remove the rear combination light
assembly from the body of the
vehicle.
Stop/Tail lamp and turn signal
lamp
5.Remove the socket from the
assembly by turning the socket
anticlockwise until the tabs on the
socket align with the slots on the
assembly.
OAD075037
OAD075038
■Ty p e A
■Ty p e B , C
Ta i l / s t o p
Tu r n s i g n a l
Tu r n s i g n a l
OAD075051OAD075050
Page:
< prev 1-8 9-16 17-24