2017 Hyundai Azera lock
[x] Cancel search: lockPage 110 of 520

431
Features of your vehicle
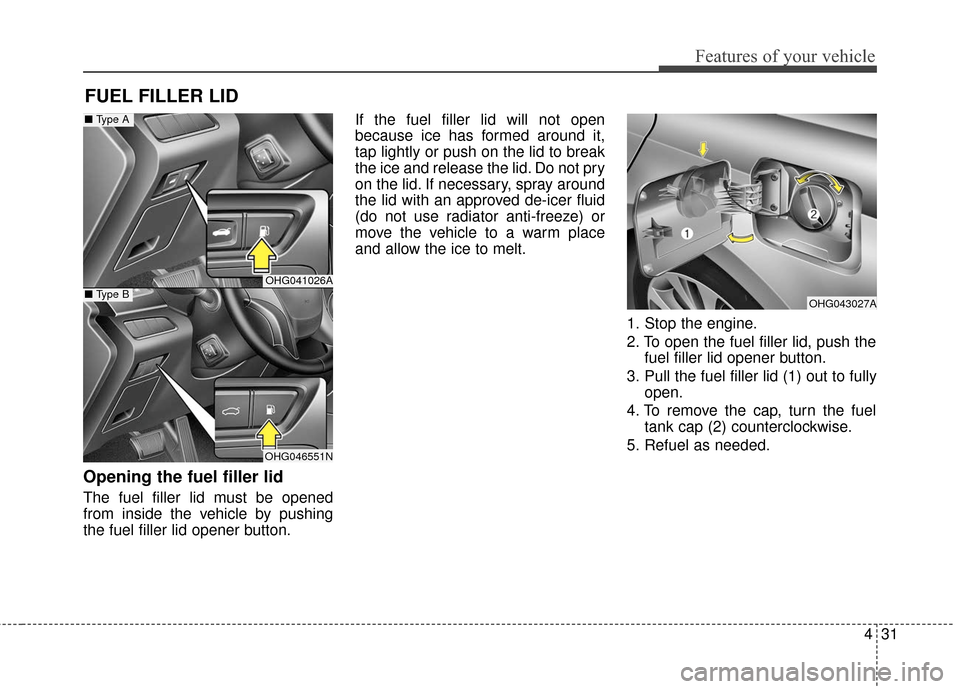
Opening the fuel filler lid
The fuel filler lid must be opened
from inside the vehicle by pushing
the fuel filler lid opener button.If the fuel filler lid will not open
because ice has formed around it,
tap lightly or push on the lid to break
the ice and release the lid. Do not pry
on the lid. If necessary, spray around
the lid with an approved de-icer fluid
(do not use radiator anti-freeze) or
move the vehicle to a warm place
and allow the ice to melt.
1. Stop the engine.
2. To open the fuel filler lid, push thefuel filler lid opener button.
3. Pull the fuel filler lid (1) out to fully open.
4. To remove the cap, turn the fuel tank cap (2) counterclockwise.
5. Refuel as needed.
FUEL FILLER LID
OHG043027A
OHG041026A
OHG046551N
■ Type A
■ Type B
Page 111 of 520

Features of your vehicle
32
4
Closing the fuel filler lid
1. To install the cap, turn it clockwise
until it clicks one time. This indi-
cates that the cap is securely
tightened.
2. Close the fuel filler lid and push it lightly and make sure that it is
securely closed.
✽ ✽NOTICE
Tighten the cap until it clicks one
time, otherwise the warning light
“Check Fuel Cap” will illuminate on
the LCD display.
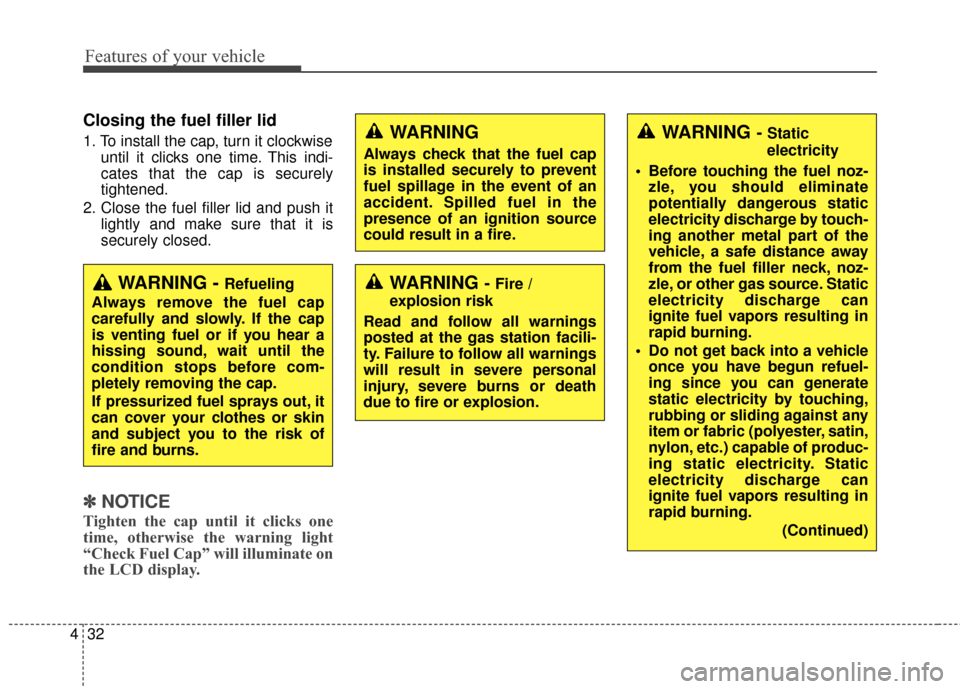
WARNING - Fire /
explosion risk
Read and follow all warnings
posted at the gas station facili-
ty. Failure to follow all warnings
will result in severe personal
injury, severe burns or death
due to fire or explosion.
WARNING
Always check that the fuel cap
is installed securely to prevent
fuel spillage in the event of an
accident. Spilled fuel in the
presence of an ignition source
could result in a fire.
WARNING - Static
electricity
Before touching the fuel noz- zle, you should eliminate
potentially dangerous static
electricity discharge by touch-
ing another metal part of the
vehicle, a safe distance away
from the fuel filler neck, noz-
zle, or other gas source. Static
electricity discharge can
ignite fuel vapors resulting in
rapid burning.
Do not get back into a vehicle once you have begun refuel-
ing since you can generate
static electricity by touching,
rubbing or sliding against any
item or fabric (polyester, satin,
nylon, etc.) capable of produc-
ing static electricity. Static
electricity discharge can
ignite fuel vapors resulting in
rapid burning.
(Continued)
WARNING - Refueling
Always remove the fuel cap
carefully and slowly. If the cap
is venting fuel or if you hear a
hissing sound, wait until the
condition stops before com-
pletely removing the cap.
If pressurized fuel sprays out, it
can cover your clothes or skin
and subject you to the risk of
fire and burns.
Page 123 of 520

Features of your vehicle
44
4
Tilt and telescopic steering
Tilt and telescopic steering allows
you to adjust the steering wheel
before you drive. You can also raise it
to give your legs more room when
you exit and enter the vehicle.
The steering wheel should be posi-
tioned so that it is comfortable for
you to drive, while permitting you to
see the instrument panel warning
lights and gauges.
Manual type
To change the steering wheel angle
and height:
1. Pull down the lock-release lever
(1).
2. Adjust the steering wheel to the desired angle (2) and height (3).
3. Pull up the lock-release lever to lock the steering wheel in place.
Electric type
To change the steering wheel angle
and height:
Move the switch (1) up and downto adjust the angle (2).
Move the switch forward or rear- ward to adjust the height (3).
OHG040189LOHG040035
WARNING - Steering
wheel adjustment
Never adjust the angle and
height of the steering wheel
while driving. You may lose
steering control and cause seri-
ous personal injury, death, or
accidents.
Page 128 of 520

449
Features of your vehicle
To adjust the Zone setting:
1. Determine the desired ZoneNumber based upon your current
location on the Zone Map.
2. Press and hold the button for 6 seconds, the current Zone
Number will appear on the display.
3. Pressing and holding the button again will cause the numbers to
increment (Note: they will repeat
…13, 14, 15, 1, 2, …). Releasing
the button when the desired Zone
Number appears on the display
will set the new Zone.
4. Within about 5 seconds the com- pass will start displaying a com-
pass heading again. There are some conditions that can
cause changes to the vehicle mag-
nets, such as installing a ski rack or
a CB antenna. Body repair work on
the vehicle can also cause changes
to the vehicle's magnetic field. In
these situations, the compass will
need to be re-calibrated to quickly
correct these changes. To re-cali-
brate the compass:
1. Press and hold the button for
more than 9 seconds. When the
compass memory is cleared a "C"
will appear in the display.
2. To calibrate the compass, drive the vehicle in 2 complete circles at
less than 5 mph (8 km/h). Integrated HomeLink®Wireless
Control System
The HomeLink
®Wireless Control
System provides a convenient way to
replace up to three hand-held radio-
frequency (RF) transmitters with a
single built-in device. This innovative
feature will learn the radio frequency
codes of most current transmitters to
operate devices such as gate opera-
tors, garage door openers, entry
door locks, security systems, even
home lighting. Both standard and
rolling code-equipped transmitters
can be programmed by following the
outlined procedures. Additional
HomeLink
®information can be found
at: www.homelink.com or by calling
1-800-355-3515.
Page 131 of 520

Features of your vehicle
52
4
4. Firmly press, hold for 5 seconds
and release the programmed
HomeLink
®button up to two sepa-
rate times to activate the door. If
the door does not activate, press
and hold the just-trained
HomeLink
®button and observe
the indicator light.
stantly, programming is complete
and your device should activate
when the HomeLink
®button is
pressed and released.
for 2 seconds and then turns to
a constant light, continue with
"Programming" steps 5-7 to
complete the programming of a
rolling code equipped device
(most commonly a garage door
opener).
5. At the garage door opener receiv- er (motor-head unit) in the garage,
locate the "learn" or "smart" but-
ton. This can usually be found
where the hanging antenna wire is
attached to the motor-head unit. 6. Firmly press and release the
"learn" or "smart" button. (The
name and color of the button vary
by manufacturer). There are 30
seconds to initiate step 7.
7. Return to the vehicle and firmly press, hold for 2 seconds
and release the programmed
HomeLink
®button. Repeat the
"press/hold/release" sequence a
second time, and, depending on
the brand of the garage door
opener (or other rolling code
equipped device), repeat this
sequence a third time to complete
the programming process.
HomeLink
®should now activate your
rolling code equipped device. Gate operator & Canadian
programming
During programming, your handheld
transmitter may automatically stop
transmitting. Continue to press
the Integrated HomeLink
®Wireless
Control System button (note steps
2 through 4 in the Standard
Programming portion of this docu-
ment) while you press and re-press
("cycle") your handheld transmitter
every two seconds until the frequen-
cy signal has been learned. The indi-
cator light will flash slowly and then
rapidly after several seconds upon
successful training.
Operating HomeLink
®
To operate, simply press and release
the programmed HomeLink®button.
Activation will now occur for the
trained device (i.e. garage door
opener, gate operator, security sys-
tem, entry door lock, home/office
lighting, etc.). For convenience, the
hand-held transmitter of the device
may also be used at any time.
Page 135 of 520

Features of your vehicle
56
4
4. After the adjustment, position the
lever in the center to prevent inad-
vertent movement.
Folding/unfolding the side viewmirror
Manual type
To fold the side view mirror, grasp the
housing of the mirror and then fold it
toward the rear of the vehicle. Electric type (if equipped)
The side view mirror can be folded or
unfolded by pressing the switch as
below.
Left (1) :
The mirror will unfold.
Right (2) : The mirror will fold.
Center (AUTO, 3) :
The mirror will fold or unfold automat-
ically as follows:
- The mirror will fold or unfold when the door is locked or unlocked by the
smart key.
- The mirror will fold or unfold when the door is locked or unlocked by the
button on the outside door handle.
CAUTION - Outside
mirror
The mirrors stop moving when they reach the maximumadjusting angles, but themotor continues to operatewhile the switch is pressed.Do not press the switch longerthan necessary, the motormay be damaged.
Do not attempt to adjust the side view mirror by hand.Doing so may damage therelated parts.
OHG041214AOHG040045
Page 136 of 520

457
Features of your vehicle
- The mirror will unfold when youapproach the vehicle (all doors
closed and locked) with a smart
key in possession. (if equipped)
Reverse parking aid function
(if equipped)
While the vehicle is moving rear-
ward, the side view mirror(s) will
move downward to aid reverse park-
ing. According to the position of the
side view mirror switch (1), the side
view mirror(s) will operate as follows:
L/R : When the remote control side
view mirror switch is selected to
the L (left) or R (right) position,
both side view mirrors will move
downward. Neutral
: When the remote control
side view mirror switch is
placed in the middle, the
side view mirrors will not
operate while the vehicle is
moving rearward.
The side view mirrors will automati-
cally revert to their original positions
under the following conditions:
1. The ignition switch is in the OFF position.
2. Shift lever is moved to any position except R (Reverse).
3. Remote control side view mirror switch is placed in the middle.
OHG041034A
CAUTION
In case it is an electric type sideview mirror, don’t fold it byhand. It could cause motor fail-ure.
CAUTION
The electric type side view mir-ror operates even though theENGINE START/ STOP button isin the OFF position. However, toprevent unnecessary batterydischarge, do not adjust themirrors longer than necessarywhile the engine is not running.
Page 148 of 520

469
Features of your vehicle
Door/Trunk
ItemsExplanation
Automatically Lock
Off (Disable) : The auto door lock operation will be deactivated.
Enable on Speed: All doors will be automatically locked when the vehicle speed exceeds 9.3mph(15km/h).
Enable on Shift: All doors will be automatically locked if the automatic transaxle shift lever is shift- ed from the P (Park) position to the R (Reverse), N (Neutral), or D (Drive) posi-
tion.
Automatically Unlock
Off (Disable) : The auto door unlock operation will be deactivated.
Vehicle Off: All doors will be automatically unlocked when the Engine Start/Stop button is set tothe OFF position.
Driver Door Unlock: All doors will be automatically unlocked if the driver's door is unlocked.
On Shift to P: All doors will be automatically unlocked if the automatic transaxle shift lever is shift- ed to the P (Park) position.
Two Press Unlock
The two press unlock function will be deactivated. Therefore, all doors will unlock if the dooris unlocked.
The driver’s door will unlock if the door is unlocked. When the door is unlocked again within 4 seconds, all doors will unlock.
Door Lock Sound
(Lock/Unlock Sound)To activate or deactivate the lock sound when locking doors.
Smart TrunkTo activate or deactivate the Smart Trunk system.
For more details, refer to "Smart Trunk" in this chapter.