2017 HONDA RIDGELINE wheel
[x] Cancel search: wheelPage 49 of 85

NAVIGATION
90 || 91
N
AVIGATION
NAVIGATION*
Learn how to enter a destination and operate the navigation system.
Basic Navigation Operation
A real-time navigation system uses GPS and a map database to show your current
location and help guide you to a desired destination. You can operate the system using
voice commands or the system controls.
To reduce the potential for driver distraction, certain manual functions \
may be
inoperable or grayed out while the vehicle is moving. Voice commands are always
available.
n
Steering Wheel Controls
Use the steering wheel controls to say voice commands.
BACK button: Press to cancel
a command or operation.
TALK button: Press to say
navigation commands.
n Talk Button Tips
•
When using the Talk button, wait for a beep before saying a command.
•
To bypass the system prompts, simply press the Talk button again to say
your command.
•
Speak in a clear, natural voice.
•
Reduce all background noise.
•
Adjust the dashboard vents away from the microphone in the ceiling.
•
Close the windows and moonroof*.
n
System Guidance Volume
Adjust the navigation system volume.
1.
From the Home screen, select Settings.
2.
Select System.
3.
Select the Sound/Beep tab.
4.
Adjust the Guidance Volume level.
5.
Press BACK to exit the menus.
*if equipped
n Navigation Display and Controls
Touch icons on the screen to enter information and make selections.
Navi: Display the
navigation screen.
BACK: Go back to
the previous display. MENU: Display
navigation options. Traffic flow
Current vehicle
position Traffic incident
icon Search icon
Map menu
MAP: Display the
map screen.
Page 52 of 85

NAVIGATION
96 || 97
D
RIVING
n Traffic
View traffic flow and incidents in major metro areas. Traffic alerts are accompanied
by an audible beep. Pop-up messages and traffic information can be vie\
wed when
you are on the map screen. You can also select traffic to avoid. Traffic coverage is
limited in Canada.
Viewing traffic
1.
From the map screen, select the traffic icon.
2.
Select Traffic Conditions.
3.
Traffic icons are shown on the map. Select the
magnifying glass icon to display a full list of
traffic delays.
To mute traffic alerts and voice guidance: From the map screen, press MENU.
Select Mute. To lower voice guidance volume, see page 90.
Avoiding traffic on your route
1.
From the map screen, select the traffic icon.
2.
Select Traffic on Route.
3.
Select an incident to avoid from the list.
4.
Select the menu icon.
5.
Select Avoid.
DRIVING
Learn about preparation for driving, as well as other features.
Before Driving
Check the following items before you begin driving.
n
Exterior Checks •
Make sure there are no obstructions on the windows, door mirrors, exteri\
or lights, or other parts of the vehicle.
•
Remove any frost, snow, or ice.
•
Make sure the hood is securely closed.
•
Make sure the trunk is closed and locked.
•
Make sure the tailgate is closed when not being used as an extended bed.\
•
Heat from the engine and exhaust can ignite flammable materials left u\
nder
the hood, causing a fire. If you’ve parked your vehicle for an exte\
nded period,
inspect and remove any debris that may have collected, such as dried gra\
ss
and leaves that have fallen or have been carried in for use as a nest by\
a small
animal. Also check under the hood for leftover flammable materials aft\
er you or
someone else has performed maintenance on your vehicle.
•
Make sure the tires are in good condition.
•
Make sure there are no people or objects behind or around the vehicle.
If the doors are frozen shut, use warm water around the door edges to me\
lt any ice.
Do not try to force them open, as this can damage the rubber trim around\
the doors.
When done, wipe dry to avoid further freezing.
NOTICE
n
Interior Checks •
Store or secure all items on board properly.
•
Do not pile items higher than the seat height.
•
Do not place anything in the front seat footwells.
Make sure to secure the floor mats.
•
If you have any animals on board, do not let them move freely around in \
the vehicle.
•
Securely close and lock all doors and the tailgate.
•
Adjust your seating position, mirrors, and steering wheel properly.
•
Make sure items placed on the floor behind the front seats cannot roll\
under the seats.
•
Everyone in the vehicle must fasten their seat belt.
•
Make sure that the indicators in the instrument panel come on when you s\
tart
the vehicle, and go off soon after.
Page 58 of 85

DRIVING
108 || 109
D
RIVING
Braking
Slow down or stop your vehicle, and keep it from moving when parked.
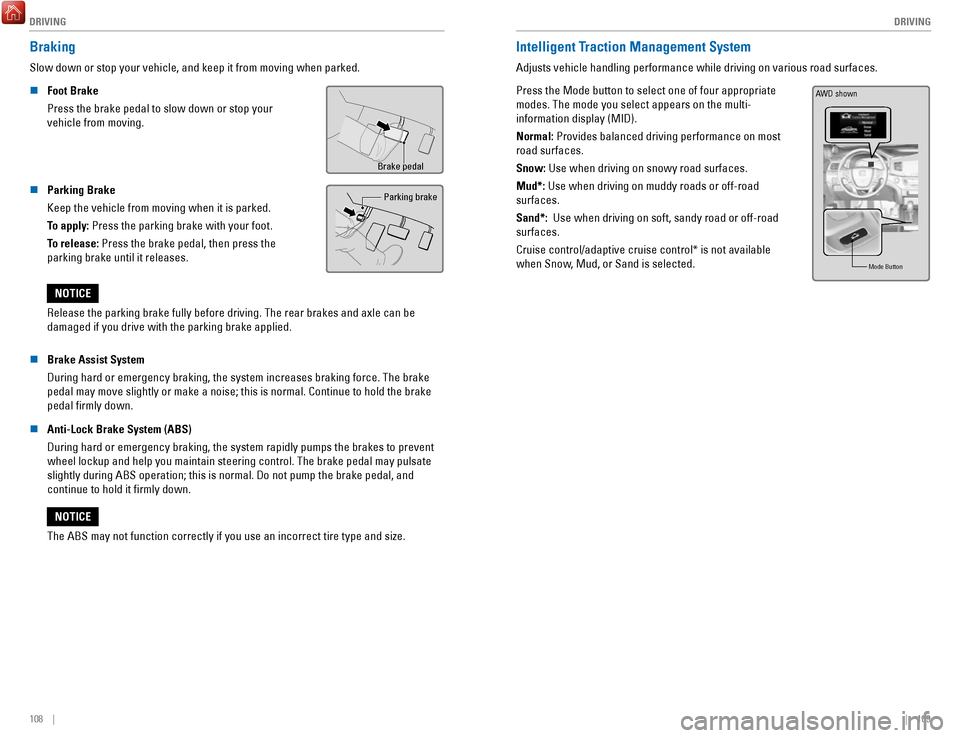
n
Foot Brake
Press the brake pedal to slow down or stop your
vehicle from moving.
Brake pedal
n Parking Brake
Keep the vehicle from moving when it is parked.
To apply: Press the parking brake with your foot.
To release: Press the brake pedal, then press the
parking brake until it releases. Parking brake
Release the parking brake fully before driving. The rear brakes and axle\
can be
damaged if you drive with the parking brake applied.
NOTICE
n
Brake Assist System
During hard or emergency braking, the system increases braking force. The brake
pedal may move slightly or make a noise; this is normal. Continue to hol\
d the brake
pedal firmly down.
n
Anti-Lock Brake System (ABS)
During hard or emergency braking, the system rapidly pumps the brakes to\
prevent wheel lockup and help you maintain steering control. The brake pedal may\
pulsate
slightly during ABS operation; this is normal. Do not pump the brake ped\
al, and
continue to hold it firmly down.
The ABS may not function correctly if you use an incorrect tire type and\
size.
NOTICE
Intelligent Traction Management System
Adjusts vehicle handling performance while driving on various road surfa\
ces.
Press the Mode button to select one of four appropriate
modes. The mode you select appears on the multi-
information display (MID).
Normal: Provides balanced driving performance on most
road surfaces.
Snow: Use when driving on snowy road surfaces.
Mud*: Use when driving on muddy roads or off-road
surfaces.
Sand*: Use when driving on soft, sandy road or off-road
surfaces.
Cruise control/adaptive cruise control* is not available
when Snow, Mud, or Sand is selected.
Mode Butto n
AWD shown
Page 61 of 85

DRIVING
114 || 115
D
RIVING
*if equipped
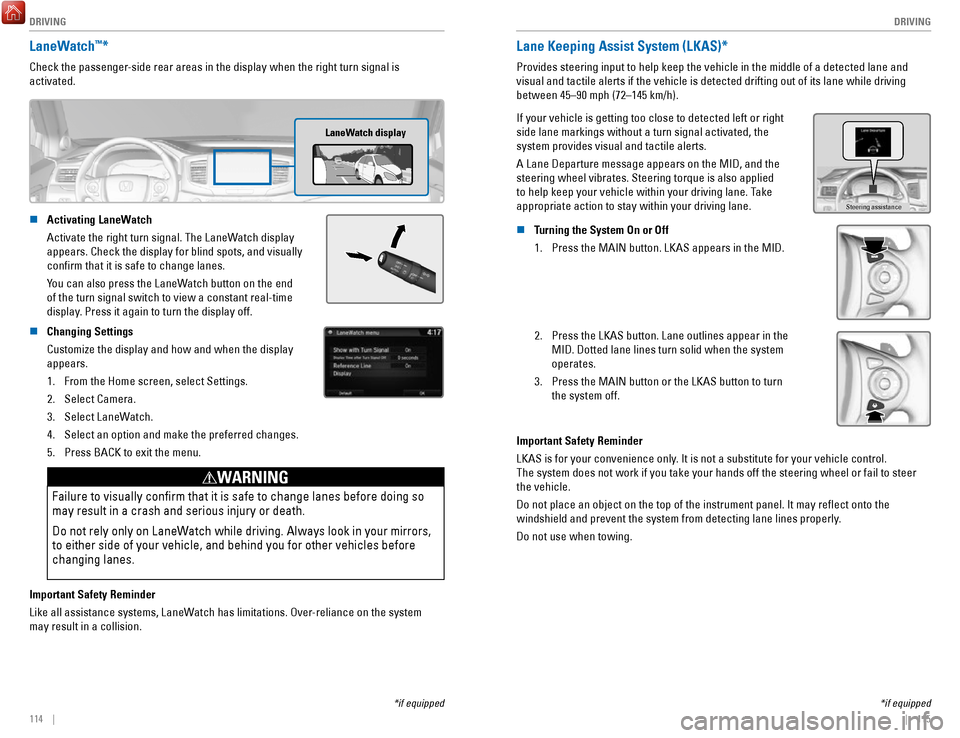
LaneWatch™*
Check the passenger-side rear areas in the display when the right turn signal is
activated.
LaneWatch display
n Activating LaneWatch
Activate the right turn signal. The LaneWatch display
appears. Check the display for blind spots, and visually
confirm that it is safe to change lanes.
You can also press the LaneWatch button on the end
of the turn signal switch to view a constant real-time
display
. Press it again to turn the display off.
n Changing Settings
Customize the display and how and when the display
appears.1.
From the Home screen, select Settings.
2.
Select Camera.
3.
Select LaneWatch.
4.
Select an option and make the preferred changes.
5.
Press BACK to exit the menu.
Failure to visually confirm that it is safe to change lanes before doi\
ng so
may result in a crash and serious injury or death.
Do not rely only on LaneWatch while driving. Always look in your mirrors,
to either side of your vehicle, and behind you for other vehicles before\
changing lanes.
WARNING
Important Safety Reminder
Like all assistance systems, LaneWatch has limitations. Over-reliance on the system
may result in a collision.
*if equipped
Lane Keeping Assist System (LKAS)*
Provides steering input to help keep the vehicle in the middle of a dete\
cted lane and
visual and tactile alerts if the vehicle is detected drifting out of its\
lane while driving
between 45–90 mph (72–145 km/h).
If your vehicle is getting too close to detected left or right
side lane markings without a turn signal activated, the
system provides visual and tactile alerts.
A Lane Departure message appears on the MID, and the
steering wheel vibrates. Steering torque is also applied
to help keep your vehicle within your driving lane. Take
appropriate action to stay within your driving lane.
Steering assistance
n Turning the System On or Off 1.
Press the MAIN button. LKAS appears in the MID.
2. Press the LKAS button. Lane outlines appear in the
MID. Dotted lane lines turn solid when the system
operates.
3.
Press the MAIN button or the LKAS button to turn
the system off.
Important Safety Reminder
LKAS is for your convenience only. It is not a substitute for your vehicle control.
The system does not work if you take your hands off the steering wheel or fail to steer
the vehicle.
Do not place an object on the top of the instrument panel. It may refl\
ect onto the
windshield and prevent the system from detecting lane lines properly.
Do not use when towing.
Page 62 of 85

DRIVING
116 || 117
D
RIVING
Road Departure Mitigation (RDM)*
Alerts and helps to assist you if the system determines a possibility of\
your vehicle
unintentionally crossing over detected lane markings while driving betwe\
en 45–90 mph
(72–145 km/h).
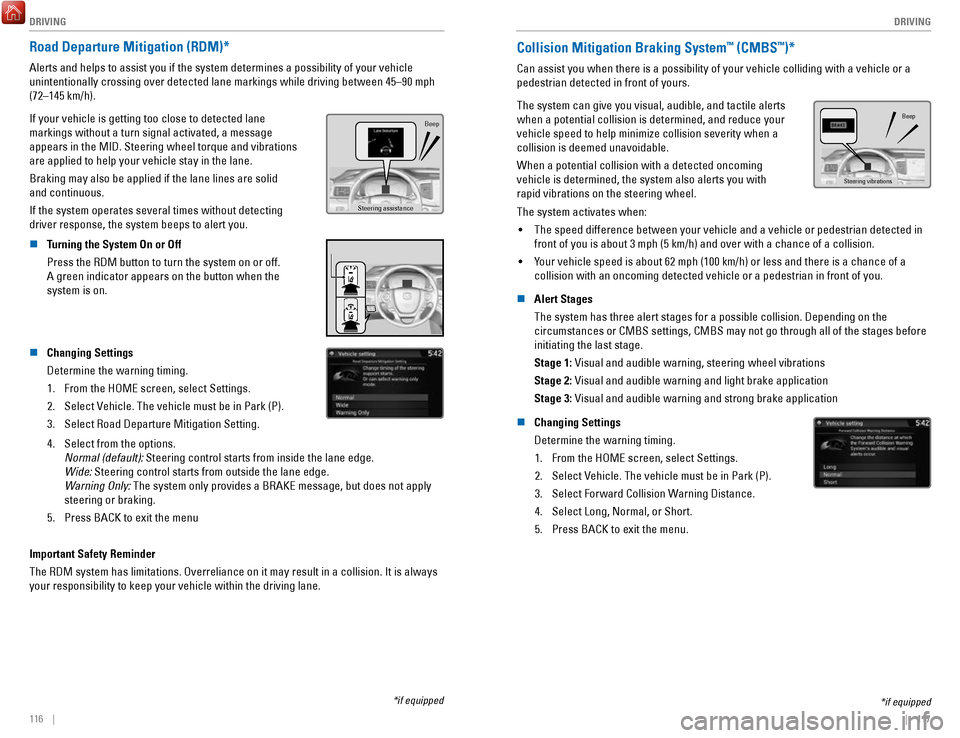
If your vehicle is getting too close to detected lane
markings without a turn signal activated, a message
appears in the MID. Steering wheel torque and vibrations
are applied to help your vehicle stay in the lane.
Braking may also be applied if the lane lines are solid
and continuous.
If the system operates several times without detecting
driver response, the system beeps to alert you.
Steering assistance
Beep
n Turning the System On or Off
Press the RDM button to turn the system on or off.
A green indicator appears on the button when the
system is on.
n Changing Settings
Determine the warning timing.
1.
From the HOME screen, select Settings.
2.
Select Vehicle. The vehicle must be in Park (P).
3.
Select Road Departure Mitigation Setting.
4. Select from the options.
Normal (default): Steering control starts from inside the lane edge.
Wide: Steering control starts from outside the lane edge.
Warning Only:
The system only provides a BRAKE message, but does not apply
steering or braking.
5.
Press BACK to exit the menu
Important Safety Reminder
The RDM system has limitations. Overreliance on it may result in a colli\
sion. It is always
your responsibility to keep your vehicle within the driving lane.
*if equipped
Collision Mitigation Braking System™ (CMBS™)*
Can assist you when there is a possibility of your vehicle colliding wit\
h a vehicle or a
pedestrian detected in front of yours.
The system can give you visual, audible, and tactile alerts
when a potential collision is determined, and reduce your
vehicle speed to help minimize collision severity when a
collision is deemed unavoidable.
When a potential collision with a detected oncoming
vehicle is determined, the system also alerts you with
rapid vibrations on the steering wheel.
Steering vibrations Beep
The system activates when:
•
The speed difference between your vehicle and a vehicle or pedestrian de\
tected in
front of you is about 3 mph (5 km/h) and over with a chance of a colli\
sion.
•
Your vehicle speed is about 62 mph (100 km/h) or less and there is a ch\
ance of a
collision with an oncoming detected vehicle or a pedestrian in front of \
you.
n
Alert Stages
The system has three alert stages for a possible collision. Depending on\
the circumstances or CMBS settings, CMBS may not go through all of the stage\
s before
initiating the last stage.
Stage 1: Visual and audible warning, steering wheel vibrations
Stage 2: Visual and audible warning and light brake application
Stage 3: Visual and audible warning and strong brake application
n
Changing Settings
Determine the warning timing. 1.
From the HOME screen, select Settings.
2.
Select Vehicle. The vehicle must be in Park (P).
3.
Select Forward Collision Warning Distance.
4.
Select Long, Normal, or Short.
5.
Press BACK to exit the menu.
*if equipped
Page 63 of 85

DRIVING
118 || 119
D
RIVING
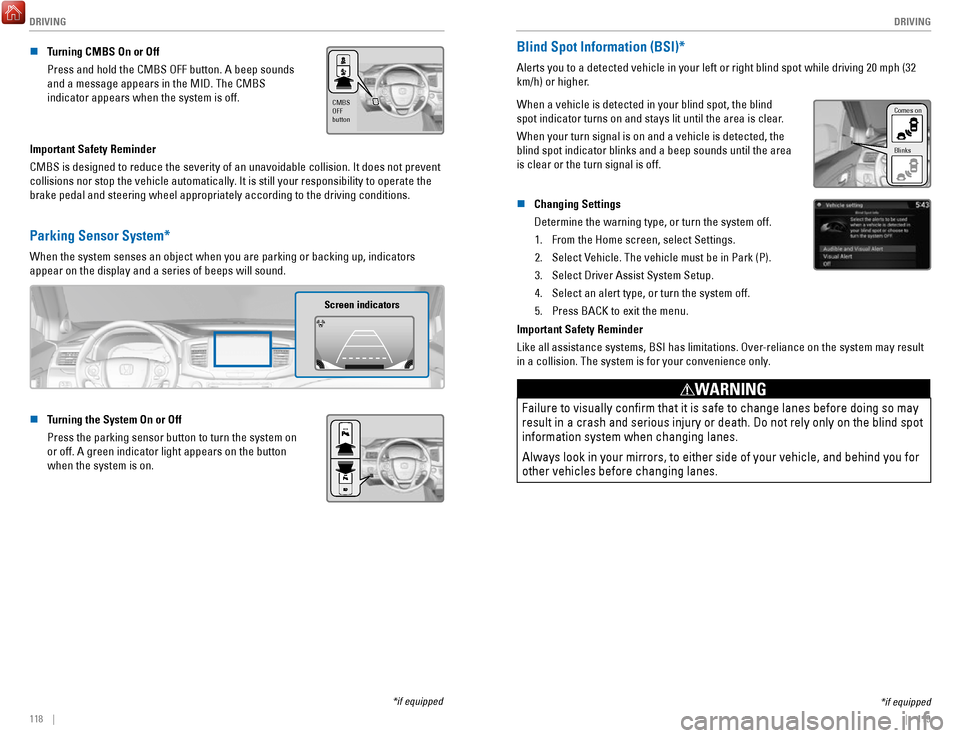
n Turning CMBS On or Off
Press and hold the CMBS OFF button. A beep sounds
and a message appears in the MID. The CMBS
indicator appears when the system is off.
CMBS
OFF
button
Important Safety Reminder
CMBS is designed to reduce the severity of an unavoidable collision. It \
does not prevent
collisions nor stop the vehicle automatically. It is still your responsibility to operate the
brake pedal and steering wheel appropriately according to the driving co\
nditions.
Parking Sensor System*
When the system senses an object when you are parking or backing up, ind\
icators
appear on the display and a series of beeps will sound.
Screen indicators
n Turning the System On or Off
Press the parking sensor button to turn the system on
or off. A green indicator light appears on the button
when the system is on.
*if equipped
*if equipped
Blind Spot Information (BSI)*
Alerts you to a detected vehicle in your left or right blind spot while \
driving 20 mph (32
km/h) or higher.
When a vehicle is detected in your blind spot, the blind
spot indicator turns on and stays lit until the area is clear.
When your turn signal is on and a vehicle is detected, the
blind spot indicator blinks and a beep sounds until the area
is clear or the turn signal is off.
Comes on
Blinks
n Changing Settings
Determine the warning type, or turn the system off.
1.
From the Home screen, select Settings.
2.
Select Vehicle. The vehicle must be in Park (P).
3.
Select Driver Assist System Setup.
4.
Select an alert type, or turn the system off.
5.
Press BACK to exit the menu.
Important Safety Reminder
Like all assistance systems, BSI has limitations. Over-reliance on the system may result
in a collision. The system is for your convenience only.
Failure to visually confirm that it is safe to change lanes before doi\
ng so may
result in a crash and serious injury or death. Do not rely only on the b\
lind spot
information system when changing lanes.
Always look in your mirrors, to either side of your vehicle, and behind \
you for
other vehicles before changing lanes.
WARNING
Page 65 of 85

DRIVING
122 || 123
D
RIVING
Models with touchscreen
1.
From the HOME screen, select Settings.
2.
Select Camera.
3.
Select one of the options.
Fixed Guidelines: Guidelines appear when you
change the gear to Reverse. Select On or Off.
Dynamic Guidelines: Guidelines move as you turn
the steering wheel. Select On or Off.
4.
Press BACK to exit the menu.
The rear camera view is restricted. You cannot see the corner ends of the bumper or what is
underneath the bumper. Its unique lens also makes objects appear closer or farther than they \
actually are.
Visually confirm that it is safe to drive before backing up. Certain c\
onditions (such as weather,
lighting, and high temperatures) may also restrict the rear view. Do not rely on the rearview display,
which does not give you all information about conditions at the rear of \
your vehicle.
Refueling
Use the proper fuel and refueling procedure to ensure the best performan\
ce and safety
of your vehicle.
n
Fuel Information
Use of unleaded gasoline of 87 octane or higher is recommended.
Honda recommends TOP TIER Detergent Gasoline where available.
Do NOT use gasoline containing more than 15% ethanol.
Do NOT use gasoline containing methanol.
Do NOT use gasoline containing MMT.
We recommend quality gasoline containing detergent additives that help pr\
event
fuel system and engine deposits. In addition, in order to maintain good \
performance,
fuel economy, and emissions control, we strongly recommend the use of
gasoline
that does NOT contain harmful manganese-based fuel additives such as MMT\
, if
such gasoline is available.
NOTICE n
How to Refuel
1.
The fuel fill door is located at the left rear of the
vehicle. Park next to the service pump that is most
accessible.
2.
Turn off the engine.
3.
Press the fuel fill door release button on the
driver’s door. The fuel fill door opens.
4.
Place the end of the filler nozzle on the lower part
of the filler opening, then insert it slowly and fully.
5.
After filling, wait about 5 seconds before removing
the filler nozzle. Close the fuel fill door by hand.
Gasoline is highly flammable and explosive. You can be burned or
seriously injured when handling fuel.
Stop the engine, and keep heat, sparks, and flame away.
Handle fuel only outdoors.
Wipe up spills immediately.
WARNING
NOTICE
The fuel filler opening is designed to accept only service station fi\
ller nozzles for
refueling. Use of smaller diameter tubes (e.g., to siphon fuel for othe\
r uses) or other
non-service station devices can damage the area in and around the fill\
er opening.
NOTICE
Page 68 of 85

HANDLING THE UNEXPECTED
128 || 129
H
ANDLING THE UNEXPECTED
Emergency Engine Stop
The ENGINE START/STOP button may be used to stop the engine due to an emergency
situation even while driving. If you must stop the engine, choose one of\
the following
operations:
•
Press and hold the ENGINE START/STOP button
for two seconds, or
•
Firmly press the ENGINE START/STOP button
three times.
If the vehicle is in Park (P), the power mode changes to VEHICLE OFF. Otherwise, the
power mode changes to ACCESSORY.
The steering wheel will not lock. Because turning off the engine also di\
sables the
power assist the engine provides to the steering and braking systems, it\
will require
significantly more physical effort and time to steer and slow the vehi\
cle. Use both feet
on the brake pedal, if necessary, to slow the vehicle and stop immediately in
a safe place.
Do not press the button while driving unless it is absolutely necessary \
for the engine to
be switched off.
Emergency Towing
Call a professional towing service if you need to tow your vehicle.
All models
Flat bed equipment: The operator loads your vehicle on the back of a tru\
ck.
This is the best way to transport your vehicle.
2WD models
Wheel lift equipment: The tow truck uses two pivoting arms that go under the front tires
and lift them off the ground. The rear tires remain on the ground.
This is an acceptable way to tow your vehicle.
Trying to lift or tow your vehicle by the bumpers will cause serious dama\
ge.
The bumpers are not designed to support the vehicle’s weight.
Improper towing such as towing behind a motorhome or other motor vehicle\
can
damage the transmission.
NOTICE
Tire Pressure Monitoring System (TPMS)
Monitors the tire pressure while you are driving.
If your vehicle’s tire pressure becomes significantly low,
the low tire pressure indicator comes on and a message
appears on the multi-information display. The specific tire
with low pressure is displayed.
n What to Do
Stop your vehicle in a safe place. Check the tire pressure and adjust th\
e pressure to
the specified level. The specified tire pressure is on a label on th\
e driver’s doorjamb.
n
Tire Fill Assist
Your vehicle gives you visual and audible alerts to help you adjust the t\
ire pressure to its appropriate level when the vehicle is on.
While inflating: The system beeps and the exterior lights flash once every 5 seconds.
When the correct pressure is reached:
The system beeps and the exterior lights
flash continuously for 5 seconds. Stop filling the tire.
If you overinflate: The system beeps and the exterior lights flash twice every
3 seconds.
Driving on an extremely underinflated tire can cause it to overheat. A\
n overheated
tire can fail. Always inflate your tires to the specified pressure.
NOTICE