Page 157 of 565

uuOperating the Switches Around the Steering Wheel uDriving Position Memory System*
156
Controls
1. Adjust the driver’s seat and the door mirrors
to the desired positi on, and set the power
mode to ON.
2. Press the SET button.
u You will hear the beeper, and the
memory button indicator light will blink.
3. Press and hold memory button
(1 or (2
within five seconds of pressing the SET
button.
u Once the seat and the outside mirrors
position has been memorized, the
indicator light on the button you pressed
stays on.
1. Move the shift lever to
(P.
2. Apply the parking brake.
3. Press a memory button (
(1 or (2).
u You will hear the beeper, and the
indicator light will blink.
The seat and the door mirrors will
automatically move to the memorized
position. When it has finished moving, you
will hear the beeper, and the indicator light
stays on.
■Storing a Position in Memory1 Storing a Position in Memory
After you press the SET button, the storing operation
will be canceled when:
•You do not press the memory button within five
seconds.
•You readjust the seat position before the double-
beep.
•You readjust the door mirrors.
•You set the power mode to any position except
ON.
Memory
Button 1
Memory
Button 2
SET Button
■Recalling the Stored Position1Recalling the Stored Position
The seat and the door mirror s will stop moving if you:
•Press the SET button, or a memory button ((1 or (2).
•Adjust the seat position.
•Adjust the door mirrors.•Shift into any position except ( P.
Memory
Button 1
Memory
Button 2
SET Button
17 US ODYSSEY (KA KC)-31TK86600.book 156 ページ 2016年10月24日 月曜日 午後4時2分
Page 160 of 565
159
uuAdjusting the Mirrors uPower Door Mirrors
Continued
Controls
Power Door Mirrors
You can adjust the door mirrors when the
ignition switch is in ON
(w*1.
■Mirror position adjustment
L/R selector switch: Select the left or right
mirror. After adjusting the mirror, return the
switch to the center position.
Mirror positi on adjustment switch: Press
the switch left, right, up , or down to move the
mirror.
■Folding door mirrors*
Press the folding button to fold in and out the
door mirrors.
*1: Models with the smart entry system have an ENGINE START/STOP button instead of an
ignition switch.
Selector
Switch
Adjustment
Switch
Folding Button*
* Not available on all models
17 US ODYSSEY (KA KC)-31TK86600.book 159 ページ 2016年10月24日 月曜日 午後4時2分
Page 166 of 565
165
uuAdjusting the Seats uAdjusting the Seat Positions
Continued
Controls
■Adjusting the front and second ro w outer and third row outer head
restraint positions To raise the head restraint: Pull it upward.
To lower the head restraint: Push it down
while pressing the release button.
17 US ODYSSEY (KA KC)-31TK86600.book 165 ページ 2016年10月24日 月曜日 午後4時2分
Page 167 of 565

uuAdjusting the Seats uAdjusting the Seat Positions
166
Controls
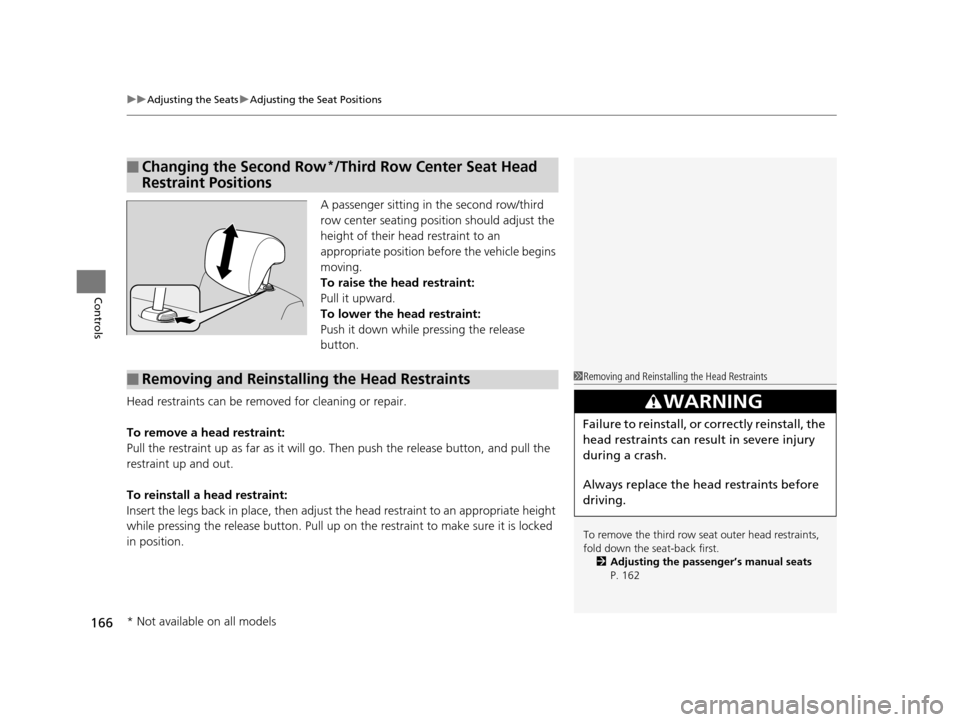
A passenger sitting in the second row/third
row center seating position should adjust the
height of their head restraint to an
appropriate position befo re the vehicle begins
moving.
To raise the head restraint:
Pull it upward.
To lower the head restraint:
Push it down while pressing the release
button.
Head restraints can be removed for cleaning or repair.
To remove a head restraint:
Pull the restraint up as far as it will go. Then push the release button, and pull the
restraint up and out.
To reinstall a head restraint:
Insert the legs back in place, then adjust the head restraint to an appropriate height
while pressing the release butto n. Pull up on the restraint to make sure it is locked
in position.
■Changing the Second Row*/Third Row Center Seat Head
Restraint Positions
■Removing and Reinstalling the Head Restraints1 Removing and Reinstalling the Head Restraints
To remove the third row seat outer head restraints,
fold down the seat-back first.
2 Adjusting the passenger’s manual seats
P. 162
3WARNING
Failure to reinstall, or correctly reinstall, the
head restraints can result in severe injury
during a crash.
Always replace the he ad restraints before
driving.
* Not available on all models
17 US ODYSSEY (KA KC)-31TK86600.book 166 ページ 2016年10月24日 月曜日 午後4時2分
Page 177 of 565

176
Controls
Interior Lights/Interior Convenience Items
Interior Lights
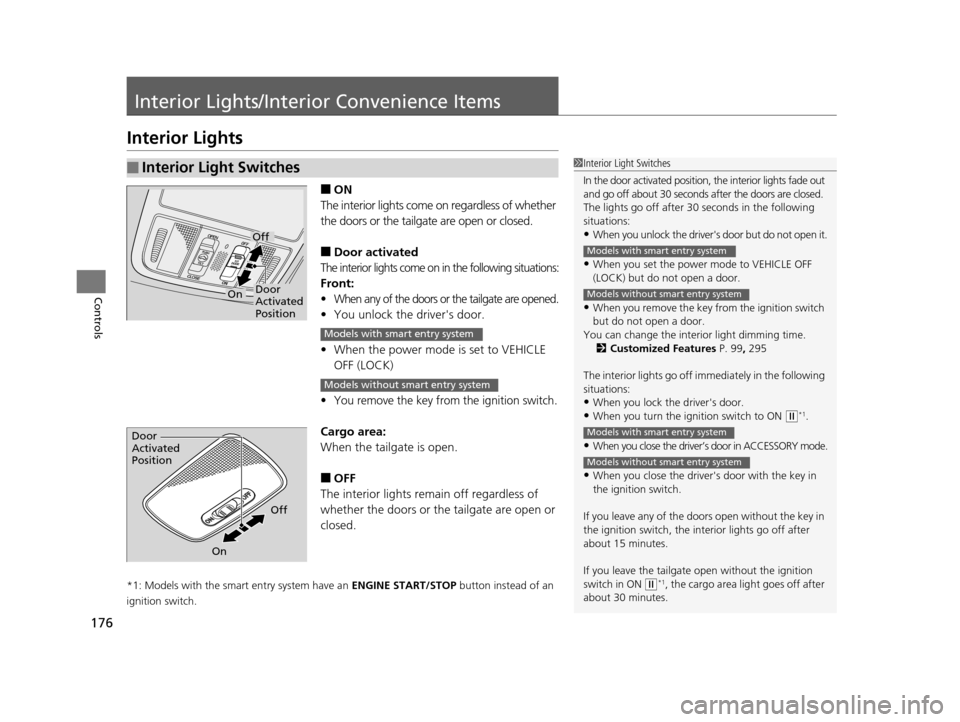
■ON
The interior lights come on regardless of whether
the doors or the tailgat e are open or closed.
■Door activated
The interior lights come on in the following situations:
Front:
•When any of the doors or the tailgate are opened.
•You unlock the driver's door.
• When the power mode is set to VEHICLE
OFF (LOCK)
•You remove the key from the ignition switch.
Cargo area:
When the tailg ate is open.
■OFF
The interior lights remain off regardless of
whether the doors or the tailgate are open or
closed.
*1: Models with the smart entry system have an ENGINE START/STOP button instead of an
ignition switch.
■Interior Light Switches1 Interior Light Switches
In the door activated position, the interior lights fade out
and go off about 30 seconds after the doors are closed.
The lights go off after 30 seconds in the following
situations:
•When you unlock the driver's door but do not open it.
•When you set the power mode to VEHICLE OFF
(LOCK) but do not open a door.
•When you remove the key from the ignition switch
but do not open a door.
You can change the inte rior light dimming time.
2 Customized Features P. 99, 295
The interior lights go off i mmediately in the following
situations:
•When you lock the driver's door.
•When you turn the ignition switch to ON ( w*1.
•When you close the driver’s door in ACCESSORY mode.
•When you close the driver's door with the key in
the ignition switch.
If you leave any of the doors open without the key in
the ignition switch, the interior lights go off after
about 15 minutes.
If you leave the tailgate open without the ignition
switch in ON
( w*1, the cargo area light goes off after
about 30 minutes.
Models with smart entry system
Models without smart entry system
Models with smart entry system
Models without smart entry system
Door
Activated
Position
Off
On
Models with smart entry system
Models without smart entry system
Door
Activated
Position
Off
On
17 US ODYSSEY (KA KC)-31TK86600.book 176 ページ 2016年10月24日 月曜日 午後4時2分
Page 181 of 565

uuInterior Lights/Interior Convenience Items uInterior Convenience Items
180
Controls
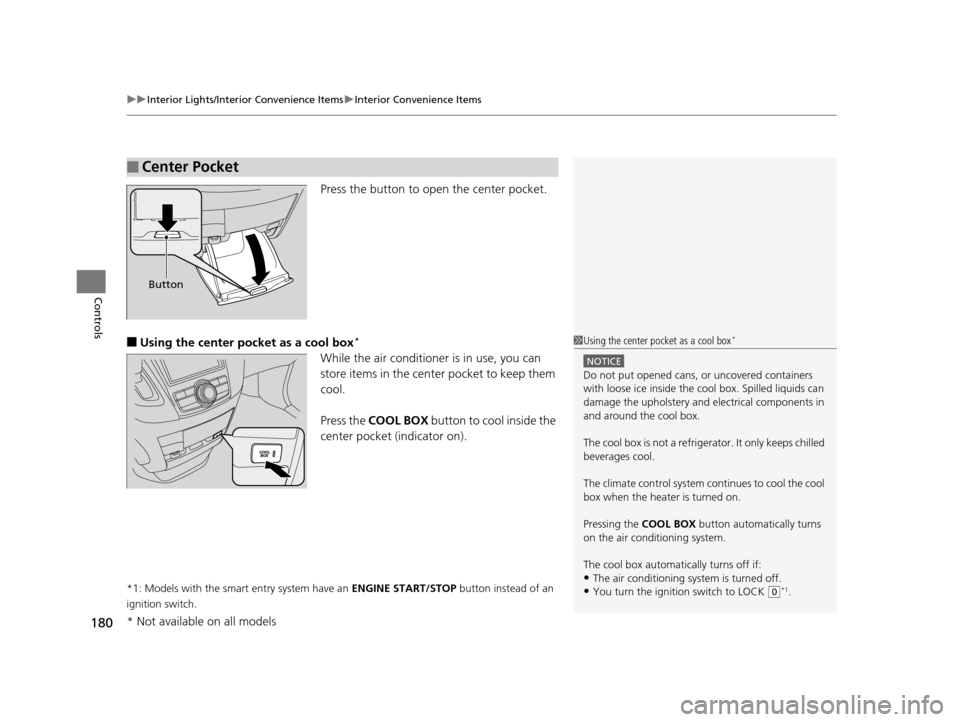
Press the button to open the center pocket.
■Using the center pocket as a cool box*
While the air conditioner is in use, you can
store items in the center pocket to keep them
cool.
Press the COOL BOX button to cool inside the
center pocket (indicator on).
*1: Models with the smart entry system have an ENGINE START/STOP button instead of an
ignition switch.
■Center Pocket
Button
1 Using the center pocket as a cool box*
NOTICE
Do not put opened cans, or uncovered containers
with loose ice inside the cool box. Spilled liquids can
damage the upholstery and electrical components in
and around the cool box.
The cool box is not a refrige rator. It only keeps chilled
beverages cool.
The climate control system continues to cool the cool
box when the heater is turned on.
Pressing the COOL BOX button automatically turns
on the air conditioning system.
The cool box automatically turns off if:
•The air conditioning system is turned off.
•You turn the ignition switch to LOCK ( 0*1.
* Not available on all models
17 US ODYSSEY (KA KC)-31TK86600.book 180 ページ 2016年10月24日 月曜日 午後4時2分
Page 184 of 565
Continued183
uuInterior Lights/Interior Convenience Items uInterior Convenience Items
Controls
■Third row seat beverage holders
The accessory power so ckets can be used when the i gnition switch is in ACCESSORY
(q or ON (w*1.
■Accessory power socket (console panel)
Open the cover to use it.
*1: Models with the smart entry system have an ENGINE START/STOP button instead of an
ignition switch.
■Accessory Power Sockets1 Accessory Power Sockets
NOTICE
Do not insert an automotive type cigarette lighter
element.
This can overheat the power socket.
The accessory power socket is designed to supply
power for 12 volt DC access ories that are rated 120
watts (10 amps) or less.
To prevent battery drain, only use the power socket
with the engine running.
When each socket is bei ng used simultaneously, the
combined power rating of the accessories should not
exceed 120 watts (10 amps).
17 US ODYSSEY (KA KC)-31TK86600.book 183 ページ 2016年10月24日 月曜日 午後4時2分
Page 192 of 565

Continued191
uuInterior Lights/Interior Convenience Items uInterior Convenience Items
Controls
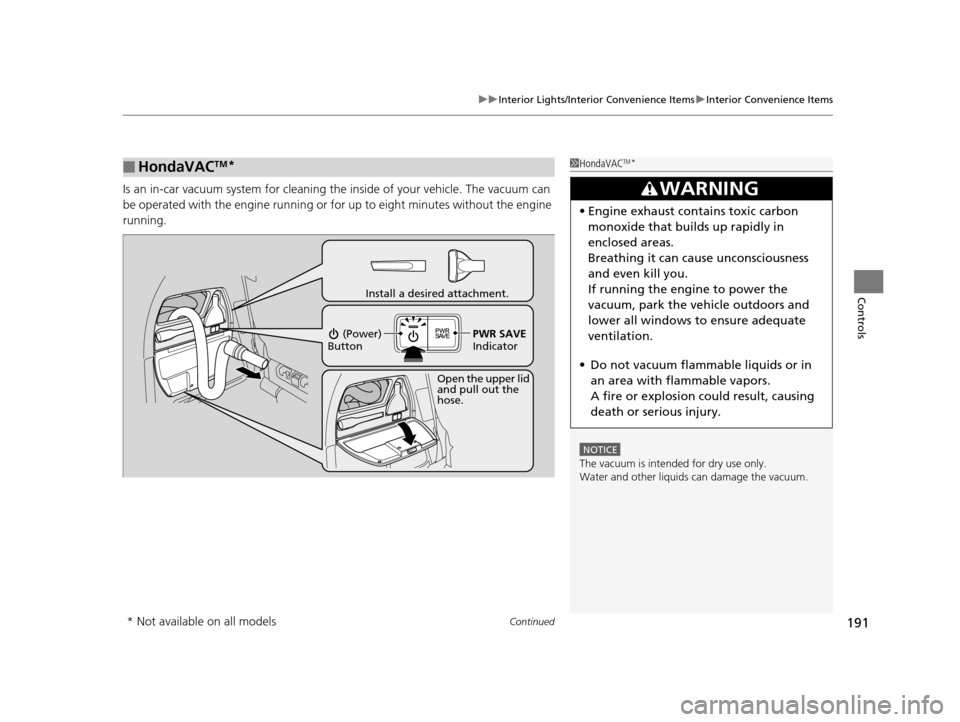
Is an in-car vacuum system for cleaning th e inside of your vehicle. The vacuum can
be operated with the engine running or for up to eight minutes without the engine
running.
■HondaVACTM*1 HondaVACTM*
NOTICE
The vacuum is intended for dry use only.
Water and other liquids can damage the vacuum.
3WARNING
•Engine exhaust contains toxic carbon
monoxide that builds up rapidly in
enclosed areas.
Breathing it can cause unconsciousness
and even kill you.
If running the engine to power the
vacuum, park the vehicle outdoors and
lower all windows to ensure adequate
ventilation.
• Do not vacuum flammable liquids or in
an area with flammable vapors.
A fire or explosion could result, causing
death or serious injury.
Open the upper lid
and pull out the
hose.
Install a desired attachment.
(Power)
Button
PWR SAVE
Indicator
* Not available on all models
17 US ODYSSEY (KA KC)-31TK86600.book 191 ページ 2016年10月24日 月曜日 午後4時2分