2017 GMC SIERRA 1500 change wheel
[x] Cancel search: change wheelPage 261 of 494

GMC Sierra/Sierra Denali Owner Manual (GMNA-Localizing-U.S./Canada/
Mexico-9955992) - 2017 - crc - 5/3/16
260 Driving and Operating
Caution
Using a tool to force the key to
turn in the ignition could cause
damage to the switch or break the
key. Use the correct key, make
sure it is all the way in, and turn it
only with your hand. If the key
cannot be turned by hand, see
your dealer.
1 (ACC/ACCESSORY) : This
position lets things like the radio
and the windshield wipers operate
while the engine is off. It also
unlocks the steering wheel. Use this
position if the vehicle must be
pushed or towed.
2 (ON/RUN) : This position can be
used to operate the electrical
accessories and to display some
instrument cluster warning and
indicator lights. This position can
also be used for service and
diagnostics, and to verify the proper
operation of the malfunction
indicator lamp as may be required
for emission inspection purposes.
The switch stays in this position when the engine is running. The
transmission is also unlocked in this
position on automatic transmission
vehicles.
If the key is left in the ACC/
ACCESSORY or ON/RUN position
with the engine off, the battery could
be drained. The vehicle may not
start if the battery is allowed to drain
for an extended period of time.
3 (START) :
This is the position that
starts the engine. When the engine
starts, release the key. The ignition
switch returns to ON/RUN for
driving.
A warning tone will sound when the
driver door is opened and the
ignition is in ACC/ACCESSORY or
LOCK/OFF, and the key is in the
ignition.
Starting the Engine
If the vehicle has a diesel engine,
see the Duramax diesel
supplement.
For an eAssist vehicle, see the
Silverado/Sierra eAssist
supplement.
Caution
If you add electrical parts or
accessories, you could change
the way the engine operates. Any
resulting damage would not be
covered by the vehicle warranty.
See Add-On Electrical
Equipment 0334.
Caution
If the steering wheel is turned
until it reaches the end of its
travel, and is held in that position
while starting the vehicle, damage
may occur to the power steering
system and there may be loss of
power steering assist.
Move the shift lever to P (Park) or
N (Neutral). To restart the engine
when the vehicle is already moving,
use N (Neutral) only.
Page 274 of 494
GMC Sierra/Sierra Denali Owner Manual (GMNA-Localizing-U.S./Canada/
Mexico-9955992) - 2017 - crc - 5/3/16
Driving and Operating 273
as with ice or snow. While the
vehicle is at a stop, select L2 using
Range Selection Mode. This will
limit torque to the wheels and help
to prevent the tires from spinning.
Tow/Haul Mode
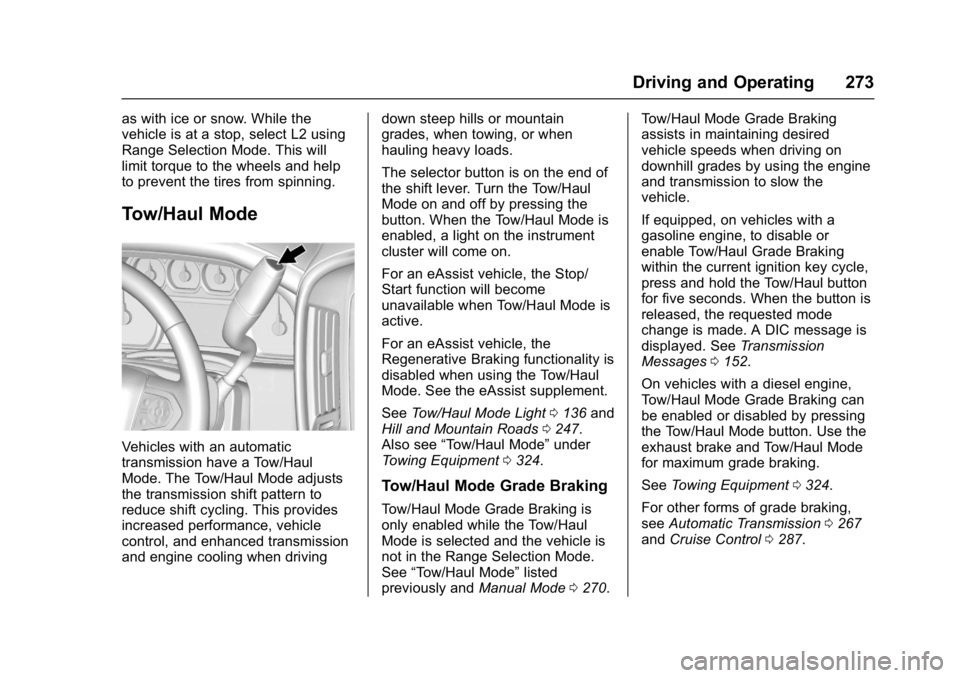
Vehicles with an automatic
transmission have a Tow/Haul
Mode. The Tow/Haul Mode adjusts
the transmission shift pattern to
reduce shift cycling. This provides
increased performance, vehicle
control, and enhanced transmission
and engine cooling when drivingdown steep hills or mountain
grades, when towing, or when
hauling heavy loads.
The selector button is on the end of
the shift lever. Turn the Tow/Haul
Mode on and off by pressing the
button. When the Tow/Haul Mode is
enabled, a light on the instrument
cluster will come on.
For an eAssist vehicle, the Stop/
Start function will become
unavailable when Tow/Haul Mode is
active.
For an eAssist vehicle, the
Regenerative Braking functionality is
disabled when using the Tow/Haul
Mode. See the eAssist supplement.
See
Tow/Haul Mode Light 0136 and
Hill and Mountain Roads 0247.
Also see “Tow/Haul Mode” under
Towing Equipment 0324.
Tow/Haul Mode Grade Braking
Tow/Haul Mode Grade Braking is
only enabled while the Tow/Haul
Mode is selected and the vehicle is
not in the Range Selection Mode.
See “Tow/Haul Mode” listed
previously and Manual Mode0270. Tow/Haul Mode Grade Braking
assists in maintaining desired
vehicle speeds when driving on
downhill grades by using the engine
and transmission to slow the
vehicle.
If equipped, on vehicles with a
gasoline engine, to disable or
enable Tow/Haul Grade Braking
within the current ignition key cycle,
press and hold the Tow/Haul button
for five seconds. When the button is
released, the requested mode
change is made. A DIC message is
displayed. See
Transmission
Messages 0152.
On vehicles with a diesel engine,
Tow/Haul Mode Grade Braking can
be enabled or disabled by pressing
the Tow/Haul Mode button. Use the
exhaust brake and Tow/Haul Mode
for maximum grade braking.
See Towing Equipment 0324.
For other forms of grade braking,
see Automatic Transmission 0267
and Cruise Control 0287.
Page 283 of 494
GMC Sierra/Sierra Denali Owner Manual (GMNA-Localizing-U.S./Canada/
Mexico-9955992) - 2017 - crc - 5/3/16
282 Driving and Operating
If driving safely on a wet road and it
becomes necessary to slam on the
brakes and continue braking to
avoid a sudden obstacle, a
computer senses the wheels are
slowing down. If one of the wheels
is about to stop rolling, the computer
will separately work the brakes at
each wheel.
ABS can change the brake pressure
to each wheel, as required, faster
than any driver could. This can help
you steer around the obstacle while
braking hard.
As the brakes are applied, the
computer keeps receiving updates
on wheel speed and controls
braking pressure accordingly.
Remember: ABS does not change
the time needed to get a foot up to
the brake pedal or always decrease
stopping distance. If you get too
close to the vehicle in front of you,
there will not be enough time to
apply the brakes if that vehicle
suddenly slows or stops. Always
leave enough room up ahead to
stop, even with ABS.Using ABS
Do not pump the brakes. Just hold
the brake pedal down firmly and let
ABS work. You may hear the ABS
pump or motor operating and feel
the brake pedal pulsate. This is
normal.
Braking in Emergencies
ABS allows you to steer and brake
at the same time. In many
emergencies, steering can help
more than even the very best
braking.
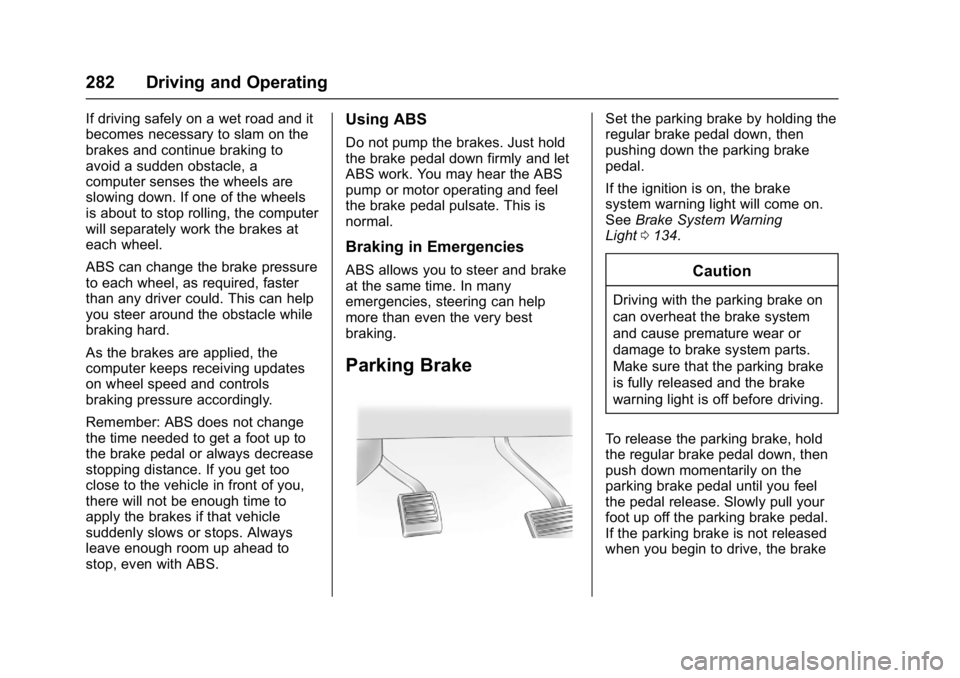
Parking Brake
Set the parking brake by holding the
regular brake pedal down, then
pushing down the parking brake
pedal.
If the ignition is on, the brake
system warning light will come on.
SeeBrake System Warning
Light 0134.
Caution
Driving with the parking brake on
can overheat the brake system
and cause premature wear or
damage to brake system parts.
Make sure that the parking brake
is fully released and the brake
warning light is off before driving.
To release the parking brake, hold
the regular brake pedal down, then
push down momentarily on the
parking brake pedal until you feel
the pedal release. Slowly pull your
foot up off the parking brake pedal.
If the parking brake is not released
when you begin to drive, the brake
Page 288 of 494
GMC Sierra/Sierra Denali Owner Manual (GMNA-Localizing-U.S./Canada/
Mexico-9955992) - 2017 - crc - 5/3/16
Driving and Operating 287
Cruise Control
With cruise control a speed of about
40 km/h (25 mph) or more can be
maintained without keeping your
foot on the accelerator. Cruise
control does not work at speeds
below about 40 km/h (25 mph).
{Warning
Cruise control can be dangerous
where you cannot drive safely at
a steady speed. Do not use
cruise control on winding roads or
in heavy traffic.
Cruise control can be dangerous
on slippery roads. On such roads,
fast changes in tire traction can
cause excessive wheel slip, and
you could lose control. Do not use
cruise control on slippery roads.
If equipped with an Allison or
Hydra-Matic 6-speed automatic
transmission, see “Tow/Haul Mode
Grade Braking” underTow/Haul
Mode 0273 for an explanation of how cruise control interacts with the
Range Selection Mode, Tow/Haul
Mode, and Grade Braking systems.
If the cruise control is being used
and the Traction Control System
(TCS) or StabiliTrak begins to limit
wheel spin, the cruise control will
automatically disengage. See
Traction Control/Electronic Stability
Control
0284. If a collision alert
occurs when cruise control is
activated, cruise control is
disengaged. See Forward Collision
Alert (FCA) System 0293. When
road conditions allow you to safely
use it again, cruise control can be
turned back on.
If the brakes are applied, the cruise
control disengages.
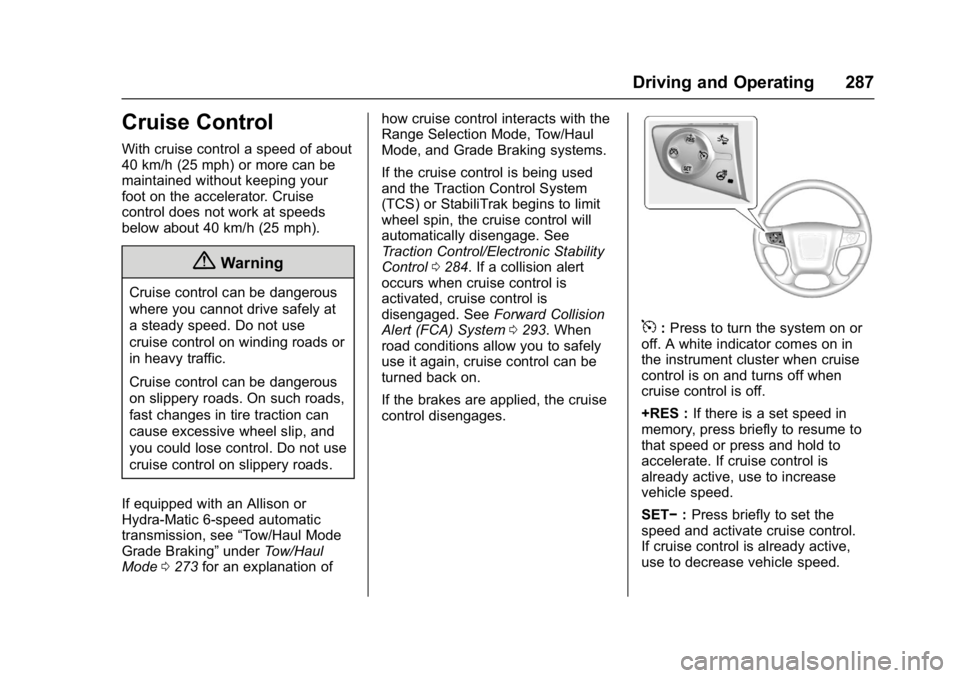
5: Press to turn the system on or
off. A white indicator comes on in
the instrument cluster when cruise
control is on and turns off when
cruise control is off.
+RES : If there is a set speed in
memory, press briefly to resume to
that speed or press and hold to
accelerate. If cruise control is
already active, use to increase
vehicle speed.
SET− :Press briefly to set the
speed and activate cruise control.
If cruise control is already active,
use to decrease vehicle speed.
Page 300 of 494
GMC Sierra/Sierra Denali Owner Manual (GMNA-Localizing-U.S./Canada/
Mexico-9955992) - 2017 - crc - 5/3/16
Driving and Operating 299
{Warning
Using LKA while towing a trailer
or on slippery roads could cause
loss of control of the vehicle and
a crash. Turn the system off.
How the System Works
The LKA camera sensor is on the
windshield ahead of the rearview
mirror.
To turn LKA on and off, press
A
on the center stack.
When on,
Ais green if LKA is
available to assist and provide LDW
alerts. It may assist by gently
turning the steering wheel and
display
Aas amber if the vehicle
approaches a detected lane marking
without using a turn signal in that
direction. It may also provide an
LDW alert by flashing
Aamber
as the lane marking is crossed.
Additionally, there will be three
beeps, or the driver seat will pulse three times, on the right or left,
depending on the lane departure
direction.
The LKA system does not
continuously steer the vehicle.
If LKA does not detect active driver
steering, an alert and chime may be
provided. Move the steering wheel
to dismiss.
When the System Does Not
Seem to Work Properly
The system performance may be
affected by:
.
Close vehicles ahead.
. Sudden lighting changes, such
as when driving through tunnels.
. Banked roads.
. Roads with poor lane markings,
such as two-lane roads.
If the LKA system is not functioning
properly when lane markings are
clearly visible, cleaning the
windshield may help.
LKA assistance and/or LDW alerts
may occur due to tar marks,
shadows, cracks in the road, temporary or construction lane
markings, or other road
imperfections. This is normal system
operation; the vehicle does not need
service. Turn LKA off if these
conditions continue.
Page 309 of 494
GMC Sierra/Sierra Denali Owner Manual (GMNA-Localizing-U.S./Canada/
Mexico-9955992) - 2017 - crc - 5/3/16
308 Driving and Operating
Caution (Continued)
vehicle warranty. To pull a trailer
correctly, follow the advice in this
section and see your dealer for
important information about
towing a trailer with the vehicle.
See Vehicle Load Limits 0250 for
more information about the vehicle's
maximum load capacity.
To identify the trailering capacity of
the vehicle, read the information in
“Weight of the Trailer” later in this
section.
Trailering is different than just
driving the vehicle by itself.
Trailering means changes in
handling, acceleration, braking,
durability, and fuel economy.
Successful, safe trailering takes
correct equipment, and it has to be
used properly.
The following information has many
time-tested, important trailering tips
and safety rules. Many of these are important for your safety and that of
your passengers. Read this section
carefully before pulling a trailer.
Weight of the Trailer
Safe trailering requires monitoring
the weight, speed, altitude, road
grades, outside temperature, and
how frequently the vehicle is used to
pull a trailer. Take into consideration
any special equipment on the
vehicle, and the amount of tongue
weight the vehicle can carry. See
“Weight of the Trailer Tongue”
later
in this section for more information.
Trailer weight rating (TWR) for
pickup models is calculated
assuming the tow vehicle has the
driver, a front seat passenger, and
all required trailering equipment.
Weight of additional optional
equipment, passengers, and cargo
in the tow vehicle must be
subtracted from the trailer weight
rating.
Ask your dealer for trailering
information or advice. For kingpin weight and trailer
tongue weight information, see
“Weight of the Trailer Tongue”
later
in this section.
Use the following chart to determine
how much the vehicle can weigh,
based upon the vehicle model and
options.
Weights listed apply for
conventional trailers and
gooseneck/fifth-wheel trailers unless
otherwise noted.
Page 332 of 494
GMC Sierra/Sierra Denali Owner Manual (GMNA-Localizing-U.S./Canada/
Mexico-9955992) - 2017 - crc - 5/3/16
Driving and Operating 331
.There is a fault present in the
wiring to the trailer brakes (a
CHECK TRAILER WIRING
message will also display on
the DIC).
. The ITBC system is not working
due to a fault (a SERVICE
TRAILER BRAKE SYSTEM
message will also display in
the DIC).
Manual Trailer Brake Apply
The Manual Trailer Brake Apply
Lever is used to apply the trailer ’s
electric brakes independent of the
vehicle’s brakes. Sliding the lever to
the left will apply only the trailer
brakes. Use this lever to adjust
Trailer Gain to properly adjust the
power output to the trailer brakes.
The trailer's and the vehicle's brake
lamps will come on when either
vehicle brakes or manual trailer
brakes are applied. Trailer Gain Adjustment Procedure
Trailer Gain should be set for a
specific trailering condition and must
be adjusted anytime vehicle loading,
trailer loading, or road surface
conditions change.
{Warning
Trailer brakes that are
over-gained or under-gained may
not stop the vehicle and the trailer
as intended and can result in a
crash. Always follow the
instructions to set the Trailer Gain
for the proper trailer stopping
performance.
Use the following to adjust Trailer
Gain for each towing condition: 1. Drive the vehicle with the trailer attached on a level road
surface representative of the
towing condition and free of
traffic at about 32 to 40 km/h
(20 to 25 mph) and fully apply
the Manual Trailer Brake Apply
Lever. Adjusting Trailer Gain at
speeds lower than 32 to
40 km/h (20 to 25 mph) may
result in an incorrect gain
setting.
2. Adjust the Trailer Gain, using the Trailer Gain Adjustment
Buttons, to just below the point
of trailer wheel lock-up,
indicated by trailer wheel
squeal or tire smoke when a
trailer wheel locks.
Trailer wheel lock-up may not
occur if towing a heavily loaded
trailer. In this case, adjust the
Trailer Gain to the highest
allowable setting for the towing
condition.
3. Readjust Trailer Gain anytime vehicle loading, trailer loading,
or road surface conditions
change or if trailer wheel
lock-up is noticed at any time
while towing.
Page 366 of 494
GMC Sierra/Sierra Denali Owner Manual (GMNA-Localizing-U.S./Canada/
Mexico-9955992) - 2017 - crc - 5/3/16
Vehicle Care 365
Caution
Continuing to drive with worn-out
brake pads could result in costly
brake repair.
Some driving conditions or climates
can cause a brake squeal when the
brakes are first applied or lightly
applied. This does not mean
something is wrong with the brakes.
Properly torqued wheel nuts are
necessary to help prevent brake
pulsation. When tires are rotated,
inspect brake pads for wear and
evenly tighten wheel nuts in the
proper sequence to torque
specifications in Capacities and
Specifications 0453.
Brake linings should always be
replaced as complete axle sets.
Brake Pedal Travel
See your dealer if the brake pedal
does not return to normal height,
or if there is a rapid increase in
pedal travel. This could be a sign
that brake service may be required.
Replacing Brake System Parts
Always replace brake system parts
with new, approved replacement
parts. If this is not done, the brakes
may not work properly. The braking
performance expected can change
in many other ways if the wrong
replacement brake parts are
installed or parts are improperly
installed.
Brake Fluid
The brake master cylinder reservoir
is filled with DOT 3 brake fluid. See
Engine Compartment Overview
0 343 for the location of the
reservoir. There are only two reasons why the
brake fluid level in the reservoir may
go down:
.
Normal brake lining wear. When
new linings are installed, the
fluid level goes back up.
. A fluid leak in the brake
hydraulic system. Have the
brake hydraulic system fixed.
With a leak, the brakes will not
work well.
Always clean the brake fluid
reservoir cap and the area around
the cap before removing it.
Do not top off the brake fluid.
Adding fluid does not correct a leak.
If fluid is added when the linings are
worn, there will be too much fluid
when new brake linings are
installed. Add or remove fluid, as
necessary, only when work is done
on the brake hydraulic system.