Page 65 of 504

The anti-scan feature turns off after anyof the following occur:
•One minute of keypad inactivity.
•You press the unlock button on theremote control.
•You switch your vehicle on.
•You unlock the vehicle using intelligentaccess.
Locking and Unlocking the Doors
Locking All Doors
Press and hold 7·8 and 9·0 on the keypadsimultaneously with the driver door closed.You do not need to enter a code first.
Unlocking All Doors
Enter the factory-set code or your personalcode, then press 3·4 on the keypad withinfive seconds.
Unlocking Only the Driver Door
Enter the factory-set or your personalfive-digit code. You must press eachnumber within five seconds of each other.The interior lamps illuminate.
Note:All doors unlock if the two-stageunlocking feature is turned off. See Lockingand Unlocking (page 57).
INTERIOR LUGGAGE
COMPARTMENT RELEASE
WARNINGS
Keep vehicle doors and luggagecompartment locked and keep keysand remote transmitters out of achild’s reach. Unsupervised children couldlock themselves in the trunk and risk injury.Children should be taught not to play invehicles.
WARNINGS
Do not leave children or animalsunattended in the vehicle. On hotdays, the temperature in the trunk orvehicle interior can rise very quickly.Exposure of people or animals to thesehigh temperatures for even a short timecan cause death or serious heat-relatedinjuries, including brain damage. Smallchildren are particularly at risk.
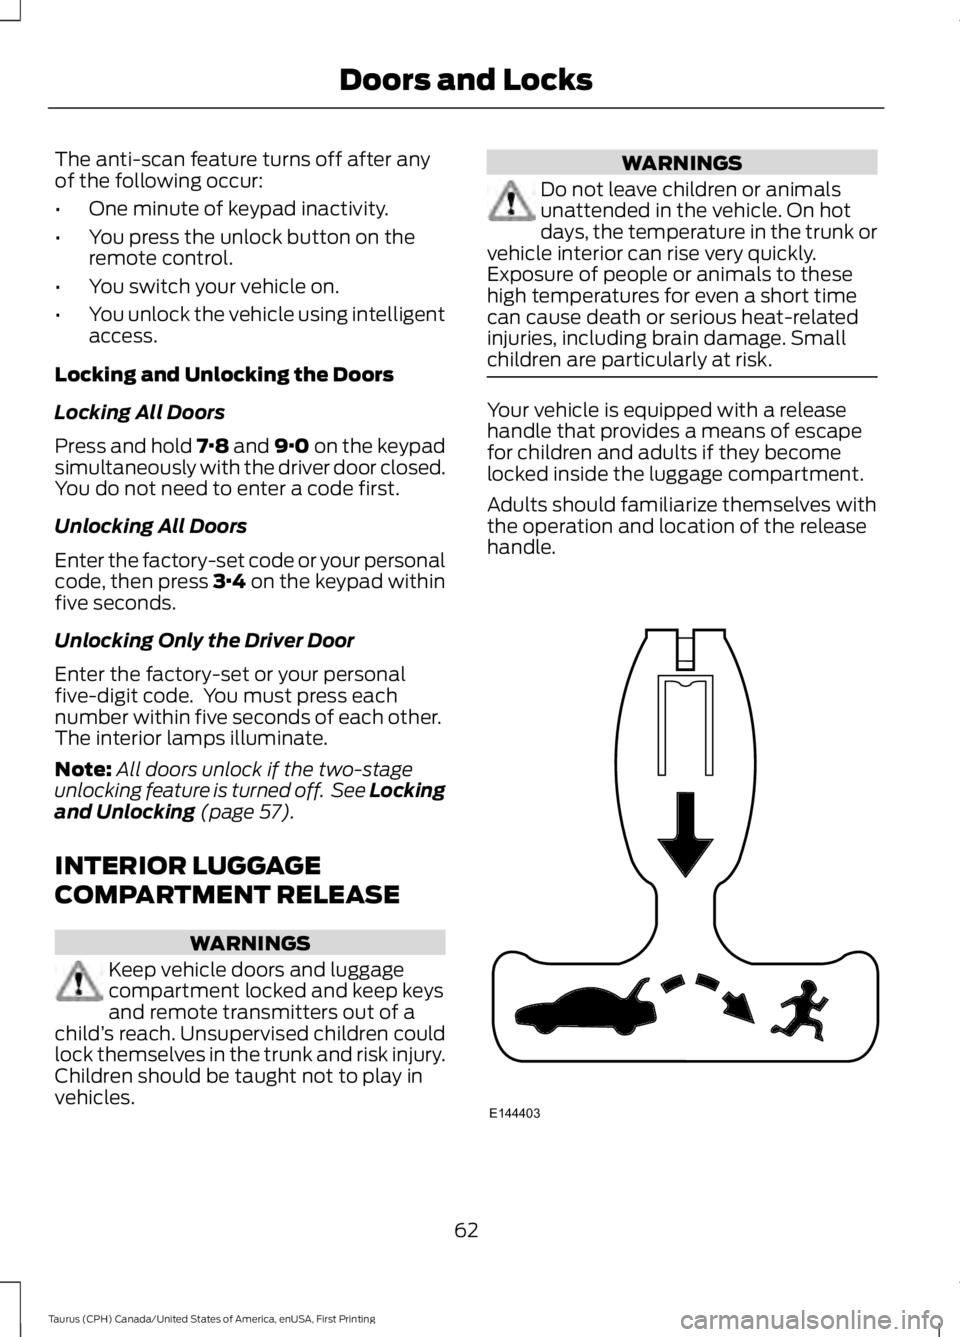
Your vehicle is equipped with a releasehandle that provides a means of escapefor children and adults if they becomelocked inside the luggage compartment.
Adults should familiarize themselves withthe operation and location of the releasehandle.
62
Taurus (CPH) Canada/United States of America, enUSA, First Printing
Doors and LocksE144403
Page 105 of 504

Collision Warning System
ActionMessage
There is a system malfunction with the collision warningsystem. The system is disabled. Contact an authorized dealeras soon as possible.
Collision WarningMalfunction
The collision warning system radar is blocked because of poorradar visibility due to bad weather or ice/mud/water in frontof the radar. Driver can typically clean the sensor to resolve.Contact an authorized dealer as soon as possible.
Collision Warning NotAvailable SensorBlocked See Manual
There is a system malfunction with the collision warningsystem. The system is disabled. Contact an authorized dealeras soon as possible.
Collision Warning NotAvailable
Doors and Locks
ActionMessage
Displays when a door is not completely closed.X Door Ajar
Displays when the trunk is not completely closed.Trunk Ajar
Driver Alert
ActionMessage
Stop and rest as soon as it is safe to do so.Driver Alert Warning RestNow
Take a rest soon.Driver Alert Warning RestSuggested
Fuel
ActionMessage
An early reminder of a low fuel condition.Fuel Level Low
The fuel fill inlet may not be properly closed.Check Fuel Fill Inlet
102
Taurus (CPH) Canada/United States of America, enUSA, First Printing
Information Displays
Page 270 of 504

GENERAL INFORMATION
A decal with tire pressure data is locatedin the driver’s door opening.
Check and set the tire pressure at theambient temperature in which you areintending to drive your vehicle and whenthe tires are cold.
Note:Check your tire pressures regularly tooptimize fuel economy.
Note:Use only approved wheel and tiresizes. Using other sizes could damage yourvehicle and will make the National TypeApproval invalid.
Note:If you change the diameter of the tiresfrom that fitted at the factory, thespeedometer may not display the correctspeed. Take your vehicle to an authorizeddealer to have the engine managementsystem reprogrammed.
TIRE SEALANT AND INFLATOR
KIT (If Equipped)
Note:The temporary mobility kit canistercontains enough sealant compound for onetire repair only. See your authorized Forddealer for additional replacement sealantcanisters.
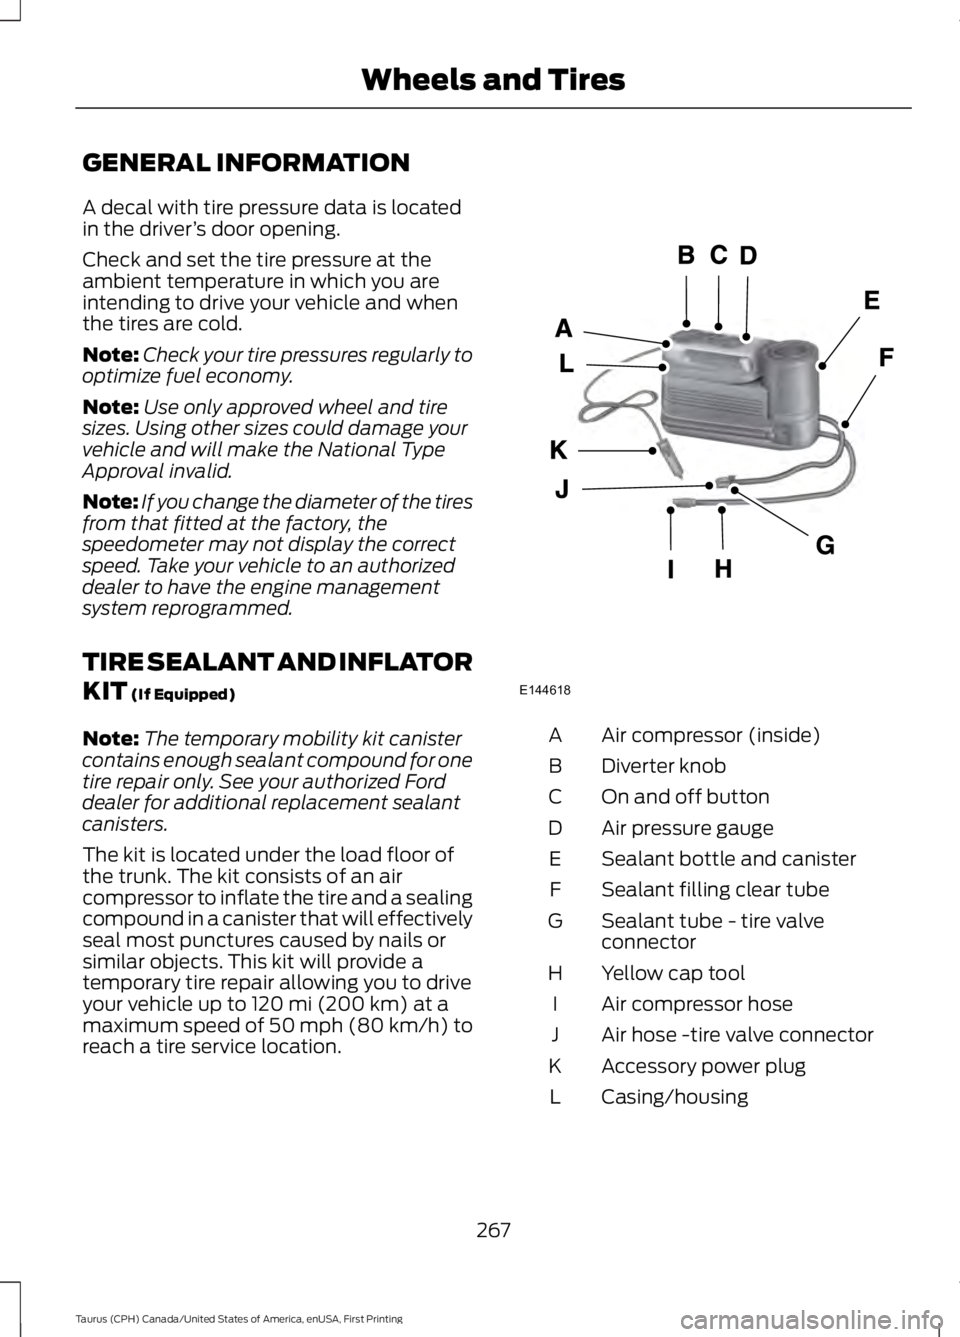
The kit is located under the load floor ofthe trunk. The kit consists of an aircompressor to inflate the tire and a sealingcompound in a canister that will effectivelyseal most punctures caused by nails orsimilar objects. This kit will provide atemporary tire repair allowing you to driveyour vehicle up to 120 mi (200 km) at amaximum speed of 50 mph (80 km/h) toreach a tire service location.
Air compressor (inside)A
Diverter knobB
On and off buttonC
Air pressure gaugeD
Sealant bottle and canisterE
Sealant filling clear tubeF
Sealant tube - tire valveconnectorG
Yellow cap toolH
Air compressor hoseI
Air hose -tire valve connectorJ
Accessory power plugK
Casing/housingL
267
Taurus (CPH) Canada/United States of America, enUSA, First Printing
Wheels and TiresE144618
Page 296 of 504

WARNINGS
Do not attempt to change a tire onthe side of the vehicle close tomoving traffic. Pull far enough off theroad to avoid the danger of being hit whenoperating the jack or changing the wheel.
Always use the jack provided asoriginal equipment with your vehicle.If using a jack other than the oneprovided, make sure the jack capacity isadequate for the vehicle weight, includingany vehicle cargo or modifications. If youare unsure if the jack capacity is adequate,contact the authorized dealer.
Note:Passengers should not remain in yourvehicle when the vehicle is being jacked.
Note:Jack at the specified locations toavoid damage to the vehicle.
1.Park on a level surface, set the parkingbrake and activate the hazard flashers.
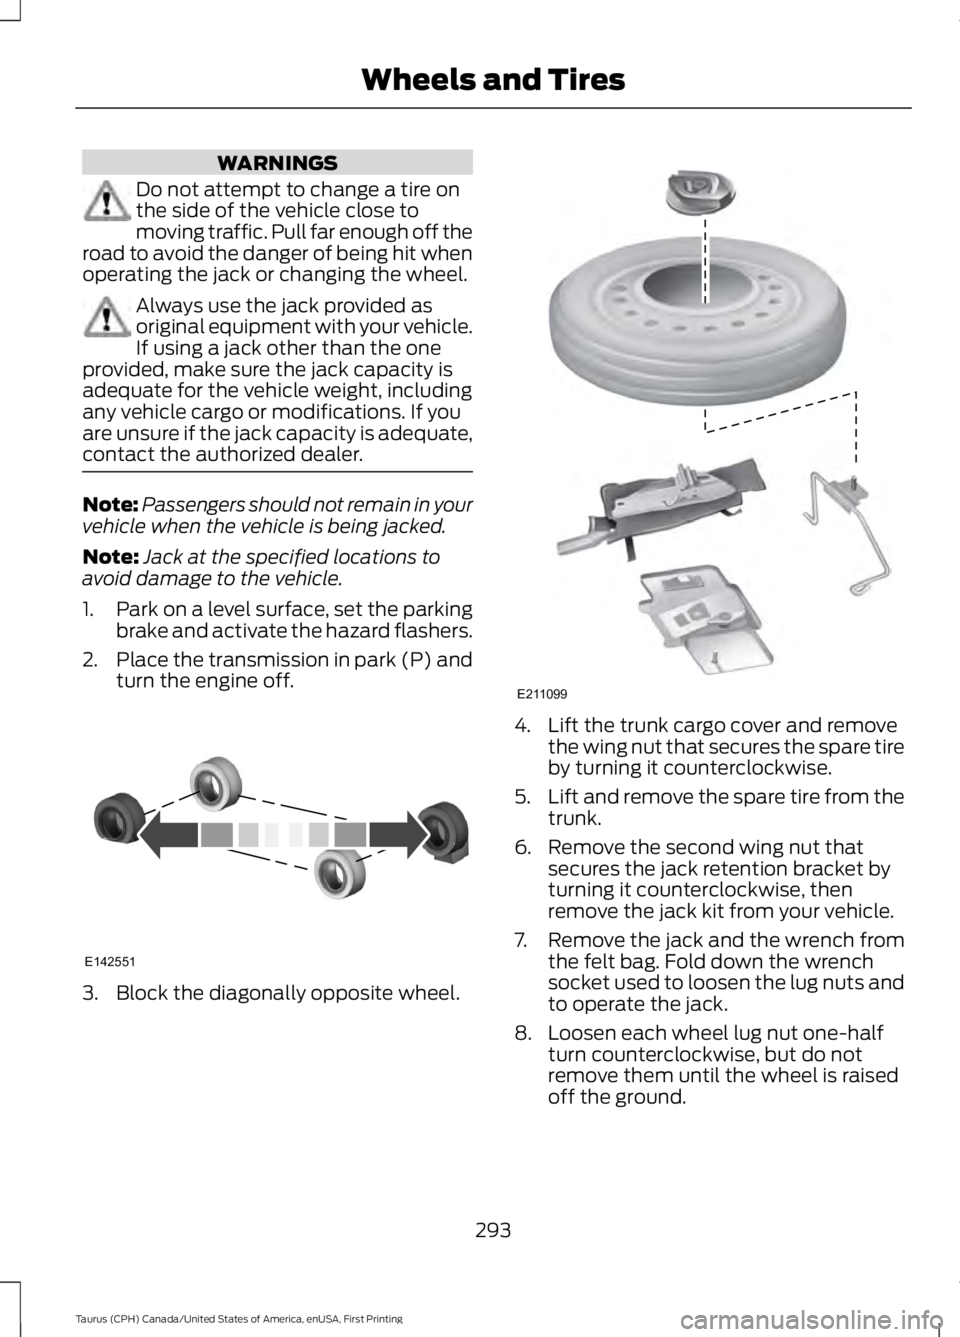
2.Place the transmission in park (P) andturn the engine off.
3. Block the diagonally opposite wheel.
4. Lift the trunk cargo cover and removethe wing nut that secures the spare tireby turning it counterclockwise.
5.Lift and remove the spare tire from thetrunk.
6. Remove the second wing nut thatsecures the jack retention bracket byturning it counterclockwise, thenremove the jack kit from your vehicle.
7. Remove the jack and the wrench fromthe felt bag. Fold down the wrenchsocket used to loosen the lug nuts andto operate the jack.
8. Loosen each wheel lug nut one-halfturn counterclockwise, but do notremove them until the wheel is raisedoff the ground.
293
Taurus (CPH) Canada/United States of America, enUSA, First Printing
Wheels and TiresE142551 E211099
Page 298 of 504
2. Insert the straight end of the jackretention bracket through the eyelet ofthe angled bracket and swing theretention bracket over the jack. Withthe jack in place, place the end of theretention bracket over the threadedstud in the trunk floor and secure it withthe plastic wing nut.
3. Screw the extension bolt onto thethreaded stud of the jack retentionbracket.
4. Place the flat tire in the spare tire wellwith the wheel facing up.
5. Safely secure the wheel by screwingthe large wing nut onto the extensionbolt.
295
Taurus (CPH) Canada/United States of America, enUSA, First Printing
Wheels and TiresE211101