2017 FORD TAURUS instrument panel
[x] Cancel search: instrument panelPage 266 of 504
CLEANING THE INTERIOR
WARNINGS
Do not use cleaning solvents, bleachor dye on the vehicle’s safety belts,as these actions may weaken thebelt webbing.
On vehicles equipped withseat-mounted airbags, do not usechemical solvents or strongdetergents. Such products couldcontaminate the side airbag system andaffect performance of the side airbag in acollision.
For fabric, carpets, cloth seats, safety beltsand seats equipped with side airbags:
•Remove dust and loose dirt with avacuum cleaner.
•Remove light stains and soil withMotorcraft Professional StrengthCarpet & Upholstery Cleaner.
•If grease or tar is present on thematerial, spot-clean the area first withMotorcraft Spot and Stain Remover. InCanada, use Motorcraft Multi-PurposeCleaner.
•If a ring forms on the fabric after spotcleaning, clean the entire areaimmediately (but do not oversaturate)or the ring will set.
•Do not use household cleaningproducts or glass cleaners, which canstain and discolor the fabric and affectthe flame retardant abilities of the seatmaterials.
CLEANING THE INSTRUMENT
PANEL AND INSTRUMENT
CLUSTER LENS
WARNING
Do not use chemical solvents orstrong detergents when cleaning thesteering wheel or instrument panelto avoid contamination of the airbagsystem.
Note:Follow the same procedure ascleaning leather seats for cleaning leatherinstrument panels and leather interior trimsurfaces. See Cleaning Leather Seats(page 264).
Clean the instrument panel and clusterlens with a clean, damp and soft cloth,then use a clean, dry and soft cloth to drythese areas.
•Avoid cleaners or polishes that increasethe gloss of the upper portion of theinstrument panel. The dull finish in thisarea helps protect you fromundesirable windshield reflection.
•Do not use any household cleaningproducts or glass cleaners as thesemay damage the finish of theinstrument panel, interior trim andcluster lens.
•Wash or wipe your hands clean if youhave been in contact with certainproducts such as insect repellent andsuntan lotion to avoid possible damageto the interior painted surfaces.
•Do not allow air fresheners and handsanitizers to spill onto interior surfaces.If a spill occurs, wipe off immediately.Your warranty may not cover thesedamages.
If a staining liquid like coffee or juice hasbeen spilled on the instrument panel or oninterior trim surfaces:
263
Taurus (CPH) Canada/United States of America, enUSA, First Printing
Vehicle Care
Page 267 of 504
1. Wipe up spilled liquid using a clean,soft cloth as quickly as possible.
2. Use Motorcraft Premium Leather andVinyl Cleaner or a commerciallyavailable leather cleaning product forautomotive interiors. Test any cleaneror stain remover on an inconspicuousarea.
3. Alternatively, wipe the surface with aclean, soft cloth and a mild soap andwater solution. Dry the area with aclean, soft cloth.
4. If necessary, apply more soap andwater solution or cleaning product toa clean, soft cloth and press it onto thesoiled area. Allow this to set at roomtemperature for 30 minutes.
5. Remove the soaked cloth, then with aclean, damp cloth, use a rubbingmotion for 60 seconds on the soiledarea.
6. Dry the area with a clean, soft cloth.
CLEANING LEATHER SEATS (If
Equipped)
Note:Follow the same procedure ascleaning leather seats for cleaning leatherinstrument panels and leather interior trimsurfaces.
For routine cleaning, wipe the surface witha soft, damp cloth and a mild soap andwater solution. Dry the area with a clean,soft cloth.
For cleaning and removing stains such asdye transfer, use Motorcraft PremiumLeather and Vinyl Cleaner or acommercially available leather cleaningproduct for automotive interiors.
Note:Test any cleaner or stain remover onan inconspicuous area.
You should:
•Remove dust and loose dirt with avacuum cleaner.
•Clean and treat spills and stains assoon as possible.
Do not use the following products as thesemay damage the leather:
•Oil and petroleum or silicone-basedleather conditioners.
•Household cleaners.
•Alcohol solutions.
•Solvents or cleaners intendedspecifically for rubber, vinyl andplastics.
REPAIRING MINOR PAINT
DAMAGE
Authorized dealers have touch-up paint tomatch your vehicle’s color. Your vehiclecolor code is printed on a sticker on thefront, left-hand side door jamb. Take yourcolor code to your authorized dealer tomake sure you get the correct color.
Before repairing minor paint damage, usea cleaner such as Motorcraft Bug and TarRemover to remove particles such as birddroppings, tree sap, insect deposits, tarspots, road salt and industrial fallout.
Always read the instructions before usingcleaning products.
CLEANING THE WHEELS
Note:Do not apply a cleaning chemical towarm or hot wheel rims and covers.
Note:Some automatic car washes maycause damage to the finish on your wheelrims and covers.
264
Taurus (CPH) Canada/United States of America, enUSA, First Printing
Vehicle Care
Page 272 of 504

•When inflating a tire or other objects,use the black air hose only. Do not usethe transparent hose which is designedfor sealant application only.
•Operating the kit could cause anelectrical disturbance in radio, CD, andDVD player operation.
What to do when a Tire IsPunctured
A tire puncture within the tire tread areacan be repaired in two stages with the kit.
•In the first stage, the tire will bereinflated with a sealing compoundand air. After the tire has beenreinflated, you will need to drive thevehicle a short distance 4 mi (6 km) todistribute the sealant in the tire.
•In the second stage, you will need tocheck the tire pressure and adjust, ifnecessary, to the vehicle tire inflationpressure.
First Stage: Reinflating the Tirewith Sealing Compound and Air
WARNINGS
Do not stand directly over the kitwhile inflating the tire. If you noticeany unusual bulges or deformationsin the tire sidewall during inflation, stopand call roadside assistance.
If the tire does not inflate to therecommended tire pressure within15 minutes, stop and call roadsideassistance.
Preparation: Park the vehicle in a safe, leveland secure area, away from moving traffic.Turn the hazard lights on. Apply the parkingbrake and turn the engine off. Inspect theflat tire for visible damage.
Sealant compound contains latex. Toavoid any allergic reactions, use thenon-latex gloves located in the accessorybox on the underside of the kit housing.
Do not remove any foreign object that haspierced the tire. If a puncture is located inthe tire sidewall, stop and call roadsideassistance.
1. Remove the valve cap from the tirevalve.
2. Unwrap the clear tube from thecompressor housing.
3. Remove the tube cap and fasten themetal connector of the tube to the tirevalve, turning clockwise. Make sure theconnection is tightly fastened.
4. Plug the power cable into the 12-voltpower point in the vehicle.
5. Remove the warning sticker found onthe canister and place it on the top ofthe instrument panel or the center ofthe dash.
6. Start the vehicle only if the vehicle isoutdoors or in a well-ventilated area.
269
Taurus (CPH) Canada/United States of America, enUSA, First Printing
Wheels and TiresE144619
Page 305 of 504
VEHICLE IDENTIFICATION
NUMBER
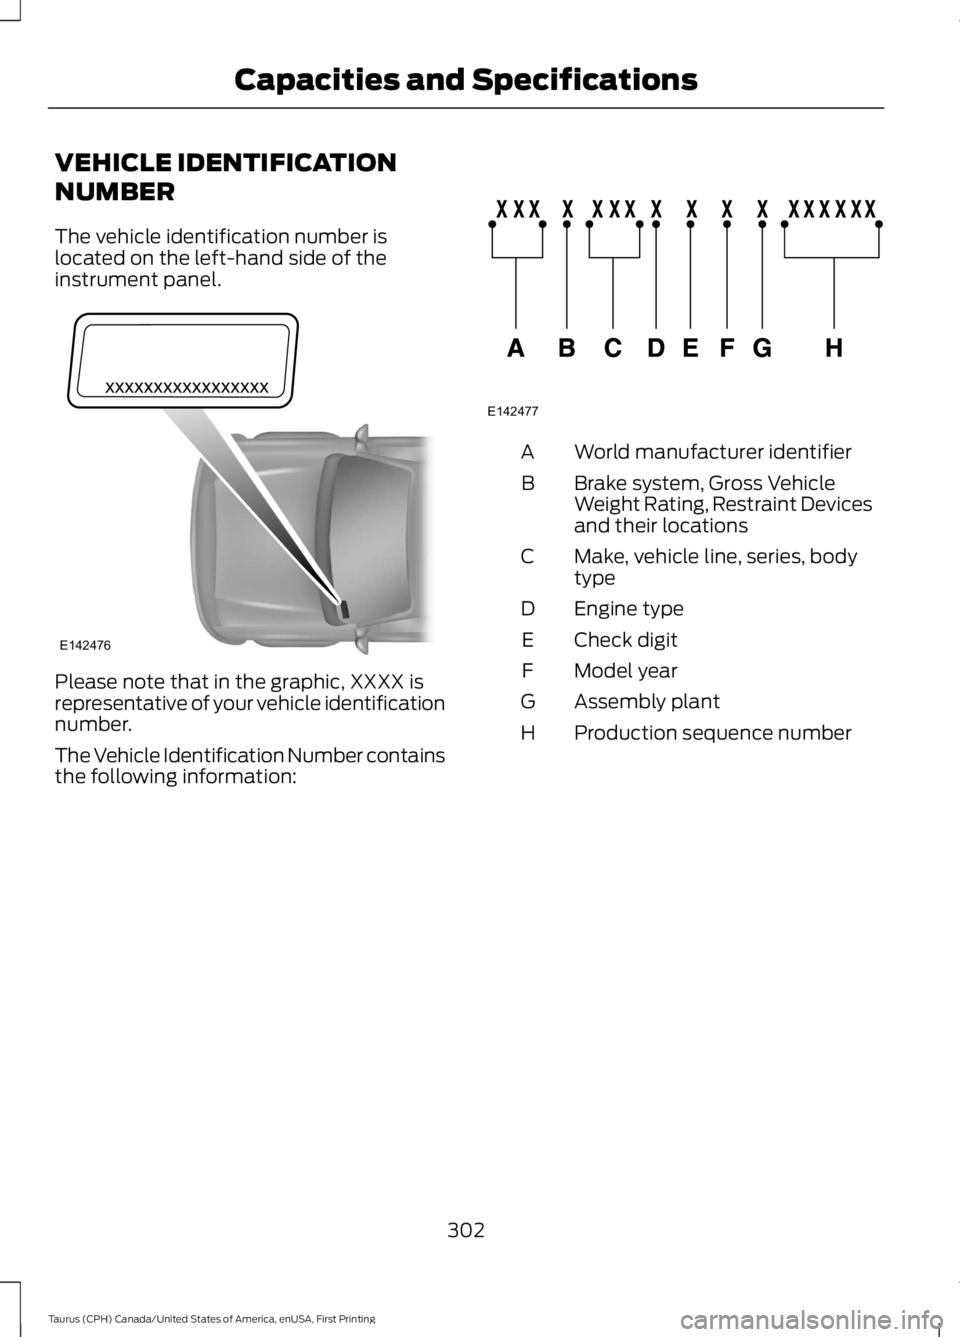
The vehicle identification number islocated on the left-hand side of theinstrument panel.
Please note that in the graphic, XXXX isrepresentative of your vehicle identificationnumber.
The Vehicle Identification Number containsthe following information:
World manufacturer identifierA
Brake system, Gross VehicleWeight Rating, Restraint Devicesand their locations
B
Make, vehicle line, series, bodytypeC
Engine typeD
Check digitE
Model yearF
Assembly plantG
Production sequence numberH
302
Taurus (CPH) Canada/United States of America, enUSA, First Printing
Capacities and SpecificationsE142476 E142477
Page 329 of 504
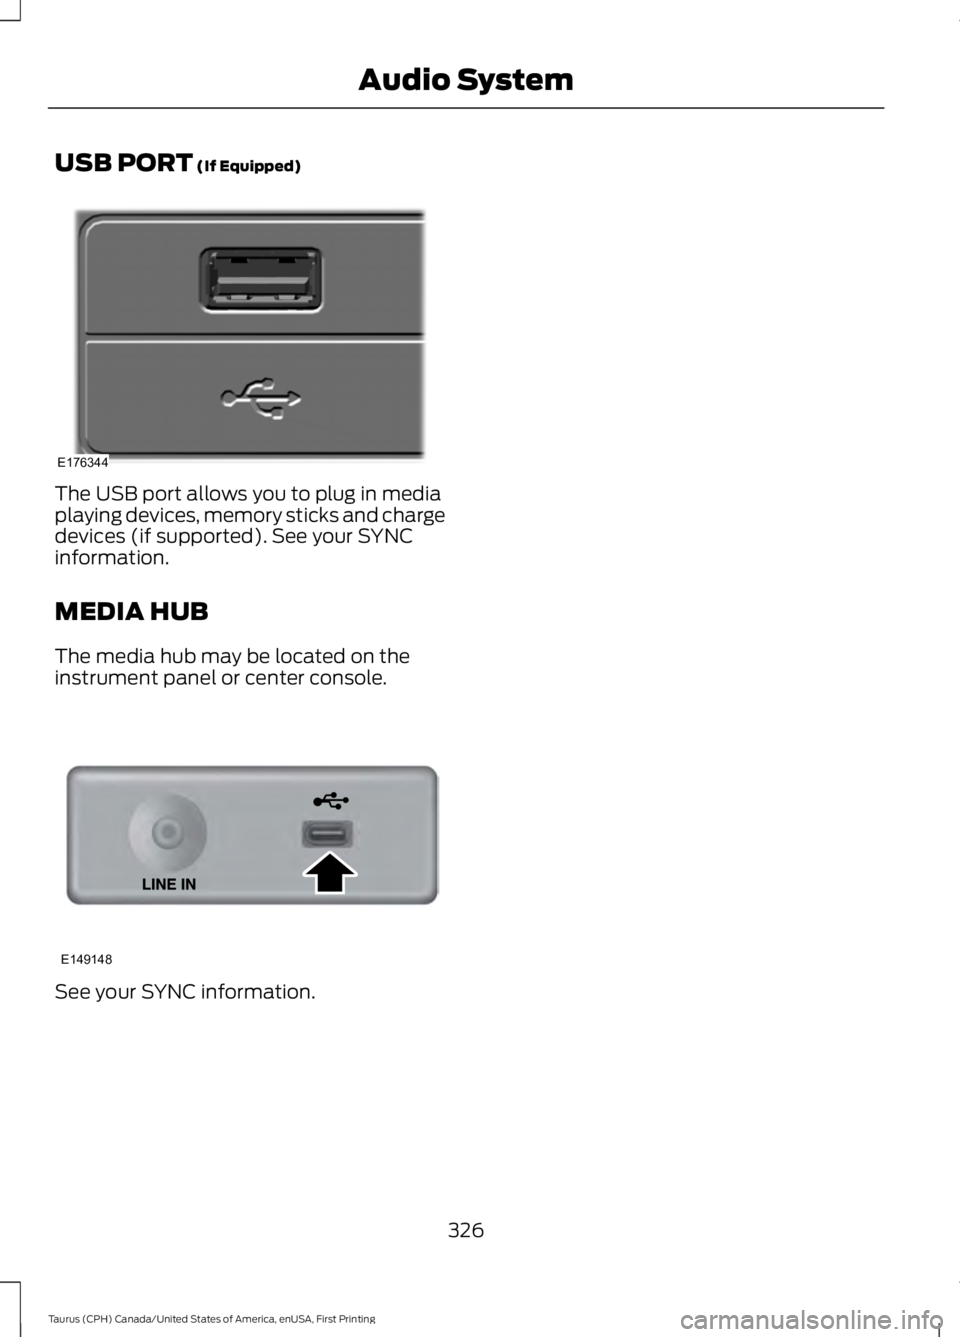
USB PORT (If Equipped)
The USB port allows you to plug in mediaplaying devices, memory sticks and chargedevices (if supported). See your SYNCinformation.
MEDIA HUB
The media hub may be located on theinstrument panel or center console.
See your SYNC information.
326
Taurus (CPH) Canada/United States of America, enUSA, First Printing
Audio SystemE176344 E149148
Page 377 of 504
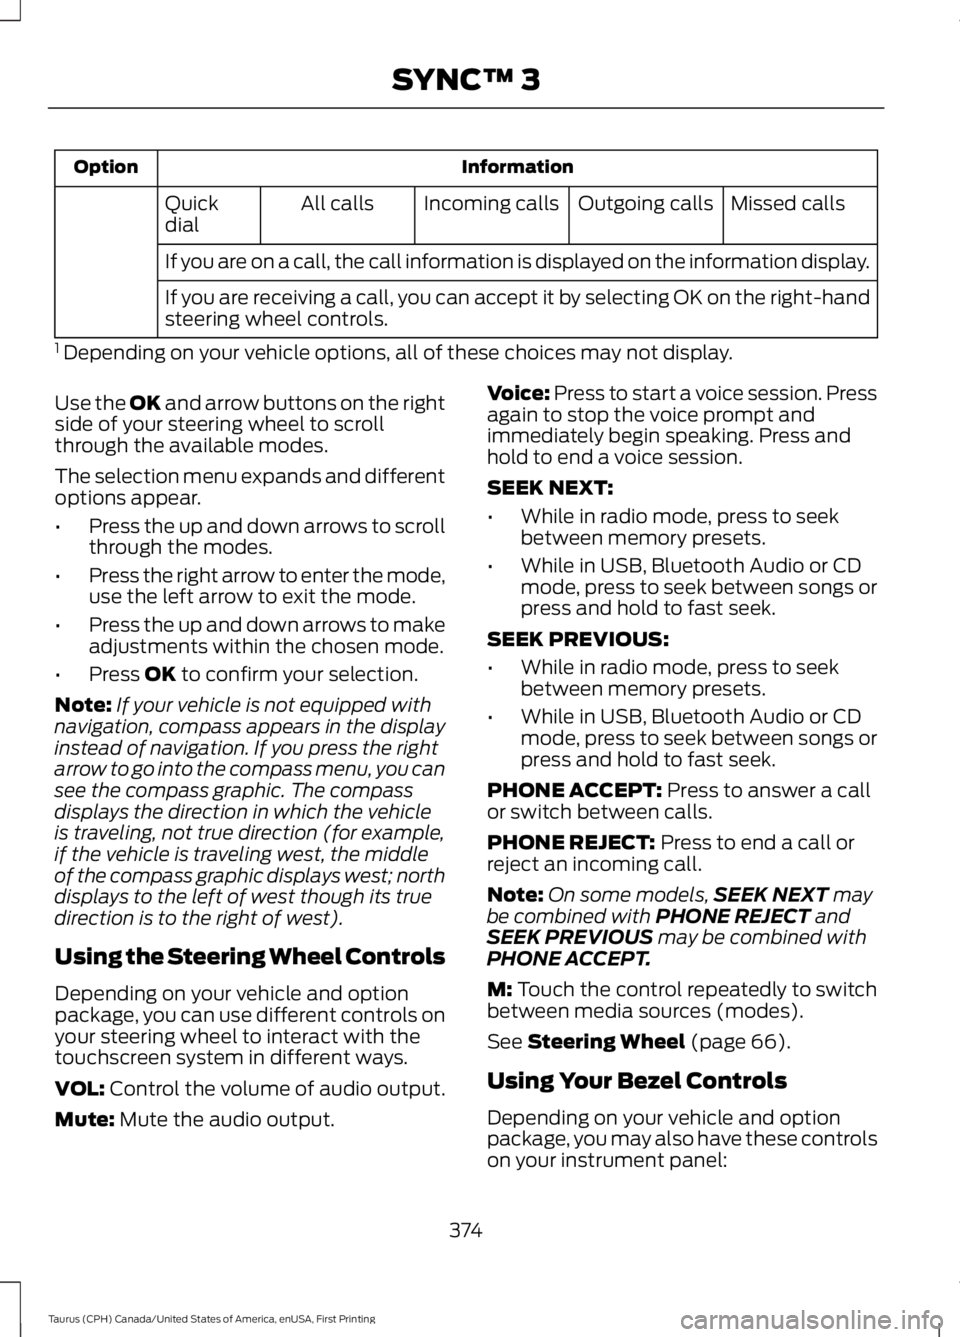
InformationOption
Missed callsOutgoing callsIncoming callsAll callsQuickdial
If you are on a call, the call information is displayed on the information display.
If you are receiving a call, you can accept it by selecting OK on the right-handsteering wheel controls.
1 Depending on your vehicle options, all of these choices may not display.
Use the OK and arrow buttons on the rightside of your steering wheel to scrollthrough the available modes.
The selection menu expands and differentoptions appear.
•Press the up and down arrows to scrollthrough the modes.
•Press the right arrow to enter the mode,use the left arrow to exit the mode.
•Press the up and down arrows to makeadjustments within the chosen mode.
•Press OK to confirm your selection.
Note:If your vehicle is not equipped withnavigation, compass appears in the displayinstead of navigation. If you press the rightarrow to go into the compass menu, you cansee the compass graphic. The compassdisplays the direction in which the vehicleis traveling, not true direction (for example,if the vehicle is traveling west, the middleof the compass graphic displays west; northdisplays to the left of west though its truedirection is to the right of west).
Using the Steering Wheel Controls
Depending on your vehicle and optionpackage, you can use different controls onyour steering wheel to interact with thetouchscreen system in different ways.
VOL: Control the volume of audio output.
Mute: Mute the audio output.
Voice: Press to start a voice session. Pressagain to stop the voice prompt andimmediately begin speaking. Press andhold to end a voice session.
SEEK NEXT:
•While in radio mode, press to seekbetween memory presets.
•While in USB, Bluetooth Audio or CDmode, press to seek between songs orpress and hold to fast seek.
SEEK PREVIOUS:
•While in radio mode, press to seekbetween memory presets.
•While in USB, Bluetooth Audio or CDmode, press to seek between songs orpress and hold to fast seek.
PHONE ACCEPT: Press to answer a callor switch between calls.
PHONE REJECT: Press to end a call orreject an incoming call.
Note:On some models,SEEK NEXT maybe combined with PHONE REJECT andSEEK PREVIOUS may be combined withPHONE ACCEPT.
M: Touch the control repeatedly to switchbetween media sources (modes).
See Steering Wheel (page 66).
Using Your Bezel Controls
Depending on your vehicle and optionpackage, you may also have these controlson your instrument panel:
374
Taurus (CPH) Canada/United States of America, enUSA, First Printing
SYNC™ 3
Page 401 of 504
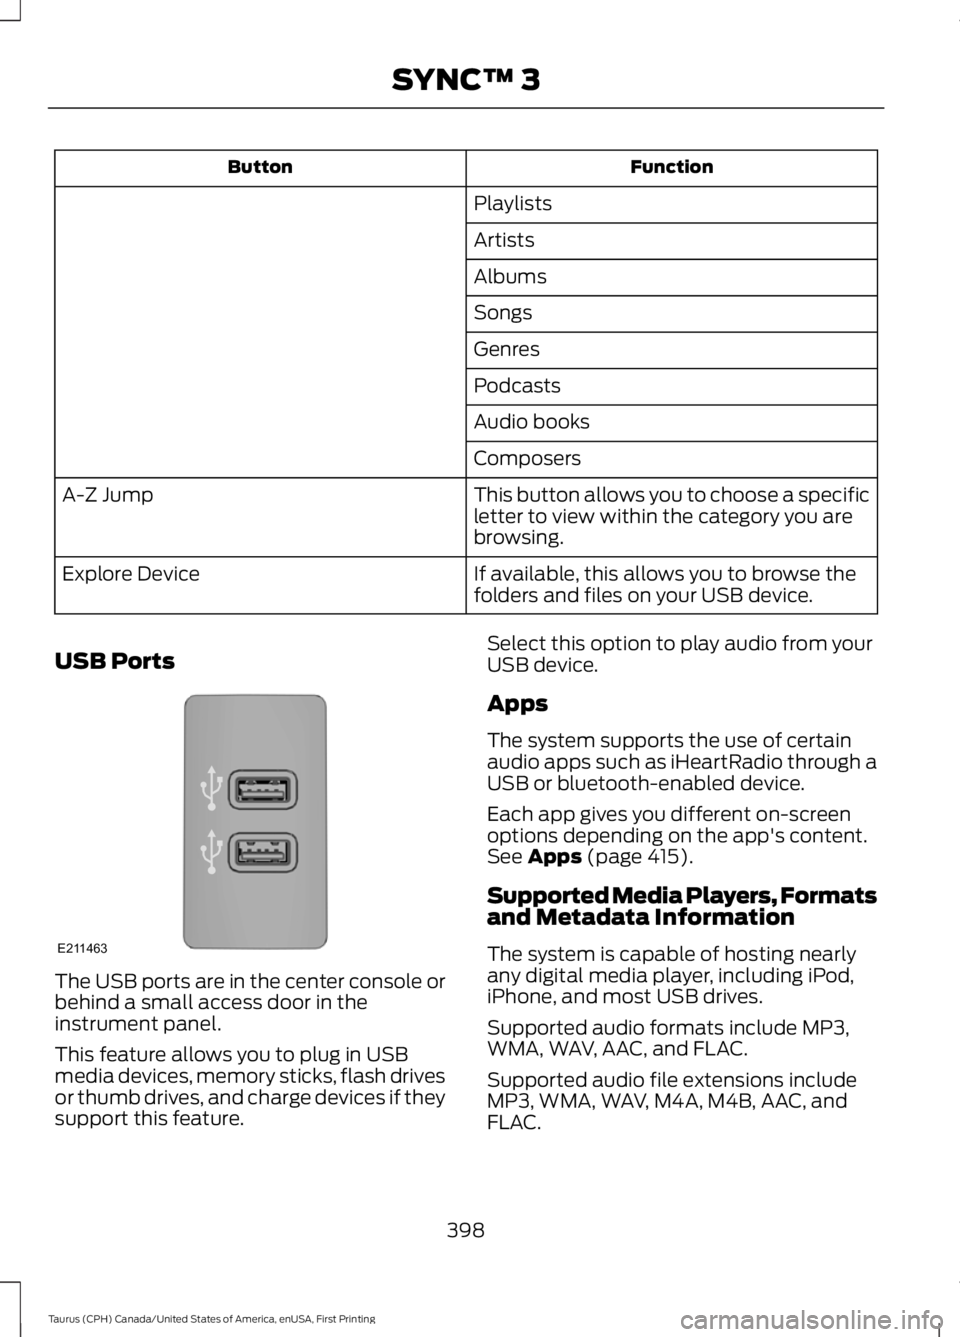
FunctionButton
Playlists
Artists
Albums
Songs
Genres
Podcasts
Audio books
Composers
This button allows you to choose a specificletter to view within the category you arebrowsing.
A-Z Jump
If available, this allows you to browse thefolders and files on your USB device.Explore Device
USB Ports
The USB ports are in the center console orbehind a small access door in theinstrument panel.
This feature allows you to plug in USBmedia devices, memory sticks, flash drivesor thumb drives, and charge devices if theysupport this feature.
Select this option to play audio from yourUSB device.
Apps
The system supports the use of certainaudio apps such as iHeartRadio through aUSB or bluetooth-enabled device.
Each app gives you different on-screenoptions depending on the app's content.See Apps (page 415).
Supported Media Players, Formatsand Metadata Information
The system is capable of hosting nearlyany digital media player, including iPod,iPhone, and most USB drives.
Supported audio formats include MP3,WMA, WAV, AAC, and FLAC.
Supported audio file extensions includeMP3, WMA, WAV, M4A, M4B, AAC, andFLAC.
398
Taurus (CPH) Canada/United States of America, enUSA, First Printing
SYNC™ 3E211463
Page 404 of 504
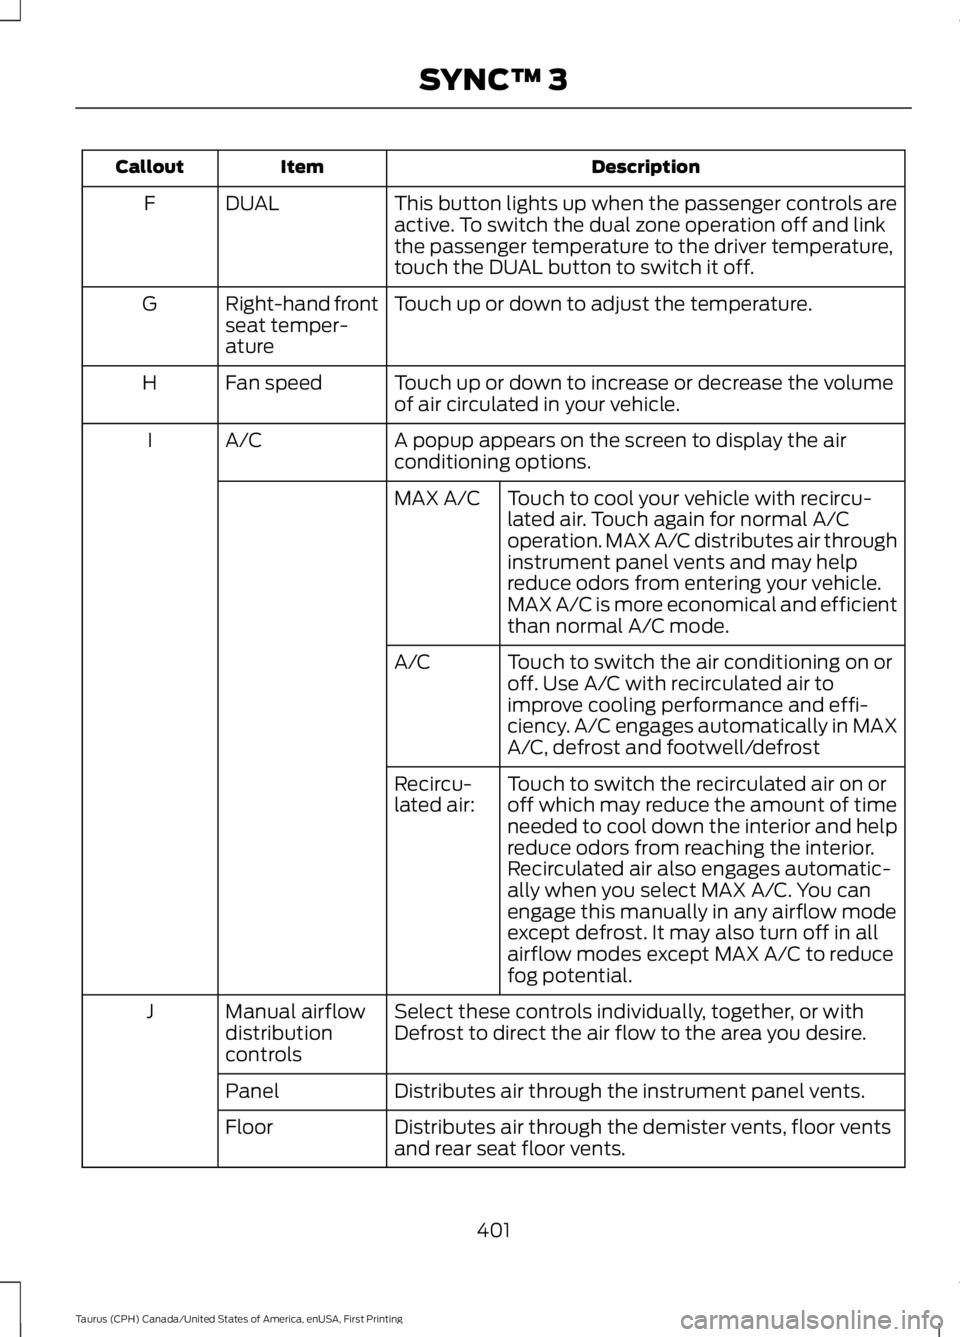
DescriptionItemCallout
This button lights up when the passenger controls areactive. To switch the dual zone operation off and linkthe passenger temperature to the driver temperature,touch the DUAL button to switch it off.
DUALF
Touch up or down to adjust the temperature.Right-hand frontseat temper-ature
G
Touch up or down to increase or decrease the volumeof air circulated in your vehicle.Fan speedH
A popup appears on the screen to display the airconditioning options.A/CI
Touch to cool your vehicle with recircu-lated air. Touch again for normal A/Coperation. MAX A/C distributes air throughinstrument panel vents and may helpreduce odors from entering your vehicle.MAX A/C is more economical and efficientthan normal A/C mode.
MAX A/C
Touch to switch the air conditioning on oroff. Use A/C with recirculated air toimprove cooling performance and effi-ciency. A/C engages automatically in MAXA/C, defrost and footwell/defrost
A/C
Touch to switch the recirculated air on oroff which may reduce the amount of timeneeded to cool down the interior and helpreduce odors from reaching the interior.Recirculated air also engages automatic-ally when you select MAX A/C. You canengage this manually in any airflow modeexcept defrost. It may also turn off in allairflow modes except MAX A/C to reducefog potential.
Recircu-lated air:
Select these controls individually, together, or withDefrost to direct the air flow to the area you desire.Manual airflowdistributioncontrols
J
Distributes air through the instrument panel vents.Panel
Distributes air through the demister vents, floor ventsand rear seat floor vents.Floor
401
Taurus (CPH) Canada/United States of America, enUSA, First Printing
SYNC™ 3