2017 FORD TAURUS clock
[x] Cancel search: clockPage 256 of 504
If you see any corrosion on the battery orterminals, remove the cables from theterminals and clean with a wire brush. Youcan neutralize the acid with a solution ofbaking soda and water.
Because your vehicle’s engine iselectronically controlled by a computer,some control conditions are maintainedby power from the battery. When thebattery is disconnected or a new batteryis installed, the engine must relearn its idleand fuel trim strategy for optimumdriveability and performance. Flexible fuelvehicles (FFV) must also relearn theethanol content of the fuel for optimumdriveability and performance.
To restore the settings, do the following:
1. Apply the parking brake.
2. Shift into park (P) or neutral (N).
3. Switch off all accessories.
4. Press the brake pedal and start yourvehicle.
5. Run the engine until it reaches normaloperating temperature. While theengine is warming up, complete thefollowing: Reset the clock. See AudioSystem (page 315). Reset the powerwindows bounce-back feature. SeeWindows and Mirrors (page 78).Reset the radio station presets. SeeAudio System (page 315).
6.Allow the engine to idle for at least oneminute.
7.Drive the vehicle at least 10 mi (16 km)to completely relearn the idle trim andfuel trim strategy.
Note:If you do not allow the engine torelearn the idle and fuel trim strategy, theidle quality of your vehicle may be adverselyaffected until the engine computereventually relearns the idle trim and fueltrim strategy.
Note:For flexible fuel vehicles, if you areoperating on E85, you may experience poorstarts or an inability to start the engine anddriveability problems until the fuel trim andethanol content have been relearned.
Make sure that you dispose of old batteriesin an environmentally friendly way. Seekadvice from your local authority aboutrecycling old batteries.
If storing your vehicle for more than 30days without recharging the battery, werecommend that you disconnect thebattery cables to maintain battery chargefor quick starting.
Battery Management System (If
Equipped)
The battery management system monitorsbattery conditions and takes actions toextend battery life. If excessive batterydrain is detected, the system temporarilydisables some electrical systems toprotect the battery.
Systems included are:
•Heated rear window.
•Heated seats.
•Climate control.
•Heated steering wheel.
•Audio unit.
•Navigation system.
A message may appear in the informationdisplays to alert you that batteryprotection actions are active. Thesemessages are only for notification that anaction is taking place, and not intended toindicate an electrical problem or that thebattery requires replacement.
253
Taurus (CPH) Canada/United States of America, enUSA, First Printing
Maintenance
Page 259 of 504
5. Locate the vertical adjuster on eachheadlamp. Use a Phillips #2screwdriver to turn the adjuster eitherclockwise or counterclockwise toadjust the vertical aim of theheadlamp. The horizontal edge of thebrighter light should touch thehorizontal reference line.
6.Repeat Steps 3 through 7 to adjust theother headlamp.
7.Close the hood and turn off the lamps.
Horizontal Aim Adjustment
Horizontal aim is not required for thisvehicle and is not adjustable.
CHANGING A BULB
WARNINGS
Bulbs can become hot. Let the bulbcool down before removing it. Failureto do so could result in personalinjury.
Switch the lamps and the ignition off.Failure to follow this warning couldresult in serious personal injury.
Use the correct specification bulb. SeeBulb Specification Chart (page 257).
Install in the reverse order unless otherwisestated.
High-Intensity DischargeHeadlamps
These lamps operate at a high voltage. Seean authorized dealer if they fail.
Front Fog Lamp (If Equipped)
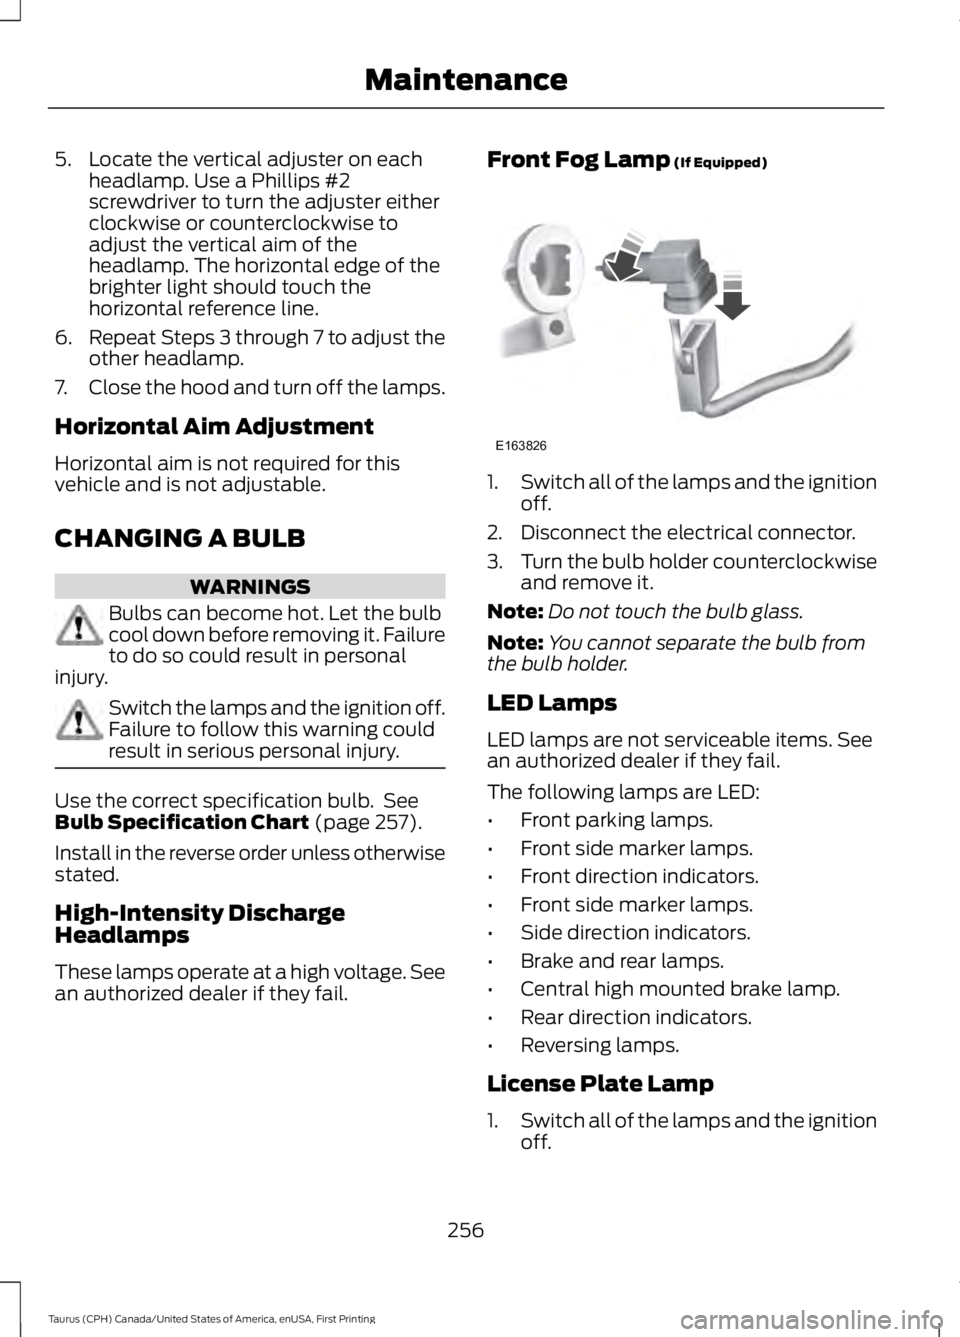
1.Switch all of the lamps and the ignitionoff.
2. Disconnect the electrical connector.
3.Turn the bulb holder counterclockwiseand remove it.
Note:Do not touch the bulb glass.
Note:You cannot separate the bulb fromthe bulb holder.
LED Lamps
LED lamps are not serviceable items. Seean authorized dealer if they fail.
The following lamps are LED:
•Front parking lamps.
•Front side marker lamps.
•Front direction indicators.
•Front side marker lamps.
•Side direction indicators.
•Brake and rear lamps.
•Central high mounted brake lamp.
•Rear direction indicators.
•Reversing lamps.
License Plate Lamp
1.Switch all of the lamps and the ignitionoff.
256
Taurus (CPH) Canada/United States of America, enUSA, First Printing
MaintenanceE163826
Page 272 of 504

•When inflating a tire or other objects,use the black air hose only. Do not usethe transparent hose which is designedfor sealant application only.
•Operating the kit could cause anelectrical disturbance in radio, CD, andDVD player operation.
What to do when a Tire IsPunctured
A tire puncture within the tire tread areacan be repaired in two stages with the kit.
•In the first stage, the tire will bereinflated with a sealing compoundand air. After the tire has beenreinflated, you will need to drive thevehicle a short distance 4 mi (6 km) todistribute the sealant in the tire.
•In the second stage, you will need tocheck the tire pressure and adjust, ifnecessary, to the vehicle tire inflationpressure.
First Stage: Reinflating the Tirewith Sealing Compound and Air
WARNINGS
Do not stand directly over the kitwhile inflating the tire. If you noticeany unusual bulges or deformationsin the tire sidewall during inflation, stopand call roadside assistance.
If the tire does not inflate to therecommended tire pressure within15 minutes, stop and call roadsideassistance.
Preparation: Park the vehicle in a safe, leveland secure area, away from moving traffic.Turn the hazard lights on. Apply the parkingbrake and turn the engine off. Inspect theflat tire for visible damage.
Sealant compound contains latex. Toavoid any allergic reactions, use thenon-latex gloves located in the accessorybox on the underside of the kit housing.
Do not remove any foreign object that haspierced the tire. If a puncture is located inthe tire sidewall, stop and call roadsideassistance.
1. Remove the valve cap from the tirevalve.
2. Unwrap the clear tube from thecompressor housing.
3. Remove the tube cap and fasten themetal connector of the tube to the tirevalve, turning clockwise. Make sure theconnection is tightly fastened.
4. Plug the power cable into the 12-voltpower point in the vehicle.
5. Remove the warning sticker found onthe canister and place it on the top ofthe instrument panel or the center ofthe dash.
6. Start the vehicle only if the vehicle isoutdoors or in a well-ventilated area.
269
Taurus (CPH) Canada/United States of America, enUSA, First Printing
Wheels and TiresE144619
Page 273 of 504
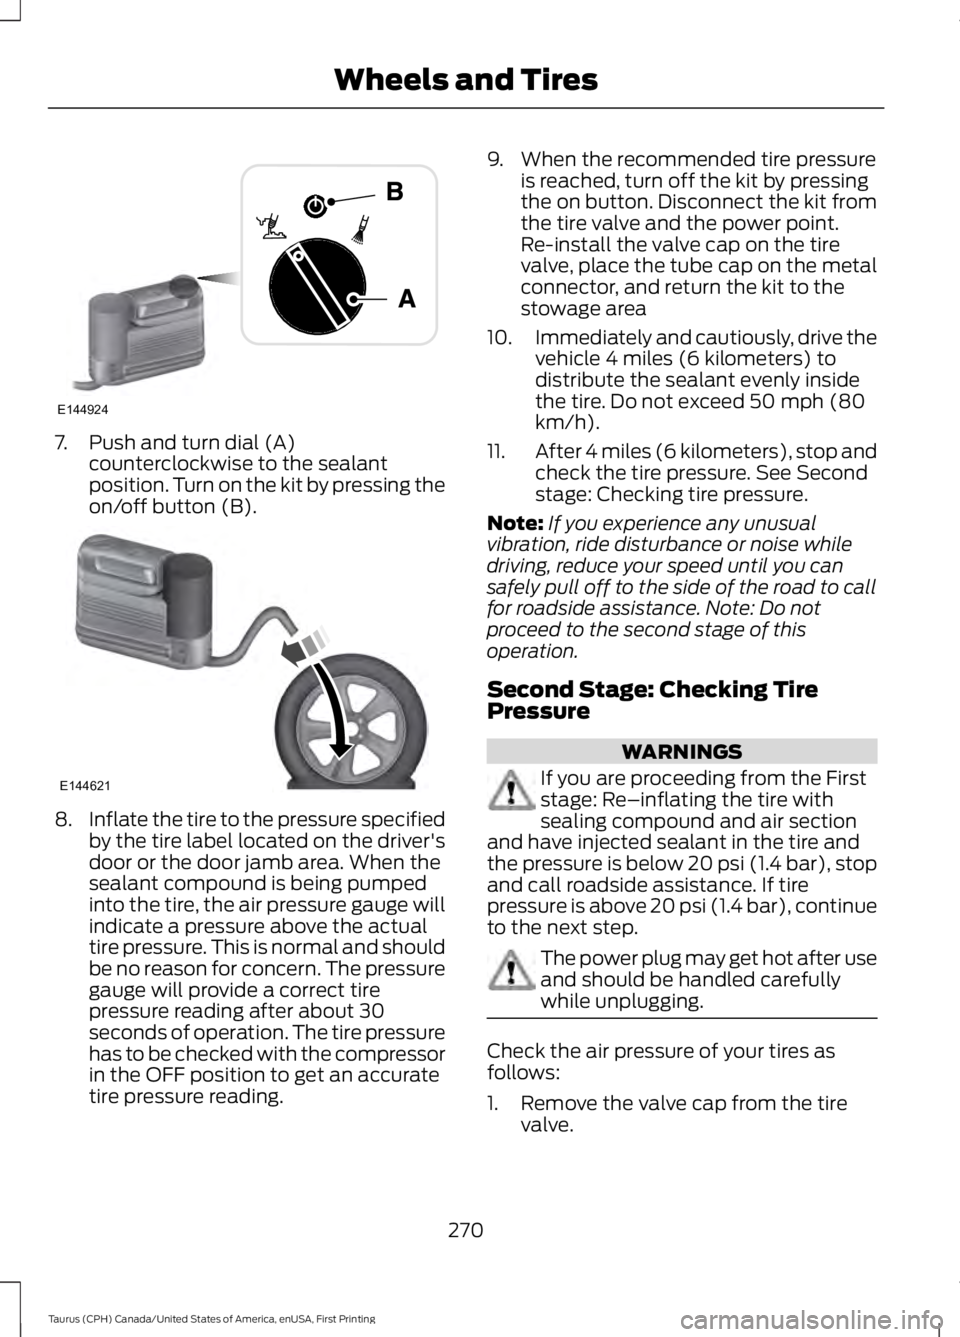
7. Push and turn dial (A)counterclockwise to the sealantposition. Turn on the kit by pressing theon/off button (B).
8.Inflate the tire to the pressure specifiedby the tire label located on the driver'sdoor or the door jamb area. When thesealant compound is being pumpedinto the tire, the air pressure gauge willindicate a pressure above the actualtire pressure. This is normal and shouldbe no reason for concern. The pressuregauge will provide a correct tirepressure reading after about 30seconds of operation. The tire pressurehas to be checked with the compressorin the OFF position to get an accuratetire pressure reading.
9. When the recommended tire pressureis reached, turn off the kit by pressingthe on button. Disconnect the kit fromthe tire valve and the power point.Re-install the valve cap on the tirevalve, place the tube cap on the metalconnector, and return the kit to thestowage area
10.Immediately and cautiously, drive thevehicle 4 miles (6 kilometers) todistribute the sealant evenly insidethe tire. Do not exceed 50 mph (80km/h).
11.After 4 miles (6 kilometers), stop andcheck the tire pressure. See Secondstage: Checking tire pressure.
Note:If you experience any unusualvibration, ride disturbance or noise whiledriving, reduce your speed until you cansafely pull off to the side of the road to callfor roadside assistance. Note: Do notproceed to the second stage of thisoperation.
Second Stage: Checking TirePressure
WARNINGS
If you are proceeding from the Firststage: Re–inflating the tire withsealing compound and air sectionand have injected sealant in the tire andthe pressure is below 20 psi (1.4 bar), stopand call roadside assistance. If tirepressure is above 20 psi (1.4 bar), continueto the next step.
The power plug may get hot after useand should be handled carefullywhile unplugging.
Check the air pressure of your tires asfollows:
1. Remove the valve cap from the tirevalve.
270
Taurus (CPH) Canada/United States of America, enUSA, First Printing
Wheels and TiresE144924 E144621
Page 274 of 504

2. Unhook the black hose from the sideof the compressor and fasten firmly onthe valve stem by turning clockwise.
3.Push and turn the dial clockwise to theair position. Turn on the kit by pressingthe on button.
4. Adjust the tire to the recommendedinflation pressure from the tire labellocated on the driver's door or doorjamb area. The tire pressure has to bechecked with the compressor in theOFF position to get the correct tirepressure reading.
5. Turn the compressor off by pressingthe on/off button.
6.When the tire pressure reading with thecompressor in the off position iscorrect, disconnect the hose, re-installthe valve cap on the tire valve, unplugthe compressor, and return the kit tothe stowage area.
What to do after the Tire has beenSealed
After using the kit to seal your tire, you willneed to replace the sealant canister andclear tube (hose). You can obtain andreplace sealing compound and spare partsat an authorized Ford dealer or tire dealer.Empty sealant bottles may be disposed ofat home. However, liquid residue from thesealing compound should be disposed byyour local authorized Ford dealer or tiredealer, or in accordance with local wastedisposal regulations.
Note:After the sealing compound has beenused, the maximum vehicle speed is 50 mph(80 km/h) and the maximum drivingdistance is 120 mi (200 km). The sealed tireshould be inspected immediately.
Note:After sealant use, the tire pressuremonitoring system sensor and valve stemon the wheel must be replaced by anauthorized Ford dealer.
You can check the tire pressure any timewithin the 120 mi (200 km) by performingthe procedure from Second stage:Checking tire pressure listed previously.
Removal of the sealant canister fromthe kit
1. Unwrap the clear tube from thecompressor housing.
271
Taurus (CPH) Canada/United States of America, enUSA, First Printing
Wheels and TiresE144622 E144623
Page 296 of 504
WARNINGS
Do not attempt to change a tire onthe side of the vehicle close tomoving traffic. Pull far enough off theroad to avoid the danger of being hit whenoperating the jack or changing the wheel.
Always use the jack provided asoriginal equipment with your vehicle.If using a jack other than the oneprovided, make sure the jack capacity isadequate for the vehicle weight, includingany vehicle cargo or modifications. If youare unsure if the jack capacity is adequate,contact the authorized dealer.
Note:Passengers should not remain in yourvehicle when the vehicle is being jacked.
Note:Jack at the specified locations toavoid damage to the vehicle.
1.Park on a level surface, set the parkingbrake and activate the hazard flashers.
2.Place the transmission in park (P) andturn the engine off.
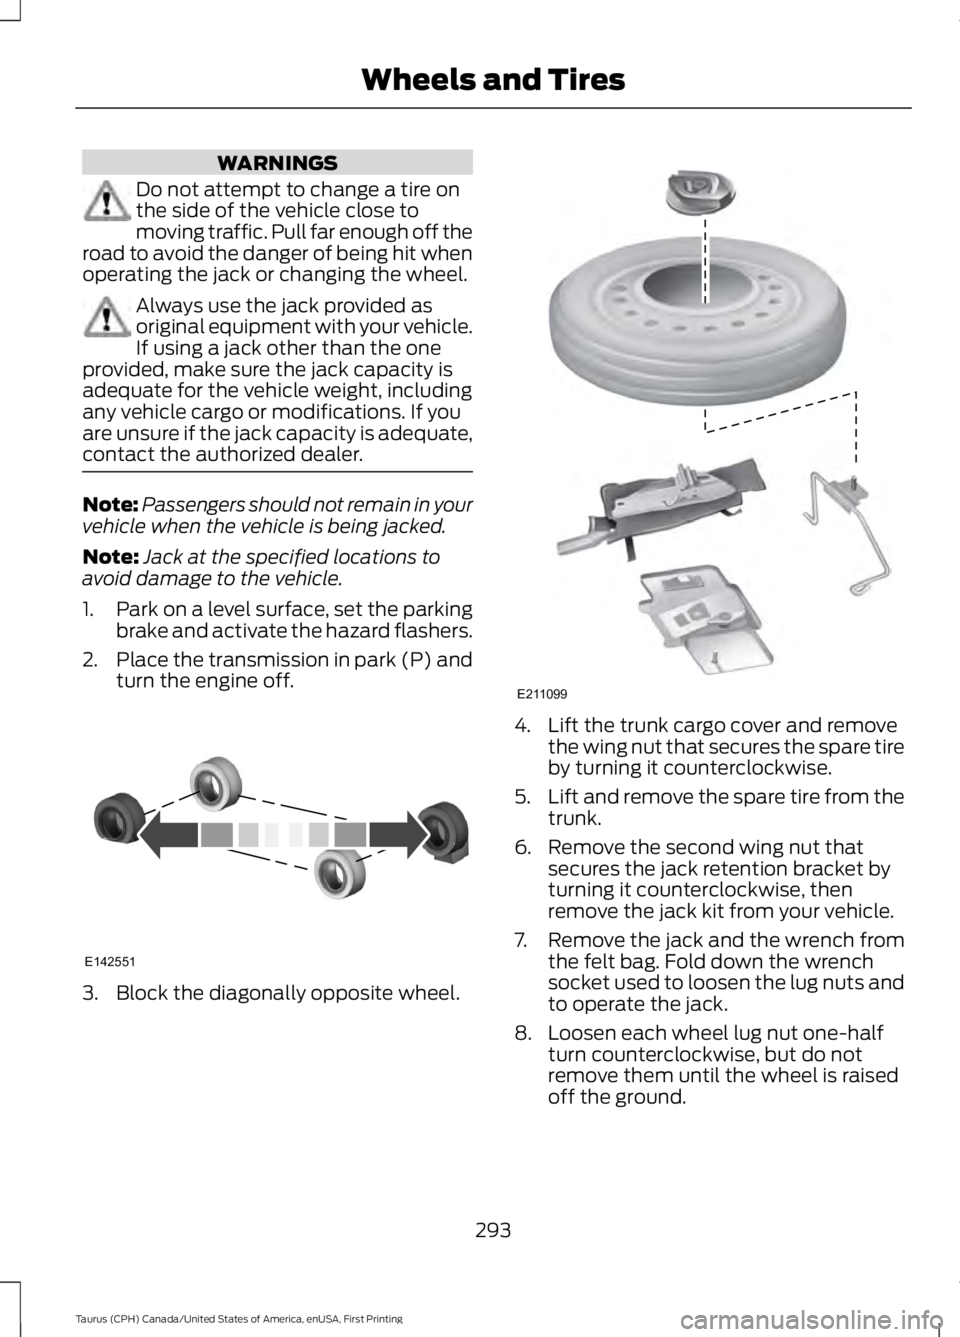
3. Block the diagonally opposite wheel.
4. Lift the trunk cargo cover and removethe wing nut that secures the spare tireby turning it counterclockwise.
5.Lift and remove the spare tire from thetrunk.
6. Remove the second wing nut thatsecures the jack retention bracket byturning it counterclockwise, thenremove the jack kit from your vehicle.
7. Remove the jack and the wrench fromthe felt bag. Fold down the wrenchsocket used to loosen the lug nuts andto operate the jack.
8. Loosen each wheel lug nut one-halfturn counterclockwise, but do notremove them until the wheel is raisedoff the ground.
293
Taurus (CPH) Canada/United States of America, enUSA, First Printing
Wheels and TiresE142551 E211099
Page 297 of 504

9. The vehicle jacking points are shownhere, and are depicted on the warninglabel on the jack. Small arrow-shapedmarks on the sills show the location ofthe jacking points.
10. Raise the wheel by turning the jackhandle clockwise.
11. Remove the lug nuts with the lugwrench.
12. Replace the flat tire with the sparetire, making sure the valve stem isfacing outward. Reinstall the lug nutsuntil the wheel is snug against thehub. Do not fully tighten the lug nutsuntil the wheel has been lowered.
13. Lower the wheel by turning the jackhandle counterclockwise.
14.Remove the jack and fully tighten thelug nuts in the order shown. SeeTechnical Specifications (page296).
Stowing the jack and flat tire
1. Remove the extension bolt from theexterior pocket of the felt bag.
294
Taurus (CPH) Canada/United States of America, enUSA, First Printing
Wheels and TiresE145908 E201156 12
3
4
5
E75442
Page 321 of 504
Seek, Fast Forward and Reverse: In radio mode, select a frequency bandand press this button. The system stops at the first station it finds in thatdirection. In SIRIUS mode, press to select the next or previous satellite radiostation. If a specific category is selected (such as jazz, rock or news), press tofind the next or previous in the selected category. In CD mode, press to selectthe previous or next track. Press and hold to move quickly forward through thecurrent track.
F
OK and Arrow buttons: Press OK to confirm menu selections. Press to scrollthrough the menu choices.G
Eject: Press to eject a CD.H
VOL and Power: Press to switch the system on and off. Turn to adjust thevolume.I
CLOCK: If not in phone mode, press to display the clock.J
SOUND: Press to access settings for Treble, Midrange, Bass, Fade or Balance.Use the up and down arrow buttons to select the various settings. When youmake your selection, press the left and right arrow buttons to change thesettings. Press OK to set or press MENU to exit. Sound settings can be set foreach audio source independently.
K
MENU: Press to access different audio system features.L
PHONE: Press to access the phone features of the SYNC system. See yourSYNC information.M
AUX: Press to access or switch between devices you plug into your vehicle.N
SIRIUS: Press to listen to Sirius satellite radio.O
Menu Structure
Note:Depending on your system, someoptions may appear slightly different.
Press MENU.
Press the up and down arrow buttons toscroll through the options.
Press the right arrow to enter a menu.Press the left arrow to exit a menu.
Press OK to confirm a selection.
Radio
Select for a brief sampling of all available channels.Scan
Select to store the six strongest local stations on the AM-AST and FM-AST frequency bands.AST
Select to display extra information such as artist name.Radio Text*
*Extra information may not always be available.
318
Taurus (CPH) Canada/United States of America, enUSA, First Printing
Audio System