2017 FORD SUPER DUTY fuel cap
[x] Cancel search: fuel capPage 197 of 636
WARNINGS
When refueling always shut the
engine off and never allow sparks or
open flames near the fuel tank filler
valve. Never smoke or use a cell phone
while refueling. Fuel vapor is extremely
hazardous under certain conditions. Avoid
inhaling excess fumes. Stop refueling after the fuel pump
nozzle automatically shuts off for the
second time. Failure to follow this
will fill the expansion space in the fuel tank
and could lead to fuel overflowing. The fuel system may be under
pressure. If the fuel filler cap is
venting vapor or if you hear a hissing
sound, wait until it stops before completely
removing the fuel filler cap. Otherwise, fuel
may spray out and injure you or others. If you do not use the proper fuel filler
cap, excessive pressure or vacuum
in the fuel tank may damage the fuel
system or cause the fuel cap to disengage
in a collision, which may result in possible
personal injury. Note:
If you must replace the fuel filler cap,
replace it with a fuel filler cap designed for
your vehicle. The vehicle Warranty may be
void for any damage to the fuel tank or fuel
system if the correct genuine Ford or
Motorcraft® fuel filler cap is not used.
Fueling Tips
If air is allowed to enter the fuel system the
engine automatically purges any trapped
air. To purge the air sooner: prior to engine
start, prime the system by turning the key
to on for 30 seconds then to off. Repeat
this several times. The engine may run
rough and produce white smoke while air
is in the system. This is normal.
Use only clean, approved containers that
will prevent the entry of dirt or water
whenever you store diesel fuel. Diesel fuel must not be stored in a
galvanized container. The fuel will dissolve
the zinc in the galvanized container. The
zinc will then remain in the fuel. If you run
the contaminated fuel through the engine,
the zinc will deposit in the fuel injectors
causing expensive-to-repair damage.
Diesel fuel dispensing nozzle fill rate
Your vehicle has a fuel fill pipe that is able
to accept fuel up to 20 gal (76 L) per
minute from an 1.2 in (30 mm)
fuel-dispensing nozzle. Pumping fuel at
greater flow rates may result in premature
nozzle shut-off or spit back.
Truck stops have pumps and nozzles
designed for larger, heavy-duty trucks.
When refueling at truck stops: if the nozzle
shuts off repeatedly when refueling, wait
5– 10 seconds; then use a slower rate of
flow, do not depress the nozzle trigger as
far.
Refueling
When fueling your vehicle do the following:
1. Fully open the fuel tank filler door until
it engages and remove the fuel tank
filler cap. The fuel tank filler cap has
an indexed design with a 1/4 turn
on/off feature. Carefully turn the filler
cap counterclockwise until it spins off.
194
Super Duty (TFE) Canada/United States of America, enUSA, First Printing Fuel and Refueling
Page 198 of 636
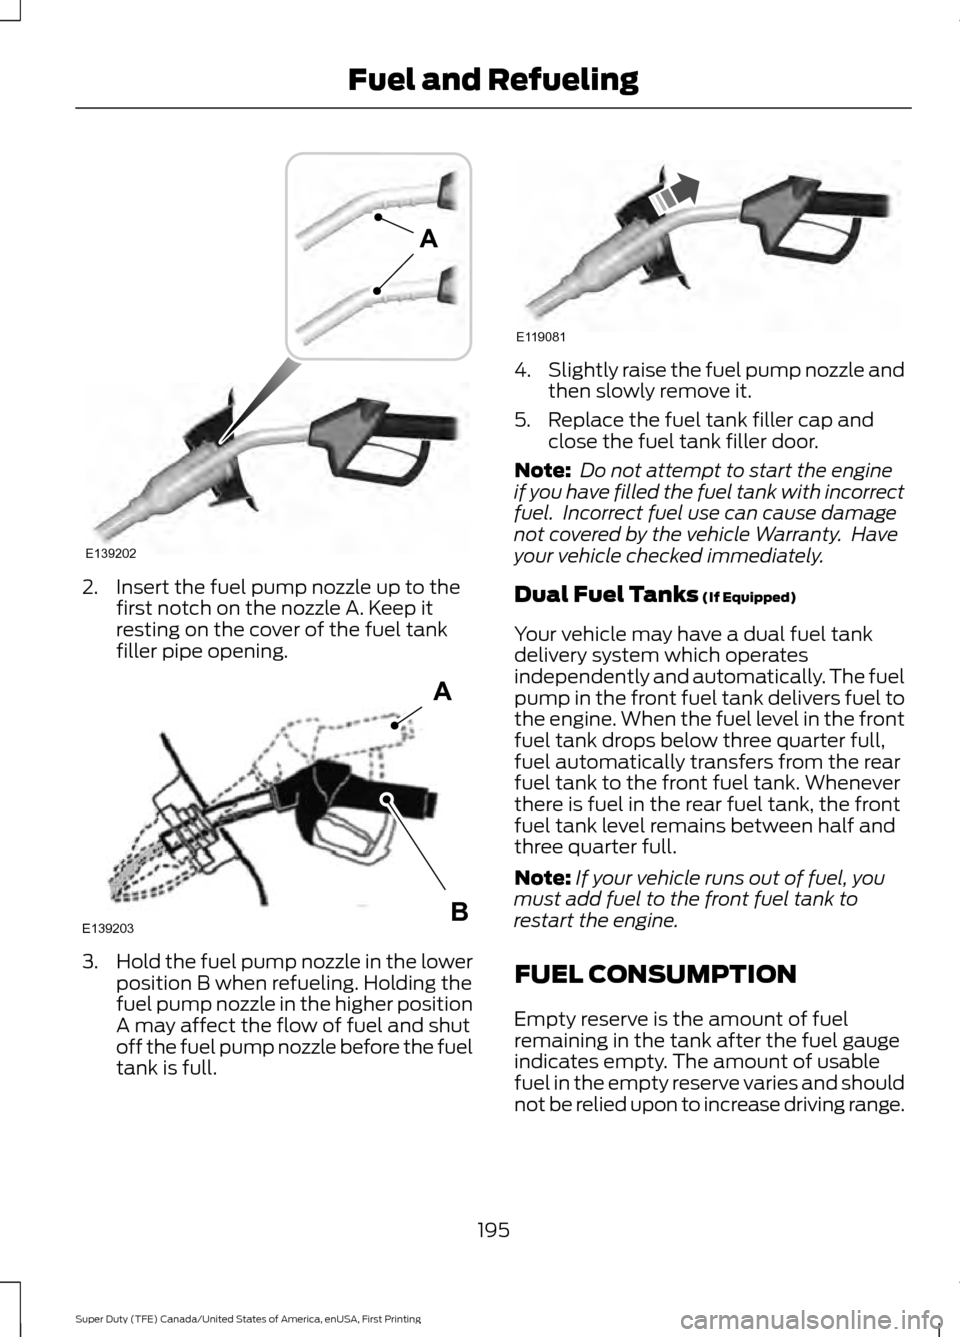
2. Insert the fuel pump nozzle up to the
first notch on the nozzle A. Keep it
resting on the cover of the fuel tank
filler pipe opening. 3.
Hold the fuel pump nozzle in the lower
position B when refueling. Holding the
fuel pump nozzle in the higher position
A may affect the flow of fuel and shut
off the fuel pump nozzle before the fuel
tank is full. 4.
Slightly raise the fuel pump nozzle and
then slowly remove it.
5. Replace the fuel tank filler cap and close the fuel tank filler door.
Note: Do not attempt to start the engine
if you have filled the fuel tank with incorrect
fuel. Incorrect fuel use can cause damage
not covered by the vehicle Warranty. Have
your vehicle checked immediately.
Dual Fuel Tanks (If Equipped)
Your vehicle may have a dual fuel tank
delivery system which operates
independently and automatically. The fuel
pump in the front fuel tank delivers fuel to
the engine. When the fuel level in the front
fuel tank drops below three quarter full,
fuel automatically transfers from the rear
fuel tank to the front fuel tank. Whenever
there is fuel in the rear fuel tank, the front
fuel tank level remains between half and
three quarter full.
Note: If your vehicle runs out of fuel, you
must add fuel to the front fuel tank to
restart the engine.
FUEL CONSUMPTION
Empty reserve is the amount of fuel
remaining in the tank after the fuel gauge
indicates empty. The amount of usable
fuel in the empty reserve varies and should
not be relied upon to increase driving range.
195
Super Duty (TFE) Canada/United States of America, enUSA, First Printing Fuel and RefuelingE139202
A E139203
A
B E119081
Page 199 of 636
•
The usable capacity of the fuel tank is
the amount of fuel that you can add to
the fuel tank when the fuel gauge
indicates empty, before the first fuel
filler nozzle automatic shutoff event.
• The advertised capacity is equal to the
volumetric difference between actual
fuel fill before the first fuel filler nozzle
automatic shutoff event and the fuel
quantity when the fuel gauge indicates
empty. See Capacities and
Specifications (page 411). It is the
usable capacity minus the empty
reserve.
• Due to the empty reserve, you may be
able to add more fuel than the
advertised capacity of the fuel tank
when the fuel gauge indicates empty.
Filling the Fuel Tank
For consistent results when refueling:
• Turn the ignition off before fueling; an
inaccurate reading results if the engine
is left running.
• Use the same fill rate
(low-medium-high) each time the tank
is filled.
• Allow no more than one automatic
shut-off when refueling.
Results are most accurate when the filling
method is consistent.
Calculating Fuel Economy
Do not measure fuel economy during the
first
1,000 mi (1,600 km) of driving (this is
your engine ’s break-in period). A more
accurate measurement is obtained after
2,000 mi (3,200 km)
to 3,000 mi
(4,800 km). Also, fuel expense, frequency
of fill ups or fuel gauge readings are not
accurate ways to measure fuel economy.
1. Fill the fuel tank completely and record
the initial odometer reading. 2. Each time you fill the fuel tank, record
the amount of fuel added.
3. After at least three fill ups, fill the fuel tank and record the current odometer
reading.
4. Subtract your initial odometer reading from the current odometer reading.
To calculate L/100 km (liters per 100
kilometers) fuel consumption, multiply the
liters used by 100, then divide by kilometers
traveled. To calculate MPG (miles per
gallon) fuel consumption, divide miles
traveled by gallons used.
Keep a record for at least one month and
record the type of driving (city or highway).
This provides an accurate estimate of your
vehicle ’s fuel economy under current
driving conditions. Keeping records during
summer and winter will show how
temperature impacts fuel economy.
Conditions
• Heavily loading your vehicle reduces
fuel economy.
• Carrying unnecessary weight in your
vehicle may reduce fuel economy.
• Adding certain accessories to your
vehicle such as bug deflectors, rollbars
or light bars, running boards and ski
racks may reduce fuel economy.
• Using fuel blended with alcohol may
lower fuel economy.
• Fuel economy may decrease with lower
temperatures.
• Fuel economy may decrease when
driving short distances.
• You will get better fuel economy when
driving on flat terrain than when driving
on hilly terrain.
196
Super Duty (TFE) Canada/United States of America, enUSA, First Printing Fuel and Refueling
Page 293 of 636
BREAKING-IN
You need to break in new tires for
approximately 300 mi (480 km). During
this time, your vehicle may exhibit some
unusual driving characteristics.
Avoid driving too fast during the first
1,000 mi (1,600 km)
. Vary your speed
frequently and change up through the
gears early. Do not labor the engine.
Drive your new vehicle at least
1,000 mi
(1,600 km) before towing a trailer. Make
sure you use the specified engine oil. See
Capacities and Specifications
(page
418).
Do not add friction modifier compounds
or special break-in oils during the first few
thousand miles (kilometers) of operation.
These additives may prevent piston ring
seating.
ECONOMICAL DRIVING
Your fuel economy is affected by several
things, such as how you drive, the
conditions you drive under, and how you
maintain your vehicle.
You may improve your fuel economy by
keeping these things in mind:
• Accelerate and slow down in a smooth,
moderate fashion.
• Drive at steady speeds without
stopping.
• Anticipate stops; slowing down may
eliminate the need to stop.
• Combine errands and minimize
stop-and-go driving.
• Close the windows for high-speed
driving.
• Drive at reasonable speeds (traveling
at 55 mph [88 km/h] uses 15% less
fuel than traveling at 65 mph [105
km/h]). •
Keep the tires properly inflated and use
only the recommended size.
• Use the recommended engine oil.
• Perform all regularly scheduled
maintenance.
Avoid these actions; they reduce your fuel
economy:
• Sudden accelerations or hard
accelerations.
• Revving the engine before turning it off.
• Idle for periods longer than one minute.
• Warm up your vehicle on cold
mornings.
• Use the air conditioner or front
defroster.
• Use the speed control in hilly terrain.
• Rest your foot on the brake pedal while
driving.
• Drive a heavily loaded vehicle or tow a
trailer.
• Carry unnecessary weight
(approximately 1 mpg [0.4 km/L] is
lost for every 400 lb [180 kilogram] of
weight carried).
• Driving with the wheels out of
alignment.
Conditions
• Heavily loading a vehicle or towing a
trailer may reduce fuel economy at any
speed.
• Adding certain accessories to your
vehicle (for example bug deflectors,
rollbars, light bars, running boards, ski
racks or luggage racks) may reduce
fuel economy.
• To maximize the fuel economy, drive
with the tonneau cover installed (if
equipped).
• Using fuel blended with alcohol may
lower fuel economy.
290
Super Duty (TFE) Canada/United States of America, enUSA, First Printing Driving Hints
Page 314 of 636
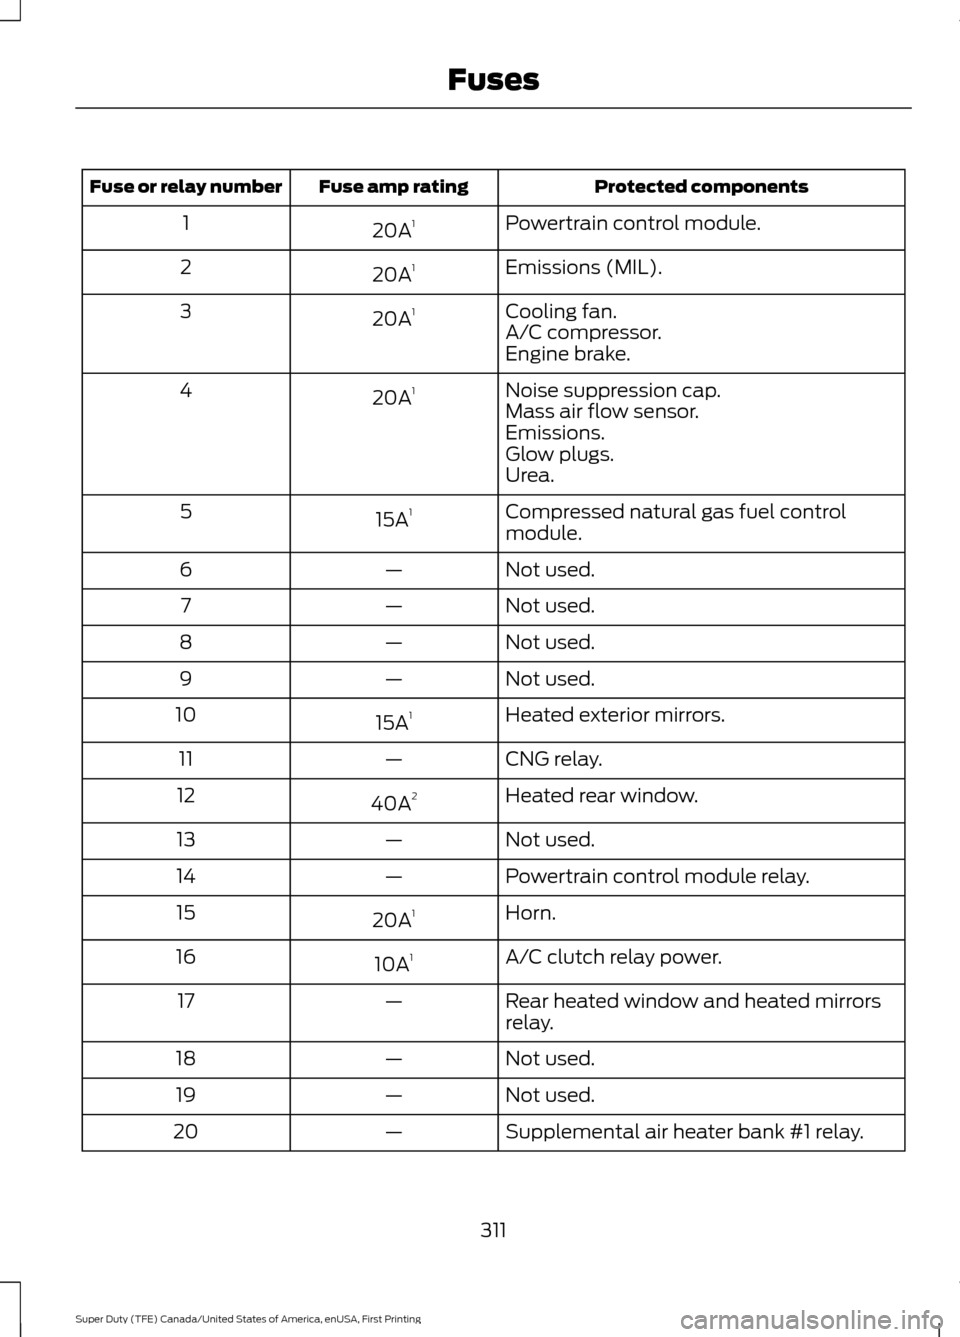
Protected components
Fuse amp rating
Fuse or relay number
Powertrain control module.
20A 1
1
Emissions (MIL).
20A 1
2
Cooling fan.
20A 1
3
A/C compressor.
Engine brake.
Noise suppression cap.
20A 1
4
Mass air flow sensor.
Emissions.
Glow plugs.
Urea.
Compressed natural gas fuel control
module.
15A
1
5
Not used.
—
6
Not used.
—
7
Not used.
—
8
Not used.
—
9
Heated exterior mirrors.
15A 1
10
CNG relay.
—
11
Heated rear window.
40A 2
12
Not used.
—
13
Powertrain control module relay.
—
14
Horn.
20A 1
15
A/C clutch relay power.
10A 1
16
Rear heated window and heated mirrors
relay.
—
17
Not used.
—
18
Not used.
—
19
Supplemental air heater bank #1 relay.
—
20
311
Super Duty (TFE) Canada/United States of America, enUSA, First Printing Fuses
Page 327 of 636
Power steering fluid reservoir
I
Secondary cooling system coolant reservoir
J
Battery
K
Air filter assembly
L
Scheduled Maintenance
The recommended scheduled
maintenance services are required because
they are considered essential to the life
and performance of your vehicle. See
Normal Scheduled Maintenance (page
570).
Use only recommended fuel, lubricants,
fluids and service parts conforming to Ford
specifications. Motorcraft® parts are
designed and built for best performance
in your vehicle. See
Capacities and
Specifications (page 428).
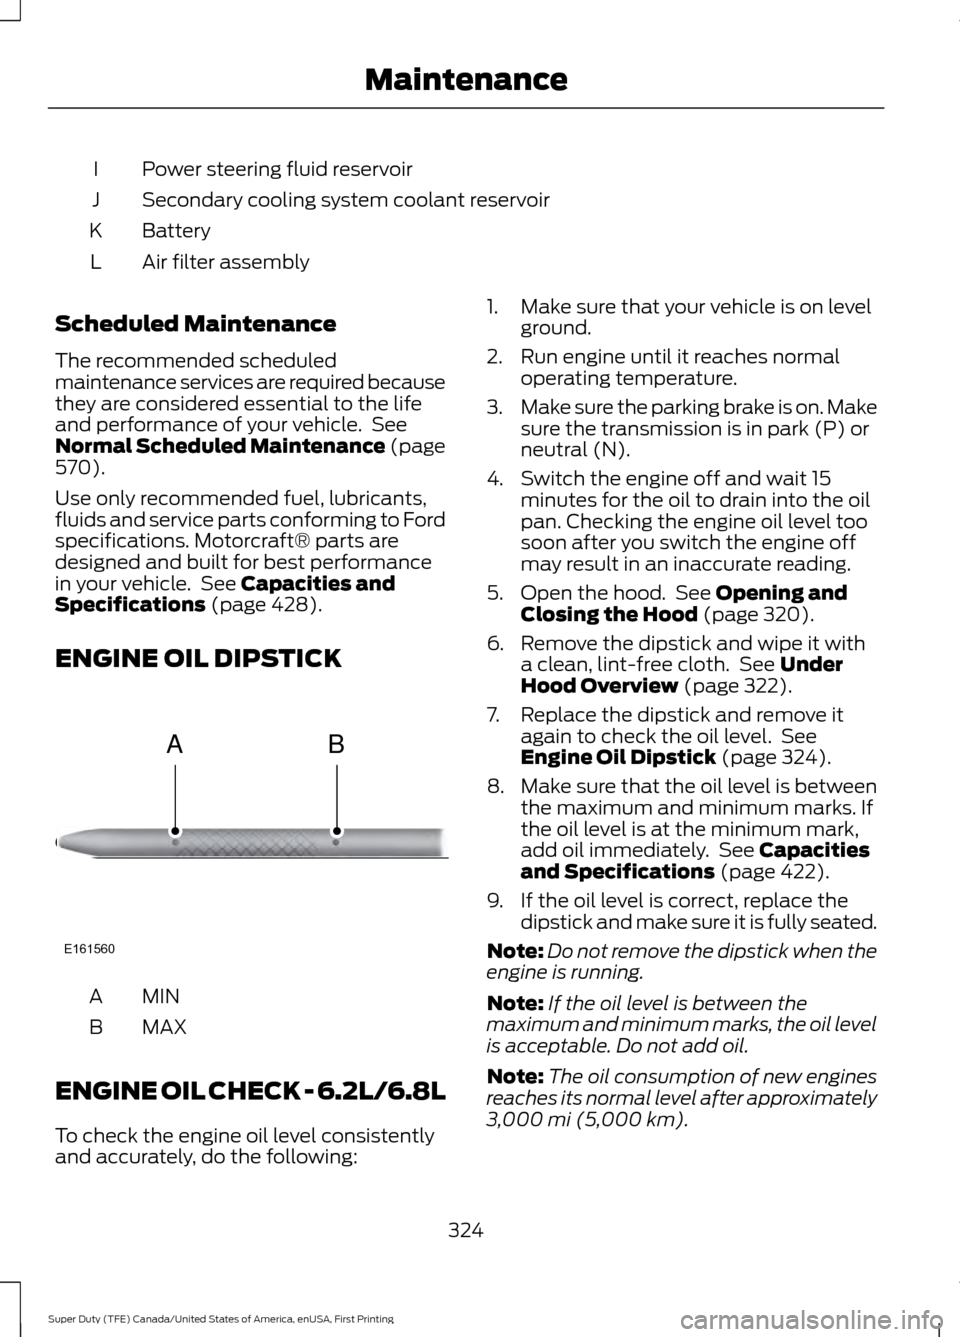
ENGINE OIL DIPSTICK MINA
MAX
B
ENGINE OIL CHECK - 6.2L/6.8L
To check the engine oil level consistently
and accurately, do the following: 1. Make sure that your vehicle is on level
ground.
2. Run engine until it reaches normal operating temperature.
3. Make sure the parking brake is on. Make
sure the transmission is in park (P) or
neutral (N).
4. Switch the engine off and wait 15 minutes for the oil to drain into the oil
pan. Checking the engine oil level too
soon after you switch the engine off
may result in an inaccurate reading.
5. Open the hood. See Opening and
Closing the Hood (page 320).
6. Remove the dipstick and wipe it with a clean, lint-free cloth. See
Under
Hood Overview (page 322).
7. Replace the dipstick and remove it again to check the oil level. See
Engine Oil Dipstick
(page 324).
8. Make sure that the oil level is between
the maximum and minimum marks. If
the oil level is at the minimum mark,
add oil immediately. See
Capacities
and Specifications (page 422).
9. If the oil level is correct, replace the dipstick and make sure it is fully seated.
Note: Do not remove the dipstick when the
engine is running.
Note: If the oil level is between the
maximum and minimum marks, the oil level
is acceptable. Do not add oil.
Note: The oil consumption of new engines
reaches its normal level after approximately
3,000 mi (5,000 km)
.
324
Super Duty (TFE) Canada/United States of America, enUSA, First Printing MaintenanceE161560
AB
Page 328 of 636
Adding Engine Oil
WARNING
Do not remove the filler cap when
the engine is running.
Do not use supplemental engine oil
additives because they are unnecessary
and could lead to engine damage that may
not be covered by the vehicle Warranty.
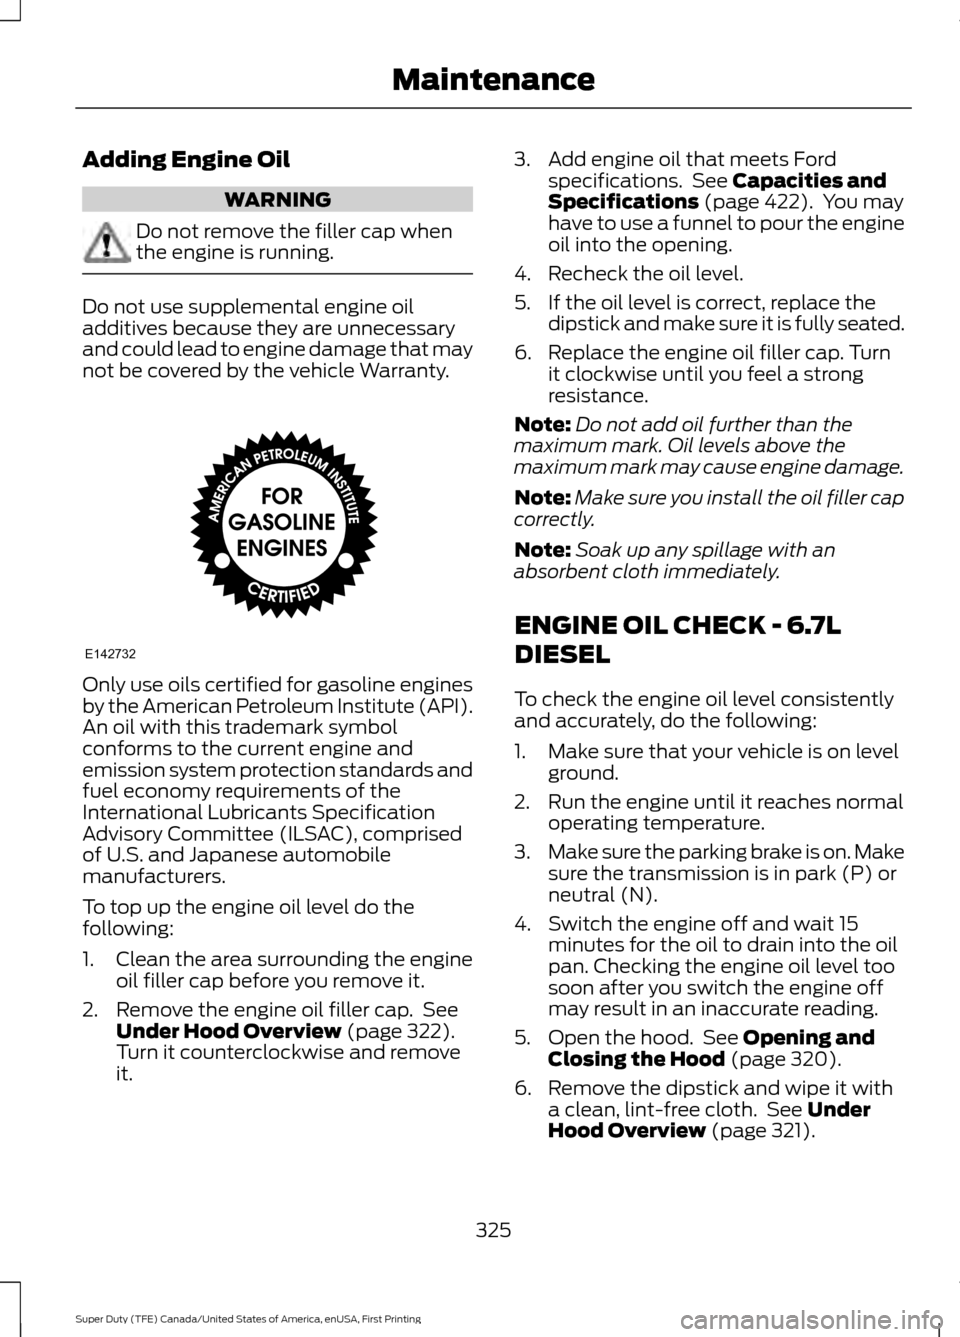
Only use oils certified for gasoline engines
by the American Petroleum Institute (API).
An oil with this trademark symbol
conforms to the current engine and
emission system protection standards and
fuel economy requirements of the
International Lubricants Specification
Advisory Committee (ILSAC), comprised
of U.S. and Japanese automobile
manufacturers.
To top up the engine oil level do the
following:
1. Clean the area surrounding the engine
oil filler cap before you remove it.
2. Remove the engine oil filler cap. See Under Hood Overview (page 322).
Turn it counterclockwise and remove
it. 3. Add engine oil that meets Ford
specifications. See
Capacities and
Specifications (page 422). You may
have to use a funnel to pour the engine
oil into the opening.
4. Recheck the oil level.
5. If the oil level is correct, replace the dipstick and make sure it is fully seated.
6. Replace the engine oil filler cap. Turn it clockwise until you feel a strong
resistance.
Note: Do not add oil further than the
maximum mark. Oil levels above the
maximum mark may cause engine damage.
Note: Make sure you install the oil filler cap
correctly.
Note: Soak up any spillage with an
absorbent cloth immediately.
ENGINE OIL CHECK - 6.7L
DIESEL
To check the engine oil level consistently
and accurately, do the following:
1. Make sure that your vehicle is on level ground.
2. Run the engine until it reaches normal operating temperature.
3. Make sure the parking brake is on. Make
sure the transmission is in park (P) or
neutral (N).
4. Switch the engine off and wait 15 minutes for the oil to drain into the oil
pan. Checking the engine oil level too
soon after you switch the engine off
may result in an inaccurate reading.
5. Open the hood. See
Opening and
Closing the Hood (page 320).
6. Remove the dipstick and wipe it with a clean, lint-free cloth. See
Under
Hood Overview (page 321).
325
Super Duty (TFE) Canada/United States of America, enUSA, First Printing MaintenanceE142732
Page 329 of 636
7. Replace the dipstick and remove it
again to check the oil level. See
Engine Oil Dipstick (page 324).
8. Make sure that the oil level is between
the maximum and minimum marks. If
the oil level is at the minimum mark,
add oil immediately. See
Capacities
and Specifications (page 428).
9. If the oil level is correct, replace the dipstick and make sure it is fully seated.
Note: Do not remove the dipstick when the
engine is running.
Note: If the oil level is between the
maximum and minimum marks, the oil level
is acceptable. Do not add oil.
Note: The oil consumption of new engines
reaches its normal level after approximately
3,000 mi (5,000 km)
.
Adding Engine Oil WARNING
Do not remove the filler cap when
the engine is running.
Do not use supplemental engine oil
additives because they are unnecessary
and could lead to engine damage that may
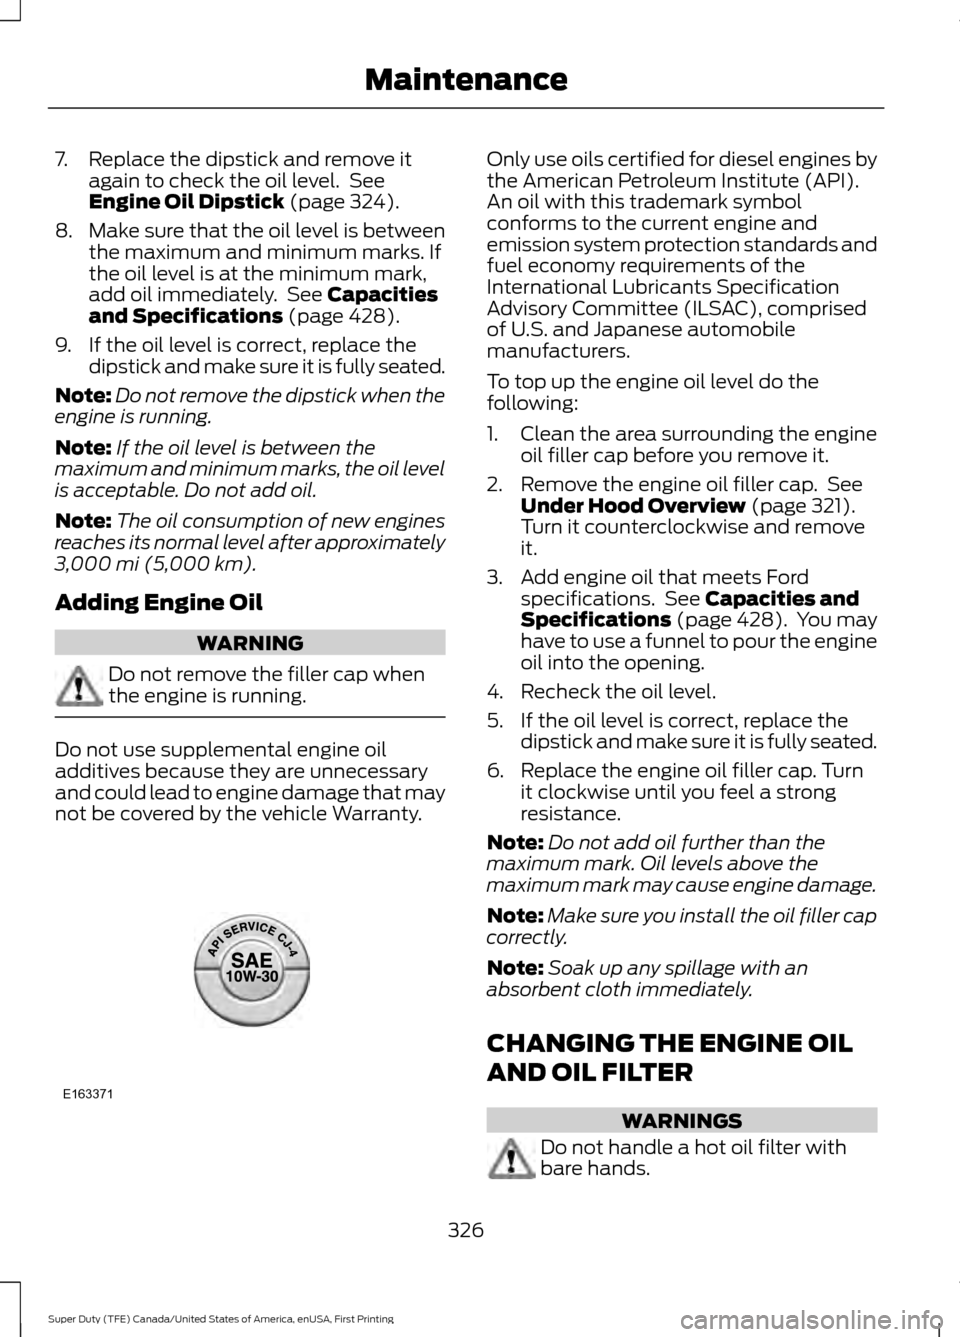
not be covered by the vehicle Warranty. Only use oils certified for diesel engines by
the American Petroleum Institute (API).
An oil with this trademark symbol
conforms to the current engine and
emission system protection standards and
fuel economy requirements of the
International Lubricants Specification
Advisory Committee (ILSAC), comprised
of U.S. and Japanese automobile
manufacturers.
To top up the engine oil level do the
following:
1. Clean the area surrounding the engine
oil filler cap before you remove it.
2. Remove the engine oil filler cap. See Under Hood Overview
(page 321).
Turn it counterclockwise and remove
it.
3. Add engine oil that meets Ford specifications. See
Capacities and
Specifications (page 428). You may
have to use a funnel to pour the engine
oil into the opening.
4. Recheck the oil level.
5. If the oil level is correct, replace the dipstick and make sure it is fully seated.
6. Replace the engine oil filler cap. Turn it clockwise until you feel a strong
resistance.
Note: Do not add oil further than the
maximum mark. Oil levels above the
maximum mark may cause engine damage.
Note: Make sure you install the oil filler cap
correctly.
Note: Soak up any spillage with an
absorbent cloth immediately.
CHANGING THE ENGINE OIL
AND OIL FILTER WARNINGS
Do not handle a hot oil filter with
bare hands.
326
Super Duty (TFE) Canada/United States of America, enUSA, First Printing MaintenanceE163371