2017 FORD SUPER DUTY transmission fluid
[x] Cancel search: transmission fluidPage 259 of 636

System Limitations
Cross Traffic Alert has its limitations;
situations such as severe weather
conditions or debris build-up on the sensor
area may limit vehicle detection.
The following are other situations that may
limit the Cross Traffic Alert performance:
•
Adjacently parked vehicles or objects
obstructing the sensors.
• Approaching vehicles passing at
speeds greater than 37 mph
(60 km/h).
• Driving in reverse faster than
7 mph
(12 km/h).
• Backing out of an angled parking spot.
False Alerts
Note: If your vehicle has a tow bar with a
factory equipped trailer tow module and it
is towing a trailer, the sensors will
automatically turn the Cross Traffic Alert
off. If your vehicle has a tow bar but no
factory equipped trailer tow module, it is
recommended to turn the Cross Traffic Alert
off manually. Operating Cross Traffic Alert
with a trailer attached will cause poor Cross
Traffic Alert performance.
There may be certain instances when there
is a false alert by the Cross Traffic Alert
system that illuminates the alert indicator
with no vehicle in the coverage zone. Some
amount of false alerts are normal; they are
temporary and self-correct.
System Errors
If Cross Traffic Alert senses a problem with
the left or right sensor a message appears
in the display screen. See
Information
Messages (page 128). Switching the System Off and On
Note:
The Cross Traffic Alert switches on
whenever the ignition is switched on and
ready to provide appropriate alerts when
the transmission is in reverse (R). Cross
Traffic Alert will not remember the last
selected on or off setting.
You can temporarily switch Cross Traffic
Alert off in the information display. See
General Information
(page 111). When
you switch Cross Traffic Alert off, you do
not receive alerts and the display screen
shows a system off message.
You can also have Cross Traffic Alert
switched off permanently at an authorized
dealer. Once switched off permanently,
the system can only be switched back on
at an authorized dealer.
STEERING
Power Steering
To help prevent damage to the power
steering system:
• Never hold the steering wheel at its
furthest turning points (until it stops)
for more than three seconds when the
engine is running.
• Do not operate the vehicle with a low
power steering pump fluid level (below
the MIN mark on the reservoir).
• Some noise is normal during operation.
If excessive, check for low power
steering pump fluid level before
seeking service by your dealer.
• Heavy or uneven efforts may be caused
by low power steering fluid. Check for
low power steering pump fluid level
before seeking service by your dealer.
• Do not fill the power steering pump
reservoir above the MAX mark on the
reservoir, as this may result in leaks
from the reservoir.
256
Super Duty (TFE) Canada/United States of America, enUSA, First Printing Driving Aids
Page 296 of 636
•
Front wheel toe may require
re-adjustment to prevent premature
uneven tire wear. Specifications are in
the Ford Workshop Manual.
• Headlight aim may require
re-adjustment.
• The tire air pressures recommended
for general driving are on the vehicle ’s
Safety Certification Label. The
maximum cold inflation pressure for
the tire and associated load rating is
on the tire sidewall. Tire air pressure
may require re-adjustment within these
pressure limits to accommodate the
additional weight of the snowplow
installation.
• Federal and some local regulations
require additional exterior lamps for
snowplow-equipped vehicles. Consult
your authorized dealer for additional
information.
Operating the Vehicle with the
Snowplow Attached
Note: Do not use your vehicle for snow
removal until you have driven at least
500 mi (800 km).
Ford recommends vehicle speed does not
exceed
45 mph (72 km/h) when
snowplowing.
The attached snowplow blade restricts
airflow to the radiator, and may cause the
engine to run at a higher temperature:
Attention to engine temperature is
especially important when outside
temperatures are above freezing. Angle
the blade to maximize airflow to the
radiator and monitor engine temperature
to determine whether a left or right angle
provides the best performance.
Follow the severe duty schedule in your
Scheduled Maintenance information for
engine oil and transmission fluid change
intervals. Snowplowing with your Airbag
Equipped Vehicle WARNINGS
Do not attempt to service, repair, or
modify the airbag supplemental
restraint system (SRS) or its fuses.
Contact an authorized dealer. Additional equipment for example
snowplow equipment may affect the
performance of the airbag sensors
increasing the risk of injury. Please refer to
the Body Builders Layout Book for
instructions about the appropriate
installation of additional equipment. All occupants of the vehicle,
including the driver, should always
properly wear their seatbelt, even
when provided with an airbag
supplemental restraint system (SRS). Your vehicle is equipped with a driver and
passenger airbag supplemental restraint
system. The supplemental restraint system
will activate in certain frontal and offset
frontal collisions when the vehicle sustains
sufficient frontal deceleration.
Careless or high speed driving while
plowing snow that results in sufficient
vehicle decelerations can deploy the
airbags. Such driving also increases the risk
of accidents.
Never remove or defeat the tripping
mechanisms designed into the snow
removal equipment by its manufacturer.
Doing so may cause damage to the vehicle
and the snow removal equipment as well
as possible airbag deployment.
Engine temperature while plowing
When driving with a plow, your engine may
run at a higher temperature than normal
because the attached snowplow blade will
restrict airflow to the radiator.
293
Super Duty (TFE) Canada/United States of America, enUSA, First Printing Driving Hints
Page 324 of 636

3. Raise the hood until the lift cylinders
hold it open.
4. To close, lower the hood and make sure that it is closed properly and fully
latched.
UNDER HOOD OVERVIEW - 6.2L Air filter. See Changing the Engine Air Filter (page 353).
A.
Engine compartment fuse box. See
Fuse Specification Chart (page 310).
B.
Automatic transmission fluid dipstick. See
Automatic Transmission Fluid
Check (page 337).
C.
Brake fluid reservoir. See
Brake Fluid Check (page 340).
D.
321
Super Duty (TFE) Canada/United States of America, enUSA, First Printing MaintenanceE190266 ABC
JEFHI
D
E222143
G
Page 325 of 636

Windshield washer fluid reservoir. See Washer Fluid Check (page 341).
E.
Engine coolant reservoir. See
Engine Coolant Check (page 329).
F.
Power steering fluid reservoir. See
Power Steering Fluid Check (page 341).
G.
Engine oil filler cap. See
Engine Oil Check (page 324).
H.
Engine oil dipstick. See
Engine Oil Dipstick (page 324).
I.
Battery. See
Changing the 12V Battery (page 343).
J.
UNDER HOOD OVERVIEW - 6.8L Air filter. See
Changing the Engine Air Filter (page 353).
A.
Engine compartment fuse box. See
Fuse Specification Chart (page 310).
B.
Automatic transmission fluid dipstick. See
Automatic Transmission Fluid
Check (page 337).
C.
Engine oil dipstick. See
Engine Oil Dipstick (page 324).
D.
Brake fluid reservoir. See
Brake Fluid Check (page 340).
E.
Windshield washer fluid reservoir. See
Washer Fluid Check (page 341).
F.
Engine coolant reservoir. See
Engine Coolant Check (page 329).
G.
322
Super Duty (TFE) Canada/United States of America, enUSA, First Printing MaintenanceABC
JFGI
ED
E222144
H
Page 326 of 636
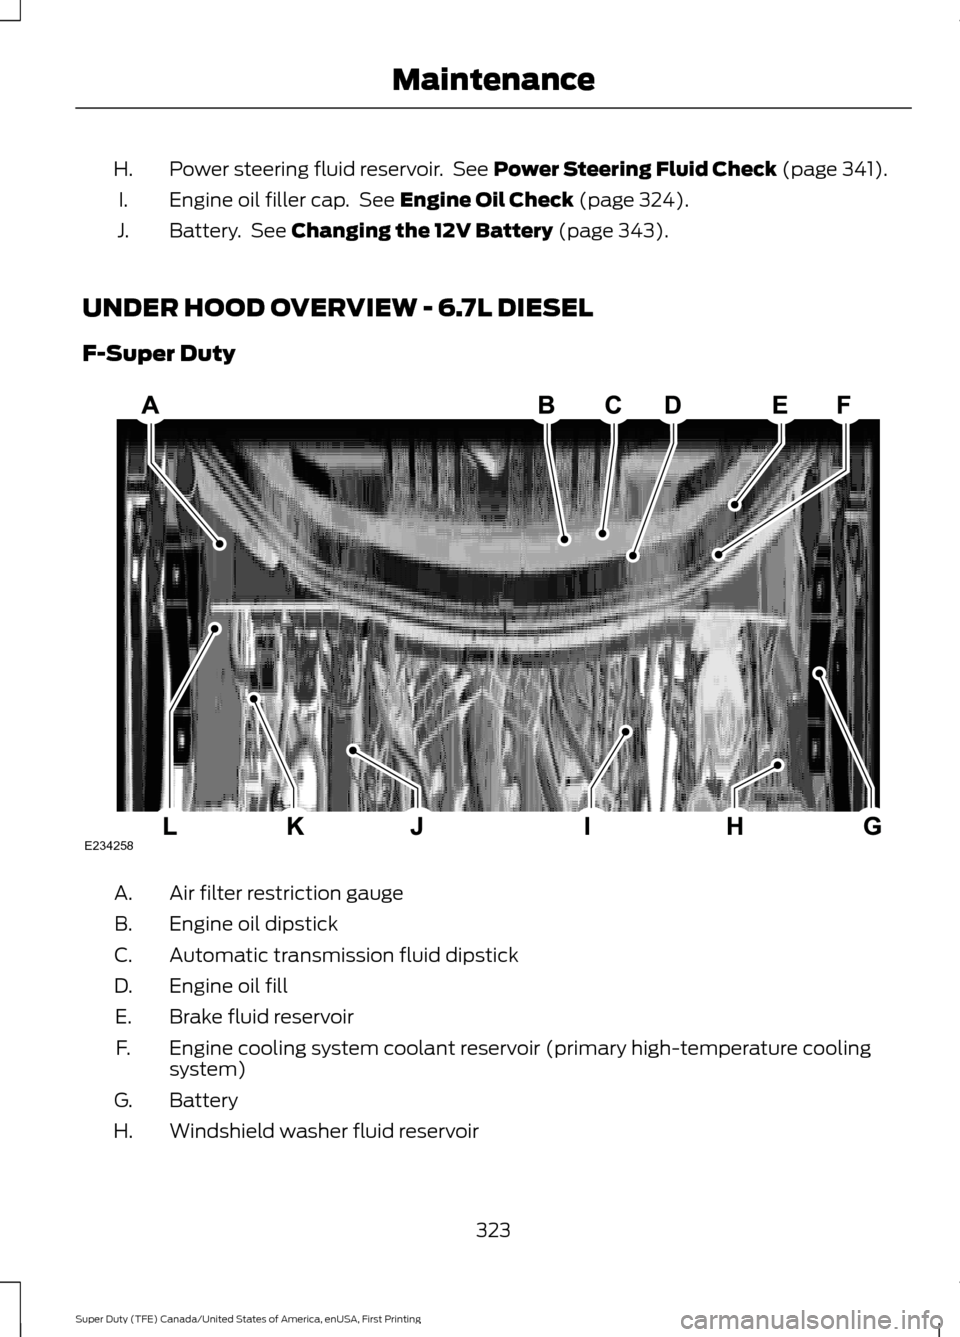
Power steering fluid reservoir. See Power Steering Fluid Check (page 341).
H.
Engine oil filler cap. See
Engine Oil Check (page 324).
I.
Battery. See
Changing the 12V Battery (page 343).
J.
UNDER HOOD OVERVIEW - 6.7L DIESEL
F-Super Duty Air filter restriction gauge
A.
Engine oil dipstick
B.
Automatic transmission fluid dipstick
C.
Engine oil fill
D.
Brake fluid reservoir
E.
Engine cooling system coolant reservoir (primary high-temperature cooling
system)
F.
Battery
G.
Windshield washer fluid reservoir
H.
323
Super Duty (TFE) Canada/United States of America, enUSA, First Printing MaintenanceE234258
Page 327 of 636
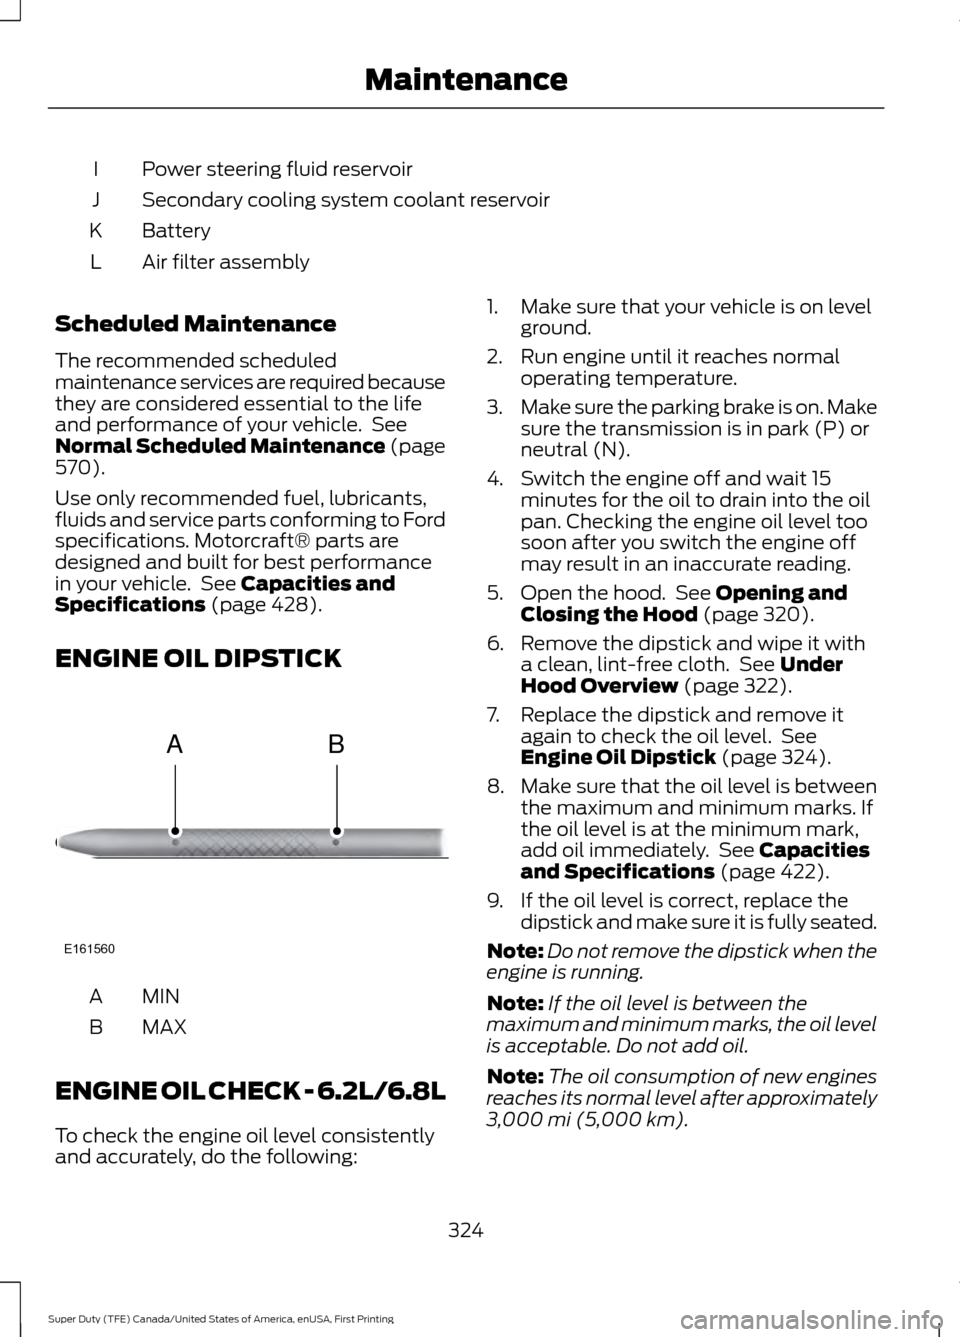
Power steering fluid reservoir
I
Secondary cooling system coolant reservoir
J
Battery
K
Air filter assembly
L
Scheduled Maintenance
The recommended scheduled
maintenance services are required because
they are considered essential to the life
and performance of your vehicle. See
Normal Scheduled Maintenance (page
570).
Use only recommended fuel, lubricants,
fluids and service parts conforming to Ford
specifications. Motorcraft® parts are
designed and built for best performance
in your vehicle. See
Capacities and
Specifications (page 428).
ENGINE OIL DIPSTICK MINA
MAX
B
ENGINE OIL CHECK - 6.2L/6.8L
To check the engine oil level consistently
and accurately, do the following: 1. Make sure that your vehicle is on level
ground.
2. Run engine until it reaches normal operating temperature.
3. Make sure the parking brake is on. Make
sure the transmission is in park (P) or
neutral (N).
4. Switch the engine off and wait 15 minutes for the oil to drain into the oil
pan. Checking the engine oil level too
soon after you switch the engine off
may result in an inaccurate reading.
5. Open the hood. See Opening and
Closing the Hood (page 320).
6. Remove the dipstick and wipe it with a clean, lint-free cloth. See
Under
Hood Overview (page 322).
7. Replace the dipstick and remove it again to check the oil level. See
Engine Oil Dipstick
(page 324).
8. Make sure that the oil level is between
the maximum and minimum marks. If
the oil level is at the minimum mark,
add oil immediately. See
Capacities
and Specifications (page 422).
9. If the oil level is correct, replace the dipstick and make sure it is fully seated.
Note: Do not remove the dipstick when the
engine is running.
Note: If the oil level is between the
maximum and minimum marks, the oil level
is acceptable. Do not add oil.
Note: The oil consumption of new engines
reaches its normal level after approximately
3,000 mi (5,000 km)
.
324
Super Duty (TFE) Canada/United States of America, enUSA, First Printing MaintenanceE161560
AB
Page 340 of 636
Coolant Change
At specific mileage intervals, as listed in
the scheduled maintenance information,
the coolant should be changed. The
information display may display a message
to change coolant at this time. Add
prediluted coolant approved to the correct
specification. See Capacities and
Specifications (page 411).
Engine-driven Cooling Fan (Fan
Clutch)
Your vehicle may have an engine driven
cooling fan drive (also called a fan clutch).
This fan drive changes the fan speed to
match the vehicle ’s changing cooling air
flow requirements. Fan speed, fan noise
level and fuel consumption all will increase
based on the driving conditions that
include trailer towing, hill climbing, heavy
loads, high speed and high ambient
temperature, individually or in combination.
The fan drive is designed to provide the
minimum fan speed (and resulting
minimum fan noise and fuel consumption)
required to meet the ever changing vehicle
cooling air flow requirements. You will hear
the amount of fan noise increasing and
decreasing as the engine power
requirements and vehicle driving conditions
change as you drive. This is to be expected
as being normal to the operation of your
vehicle. High levels of fan noise might also
be heard when your engine is first started,
and should normally decrease after driving
for a short time.
AUTOMATIC TRANSMISSION
FLUID CHECK
Have an authorized dealer check and
change the transmission fluid and filter at
the correct service interval. See
Scheduled Maintenance
(page 567). Do not use supplemental transmission
fluid additives, treatments or cleaning
agents. The use of these materials may
affect transmission operation and result
in damage to internal transmission
components.
Checking Automatic Transmission
Fluid
For scheduled intervals of the fluid checks
and changes, See
Scheduled
Maintenance (page 567). Your
transmission does not consume fluid.
However, the fluid level should be checked
if the transmission is not working properly,
i.e., if the transmission slips or shifts slowly
or if you notice some sign of fluid leakage.
Automatic transmission fluid expands
when warmed. To obtain an accurate fluid
check, drive the vehicle until it is at normal
operating temperature (approximately
19 mi (30 km)
). Verify that the
transmission fluid temperature gauge,
located on the instrument cluster, is within
normal range.
1. Drive the vehicle
19 mi (30 km)until it
reaches normal operating temperature.
2. Park the vehicle on a level surface and
engage the parking brake.
3. With the engine running, parking brake
engaged and your foot on the brake
pedal, move the gearshift lever through
all of the gear ranges. Allow sufficient
time for each gear to engage.
4. Latch the gearshift lever in P and leave
the engine running.
5. Remove the dipstick, wiping it clean with a clean, dry lint free rag. If
necessary, refer to the Under Hood
Overview in this chapter for the
location of the dipstick.
337
Super Duty (TFE) Canada/United States of America, enUSA, First Printing Maintenance
Page 341 of 636
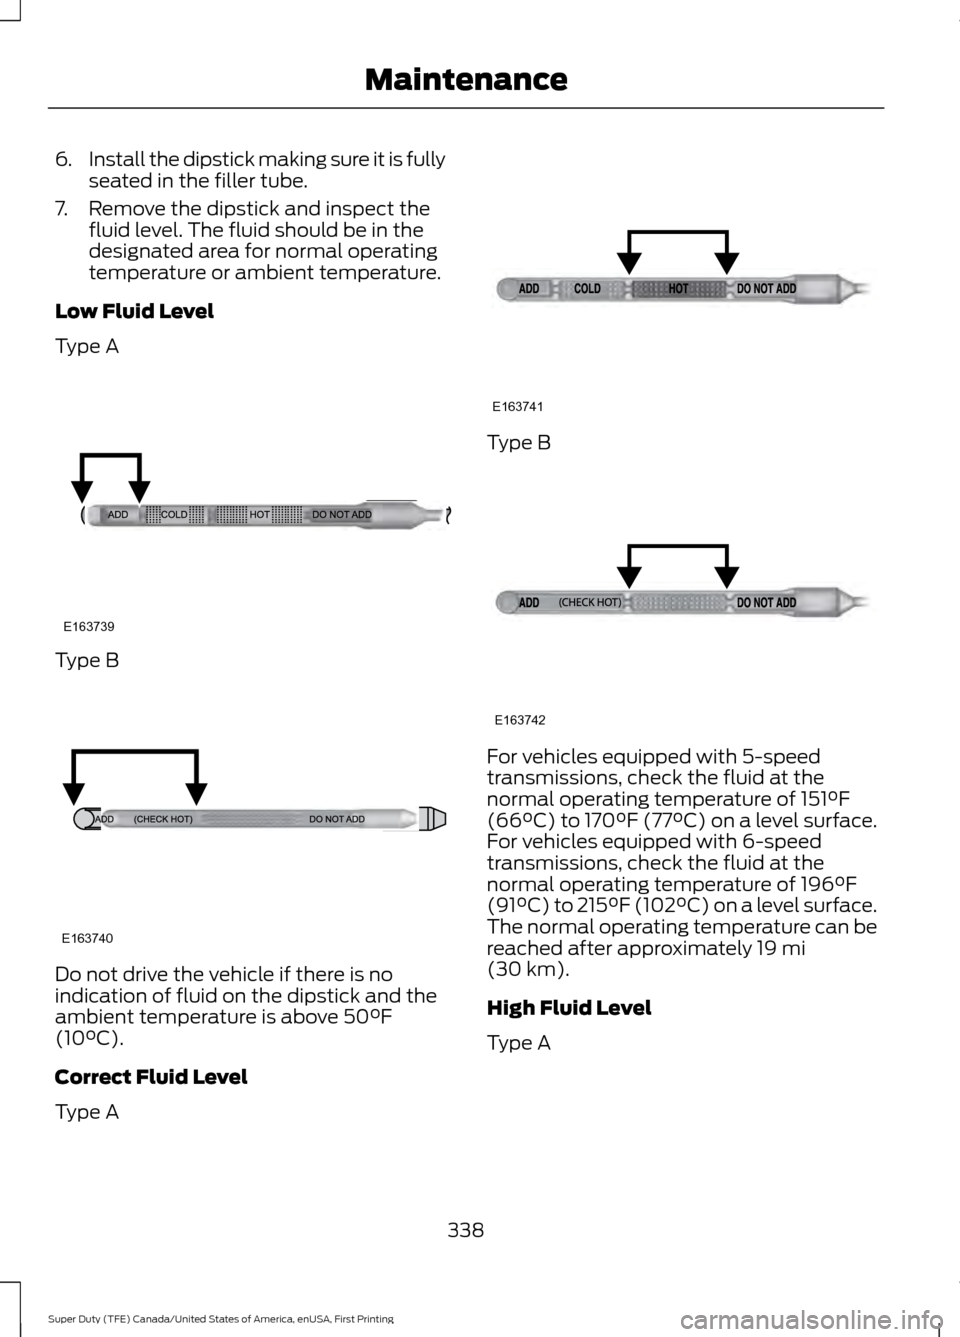
6.
Install the dipstick making sure it is fully
seated in the filler tube.
7. Remove the dipstick and inspect the fluid level. The fluid should be in the
designated area for normal operating
temperature or ambient temperature.
Low Fluid Level
Type A Type B
Do not drive the vehicle if there is no
indication of fluid on the dipstick and the
ambient temperature is above 50°F
(10°C).
Correct Fluid Level
Type A Type B
For vehicles equipped with 5-speed
transmissions, check the fluid at the
normal operating temperature of
151°F
(66°C) to 170°F (77°C) on a level surface.
For vehicles equipped with 6-speed
transmissions, check the fluid at the
normal operating temperature of
196°F
(91°C) to 215°F (102°C) on a level surface.
The normal operating temperature can be
reached after approximately
19 mi
(30 km).
High Fluid Level
Type A
338
Super Duty (TFE) Canada/United States of America, enUSA, First Printing MaintenanceE163739 E163740 E163741 E163742