2017 FORD SUPER DUTY tailgate
[x] Cancel search: tailgatePage 79 of 636
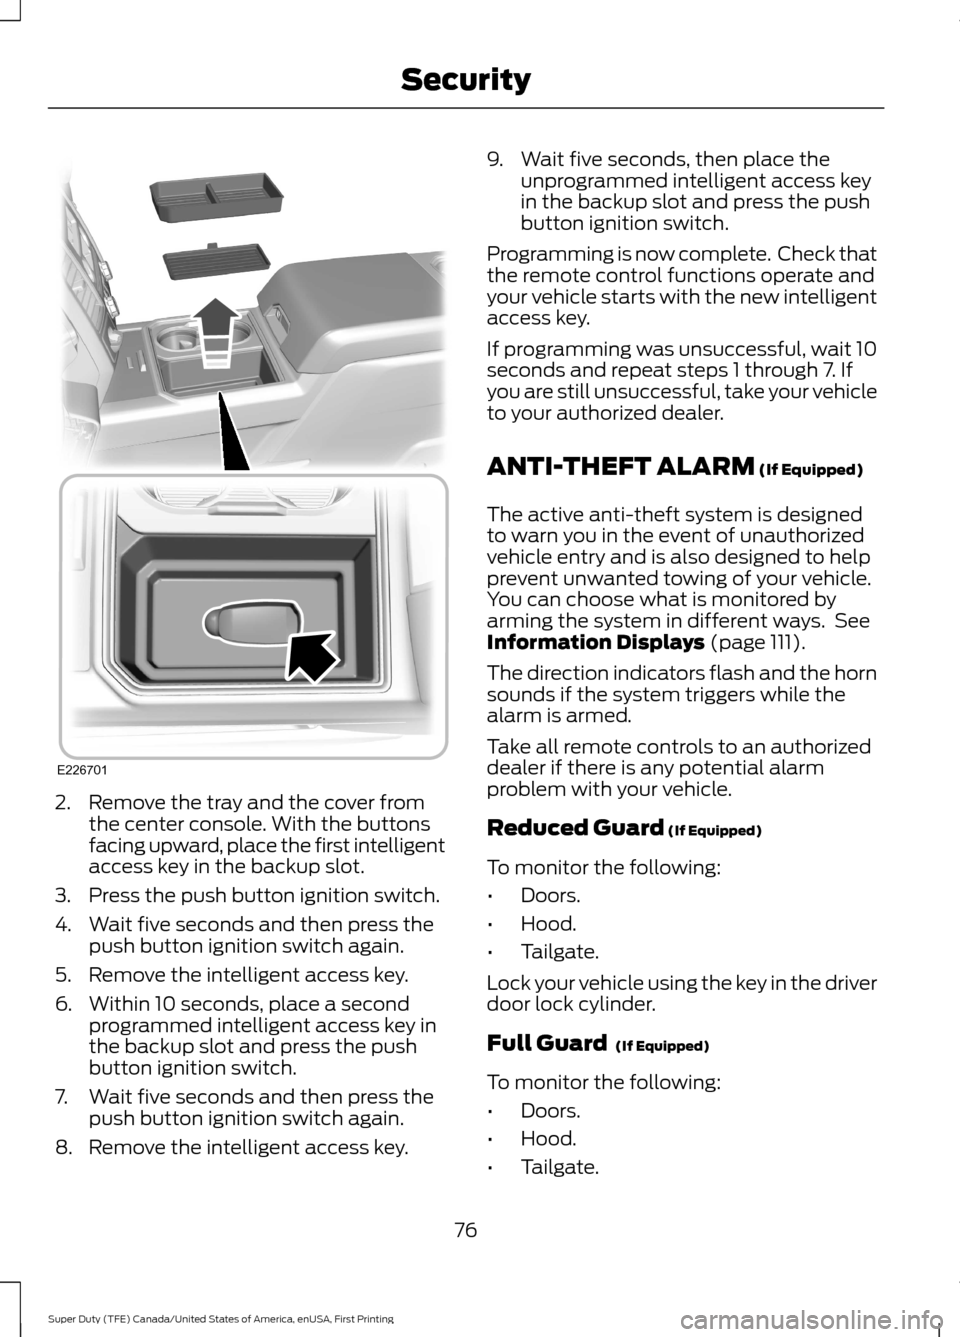
2. Remove the tray and the cover from
the center console. With the buttons
facing upward, place the first intelligent
access key in the backup slot.
3. Press the push button ignition switch.
4. Wait five seconds and then press the push button ignition switch again.
5. Remove the intelligent access key.
6. Within 10 seconds, place a second programmed intelligent access key in
the backup slot and press the push
button ignition switch.
7. Wait five seconds and then press the push button ignition switch again.
8. Remove the intelligent access key. 9. Wait five seconds, then place the
unprogrammed intelligent access key
in the backup slot and press the push
button ignition switch.
Programming is now complete. Check that
the remote control functions operate and
your vehicle starts with the new intelligent
access key.
If programming was unsuccessful, wait 10
seconds and repeat steps 1 through 7. If
you are still unsuccessful, take your vehicle
to your authorized dealer.
ANTI-THEFT ALARM (If Equipped)
The active anti-theft system is designed
to warn you in the event of unauthorized
vehicle entry and is also designed to help
prevent unwanted towing of your vehicle.
You can choose what is monitored by
arming the system in different ways. See
Information Displays
(page 111).
The direction indicators flash and the horn
sounds if the system triggers while the
alarm is armed.
Take all remote controls to an authorized
dealer if there is any potential alarm
problem with your vehicle.
Reduced Guard
(If Equipped)
To monitor the following:
• Doors.
• Hood.
• Tailgate.
Lock your vehicle using the key in the driver
door lock cylinder.
Full Guard
(If Equipped)
To monitor the following:
• Doors.
• Hood.
• Tailgate.
76
Super Duty (TFE) Canada/United States of America, enUSA, First Printing SecurityE226701
Page 94 of 636
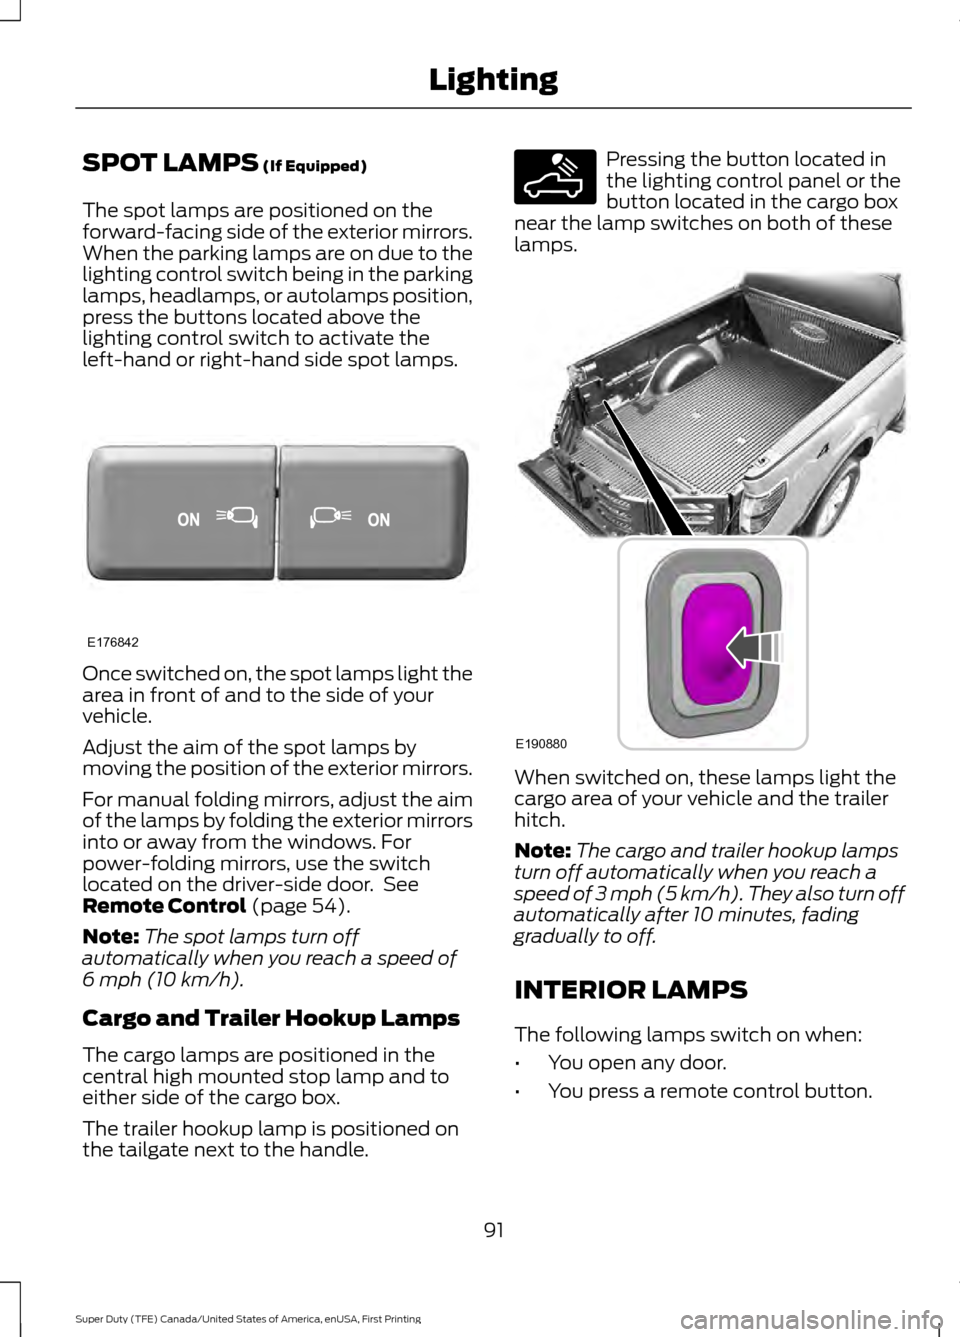
SPOT LAMPS (If Equipped)
The spot lamps are positioned on the
forward-facing side of the exterior mirrors.
When the parking lamps are on due to the
lighting control switch being in the parking
lamps, headlamps, or autolamps position,
press the buttons located above the
lighting control switch to activate the
left-hand or right-hand side spot lamps. Once switched on, the spot lamps light the
area in front of and to the side of your
vehicle.
Adjust the aim of the spot lamps by
moving the position of the exterior mirrors.
For manual folding mirrors, adjust the aim
of the lamps by folding the exterior mirrors
into or away from the windows. For
power-folding mirrors, use the switch
located on the driver-side door. See
Remote Control
(page 54).
Note: The spot lamps turn off
automatically when you reach a speed of
6 mph (10 km/h)
.
Cargo and Trailer Hookup Lamps
The cargo lamps are positioned in the
central high mounted stop lamp and to
either side of the cargo box.
The trailer hookup lamp is positioned on
the tailgate next to the handle. Pressing the button located in
the lighting control panel or the
button located in the cargo box
near the lamp switches on both of these
lamps. When switched on, these lamps light the
cargo area of your vehicle and the trailer
hitch.
Note:
The cargo and trailer hookup lamps
turn off automatically when you reach a
speed of
3 mph (5 km/h). They also turn off
automatically after 10 minutes, fading
gradually to off.
INTERIOR LAMPS
The following lamps switch on when:
• You open any door.
• You press a remote control button.
91
Super Duty (TFE) Canada/United States of America, enUSA, First Printing LightingE176842 E189587 E190880
Page 235 of 636
stationary or receding object farther than
12 in (30 cm) from the corners of the
bumper, the tone sounds for only three
seconds. Once the system detects an
object approaching, the warning sounds
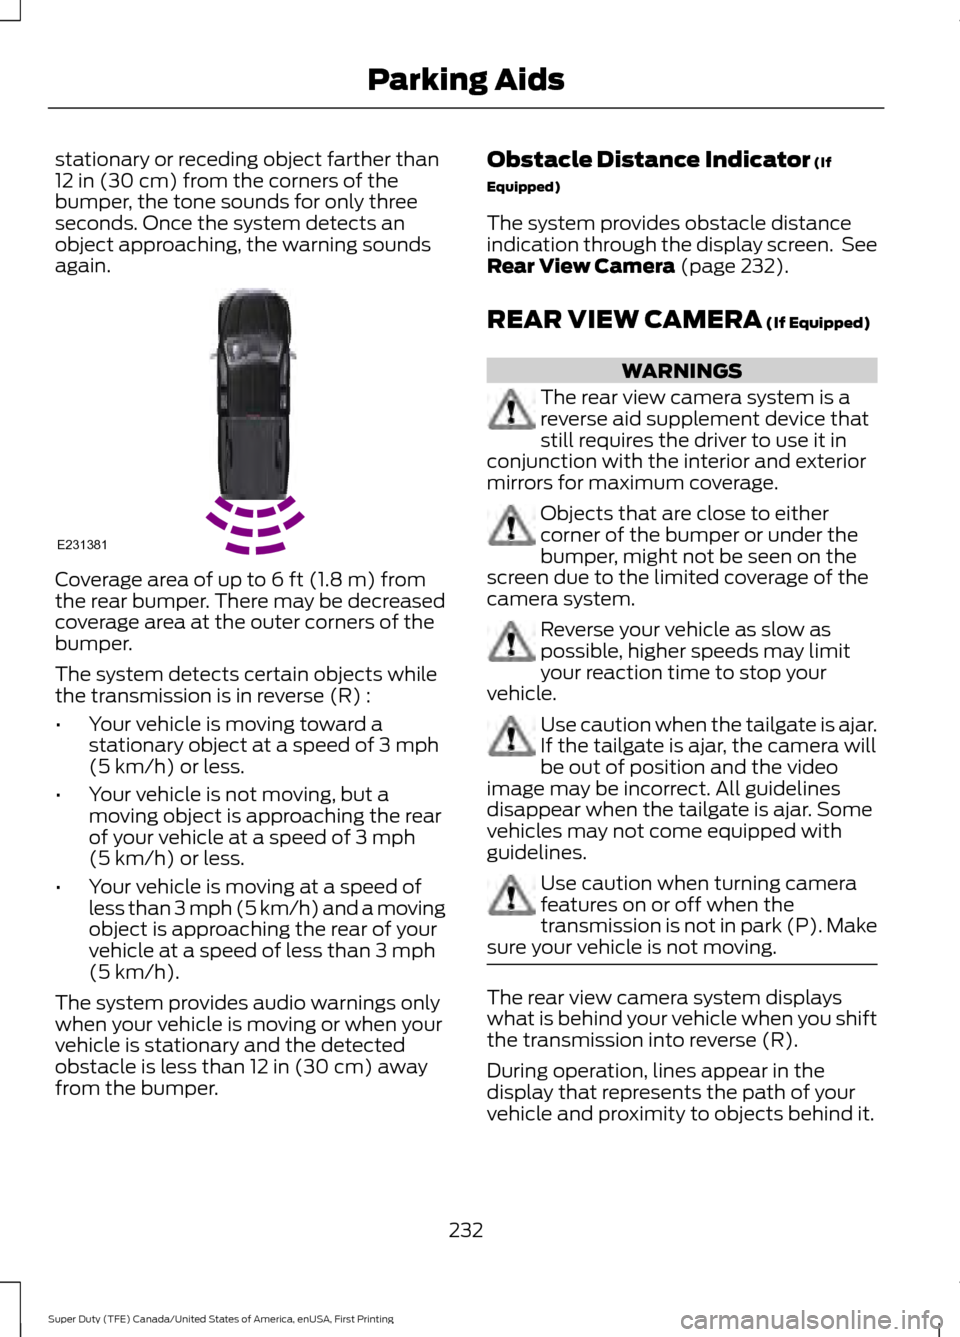
again. Coverage area of up to
6 ft (1.8 m) from
the rear bumper. There may be decreased
coverage area at the outer corners of the
bumper.
The system detects certain objects while
the transmission is in reverse (R) :
• Your vehicle is moving toward a
stationary object at a speed of
3 mph
(5 km/h) or less.
• Your vehicle is not moving, but a
moving object is approaching the rear
of your vehicle at a speed of
3 mph
(5 km/h) or less.
• Your vehicle is moving at a speed of
less than 3 mph (5 km/h) and a moving
object is approaching the rear of your
vehicle at a speed of less than
3 mph
(5 km/h).
The system provides audio warnings only
when your vehicle is moving or when your
vehicle is stationary and the detected
obstacle is less than
12 in (30 cm) away
from the bumper. Obstacle Distance Indicator
(If
Equipped)
The system provides obstacle distance
indication through the display screen. See
Rear View Camera
(page 232).
REAR VIEW CAMERA
(If Equipped) WARNINGS
The rear view camera system is a
reverse aid supplement device that
still requires the driver to use it in
conjunction with the interior and exterior
mirrors for maximum coverage. Objects that are close to either
corner of the bumper or under the
bumper, might not be seen on the
screen due to the limited coverage of the
camera system. Reverse your vehicle as slow as
possible, higher speeds may limit
your reaction time to stop your
vehicle. Use caution when the tailgate is ajar.
If the tailgate is ajar, the camera will
be out of position and the video
image may be incorrect. All guidelines
disappear when the tailgate is ajar. Some
vehicles may not come equipped with
guidelines. Use caution when turning camera
features on or off when the
transmission is not in park (P). Make
sure your vehicle is not moving. The rear view camera system displays
what is behind your vehicle when you shift
the transmission into reverse (R).
During operation, lines appear in the
display that represents the path of your
vehicle and proximity to objects behind it.
232
Super Duty (TFE) Canada/United States of America, enUSA, First Printing Parking AidsE231381
Page 236 of 636
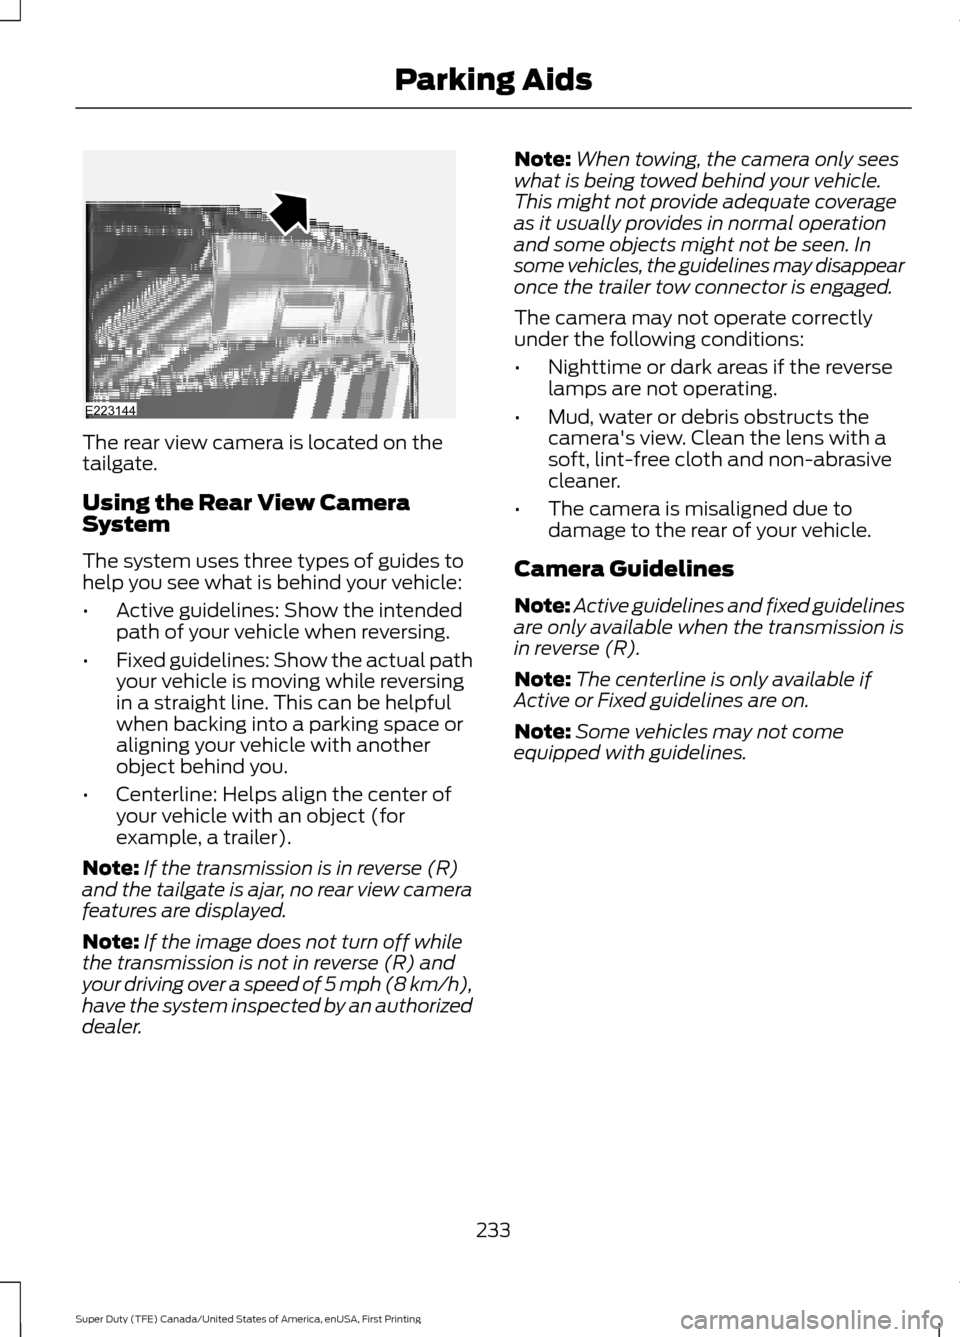
The rear view camera is located on the
tailgate.
Using the Rear View Camera
System
The system uses three types of guides to
help you see what is behind your vehicle:
•
Active guidelines: Show the intended
path of your vehicle when reversing.
• Fixed guidelines: Show the actual path
your vehicle is moving while reversing
in a straight line. This can be helpful
when backing into a parking space or
aligning your vehicle with another
object behind you.
• Centerline: Helps align the center of
your vehicle with an object (for
example, a trailer).
Note: If the transmission is in reverse (R)
and the tailgate is ajar, no rear view camera
features are displayed.
Note: If the image does not turn off while
the transmission is not in reverse (R) and
your driving over a speed of 5 mph (8 km/h),
have the system inspected by an authorized
dealer. Note:
When towing, the camera only sees
what is being towed behind your vehicle.
This might not provide adequate coverage
as it usually provides in normal operation
and some objects might not be seen. In
some vehicles, the guidelines may disappear
once the trailer tow connector is engaged.
The camera may not operate correctly
under the following conditions:
• Nighttime or dark areas if the reverse
lamps are not operating.
• Mud, water or debris obstructs the
camera's view. Clean the lens with a
soft, lint-free cloth and non-abrasive
cleaner.
• The camera is misaligned due to
damage to the rear of your vehicle.
Camera Guidelines
Note: Active guidelines and fixed guidelines
are only available when the transmission is
in reverse (R).
Note: The centerline is only available if
Active or Fixed guidelines are on.
Note: Some vehicles may not come
equipped with guidelines.
233
Super Duty (TFE) Canada/United States of America, enUSA, First Printing Parking AidsE223144
Page 268 of 636
- 1200 = - 240 pounds. No, you do
not have enough cargo capacity
to carry that much weight. In
metric units, the calculation would
be: 635 kilograms - (2 x 99
kilograms) - (12 x 45 kilograms) =
635 - 198 - 540 = -103 kilograms.
You will need to reduce the load
weight by at least 240 pounds
(104 kilograms). If you remove
three 100-pound (45-kilogram)
cement bags, then the load
calculation would be:1400 - (2 x
220) - (9 x 100) = 1400 - 440 -
900 = 60 pounds. Now you have
the load capacity to transport the
cement and your friend home. In
metric units, the calculation would
be: 635 kilograms - (2 x 99
kilograms) - (9 x 45 kilograms) =
635 - 198 - 405 = 32 kilograms.
The above calculations also
assume that the loads are
positioned in your vehicle in a
manner that does not overload
the front or the rear gross axle
weight rating specified for your
vehicle on the Safety Compliance
Certification label.
Special Loading Instructions
for Owners of Pick-up Trucks
and Utility-type Vehicles
WARNING
Loaded vehicles may handle
differently than unloaded
vehicles. Take extra precautions,
such as slower speeds and
increased stopping distance, when
driving a heavily loaded vehicle. BED RAMPS (If Equipped)
WARNINGS
The slide action of the ramp is a
pinch point. Do not place fingers or
hands in the pinch point.
Extend and retract the ramp only
when connected to the tailgate
plate.
Be sure the ramp is installed
correctly when loading and
unloading equipment on and off the
ramp. Do not step or sit on the ramp when
it is in the stowed position.
Install the ramp only within the
prescribed ramp angles.
Note:
The ramp maximum capacity is
800 lb (363 kg)
.
Note: Verify the ramp is on stable ground
before usage.
Note: For loading and unloading
equipment, your ramp should be set
between
10° upward and 26° downward to
avoid damage to the ramp claw and tailgate
plate.
Using the Bed Ramp
1. Remove the front and rear cables. 265
Super Duty (TFE) Canada/United States of America, enUSA, First Printing Load CarryingE194380
Page 269 of 636
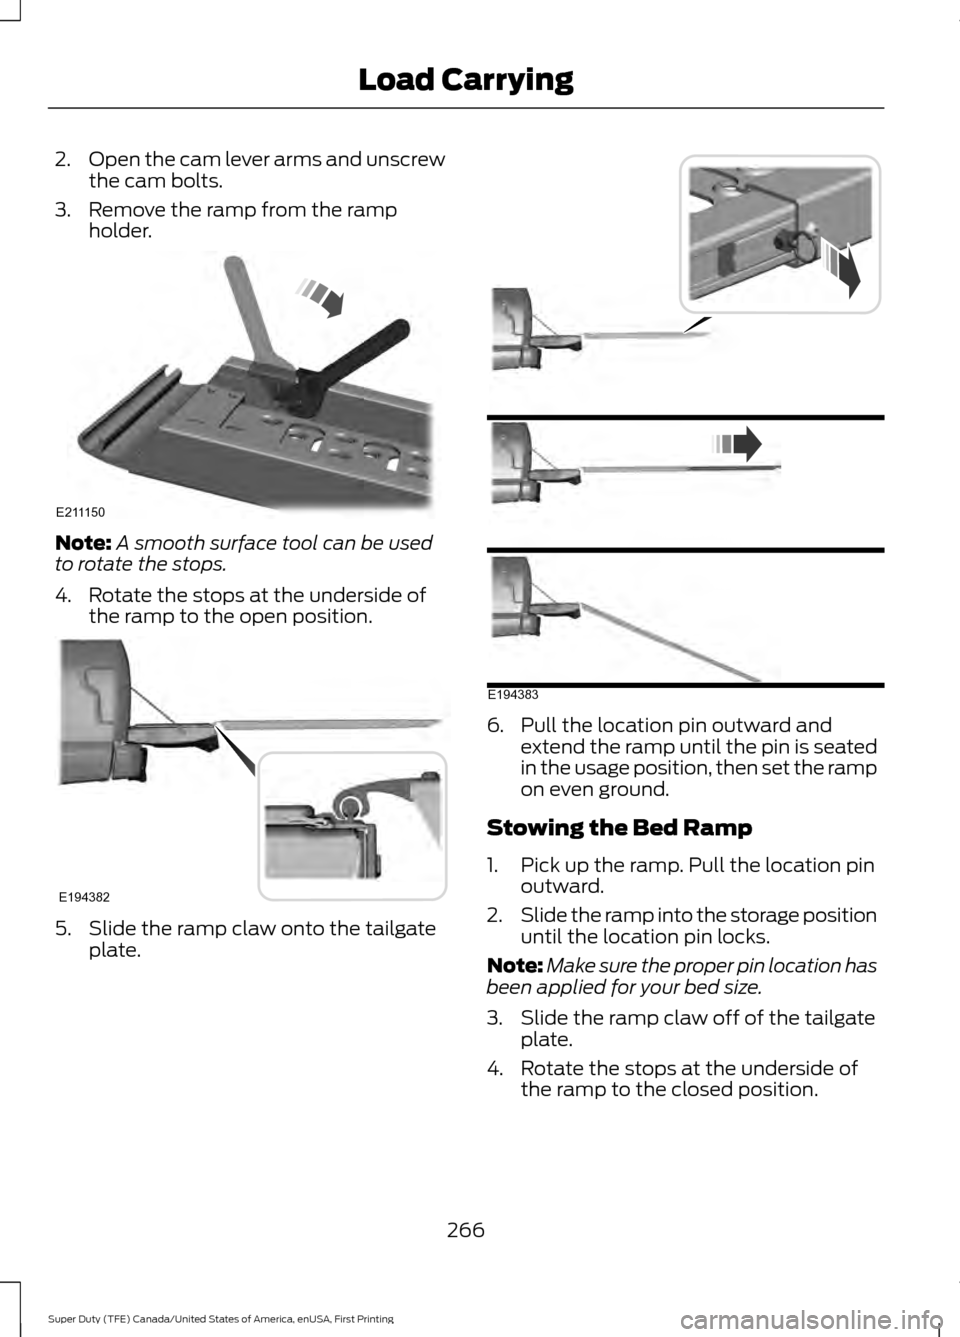
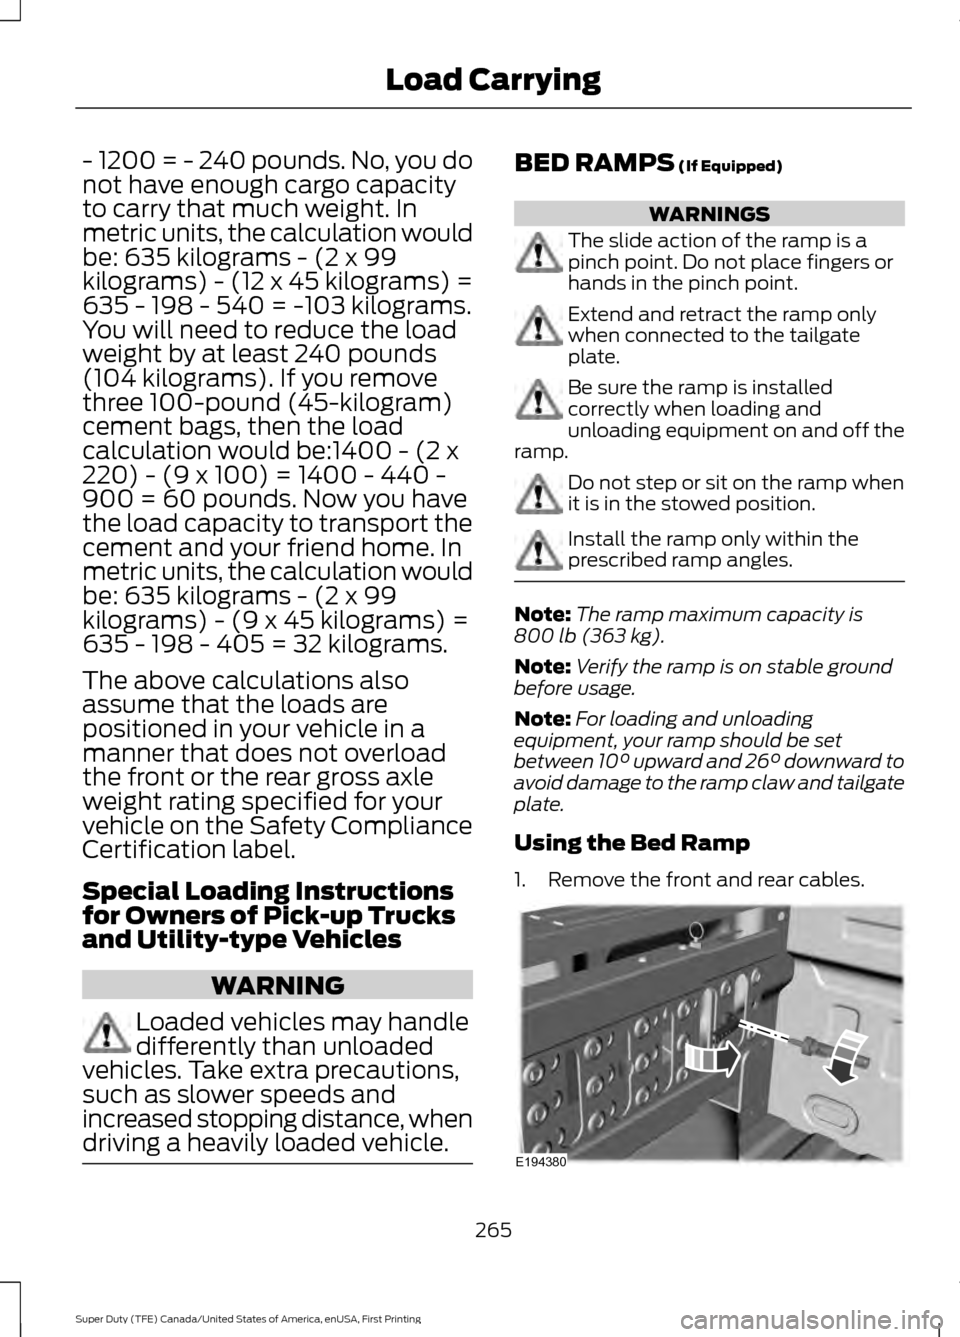
2.
Open the cam lever arms and unscrew
the cam bolts.
3. Remove the ramp from the ramp holder. Note:
A smooth surface tool can be used
to rotate the stops.
4. Rotate the stops at the underside of the ramp to the open position. 5. Slide the ramp claw onto the tailgate
plate. 6. Pull the location pin outward and
extend the ramp until the pin is seated
in the usage position, then set the ramp
on even ground.
Stowing the Bed Ramp
1. Pick up the ramp. Pull the location pin outward.
2. Slide the ramp into the storage position
until the location pin locks.
Note: Make sure the proper pin location has
been applied for your bed size.
3. Slide the ramp claw off of the tailgate plate.
4. Rotate the stops at the underside of the ramp to the closed position.
266
Super Duty (TFE) Canada/United States of America, enUSA, First Printing Load CarryingE211150 E194382 E194383
Page 274 of 636
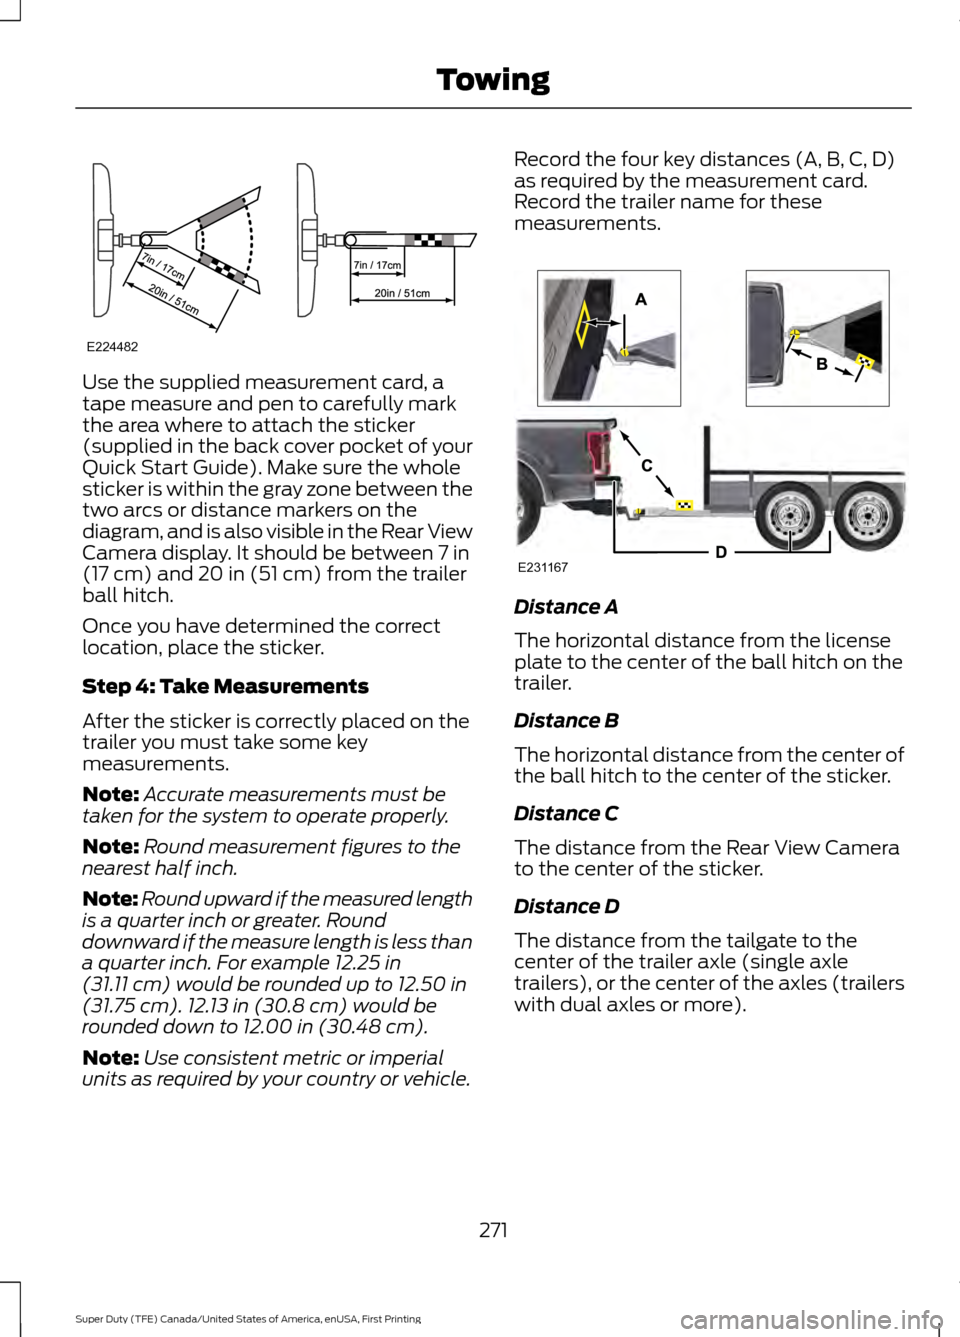
Use the supplied measurement card, a
tape measure and pen to carefully mark
the area where to attach the sticker
(supplied in the back cover pocket of your
Quick Start Guide). Make sure the whole
sticker is within the gray zone between the
two arcs or distance markers on the
diagram, and is also visible in the Rear View
Camera display. It should be between 7 in
(17 cm) and 20 in (51 cm) from the trailer
ball hitch.
Once you have determined the correct
location, place the sticker.
Step 4: Take Measurements
After the sticker is correctly placed on the
trailer you must take some key
measurements.
Note: Accurate measurements must be
taken for the system to operate properly.
Note: Round measurement figures to the
nearest half inch.
Note: Round upward if the measured length
is a quarter inch or greater. Round
downward if the measure length is less than
a quarter inch. For example
12.25 in
(31.11 cm) would be rounded up to 12.50 in
(31.75 cm). 12.13 in (30.8 cm) would be
rounded down to 12.00 in (30.48 cm).
Note: Use consistent metric or imperial
units as required by your country or vehicle. Record the four key distances (A, B, C, D)
as required by the measurement card.
Record the trailer name for these
measurements.
Distance A
The horizontal distance from the license
plate to the center of the ball hitch on the
trailer.
Distance B
The horizontal distance from the center of
the ball hitch to the center of the sticker.
Distance C
The distance from the Rear View Camera
to the center of the sticker.
Distance D
The distance from the tailgate to the
center of the trailer axle (single axle
trailers), or the center of the axles (trailers
with dual axles or more).
271
Super Duty (TFE) Canada/United States of America, enUSA, First Printing TowingE224482 E231167
Page 278 of 636
Measurement D has reached maximum or
minimum value:
•
Make sure that the measurement being
made is the horizontal distance only
from tailgate to the center of the single
axle or the center of all the axles on the
trailer. See step 4 of the setup for
additional measurement instructions.
The TBA system does not support
trailer lengths outside the range
allowed by the information display.
System is circling something beside the
sticker or system cannot find the sticker:
• Make sure the rear camera is clean and
the sticker is clearly visible in the
camera image. Clean the camera and
sticker if necessary.
• The camera system uses the entered
measurements to help locate the
sticker. Inaccurate sticker
measurements will degrade the
system ’s ability to locate the sticker.
Verify the measurements entered into
the system are accurate.
• Remove the incorrectly circled label or
decal if possible.
• If you cannot resolve the issue a new
sticker location should be tried. The
sticker location must still meet the
requirements noted in step 3 of the
setup instructions. Only one sticker can
be placed on the trailer for correct
system function. The previous sticker
must be removed or covered so only
one sticker is visible to the camera.
Calibration
The system monitors various vehicle
parameters to ensure your vehicle is being
driven straight and the trailer straight
behind your vehicle. Any steering input or
trailer movement will pause the calibration. For best results:
•
Use a long, straight and smooth road
when attempting to calibrate.
• Drive straight forward.
• Drive between 4 mph (6 km/h) and
24 mph (39 km/h).
System Operation
The following warnings or difficulties may
occur during feature operation. Tips to
resolve them are listed below.
The system is not available:
• The system relies on many
sub-systems in your vehicle to operate
correctly. If those sub-systems are not
operating correctly the system may not
be available.
•Low battery voltage is a condition
which will prevent the system from
operating. Please make sure the
battery is correctly charged if the
system is not available.
• You may need to drive your vehicle
straight forward above
25 mph
(40 km/h) before the system is
available again.
• If the message still displays take your
vehicle to an authorized dealer for
service.
275
Super Duty (TFE) Canada/United States of America, enUSA, First Printing Towing