2017 FORD SUPER DUTY remove seats
[x] Cancel search: remove seatsPage 151 of 636
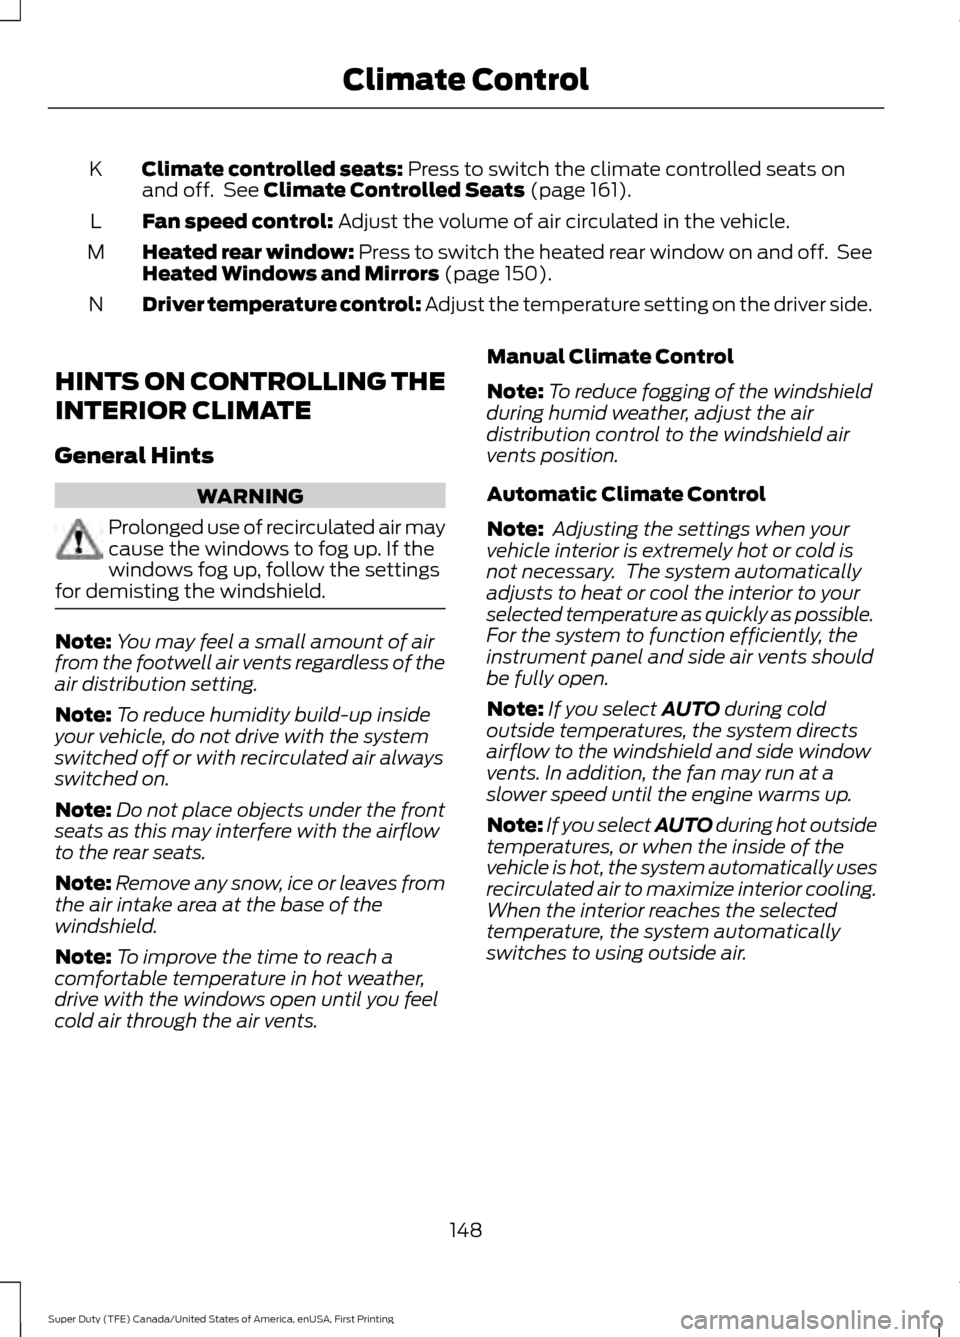
Climate controlled seats: Press to switch the climate controlled seats on
and off. See Climate Controlled Seats (page 161).
K
Fan speed control:
Adjust the volume of air circulated in the vehicle.
L
Heated rear window: Press to switch the heated rear window on and off. See
Heated Windows and Mirrors
(page 150).
M
Driver temperature control: Adjust the temperature setting on the driver side.
N
HINTS ON CONTROLLING THE
INTERIOR CLIMATE
General Hints WARNING
Prolonged use of recirculated air may
cause the windows to fog up. If the
windows fog up, follow the settings
for demisting the windshield. Note:
You may feel a small amount of air
from the footwell air vents regardless of the
air distribution setting.
Note: To reduce humidity build-up inside
your vehicle, do not drive with the system
switched off or with recirculated air always
switched on.
Note: Do not place objects under the front
seats as this may interfere with the airflow
to the rear seats.
Note: Remove any snow, ice or leaves from
the air intake area at the base of the
windshield.
Note: To improve the time to reach a
comfortable temperature in hot weather,
drive with the windows open until you feel
cold air through the air vents. Manual Climate Control
Note:
To reduce fogging of the windshield
during humid weather, adjust the air
distribution control to the windshield air
vents position.
Automatic Climate Control
Note: Adjusting the settings when your
vehicle interior is extremely hot or cold is
not necessary. The system automatically
adjusts to heat or cool the interior to your
selected temperature as quickly as possible.
For the system to function efficiently, the
instrument panel and side air vents should
be fully open.
Note: If you select
AUTO during cold
outside temperatures, the system directs
airflow to the windshield and side window
vents. In addition, the fan may run at a
slower speed until the engine warms up.
Note: If you select AUTO during hot outside
temperatures, or when the inside of the
vehicle is hot, the system automatically uses
recirculated air to maximize interior cooling.
When the interior reaches the selected
temperature, the system automatically
switches to using outside air.
148
Super Duty (TFE) Canada/United States of America, enUSA, First Printing Climate Control
Page 154 of 636
Heated Exterior Mirrors (If Equipped)
When you switch the heated rear window
on, the heated exterior mirrors will
automatically turn on.
Note: Do not remove ice from the mirrors
with a scraper or adjust the mirror glass
when it is frozen in place.
Note: Do not clean the mirror housing or
glass with harsh abrasives, fuel or other
petroleum-based cleaning products.
CABIN AIR FILTER
Your vehicle is equipped with a cabin air
filter, which gives you and your passengers
the following benefits:
• It improves your driving comfort by
reducing particle concentration.
• It improves the interior compartment
cleanliness.
• It protects the climate control
components from particle deposits.
You can locate the cabin air filter behind
the glove box.
Note: Make sure you have a cabin air filter
installed at all times. This prevents foreign
objects from entering the system. Running
the system without a filter in place could
result in degradation or damage to the
system.
Replace the filter at regular intervals. See
Scheduled Maintenance
(page 567).
For additional cabin air filter information,
or to replace the filter, see an authorized
dealer.
REMOTE START
(If Equipped)
You can switch this feature on or off and
adjust the settings using the information
display. The system adjusts the interior
temperature depending on your chosen
settings during remote start.
You cannot adjust the climate control
setting during remote start operation.
When you switch the ignition on, the
climate control system will return to the
previous settings. You can now make
adjustments.
You can switch on certain
vehicle-dependent features when needed,
such as:
•
Heated seats.
• Cooled seats.
• Heated steering wheel.
• Heated mirrors.
• Heated rear window.
Automatic Settings
In hot weather, the system is set to
72°F
(22°C). The cooled seats are set to high
(if available, and selected to AUTO in the
information display).
In moderate weather, the system either
heats or cools (based on previous
settings). The rear defroster, heated
mirrors and heated or cooled seats do not
automatically turn on.
In cold weather, the system is set to
72°F
(22°C). The heated seats are set to high
(if available, and selected to AUTO in the
information display). The heated rear
window and heated mirrors automatically
turn on.
151
Super Duty (TFE) Canada/United States of America, enUSA, First Printing Climate Control
Page 156 of 636
WARNINGS
Install the head restraint properly to
help minimize the risk of neck injury
in the event of a crash.
Note:
Adjust the seatback to an upright
driving position before adjusting the head
restraint. Adjust the head restraint so that
the top of it is level with the top of your head
and as far forward as possible. Make sure
that you remain comfortable. If you are
extremely tall, adjust the head restraint to
its highest position.
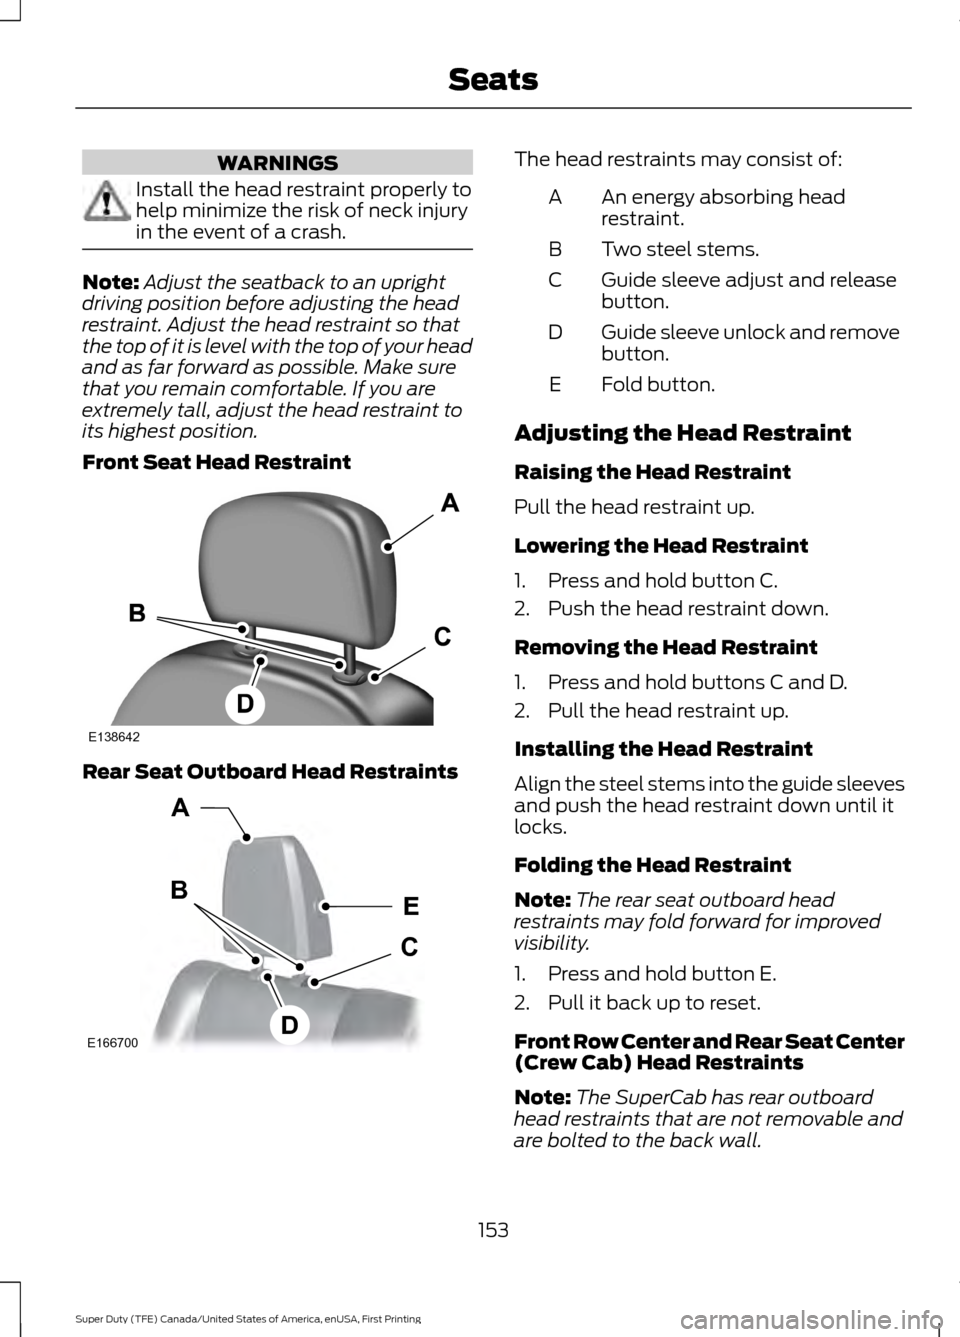
Front Seat Head Restraint Rear Seat Outboard Head Restraints The head restraints may consist of:
An energy absorbing head
restraint.
A
Two steel stems.
B
Guide sleeve adjust and release
button.
C
Guide sleeve unlock and remove
button.
D
Fold button.
E
Adjusting the Head Restraint
Raising the Head Restraint
Pull the head restraint up.
Lowering the Head Restraint
1. Press and hold button C.
2. Push the head restraint down.
Removing the Head Restraint
1. Press and hold buttons C and D.
2. Pull the head restraint up.
Installing the Head Restraint
Align the steel stems into the guide sleeves
and push the head restraint down until it
locks.
Folding the Head Restraint
Note: The rear seat outboard head
restraints may fold forward for improved
visibility.
1. Press and hold button E.
2. Pull it back up to reset.
Front Row Center and Rear Seat Center
(Crew Cab) Head Restraints
Note: The SuperCab has rear outboard
head restraints that are not removable and
are bolted to the back wall.
153
Super Duty (TFE) Canada/United States of America, enUSA, First Printing SeatsE138642 E166700
E
D
C
B
A
Page 157 of 636
Your vehicle may be equipped with head
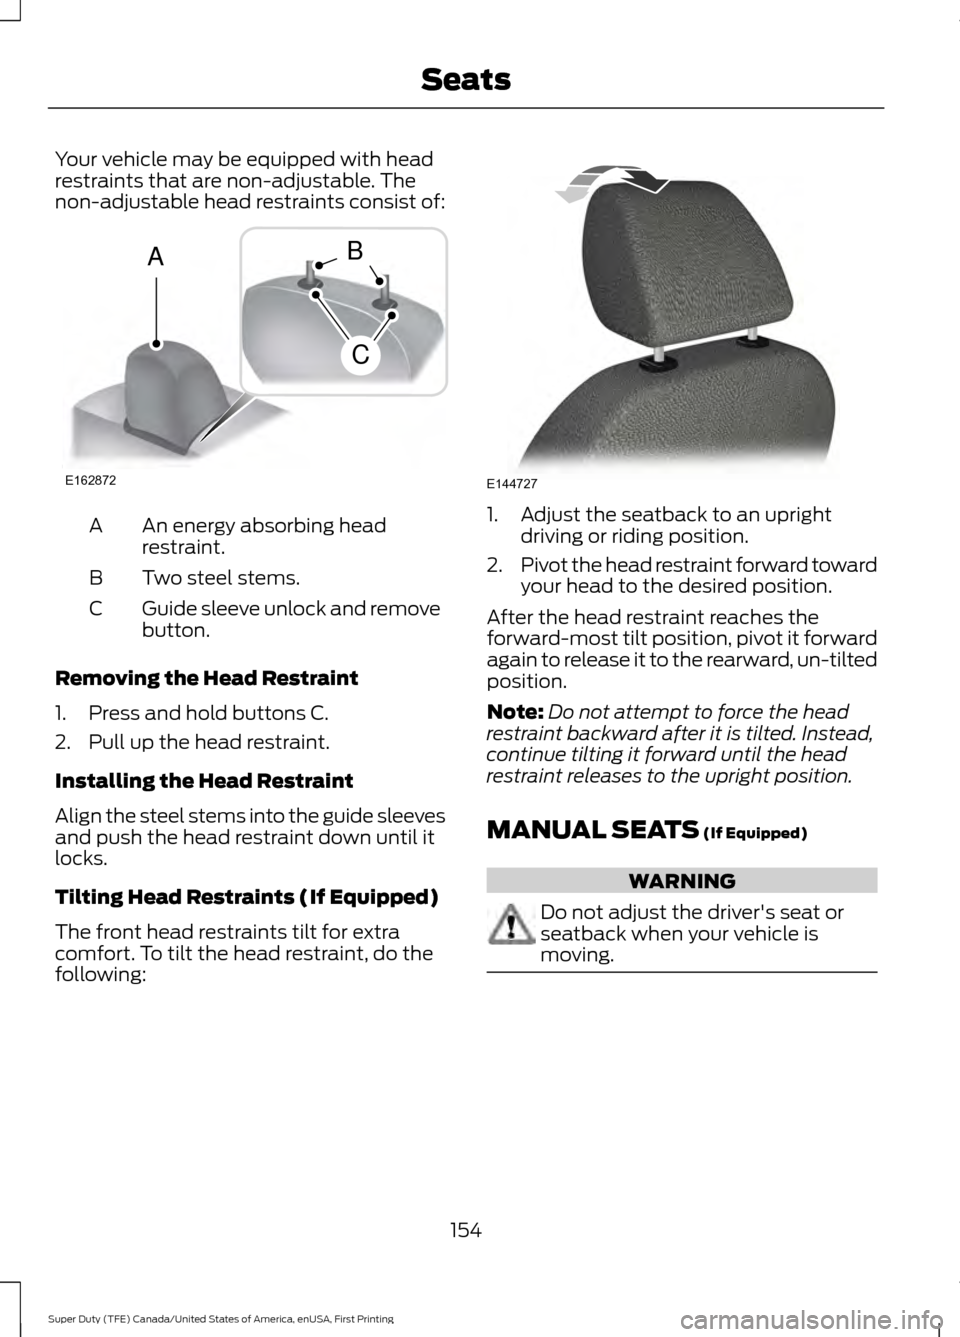
restraints that are non-adjustable. The
non-adjustable head restraints consist of:
An energy absorbing head
restraint.
A
Two steel stems.
B
Guide sleeve unlock and remove
button.
C
Removing the Head Restraint
1. Press and hold buttons C.
2. Pull up the head restraint.
Installing the Head Restraint
Align the steel stems into the guide sleeves
and push the head restraint down until it
locks.
Tilting Head Restraints (If Equipped)
The front head restraints tilt for extra
comfort. To tilt the head restraint, do the
following: 1. Adjust the seatback to an upright
driving or riding position.
2. Pivot the head restraint forward toward
your head to the desired position.
After the head restraint reaches the
forward-most tilt position, pivot it forward
again to release it to the rearward, un-tilted
position.
Note: Do not attempt to force the head
restraint backward after it is tilted. Instead,
continue tilting it forward until the head
restraint releases to the upright position.
MANUAL SEATS (If Equipped) WARNING
Do not adjust the driver's seat or
seatback when your vehicle is
moving.
154
Super Duty (TFE) Canada/United States of America, enUSA, First Printing SeatsE162872
A
C
B E144727
Page 161 of 636
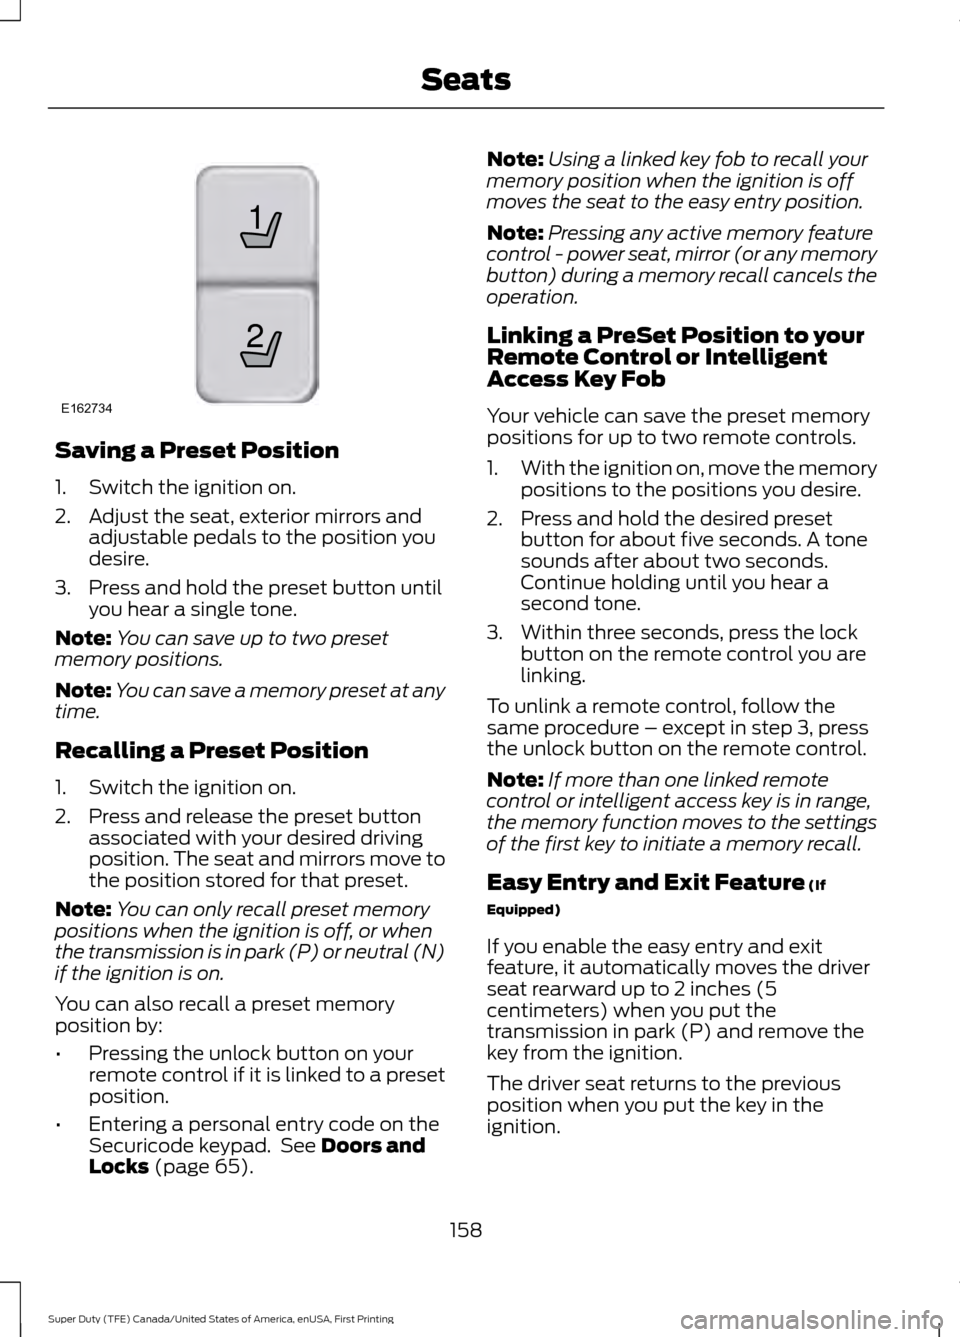
Saving a Preset Position
1. Switch the ignition on.
2. Adjust the seat, exterior mirrors and
adjustable pedals to the position you
desire.
3. Press and hold the preset button until you hear a single tone.
Note: You can save up to two preset
memory positions.
Note: You can save a memory preset at any
time.
Recalling a Preset Position
1. Switch the ignition on.
2. Press and release the preset button associated with your desired driving
position. The seat and mirrors move to
the position stored for that preset.
Note: You can only recall preset memory
positions when the ignition is off, or when
the transmission is in park (P) or neutral (N)
if the ignition is on.
You can also recall a preset memory
position by:
• Pressing the unlock button on your
remote control if it is linked to a preset
position.
• Entering a personal entry code on the
Securicode keypad. See Doors and
Locks (page 65). Note:
Using a linked key fob to recall your
memory position when the ignition is off
moves the seat to the easy entry position.
Note: Pressing any active memory feature
control - power seat, mirror (or any memory
button) during a memory recall cancels the
operation.
Linking a PreSet Position to your
Remote Control or Intelligent
Access Key Fob
Your vehicle can save the preset memory
positions for up to two remote controls.
1. With the ignition on, move the memory
positions to the positions you desire.
2. Press and hold the desired preset button for about five seconds. A tone
sounds after about two seconds.
Continue holding until you hear a
second tone.
3. Within three seconds, press the lock button on the remote control you are
linking.
To unlink a remote control, follow the
same procedure – except in step 3, press
the unlock button on the remote control.
Note: If more than one linked remote
control or intelligent access key is in range,
the memory function moves to the settings
of the first key to initiate a memory recall.
Easy Entry and Exit Feature
(If
Equipped)
If you enable the easy entry and exit
feature, it automatically moves the driver
seat rearward up to 2 inches (5
centimeters) when you put the
transmission in park (P) and remove the
key from the ignition.
The driver seat returns to the previous
position when you put the key in the
ignition.
158
Super Duty (TFE) Canada/United States of America, enUSA, First Printing Seats21
E162734
Page 165 of 636
Press the cooled seat symbol to cycle
through the various cool settings and off.
More indicator lights indicate cooler
settings.
Note:
The cooled seats may remain on after
you remote start your vehicle, based on your
remote start settings. The heated seats may
also turn on when you start your vehicle if
they were on when you switched your
vehicle off.
Note: After 60 minutes of operation, the
cooled seats switch off. Press the cooled
seat symbol to switch the cooled seats on.
Climate Controlled Seat Air Filter
Replacement
The climate controlled seat system
includes air filters. You must replace them
periodically.
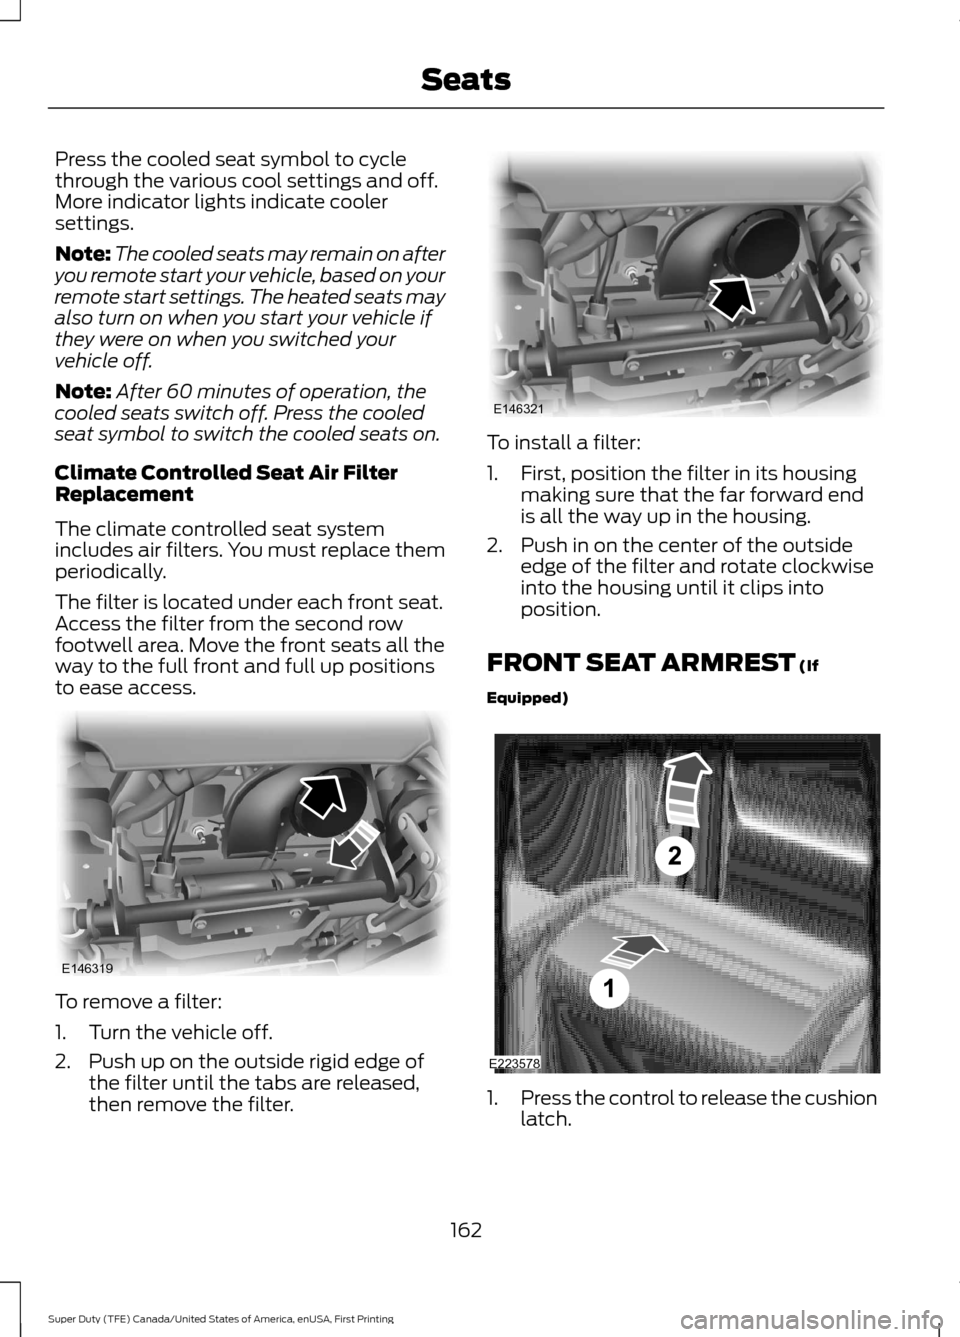
The filter is located under each front seat.
Access the filter from the second row
footwell area. Move the front seats all the
way to the full front and full up positions
to ease access. To remove a filter:
1. Turn the vehicle off.
2. Push up on the outside rigid edge of
the filter until the tabs are released,
then remove the filter. To install a filter:
1. First, position the filter in its housing
making sure that the far forward end
is all the way up in the housing.
2. Push in on the center of the outside edge of the filter and rotate clockwise
into the housing until it clips into
position.
FRONT SEAT ARMREST (If
Equipped) 1.
Press the control to release the cushion
latch.
162
Super Duty (TFE) Canada/United States of America, enUSA, First Printing SeatsE146319 E146321 E223578
Page 166 of 636
2. Lift the cushion to gain access to the
storage compartment.
The cupholder is located inside the storage
compartment. You can also flip the
cupholder so that it faces forward. See
Center Console (page 170).
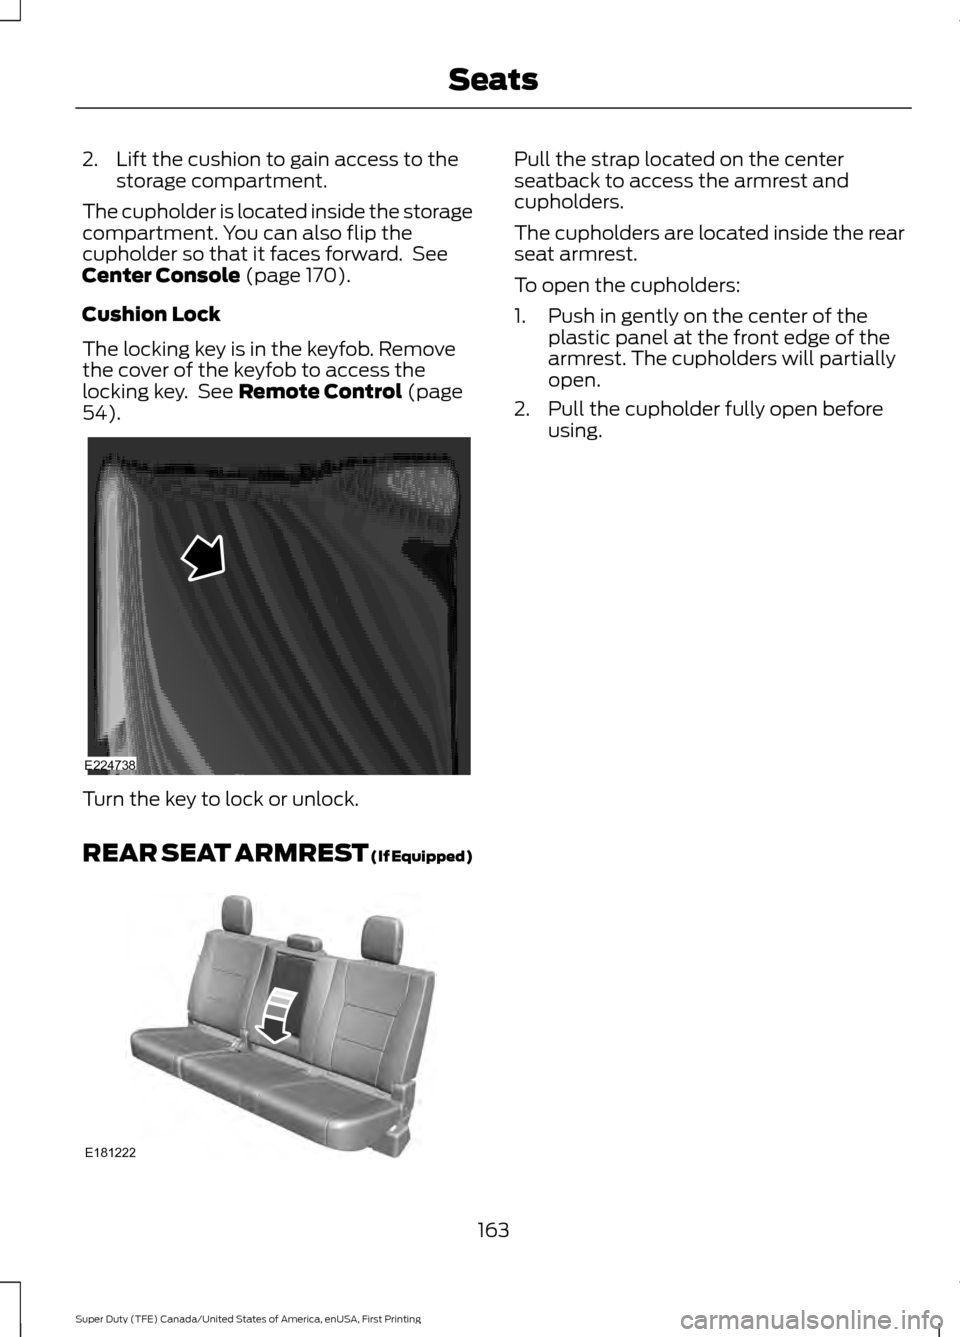
Cushion Lock
The locking key is in the keyfob. Remove
the cover of the keyfob to access the
locking key. See
Remote Control (page
54). Turn the key to lock or unlock.
REAR SEAT ARMREST
(If Equipped) Pull the strap located on the center
seatback to access the armrest and
cupholders.
The cupholders are located inside the rear
seat armrest.
To open the cupholders:
1. Push in gently on the center of the
plastic panel at the front edge of the
armrest. The cupholders will partially
open.
2. Pull the cupholder fully open before using.
163
Super Duty (TFE) Canada/United States of America, enUSA, First Printing SeatsE224738 E181222
Page 193 of 636
2. Remove the diesel exhaust fluid tank
filler cap.
3. Insert the spout in to the filler neck until
the seal on the spout seats on to the
filler neck. Pour the fluid in to the tank.
When the tank is full the fluid will stop
flowing automatically.
4. Return the container to the vertical position slightly below the diesel
exhaust fluid filler neck. Allow any fluid
remaining in the spout to drain back in
to the container.
5. Remove the spout from the diesel exhaust fluid filler neck. Replace the
diesel exhaust fluid tank cap.
6. Remove the spout from the diesel exhaust fluid container and replace the
cap.
Note: If there is diesel exhaust fluid left in
the container retain it for later use. The
spout is re-useable. Wash the spout with
clean water prior to storage. Do not use the
diesel exhaust fluid spout with any other
fluid.
Filling the Diesel Exhaust Fluid Tank in
Cold Climates
Diesel exhaust fluid may freeze if the
ambient temperature is below 12°F (-11°C).
Your vehicle has a preheating system
which allows diesel exhaust fluid to
operate below 12°F (-11°C). If you do not
use your vehicle for an extended period
when the ambient temperature is below
12°F (-11°C)
, the fluid in the tank may
freeze. If the tank is overfilled and the fluid
freezes it may damage the tank. This is not
covered by the vehicle warranty. Diesel Exhaust Fluid Warning
Messages and Vehicle Operations WARNINGS
Diesel exhaust fluid must be refilled
when low or replaced when
contaminated or your vehicle speed
becomes limited to 50 mph (80 km/h). In
these conditions, drive with caution and
refill diesel exhaust fluid immediately. If
the diesel exhaust fluid becomes empty
or contaminated and fluid is not replaced,
your vehicle becomes limited to engine idle
only once stopped. In these conditions, be
cautious where you stop your vehicle
because you may not be able to drive long
distances or maintain highway speeds until
you refill or replace the diesel exhaust fluid. Tampering with or disabling selective
catalytic reduction system results in
severe vehicle performance
limitation including eventual speed limiting
to
5 mph (5 km/h). The information display shows a series of
messages about the amount of diesel
exhaust fluid available. A systems check
displays messages indicating the amount
of diesel exhaust fluid available or displays
a warning message indicating the
approximate distance remaining as the
fluid in the diesel exhaust fluid tank nears
empty. See
Information Messages
(page 128). As the diesel exhaust fluid level
nears empty, the warning
symbol displays and a series of
tones and messages starting at
500 mi
(800 km) remaining before diesel exhaust
fluid is depleted. The warning symbol and
messages continue until you refill the
diesel exhaust fluid tank.
190
Super Duty (TFE) Canada/United States of America, enUSA, First Printing Fuel and RefuelingE163176