2017 FORD SUPER DUTY instrument panel
[x] Cancel search: instrument panelPage 149 of 636
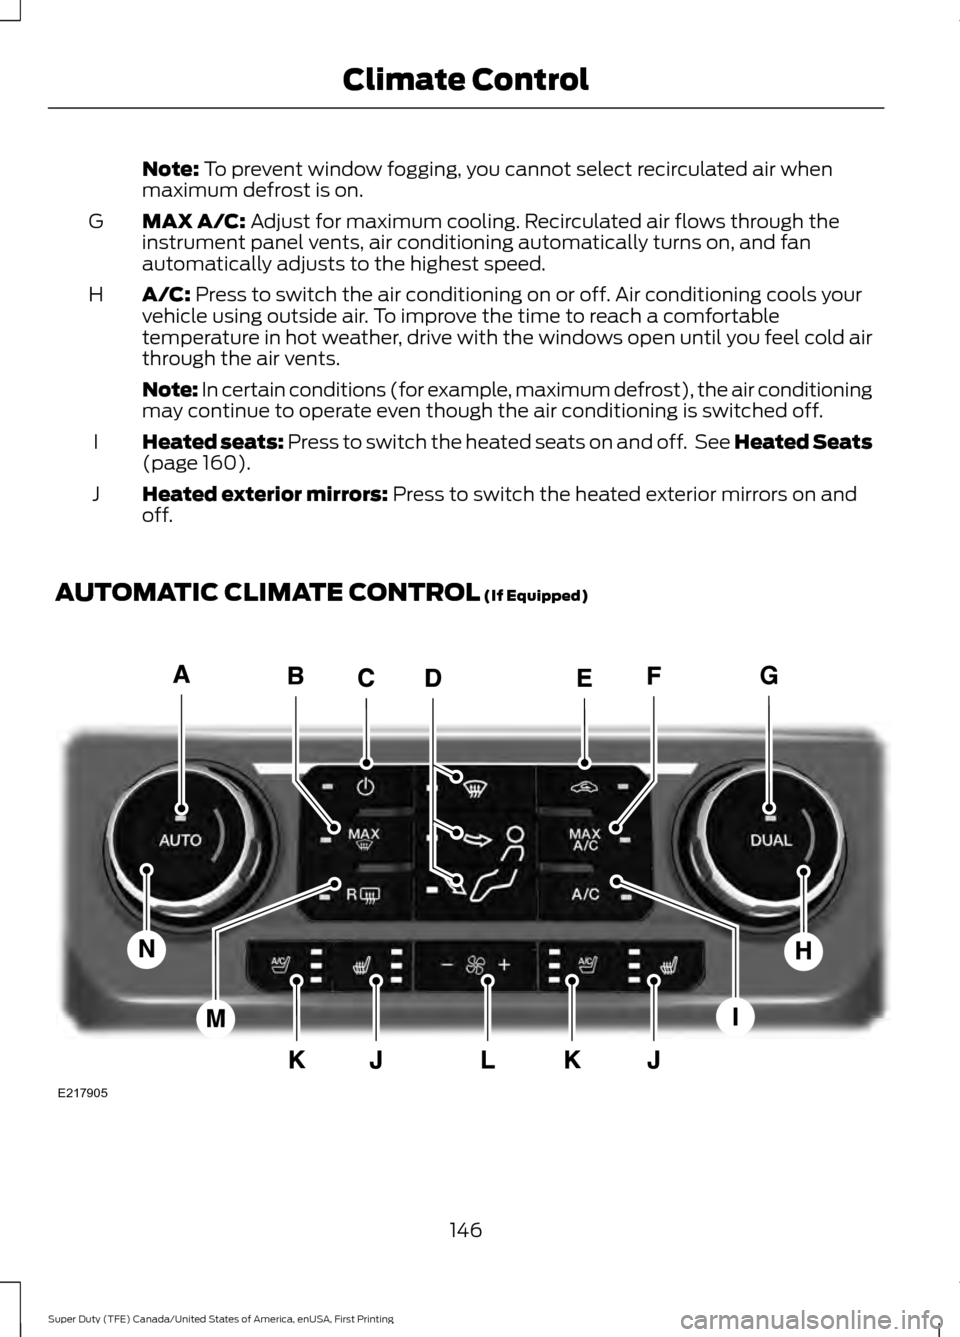
Note: To prevent window fogging, you cannot select recirculated air when
maximum defrost is on.
MAX A/C:
Adjust for maximum cooling. Recirculated air flows through the
instrument panel vents, air conditioning automatically turns on, and fan
automatically adjusts to the highest speed.
G
A/C:
Press to switch the air conditioning on or off. Air conditioning cools your
vehicle using outside air. To improve the time to reach a comfortable
temperature in hot weather, drive with the windows open until you feel cold air
through the air vents.
H
Note: In certain conditions (for example, maximum defrost), the air conditioning
may continue to operate even though the air conditioning is switched off.
Heated seats:
Press to switch the heated seats on and off. See Heated Seats
(page 160).
I
Heated exterior mirrors:
Press to switch the heated exterior mirrors on and
off.
J
AUTOMATIC CLIMATE CONTROL
(If Equipped) 146
Super Duty (TFE) Canada/United States of America, enUSA, First Printing Climate ControlE217905
Page 150 of 636
AUTO: Press to switch on automatic operation. Adjust to select the desired
temperature. Fan speed, air distribution, air conditioning operation, and outside
or recirculated air are automatically adjusted to heat or cool the vehicle to
maintain the desired temperature. You can also switch off dual zone mode by
pressing and holding for more than two seconds.
A
MAX Defrost:
Press to switch on defrost. Outside air flows through the
windshield vents, air conditioning automatically turns on, and fan automatically
adjusts to the highest speed. You can also use this setting to defrost and clear
the windshield of a thin covering of ice. The heated rear window also
automatically turns on when you select maximum defrost.
B
Note:
To prevent window fogging, you cannot select recirculated air when
maximum defrost is on.
Power:
Press to switch the system on and off. When the system is off, it
prevents outside air from entering the vehicle.
C
Air distribution control:
Press to switch airflow from the windshield,
instrument panel, or footwell vents on or off. You can distribute air through any
combination of these vents.
D
Recirculated air:
Press to switch between outside air and recirculated air. The
air currently in the passenger compartment recirculates. This can reduce the
time needed to cool the interior and reduce unwanted odors from entering your
vehicle.
E
Note:
Recirculated air may also turn on and off automatically in instrument
panel or instrument panel and floor airflow modes during hot weather to improve
cooling efficiency.
MAX A/C:
Press for maximum cooling. Recirculated air flows through the
instrument panel vents, air conditioning automatically turns on, and the fan
automatically adjusts to the highest speed.
F
DUAL:
Press to switch separate passenger side temperature control off and
on. When dual zone is off, passenger temperature settings remain the same as
the driver settings.
G
Passenger temperature control:
Adjust the temperature setting on the
passenger side.
H
A/C:
Press to switch the air conditioning on or off. Air conditioning cools your
vehicle using outside air. To improve the time to reach a comfortable
temperature in hot weather, drive with the windows open until you feel cold air
through the air vents.
I
Note: In certain conditions (for example, maximum defrost), the air conditioning
may continue to operate even though the air conditioning is switched off.
Heated seats:
Press to switch the heated seats on and off. See Heated Seats
(page 160).
J
147
Super Duty (TFE) Canada/United States of America, enUSA, First Printing Climate Control
Page 151 of 636
Climate controlled seats: Press to switch the climate controlled seats on
and off. See Climate Controlled Seats (page 161).
K
Fan speed control:
Adjust the volume of air circulated in the vehicle.
L
Heated rear window: Press to switch the heated rear window on and off. See
Heated Windows and Mirrors
(page 150).
M
Driver temperature control: Adjust the temperature setting on the driver side.
N
HINTS ON CONTROLLING THE
INTERIOR CLIMATE
General Hints WARNING
Prolonged use of recirculated air may
cause the windows to fog up. If the
windows fog up, follow the settings
for demisting the windshield. Note:
You may feel a small amount of air
from the footwell air vents regardless of the
air distribution setting.
Note: To reduce humidity build-up inside
your vehicle, do not drive with the system
switched off or with recirculated air always
switched on.
Note: Do not place objects under the front
seats as this may interfere with the airflow
to the rear seats.
Note: Remove any snow, ice or leaves from
the air intake area at the base of the
windshield.
Note: To improve the time to reach a
comfortable temperature in hot weather,
drive with the windows open until you feel
cold air through the air vents. Manual Climate Control
Note:
To reduce fogging of the windshield
during humid weather, adjust the air
distribution control to the windshield air
vents position.
Automatic Climate Control
Note: Adjusting the settings when your
vehicle interior is extremely hot or cold is
not necessary. The system automatically
adjusts to heat or cool the interior to your
selected temperature as quickly as possible.
For the system to function efficiently, the
instrument panel and side air vents should
be fully open.
Note: If you select
AUTO during cold
outside temperatures, the system directs
airflow to the windshield and side window
vents. In addition, the fan may run at a
slower speed until the engine warms up.
Note: If you select AUTO during hot outside
temperatures, or when the inside of the
vehicle is hot, the system automatically uses
recirculated air to maximize interior cooling.
When the interior reaches the selected
temperature, the system automatically
switches to using outside air.
148
Super Duty (TFE) Canada/United States of America, enUSA, First Printing Climate Control
Page 153 of 636
Recommended Settings for Cooling
Vehicle with automatic climate control
Vehicle with manual climate control
Press the AUTO button.
Adjust the fan speed to the center
setting.
1
Adjust the temperature control to the
desired setting. Use
72°F (22°C) as a
starting point, then adjust the setting as
necessary.
Adjust the temperature control to the
midway point of the cold settings.
2
Select the instrument panel air vents
using the air distribution buttons.
3
Side Window Defogging in Cold Weather Vehicle with automatic climate control
Vehicle with manual climate control
Press the defrost button.
Select the windshield air vents using the
air distribution buttons.
1
Adjust the temperature control to the
desired setting. Use
72°F (22°C) as a
starting point, then adjust the setting as
necessary.
Press the A/C button if the indicator is
off.
2
Adjust the temperature control to the
desired setting.
3
Adjust the fan speed to a high speed
setting.
4
HEATED WINDOWS AND
MIRRORS
(If Equipped)
Heated Rear Window
Note: Make sure the engine is running
before operating the heated windows.
Note: If your vehicle is equipped with a
sliding rear window, the feature still
operates when you open the window. Press the button to clear the
heated rear window of thin ice
and fog. The heated rear
window will automatically turn off after a
short period of time. Press the button
again to switch it off.
Note: Do not use razor blades or other
sharp objects to clean or remove decals
from the inside of the heated rear window.
The vehicle warranty does not cover
damage caused to the heated rear window
grid lines.
150
Super Duty (TFE) Canada/United States of America, enUSA, First Printing Climate ControlE184884
Page 171 of 636
12 Volt DC Power Point
WARNINGS
Do not plug optional electrical
accessories into the cigar lighter
socket. Incorrect use of the cigar
lighter can cause damage not covered by
the vehicle warranty, and can result in fire
or serious injury. Do not use a power point for
operating a cigar lighter. Incorrect
use of the power points can cause
damage not covered by the vehicle
warranty, and can result in fire or serious
injury. Note:
When you switch the ignition on, you
can use the socket to power 12 volt
appliances with a maximum current rating
of 20 amps.
Note: Do not hang any accessory from the
accessory plug.
Note: Do not use the power point over the
vehicle capacity of 12 volt DC 240 watts or
a fuse may blow.
Note: Always keep the power point caps
closed when not in use.
Do not insert objects other than an
accessory plug into the power point. This
will damage the power point and blow the
fuse.
Run the vehicle for full capacity use of the
power point.
To prevent the battery from running out of
charge:
• Do not use the power point longer than
necessary when the vehicle is not
running.
• Do not leave devices plugged in
overnight or when you park your vehicle
for extended periods. Locations
Power points may be in the following
locations:
•
On the instrument panel.
• Inside the center console.
• On the rear of the center console.
• Inside the front under-seat storage
compartment.
Note: Timed power points remain on for 30
minutes if the vehicle is in accessory mode.
If you switch the vehicle off, the timed
power points remain on for 75 minutes.
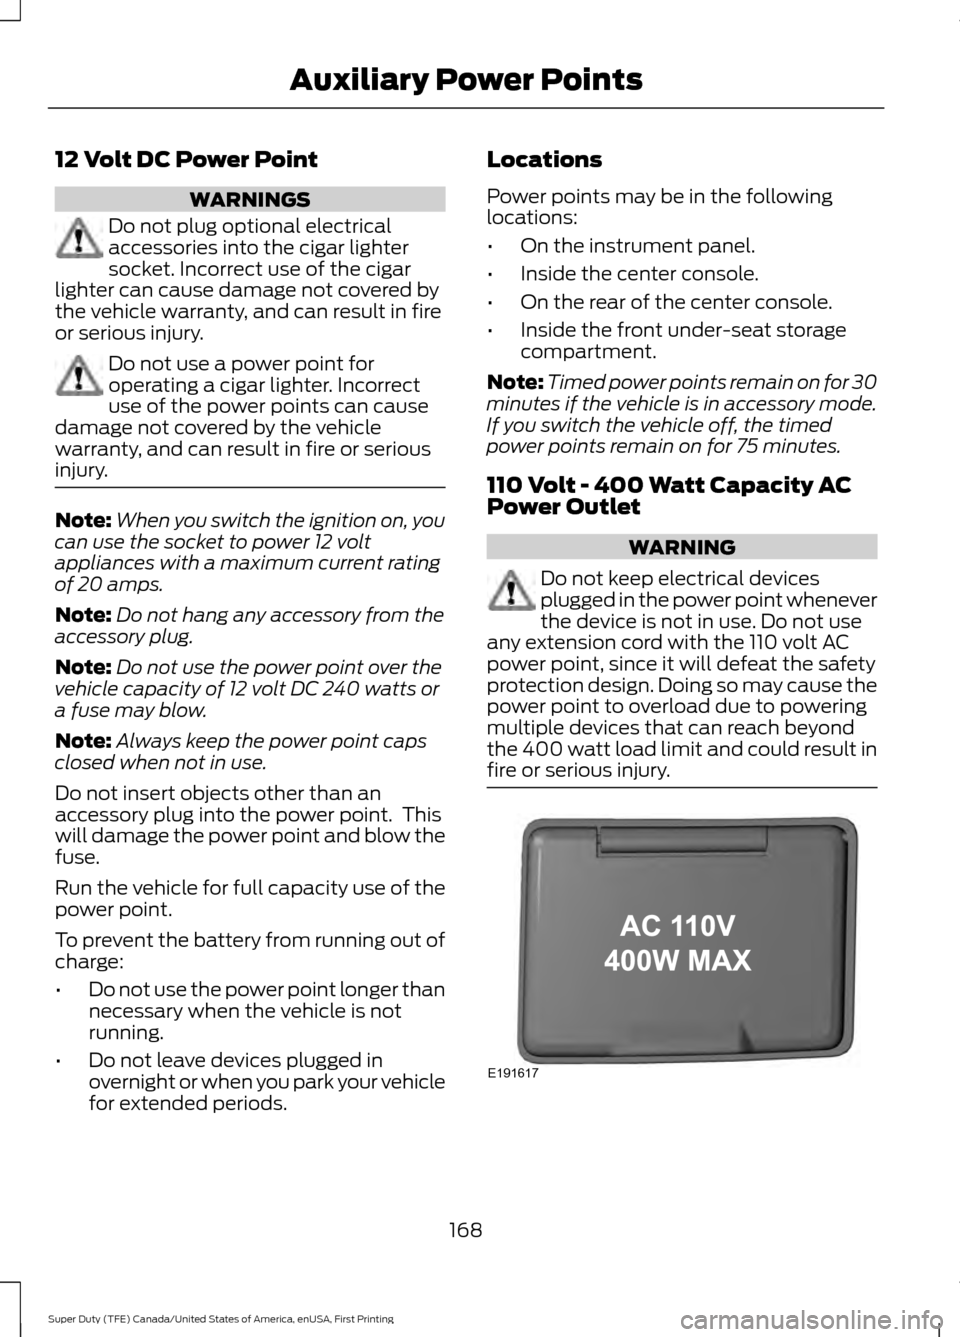
110 Volt - 400 Watt Capacity AC
Power Outlet WARNING
Do not keep electrical devices
plugged in the power point whenever
the device is not in use. Do not use
any extension cord with the 110 volt AC
power point, since it will defeat the safety
protection design. Doing so may cause the
power point to overload due to powering
multiple devices that can reach beyond
the 400 watt load limit and could result in
fire or serious injury. 168
Super Duty (TFE) Canada/United States of America, enUSA, First Printing Auxiliary Power PointsE191617
Page 177 of 636
KEYLESS STARTING (If Equipped)
Note: The system may not function if the
passive key is close to metal objects or
electronic devices, for example keys or a cell
phone.
Note: A valid passive key must be located
inside your vehicle to switch the ignition on
and start your vehicle.
Note: A light on the button illuminates
when the ignition is on and when your
vehicle starts.
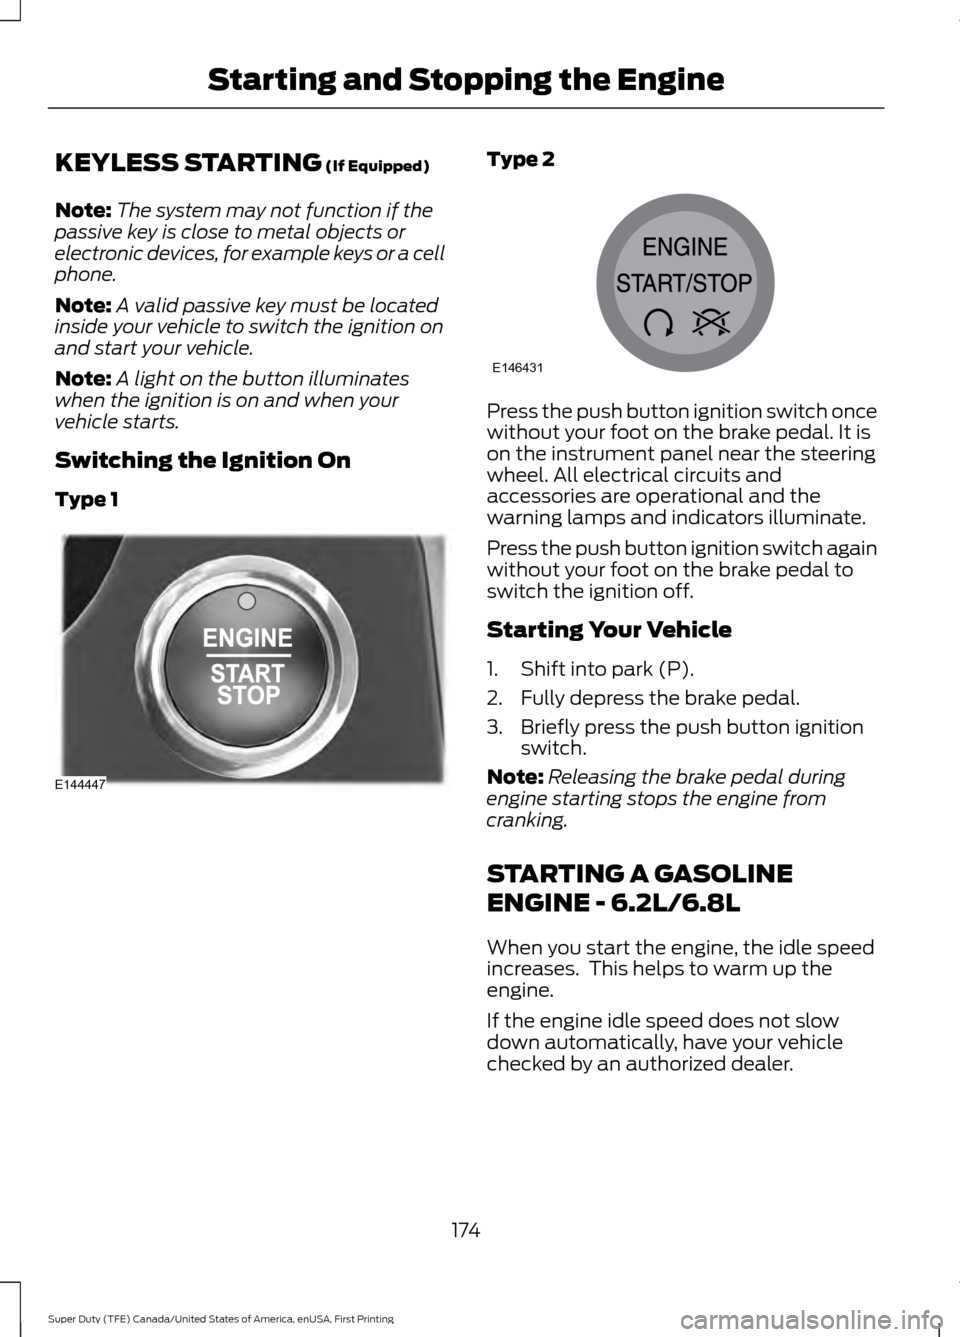
Switching the Ignition On
Type 1 Type 2
Press the push button ignition switch once
without your foot on the brake pedal. It is
on the instrument panel near the steering
wheel. All electrical circuits and
accessories are operational and the
warning lamps and indicators illuminate.
Press the push button ignition switch again
without your foot on the brake pedal to
switch the ignition off.
Starting Your Vehicle
1. Shift into park (P).
2. Fully depress the brake pedal.
3. Briefly press the push button ignition
switch.
Note: Releasing the brake pedal during
engine starting stops the engine from
cranking.
STARTING A GASOLINE
ENGINE - 6.2L/6.8L
When you start the engine, the idle speed
increases. This helps to warm up the
engine.
If the engine idle speed does not slow
down automatically, have your vehicle
checked by an authorized dealer.
174
Super Duty (TFE) Canada/United States of America, enUSA, First Printing Starting and Stopping the EngineE144447 E146431
Page 214 of 636
For proper operation, make sure that each
hub is fully engaged and that both hub
locks are set to the same position (both
set to LOCK or both set to AUTO). To
engage LOCK, turn the hub locks
completely clockwise; to engage AUTO,
turn the hub locks completely
counterclockwise.
The ESOF 4WD system:
•
provides 4x4 High engagement and
disengagement while the vehicle is
moving.
• is operated by a rotary control located
on the instrument panel that allows
you select 4x2, 4x4 High or 4x4 Low
operation.
• uses auto-manual hub locks that can
be engaged and disengaged
automatically based on the 4x4 mode
selected.
• will increase fuel economy when used
in the hub lock's recommended AUTO
mode.
4WD Indicator Lights
Note: When a 4X4 system fault is present,
the system will typically remain in whichever
4X4 mode was selected prior to the fault
condition occurring. It will not default to 4X2
in all circumstances. When this warning is
displayed, have your vehicle serviced by an
authorized dealer.
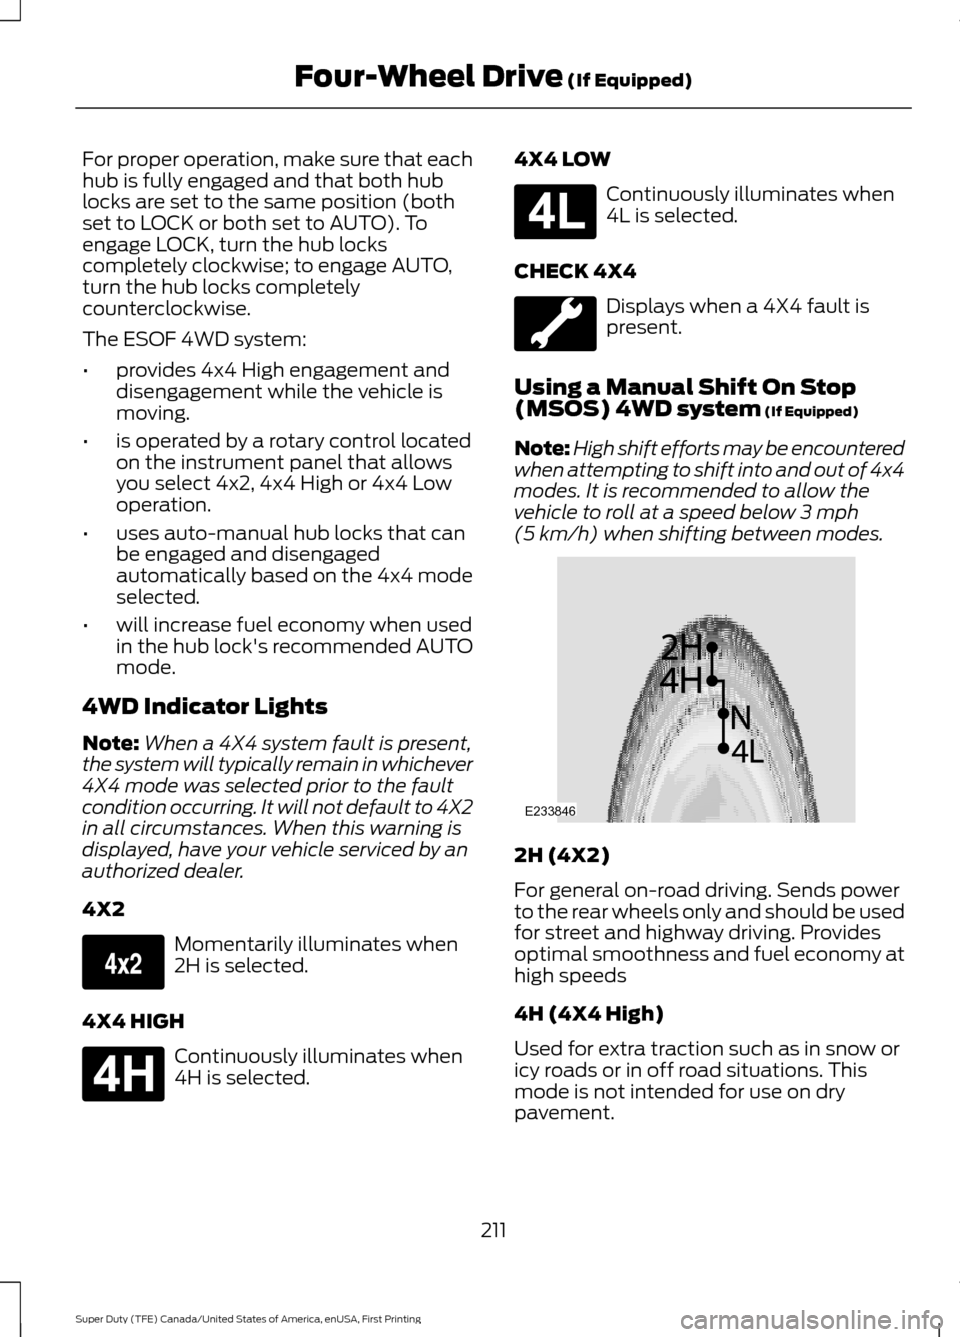
4X2 Momentarily illuminates when
2H is selected.
4X4 HIGH Continuously illuminates when
4H is selected. 4X4 LOW Continuously illuminates when
4L is selected.
CHECK 4X4 Displays when a 4X4 fault is
present.
Using a Manual Shift On Stop
(MSOS) 4WD system (If Equipped)
Note: High shift efforts may be encountered
when attempting to shift into and out of 4x4
modes. It is recommended to allow the
vehicle to roll at a speed below
3 mph
(5 km/h) when shifting between modes. 2H (4X2)
For general on-road driving. Sends power
to the rear wheels only and should be used
for street and highway driving. Provides
optimal smoothness and fuel economy at
high speeds
4H (4X4 High)
Used for extra traction such as in snow or
icy roads or in off road situations. This
mode is not intended for use on dry
pavement.
211
Super Duty (TFE) Canada/United States of America, enUSA, First Printing Four-Wheel Drive
(If Equipped)E163173 E181779 E181780 E233846
Page 226 of 636

Apply the parking brake whenever your
vehicle is parked. Press the pedal
downward to set the parking brake. The
brake warning lamp in the instrument
cluster will illuminate and remains
illuminated until the parking brake is
released.
To release, pull the brake release lever
located at the lower left side of the
instrument panel.
If you are parking your vehicle on a grade
or with a trailer, press and hold the brake
pedal down, then set the parking brake.
There may be a little vehicle movement as
the parking brake sets to hold the vehicle's
weight. This is normal and should be no
reason for concern. If needed, press and
hold the service brake pedal down, then
try reapplying the parking brake. Chock the
wheels if required. If the parking brake
cannot hold the weight of the vehicle, the
parking brake may need to be serviced or
the vehicle may be overloaded.
HILL START ASSIST
WARNINGS
The system does not replace the
parking brake. When you leave your
vehicle, always apply the parking
brake and shift the transmission into park
(P) (automatic transmission) or first gear
(1) (manual transmission). You must remain in your vehicle once
you have activated the system.
During all times, you are responsible
for controlling your vehicle,
supervising the system and
intervening, if required. If the engine is revved excessively, or
if a malfunction is detected, the
system will be deactivated. The system makes it easier to pull away
when your vehicle is on a slope without the
need to use the parking brake.
When the system is active, your vehicle will
remain stationary on the slope for two to
three seconds after you release the brake
pedal. This allows you time to move your
foot from the brake to the accelerator
pedal. The brakes release automatically
when the engine has sufficient torque to
prevent your vehicle from rolling down the
grade. This is an advantage when pulling
away on a slope, for example from a car
park ramp, traffic lights or when reversing
uphill into a parking space.
The system will activate automatically on
any slope that will cause significant vehicle
rollback. For vehicles with a manual
transmission, you can switch this feature
off using the information display. See
Information Displays (page 111). The
system will remain on or off depending on
how it was last set.
Note: There is no warning lamp to indicate
the system is either on or off.
Note: If your vehicle is equipped with Auto
Hold, Hill Start Assist will not be available
while Auto Hold is active.
Using Hill Start Assist
1. Bring your vehicle to a complete standstill. Keep the brake pedal
pressed and select an uphill gear (for
example, first (1) when facing uphill or
reverse (R) when facing downhill).
2. If the sensors detect that your vehicle is on a slope, the system will activate
automatically.
3. When you remove your foot from the brake pedal, your vehicle will remain
on the slope without rolling away for
about two or three seconds. This hold
time will automatically be extended if
you are in the process of driving off.
223
Super Duty (TFE) Canada/United States of America, enUSA, First Printing Brakes