2017 FORD POLICE INTERCEPTOR SEDAN tow
[x] Cancel search: towPage 60 of 358
WINDSHIELD WIPERS
Note:
Fully defrost the windshield before
you switch the windshield wipers on.
Note: Make sure you switch the windshield
wipers off before entering a car wash.
Note: Clean the windshield and wiper
blades if they begin to leave streaks or
smears. If that does not resolve the issue,
install new wiper blades. See Changing
the Wiper Blades (page 187).
Note: Do not operate the wipers on a dry
windshield. This may scratch the glass,
damage the wiper blades or cause the wiper
motor to burn out. Always use the
windshield washers before wiping a dry
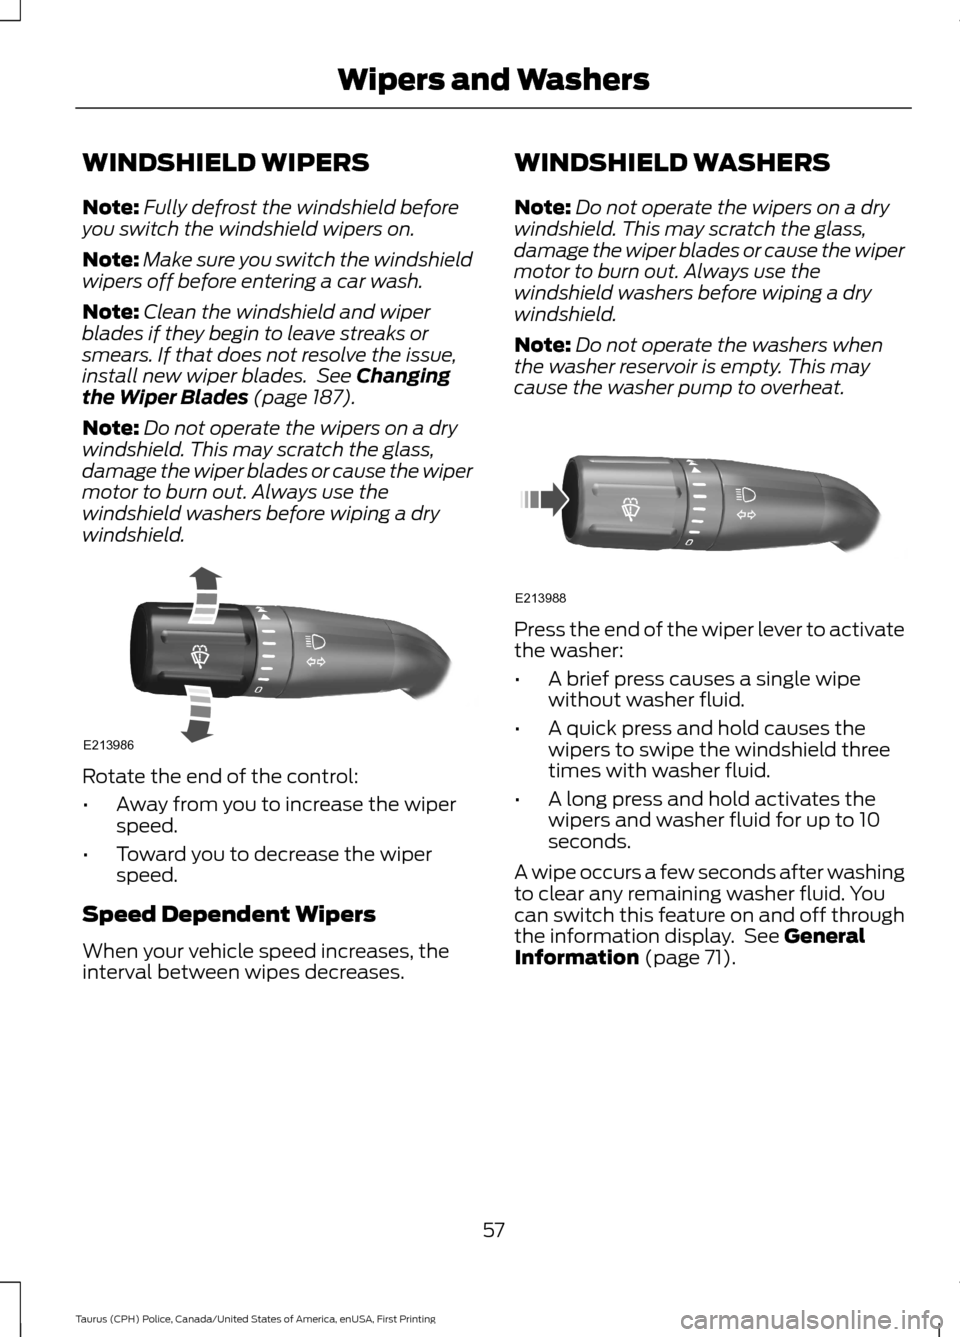
windshield. Rotate the end of the control:
•
Away from you to increase the wiper
speed.
• Toward you to decrease the wiper
speed.
Speed Dependent Wipers
When your vehicle speed increases, the
interval between wipes decreases. WINDSHIELD WASHERS
Note:
Do not operate the wipers on a dry
windshield. This may scratch the glass,
damage the wiper blades or cause the wiper
motor to burn out. Always use the
windshield washers before wiping a dry
windshield.
Note: Do not operate the washers when
the washer reservoir is empty. This may
cause the washer pump to overheat. Press the end of the wiper lever to activate
the washer:
•
A brief press causes a single wipe
without washer fluid.
• A quick press and hold causes the
wipers to swipe the windshield three
times with washer fluid.
• A long press and hold activates the
wipers and washer fluid for up to 10
seconds.
A wipe occurs a few seconds after washing
to clear any remaining washer fluid. You
can switch this feature on and off through
the information display. See
General
Information (page 71).
57
Taurus (CPH) Police, Canada/United States of America, enUSA, First Printing Wipers and WashersE213986 E213988
Page 61 of 358
GENERAL INFORMATION
Condensation in Lamp Assemblies
Exterior lamps have vents to
accommodate normal changes in air
pressure.
Condensation can be a natural by-product
of this design. When moist air enters the
lamp assembly through the vents, there is
a possibility that condensation can occur
when the temperature is cold. When
normal condensation occurs, a fine mist
can form on the interior of the lens. The
fine mist eventually clears and exits
through the vents during normal operation.
Clearing time may take as long as 48 hours
under dry weather conditions.
Examples of acceptable condensation are:
•
The presence of a fine mist (no streaks,
drip marks or large droplets).
• A fine mist covers less than 50% of the
lens.
Examples of unacceptable condensation
are:
• A water puddle inside the lamp.
• Streaks, drip marks or large droplets
present on the interior of the lens.
If you see any unacceptable condensation,
have your vehicle checked by an authorized
dealer.
Silent Mode (If Equipped)
You can switch on Silent Mode in the
information display. See
Information
Displays (page 71).
When you enable Silent Mode, the
following features may be disabled:
• Welcome/farewell lighting.
• Courtesy lighting.
• Daytime running lamps. Note:
Silent Mode does not disable the
daytime running lamps in markets that
mandate this feature by law.
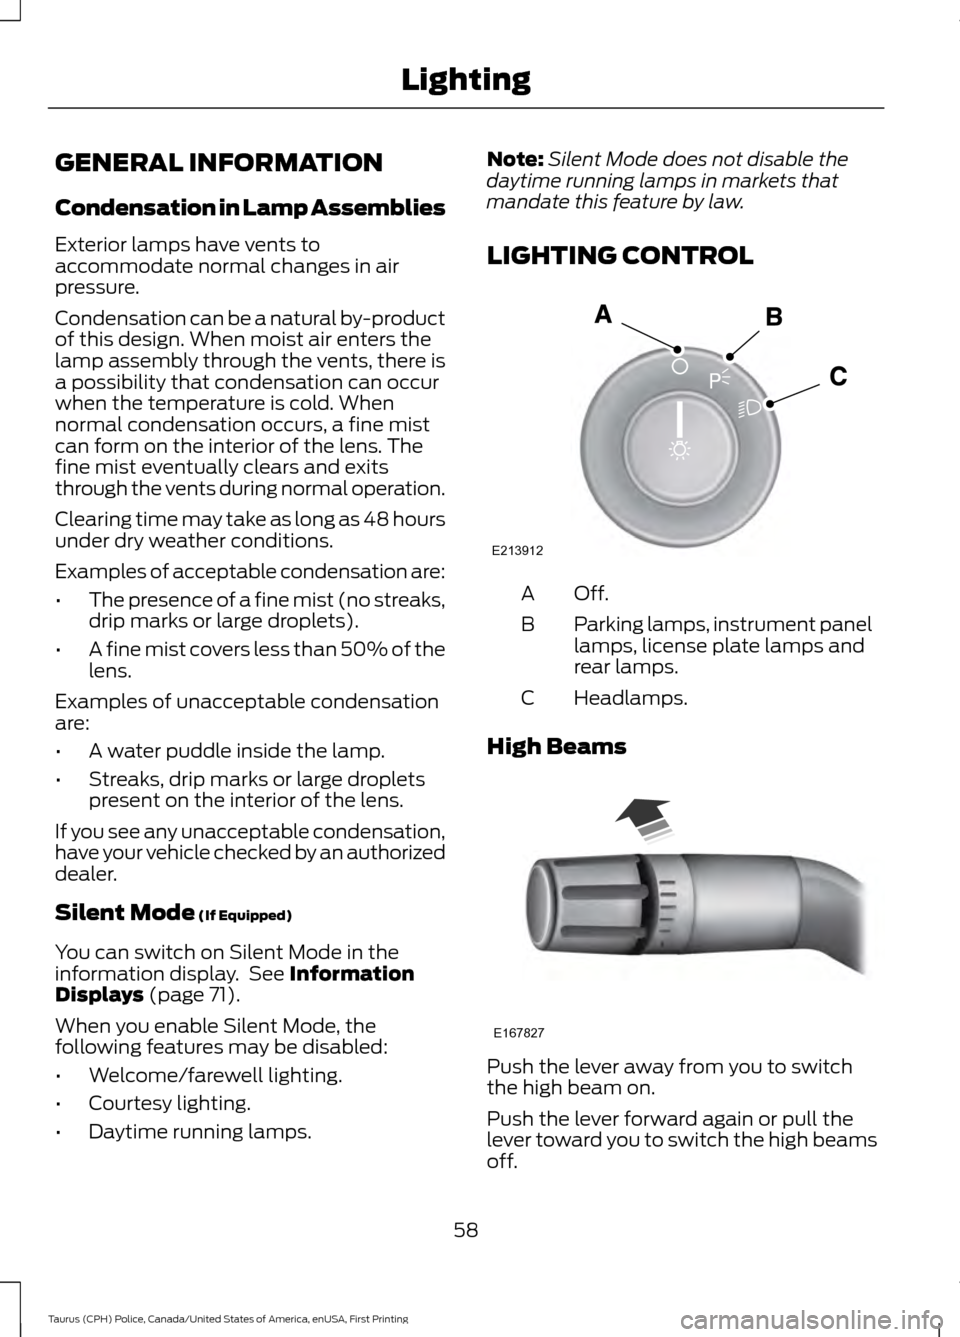
LIGHTING CONTROL Off.A
Parking lamps, instrument panel
lamps, license plate lamps and
rear lamps.
B
Headlamps.
C
High Beams Push the lever away from you to switch
the high beam on.
Push the lever forward again or pull the
lever toward you to switch the high beams
off.
58
Taurus (CPH) Police, Canada/United States of America, enUSA, First Printing LightingE213912 E167827
Page 62 of 358
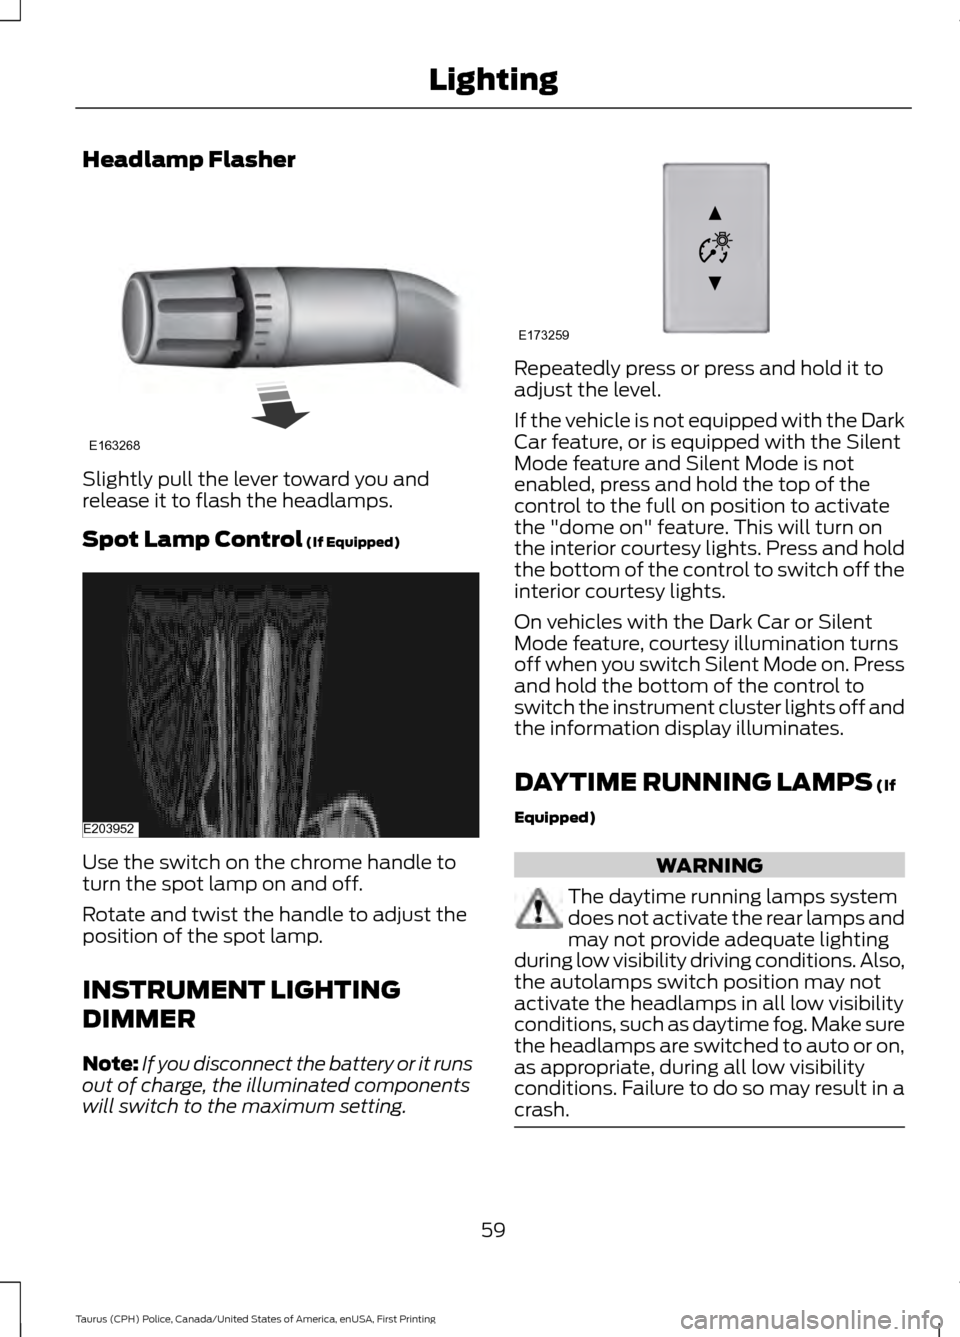
Headlamp Flasher
Slightly pull the lever toward you and
release it to flash the headlamps.
Spot Lamp Control (If Equipped)
Use the switch on the chrome handle to
turn the spot lamp on and off.
Rotate and twist the handle to adjust the
position of the spot lamp.
INSTRUMENT LIGHTING
DIMMER
Note:
If you disconnect the battery or it runs
out of charge, the illuminated components
will switch to the maximum setting. Repeatedly press or press and hold it to
adjust the level.
If the vehicle is not equipped with the Dark
Car feature, or is equipped with the Silent
Mode feature and Silent Mode is not
enabled, press and hold the top of the
control to the full on position to activate
the "dome on" feature. This will turn on
the interior courtesy lights. Press and hold
the bottom of the control to switch off the
interior courtesy lights.
On vehicles with the Dark Car or Silent
Mode feature, courtesy illumination turns
off when you switch Silent Mode on. Press
and hold the bottom of the control to
switch the instrument cluster lights off and
the information display illuminates.
DAYTIME RUNNING LAMPS
(If
Equipped) WARNING
The daytime running lamps system
does not activate the rear lamps and
may not provide adequate lighting
during low visibility driving conditions. Also,
the autolamps switch position may not
activate the headlamps in all low visibility
conditions, such as daytime fog. Make sure
the headlamps are switched to auto or on,
as appropriate, during all low visibility
conditions. Failure to do so may result in a
crash. 59
Taurus (CPH) Police, Canada/United States of America, enUSA, First Printing LightingE163268 E203952 E173259
Page 66 of 358

EXTERIOR MIRRORS
Power Exterior Mirrors
WARNING
Do not adjust the mirrors when your
vehicle is moving.
Left-hand mirror.
A
Adjustment control.
B
Right-hand mirror.
C
To adjust your mirrors, switch your vehicle
on (with the ignition in accessory mode or
the engine running) and then:
1. Select the mirror you want to adjust. The control lights.
2. Use the adjustment control to adjust the position of the mirror.
3. Press the mirror control again. The control light turns off.
Fold-Away Exterior Mirrors
Push the mirror toward the door window
glass. Make sure that you fully engage the
mirror in its support when returning it to its
original position. Heated Exterior Mirrors (If Equipped)
See Heated Windows and Mirrors (page
82
).
Integrated Blind Spot Mirror
(If
Equipped) WARNING
Objects in the blind spot mirror are
closer than they appear.
Blind spot mirrors have an integrated
convex mirror built into the upper outboard
corner of the exterior mirrors. They can
assist you by increasing visibility along the
side of your vehicle.
Check the main mirror first before a lane
change, then check the blind spot mirror.
If no vehicles are present in the blind spot
mirror and the traffic in the adjacent lane
is at a safe distance, signal that you are
going to change lanes. Glance over your
shoulder to verify traffic is clear, and
carefully change lanes.
63
Taurus (CPH) Police, Canada/United States of America, enUSA, First Printing Windows and MirrorsE144073
Page 67 of 358

The image of the approaching vehicle is
small and near the inboard edge of the
main mirror when it is at a distance. The
image becomes larger and begins to move
outboard across the main mirror as the
vehicle approaches (A). The image
transitions from the main mirror and begins
to appear in the blind spot mirror as the
vehicle approaches (B). The vehicle
transitions to your peripheral field of view
as it leaves the blind spot mirror (C).
Blind Spot Information System (If
Equipped)
See
Blind Spot Information System
(page 126). INTERIOR MIRROR WARNING
Do not adjust the mirror when your
vehicle is moving.
Note:
Do not clean the housing or glass of
any mirror with harsh abrasives, fuel or other
petroleum or ammonia-based cleaning
products.
You can adjust the interior mirror to your
preference. Some mirrors also have a
second pivot point. This lets you move the
mirror head up or down and from side to
side.
Pull the tab below the mirror toward you
to reduce glare at night.
Auto-Dimming Mirror
(If Equipped)
Note: Do not block the sensors on the front
and back of the mirror. Mirror performance
may be affected. A rear center passenger or
raised rear center head restraint may also
block light from reaching the sensor.
The mirror will dim automatically to reduce
glare when bright lights are detected from
behind your vehicle. It will automatically
return to normal reflection when you select
reverse gear to make sure you have a clear
view when backing up.
64
Taurus (CPH) Police, Canada/United States of America, enUSA, First Printing Windows and MirrorsA
B
C
E138665
Page 68 of 358
SUN VISORS
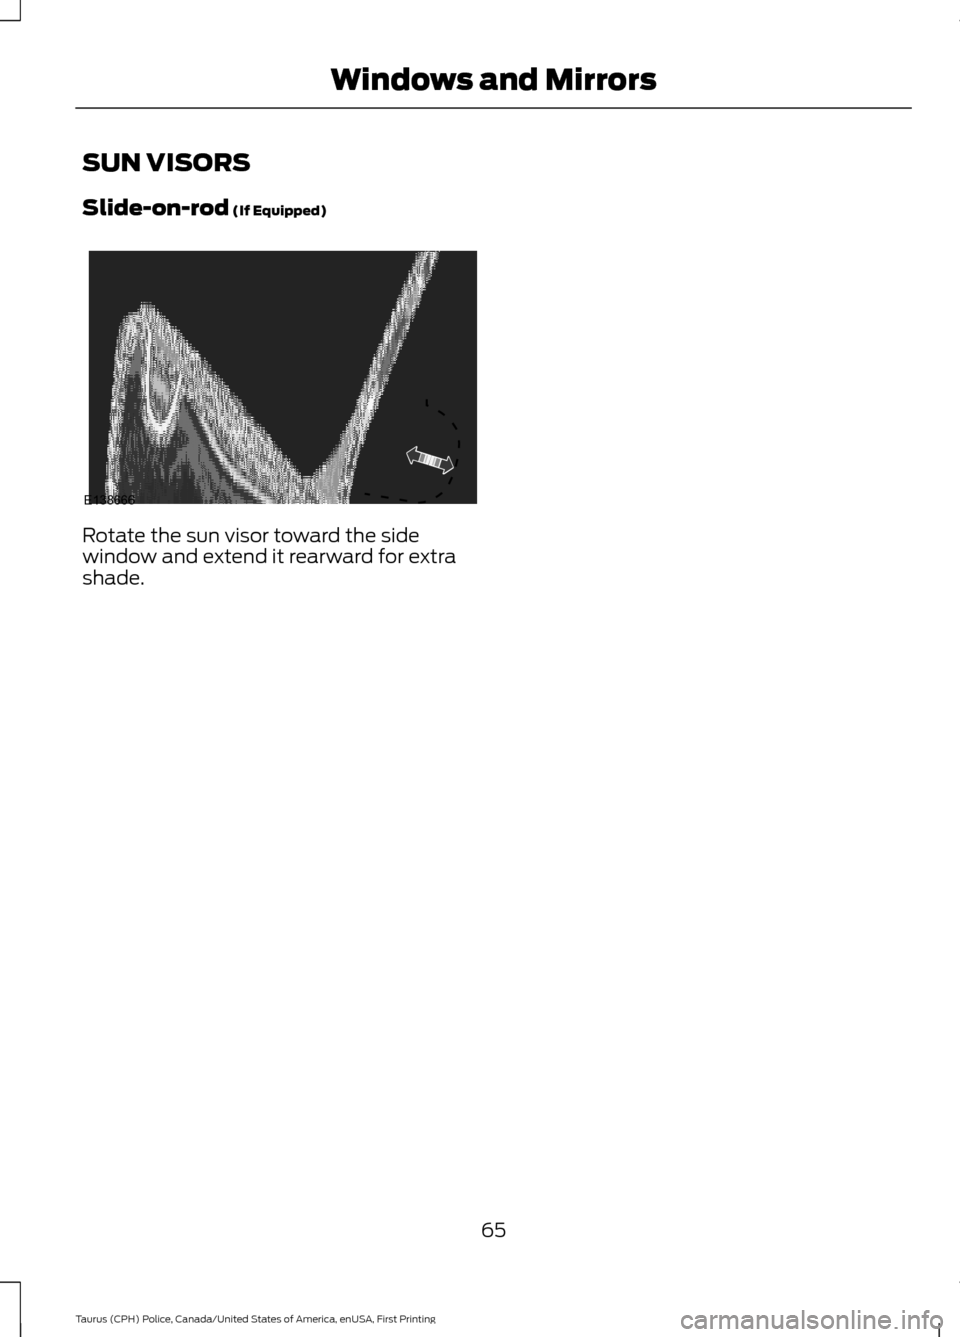
Slide-on-rod (If Equipped)
Rotate the sun visor toward the side
window and extend it rearward for extra
shade.
65
Taurus (CPH) Police, Canada/United States of America, enUSA, First Printing Windows and MirrorsE138666
Page 70 of 358
Switch the ignition on. The fuel gauge will
indicate approximately how much fuel is
left in the fuel tank. The arrow adjacent to
the fuel pump symbol indicates on which
side of your vehicle the fuel filler door is
located.
The needle should move toward F when
you refuel your vehicle. If the needle points
to E after adding fuel, this indicates your
vehicle needs service soon.
After refueling some variability in needle
position is normal:
•
It may take a short time for the needle
to reach full after leaving the gas
station. This is normal and depends
upon the slope of pavement at the gas
station.
• The fuel amount dispensed into the
tank is a little less or more than the
gauge indicated. This is normal and
depends upon the slope of pavement
at the gas station.
• If the gas station nozzle shuts off
before the tank is full, try a different
gas pump nozzle.
• There is a small reserve left in the tank
when the fuel gauge reaches empty.
Low Fuel Reminder
A low fuel reminder triggers when the
distance to empty reaches, 75 mi (120 km),
50 mi (80 km), 25 mi (40 km), 12 mi
(20 km), 0 mi (0 km).
Variations:
Note: The low fuel reminder can appear at
different fuel gauge positions depending on
fuel economy conditions. This variation is
normal. WARNING LAMPS AND
INDICATORS
The following warning lamps and
indicators alert you to a vehicle condition
that may become serious. Some lamps
illuminate when you start your vehicle to
make sure they work. If any lamps remain
on after starting your vehicle, refer to the
respective system warning lamp for further
information.
Note:
Some warning indicators appear in
the information display and function the
same as a warning lamp, but do not display
when you start your vehicle.
Airbag readiness If this light fails to illuminate
when the ignition is turned on,
continues to flash or remains on,
contact your authorized dealer as soon as
possible. A chime will sound when there is
a malfunction in the indicator light.
Anti-Lock Braking System If it illuminates when you are
driving, this indicates a
malfunction. You continue to
have the normal braking system (without
ABS) unless the brake system warning
lamp is also illuminated. Have the system
checked by an authorized dealer.
Brake System It illuminates when you engage
the parking brake with the
ignition on.
If it illuminates when you are driving, check
that the parking brake is not engaged. If
the parking brake is not engaged, this
indicates low brake fluid level or a brake
system malfunction. Have the system
checked immediately by an authorized
dealer.
67
Taurus (CPH) Police, Canada/United States of America, enUSA, First Printing Instrument ClusterE67017 E144522
Page 85 of 358
Recommended Settings for
Cooling
•
Adjust the fan speed to the second
speed setting.
• Adjust the temperature control to the
midway point of the cold settings.
• Adjust the air distribution control to the
instrument panel air vents position.
Vehicle Stationary for Extended
Periods During Extreme High
Ambient Temperatures
• Apply the parking brake.
• Move the transmission selector lever
to position P or neutral.
• Adjust the temperature control to the
MAX A/C
position.
• Adjust the fan speed to the lowest
speed setting.
Side Window Defogging in Cold
Weather
• Adjust the air distribution control to the
instrument panel and windshield air
vents positions.
• Press the
A/C button.
• Adjust the temperature control to the
desired setting.
• Adjust the fan speed to the highest
setting.
• Direct the instrument panel side air
vents toward the side windows.
• Close the instrument panel vents. Maximum Cooling Performance in
Instrument Panel or Instrument
Panel and Footwell Positions
•
Adjust the temperature control to the
lowest setting.
• Press the
A/C and recirculated air
buttons.
• Adjust the fan speed to the highest
setting initially and then adjust it to suit
the desired comfort level.
HEATED WINDOWS AND
MIRRORS
Heated Rear Window
Note: Make sure the engine is running
before operating the heated windows. Press the button to clear the
heated rear window of thin ice
and fog. The heated rear window
will automatically turn off after a short
period of time. Start the engine before you
switch the heated rear window on.
Note: Do not use razor blades or other
sharp objects to clean or remove decals
from the inside of the heated rear window.
The vehicle warranty does not cover
damage caused to the heated rear window
grid lines.
Heated Exterior Mirror
(If Equipped)
When you switch the heated rear window
on, the heated exterior mirrors will
automatically turn on.
Note: Do not remove ice from the mirrors
with a scraper or adjust the mirror glass
when it is frozen in place.
Note: Do not clean the mirror housing or
glass with harsh abrasives, fuel or other
petroleum-based cleaning products.
82
Taurus (CPH) Police, Canada/United States of America, enUSA, First Printing Climate ControlE184884