2017 FORD FUSION (AMERICAS) ignition
[x] Cancel search: ignitionPage 230 of 528
2.
Select the neutral tow option under the
vehicle settings menu in the
information display. See General
Information (page 93).
3. Press and hold the OK button to start the neutral tow process.
4. Press the brake pedal and select N on the rotary shift transmission.
5. Turn the ignition off by pressing the engine START button without pressing
the brake pedal.
If the process completes successfully:
• the N on the rotary shift transmission
blinks slowly.
• A confirmation message appears in the
information display.
Note: If the parking brake is applied, a
message appears in the information display.
Note: Do not exceed 65 mph (105 km/h).
Note: Start the engine and allow it to run
for five minutes at the beginning of each day
and every six hours (or fewer). Shut the
engine off and verify that a message
appears indicating neutral tow has been
engaged, before continuing to tow.
Exit Neutral Tow mode, make sure the
ignition is on (engine can be on or off),
press the brake pedal and select P on the
rotary shift transmission.
If the process is completed successfully,
a message appears indicating that neutral
tow has disengaged in both the instrument
cluster and rotary shift transmission
display P.
227
Fusion (CC7) Canada/United States of America, enUSA, First Printing Towing
Page 235 of 528
This program is separate from the New
Vehicle Limited Warranty, but the coverage
is concurrent with the powertrain coverage
period of your vehicle.
Canadian customers who require roadside
assistance, call 1-800-665-2006.
Vehicles Sold in Canada: Using
Roadside Assistance
Complete the roadside assistance
identification card and place it in your
wallet for quick reference.
In Canada, this card is found in the
Warranty Guide in the glove compartment
of your vehicle.
Vehicles Sold in Canada: Roadside
Assistance Program Coverage
The service is available 24 hours a day,
seven days a week.
Canadian roadside coverage and benefits
may differ from the U.S. coverage.
For complete program coverage details
you may contact your dealer, you can call
us in Canada at 1-800-665-2006, or visit
our website at www.ford.ca.
HAZARD WARNING FLASHERS
Note:
If used when the vehicle is not
running, the battery will lose charge. There
may be insufficient power to restart your
vehicle. The hazard warning button is
located on the instrument panel.
Use it when your vehicle is
creating a safety hazard for other
motorists.
• Press the button to turn on the hazard
warning function, and the front and
rear direction indicators will flash.
• Press the button again to turn them
off. FUEL SHUTOFF WARNING
Failure to inspect and, if necessary,
repair fuel leaks after a collision may
increase the risk of fire and serious
injury. Ford Motor Company recommends
that the fuel system be inspected by an
authorized dealer after any collision. In the event of a moderate to severe
collision, this vehicle includes a fuel pump
shutoff feature that stops the flow of fuel
to the engine. Not every impact will cause
a shutoff.
Should your vehicle shut off after a
collision, you may restart your vehicle. For
vehicles equipped with a key system:
1. Switch off the ignition.
2. Switch on the ignition.
3. Repeat Steps 1 and 2 to re-enable the
fuel pump.
For vehicles equipped with a push button
start system:
1. Press the START/STOP button to
switch off the ignition.
2. Press the brake pedal and press the START/STOP
button to switch on the
ignition.
3. Remove your foot from the brake pedal
and press the
START/STOP button
to switch off the ignition.
4. You can either attempt to start the engine by pressing the brake pedal and
the
START/STOP button, or switch
on the ignition only by pressing the
START/STOP
button without
pressing the brake pedal. Both ways
re-enable the fuel system.
232
Fusion (CC7) Canada/United States of America, enUSA, First Printing Roadside Emergencies
Page 238 of 528
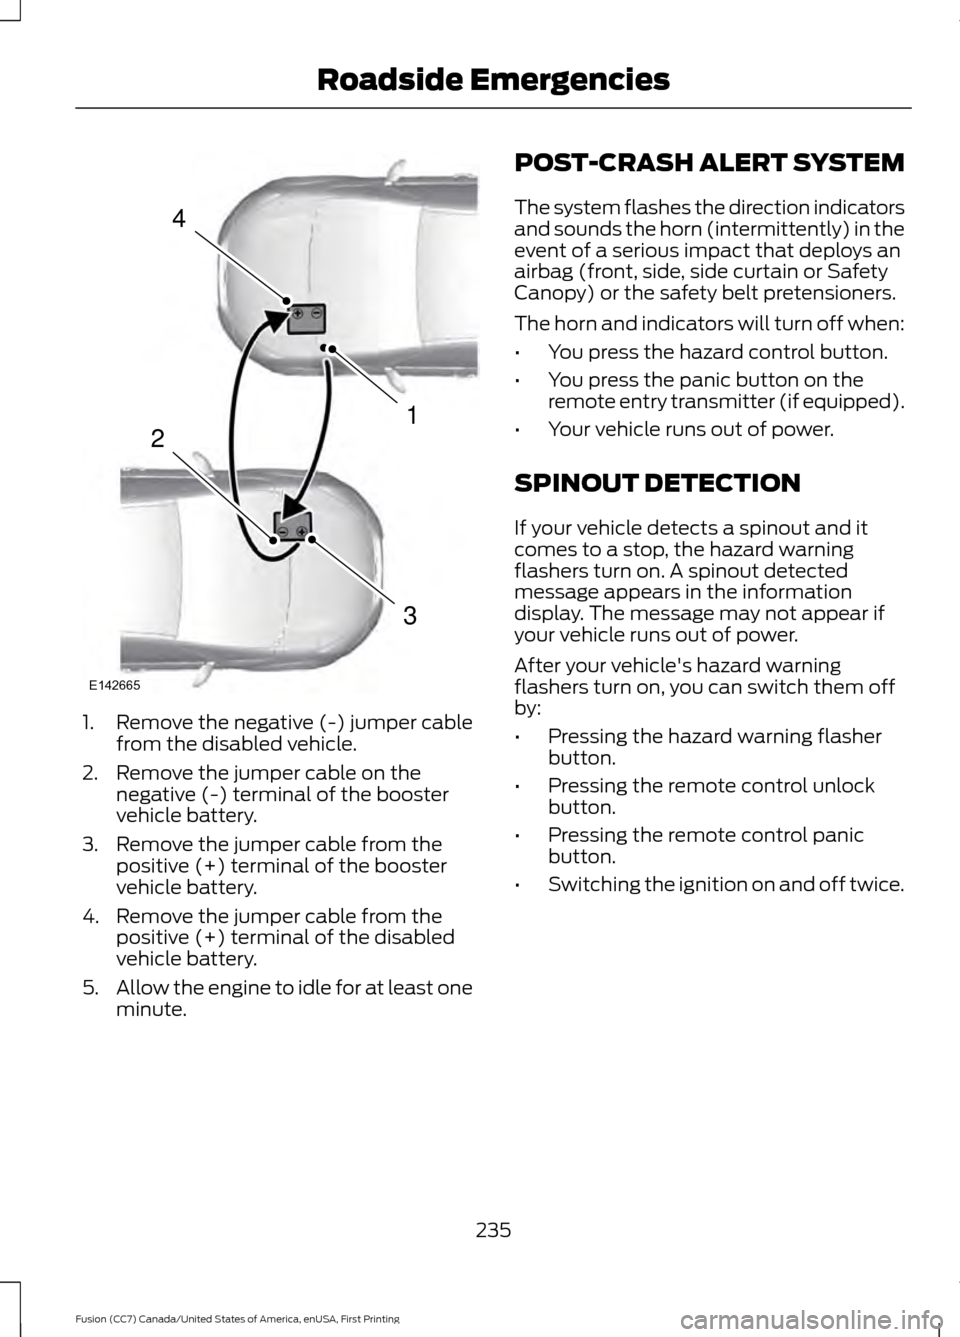
1. Remove the negative (-) jumper cable
from the disabled vehicle.
2. Remove the jumper cable on the negative (-) terminal of the booster
vehicle battery.
3. Remove the jumper cable from the positive (+) terminal of the booster
vehicle battery.
4. Remove the jumper cable from the positive (+) terminal of the disabled
vehicle battery.
5. Allow the engine to idle for at least one
minute. POST-CRASH ALERT SYSTEM
The system flashes the direction indicators
and sounds the horn (intermittently) in the
event of a serious impact that deploys an
airbag (front, side, side curtain or Safety
Canopy) or the safety belt pretensioners.
The horn and indicators will turn off when:
•
You press the hazard control button.
• You press the panic button on the
remote entry transmitter (if equipped).
• Your vehicle runs out of power.
SPINOUT DETECTION
If your vehicle detects a spinout and it
comes to a stop, the hazard warning
flashers turn on. A spinout detected
message appears in the information
display. The message may not appear if
your vehicle runs out of power.
After your vehicle's hazard warning
flashers turn on, you can switch them off
by:
• Pressing the hazard warning flasher
button.
• Pressing the remote control unlock
button.
• Pressing the remote control panic
button.
• Switching the ignition on and off twice.
235
Fusion (CC7) Canada/United States of America, enUSA, First Printing Roadside Emergencies4
1
3
2
E142665
Page 249 of 528

Protected components
Fuse amp rating
Fuse or relay number
Panoramic moonroof.
30A 3
1
Starter relay.
-
2
Rain sensor.
15A 1
3
Blower motor relay.
—
4
Power point 3 - Back of console.
20A 3
5
Not used.
—
6
Powertrain control module - vehicle power
1.
20A
1
7
Powertrain control module power.
Powertrain control module - vehicle power
2.
20A
1
8
Emission components.
Powertrain control module relay.
—
9
Power point 1 - driver front.
20A 3
10
Powertrain control module - vehicle power
4.
15A
2
11
Ignition coils.
Powertrain control module - vehicle power
3.
15A
2
12
Non-emission components.
Not used.
10A 2
13
Not used.
10A 2
14
Run-start relay.
—
15
Power point 2 - console.
20A 3
16
Not used.
—
17
Not used.
—
18
Run-start electronic power assist steering.
10A 1
19
Adaptive cruise control.
10A 1
20
246
Fusion (CC7) Canada/United States of America, enUSA, First Printing Fuses
Page 274 of 528
Run the tip of your fingers over the edge of
the blade to check for roughness.
Clean the wiper blades with washer fluid
or water applied with a soft sponge or
cloth.
CHANGING THE WIPER
BLADES
The wiper arms can be manually moved
when the ignition is off. This allows for ease
of blade replacement and cleaning under
the blades.
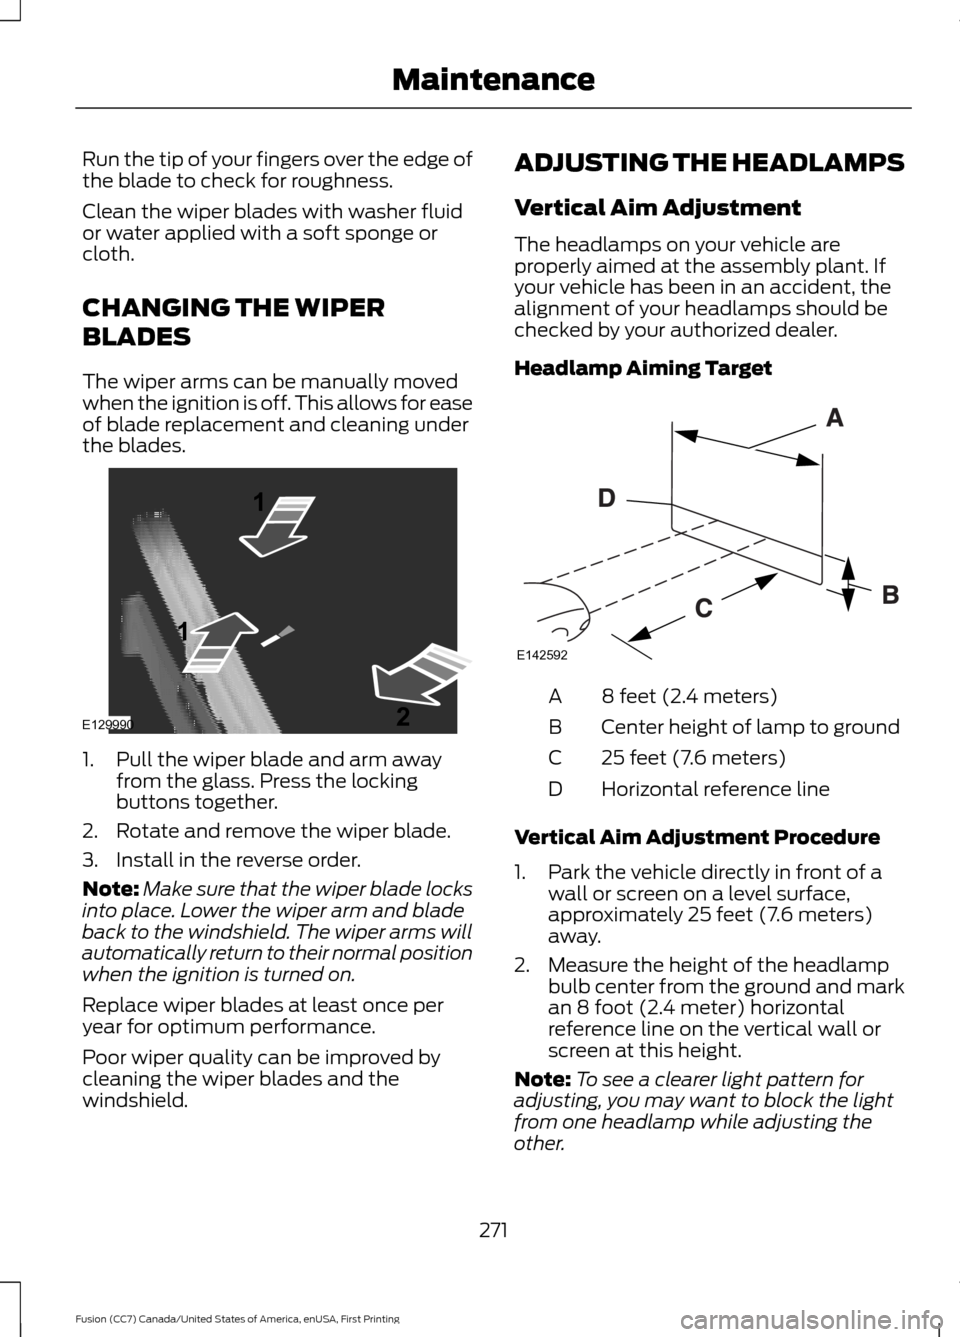
1. Pull the wiper blade and arm away
from the glass. Press the locking
buttons together.
2. Rotate and remove the wiper blade.
3. Install in the reverse order.
Note: Make sure that the wiper blade locks
into place. Lower the wiper arm and blade
back to the windshield. The wiper arms will
automatically return to their normal position
when the ignition is turned on.
Replace wiper blades at least once per
year for optimum performance.
Poor wiper quality can be improved by
cleaning the wiper blades and the
windshield. ADJUSTING THE HEADLAMPS
Vertical Aim Adjustment
The headlamps on your vehicle are
properly aimed at the assembly plant. If
your vehicle has been in an accident, the
alignment of your headlamps should be
checked by your authorized dealer.
Headlamp Aiming Target
8 feet (2.4 meters)
A
Center height of lamp to ground
B
25 feet (7.6 meters)
C
Horizontal reference line
D
Vertical Aim Adjustment Procedure
1. Park the vehicle directly in front of a wall or screen on a level surface,
approximately 25 feet (7.6 meters)
away.
2. Measure the height of the headlamp bulb center from the ground and mark
an 8 foot (2.4 meter) horizontal
reference line on the vertical wall or
screen at this height.
Note: To see a clearer light pattern for
adjusting, you may want to block the light
from one headlamp while adjusting the
other.
271
Fusion (CC7) Canada/United States of America, enUSA, First Printing MaintenanceE129990
1
1 2 E142592
Page 277 of 528
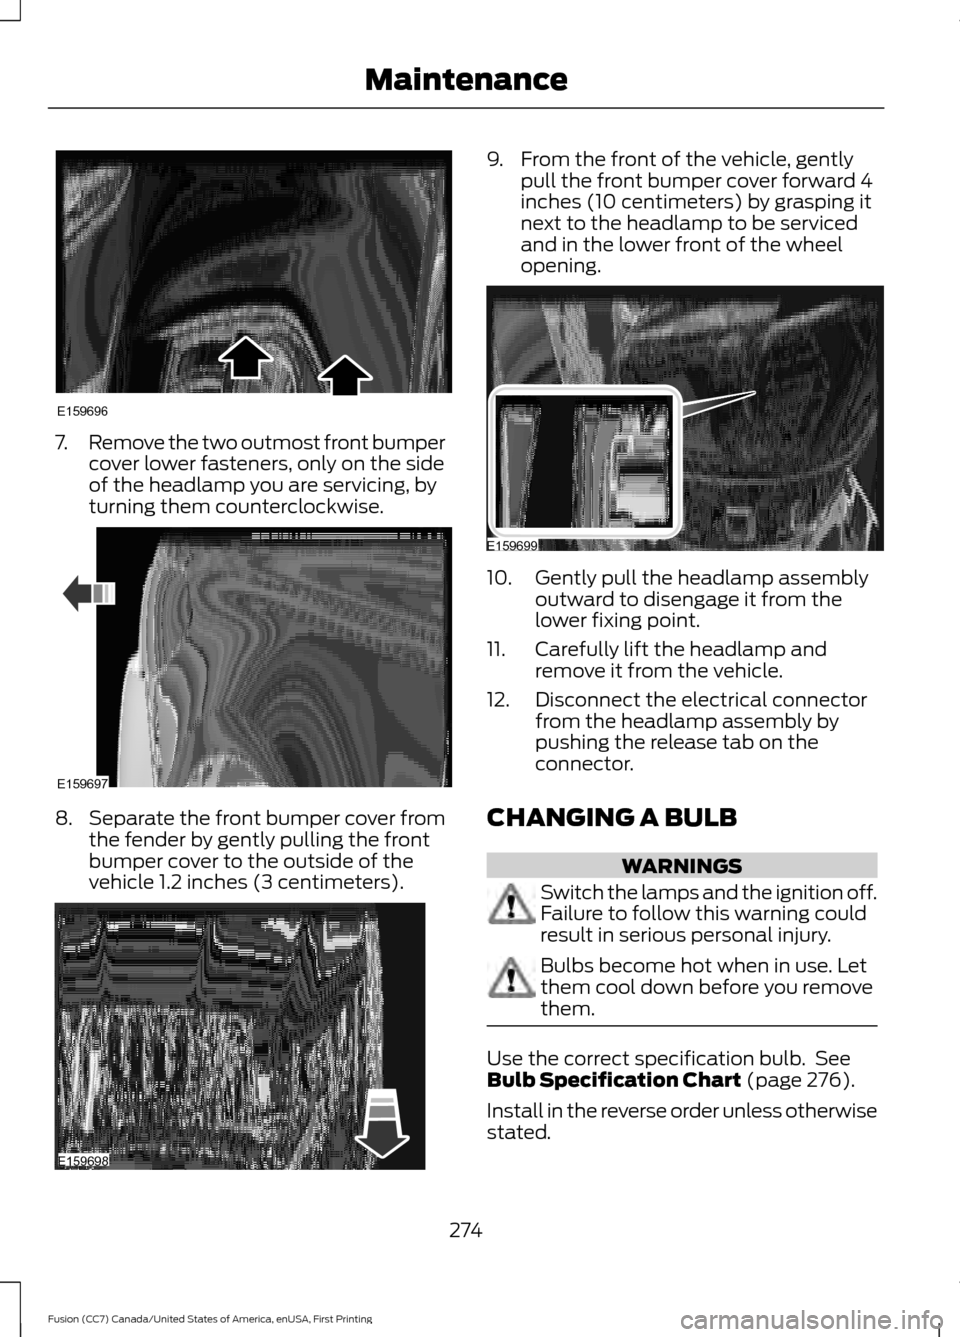
7.
Remove the two outmost front bumper
cover lower fasteners, only on the side
of the headlamp you are servicing, by
turning them counterclockwise. 8.
Separate the front bumper cover from
the fender by gently pulling the front
bumper cover to the outside of the
vehicle 1.2 inches (3 centimeters). 9. From the front of the vehicle, gently
pull the front bumper cover forward 4
inches (10 centimeters) by grasping it
next to the headlamp to be serviced
and in the lower front of the wheel
opening. 10. Gently pull the headlamp assembly
outward to disengage it from the
lower fixing point.
11. Carefully lift the headlamp and remove it from the vehicle.
12. Disconnect the electrical connector from the headlamp assembly by
pushing the release tab on the
connector.
CHANGING A BULB WARNINGS
Switch the lamps and the ignition off.
Failure to follow this warning could
result in serious personal injury.
Bulbs become hot when in use. Let
them cool down before you remove
them.
Use the correct specification bulb. See
Bulb Specification Chart (page 276).
Install in the reverse order unless otherwise
stated.
274
Fusion (CC7) Canada/United States of America, enUSA, First Printing MaintenanceE159696 E159697 E159698 E159699
Page 284 of 528
•
Do not allow wax to come in contact
with any non-body (low-gloss black)
colored trim. The wax will discolor or
stain the parts over time.
•Roof racks.
• Bumpers.
• Grained door handles.
• Side moldings.
• Mirror housings.
• Windshield cowl area.
• Do not apply wax to glass areas.
• After waxing, your car's paint should
feel smooth, and be free of streaks and
smudges.
CLEANING THE ENGINE
Engines are more efficient when they are
clean because grease and dirt buildup keep
the engine warmer than normal.
When washing:
• Take care when using a power washer
to clean the engine. The high-pressure
fluid could penetrate the sealed parts
and cause damage.
• Do not spray a hot engine with cold
water to avoid cracking the engine
block or other engine components.
• Spray Motorcraft Engine Shampoo and
Degreaser on all parts that require
cleaning and pressure rinse clean. In
Canada, use Motorcraft Engine
Shampoo.
• Never wash or rinse the engine while it
is hot or running; water in the running
engine may cause internal damage. •
Never wash or rinse any ignition coil,
spark plug wire or spark plug well, or
the area in and around these locations.
• Cover the battery, power distribution
box, and air filter assembly to prevent
water damage when cleaning the
engine.
CLEANING THE WINDOWS AND
WIPER BLADES
Car wash chemicals and environmental
fallout can result in windshield and wiper
blade contamination. Dirty windshield and
wipers will result in poor windshield wiper
operation. Keep the windshield and wiper
blades clean to maintain windshield wiper
performance.
To clean the windshield and wiper blades:
• Clean the windshield with a
non-abrasive glass cleaner. When
cleaning the interior of the windshield,
avoid getting any glass cleaner on the
instrument panel or door panels. Wipe
any glass cleaner off these surfaces
immediately.
• For windshields contaminated with
tree sap, chemicals, wax or bugs, clean
the entire windshield using steel wool
(no greater than 0000 grade) in a
circular motion and rinse with water.
• Clean the wiper blades with isopropyl
rubbing alcohol or windshield washer
concentrate.
Note: Do not use razor blades or other
sharp objects to clean or remove decals
from the inside of the heated rear window.
The vehicle warranty does not cover
damage caused to the heated rear window
grid lines.
281
Fusion (CC7) Canada/United States of America, enUSA, First Printing Vehicle Care
Page 324 of 528

ENGINE SPECIFICATIONS - 1.5L ECOBOOST™
1.5L EcoBoost engine
Engine
92
Cubic inches
1-3-4-2
Firing order
10.0:1
Compression ratio
0.025-0.029 in. (0.65-0.75 mm)
Spark plug gap
Coil on plug
Ignition system
Drivebelt Routing ENGINE SPECIFICATIONS - 2.0L ECOBOOST™
2.0L EcoBoost engine
Engine
122
Cubic inches
1-3-4-2
Firing order
9.3:1
Compression ratio
0.027-0.031 in. (0.70-0.80 mm)
Spark plug gap
Coil on plug
Ignition system
321
Fusion (CC7) Canada/United States of America, enUSA, First Printing Capacities and SpecificationsE167586