2017 FORD FUSION (AMERICAS) steering
[x] Cancel search: steeringPage 232 of 528
When driving through standing water, drive
very slowly and do not stop your vehicle.
Your brake performance and traction may
be limited. After driving through water and
as soon as it is safe to do so:
•
Lightly press the brake pedal to dry the
brakes and to check that they work.
• Check that the horn works.
• Check that the exterior lights work.
• Turn the steering wheel to check that
the steering power assist works.
FLOOR MATS WARNINGS
Always use floor mats that are
designed to fit the foot well of your
vehicle. Only use floor mats that
leave the pedal area unobstructed. Only
use floor mats that are firmly secured to
retention posts so that they cannot slip out
of position and interfere with the pedals
or impair safe operation of your vehicle in
other ways. Pedals that cannot move freely can
cause loss of vehicle control and
increase the risk of serious personal
injury. WARNINGS
Always make sure that the floor
mats are properly attached to the
retention posts in the carpet that are
supplied with your vehicle. Floor mats must
be properly secured to both retention posts
to make sure mats do not shift out of
position. Never place floor mats or any other
covering in the vehicle foot well that
cannot be properly secured to
prevent them from moving and interfering
with the pedals or the ability to control the
vehicle. Never place floor mats or any other
covering on top of already installed
floor mats. Floor mats should always
rest on top of vehicle carpeting surface and
not another floor mat or other covering.
Additional floor mats or any other covering
will reduce the pedal clearance and
potentially interfere with pedal operation. Check attachment of floor mats on
a regular basis. Always properly
reinstall and secure floor mats that
have been removed for cleaning or
replacement. Always make sure that objects
cannot fall into the driver foot well
while the vehicle is moving. Objects
that are loose can become trapped under
the pedals causing a loss of vehicle control. Failure to properly follow floor mat
installation or attachment
instructions can potentially cause
interference with pedal operation causing
a loss of vehicle control. 229
Fusion (CC7) Canada/United States of America, enUSA, First Printing Driving HintsE176360
Page 249 of 528

Protected components
Fuse amp rating
Fuse or relay number
Panoramic moonroof.
30A 3
1
Starter relay.
-
2
Rain sensor.
15A 1
3
Blower motor relay.
—
4
Power point 3 - Back of console.
20A 3
5
Not used.
—
6
Powertrain control module - vehicle power
1.
20A
1
7
Powertrain control module power.
Powertrain control module - vehicle power
2.
20A
1
8
Emission components.
Powertrain control module relay.
—
9
Power point 1 - driver front.
20A 3
10
Powertrain control module - vehicle power
4.
15A
2
11
Ignition coils.
Powertrain control module - vehicle power
3.
15A
2
12
Non-emission components.
Not used.
10A 2
13
Not used.
10A 2
14
Run-start relay.
—
15
Power point 2 - console.
20A 3
16
Not used.
—
17
Not used.
—
18
Run-start electronic power assist steering.
10A 1
19
Adaptive cruise control.
10A 1
20
246
Fusion (CC7) Canada/United States of America, enUSA, First Printing Fuses
Page 254 of 528
Protected components
Fuse amp rating
Fuse or relay number
Not used.
—
76
Climate control seat module.
30A 1
77
Not used.
—
78
Blower motor.
40A 2
79
Wiper motor 2.
25A 1
80
Inverter.
40A 1
81
Not used.
–
82
TRCM shifter.
20A 1
83
Starter solenoid.
30A 1
84
Not used.
—
85
Not used.
–
86
Anti-lock brake system pump.
60A 2
87
1 M-type fuse.
2 J-type fuse.
Passenger Compartment Fuse
Panel
The fuse panel is located under the
instrument panel to the left of the steering
column. Note:
It may be easier to access the fuse
panel if you remove the finish trim piece.
251
Fusion (CC7) Canada/United States of America, enUSA, First Printing Fuses
Page 256 of 528

Protected components
Fuse amp rating
Fuse or relay number
Climate control.
7.5A 2
12
Gear shift
Steering wheel column lock.
7.5A 2
13
Cluster.
Datalink logic.
Extended power module.
10A 2
14
Datalink gateway module.
10A 2
15
Child lock.
15A 1
16
Decklid-liftglass release.
Not used (spare).
5A 2
17
Push button stop start switch.
5A 2
18
Extended power module.
7.5A 2
19
Adaptive headlamp.
7.5A 2
20
Humidity and in–car temperature sensor.
5A 2
21
Not Used (spare).
5A 2
22
Delayed accessory (power inverter logic,
moonroof logic, driver master switch).
10A
1
23
Central lock unlock.
20A 1
24
Driver door (window, mirror).
30A 1
25
Front passenger door (window, mirror).
30A 1
26
Moonroof.
30A 1
27
Amplifier.
20A 1
28
Rear driver side door (window).
30A 1
29
Rear passenger side door (window).
30A 1
30
Not used (spare).
15A 1
31
253
Fusion (CC7) Canada/United States of America, enUSA, First Printing Fuses
Page 257 of 528
Protected components
Fuse amp rating
Fuse or relay number
Global positioning system.
10A 1
32
Display.
Voice control.
Radio frequency receiver.
Radio.
20A 1
33
Active noise control.
Run-start bus (fuse 19, 20, 21, 22, 35, 36,
37, circuit breaker).
30A
1
34
Not used (spare).
5A 1
35
Auto-dimming rear view mirror.
15A 1
36
Continuous control damping suspension.
Rear heated seats.
Heated steering wheel.
20A 1
37
Not used (spare).
30A
38
1 Micro fuse.
2 Dual micro fuse.
CHANGING A FUSE
Fuses WARNING
Always replace a fuse with one that
has the specified amperage rating.
Using a fuse with a higher amperage
rating can cause severe wire damage and
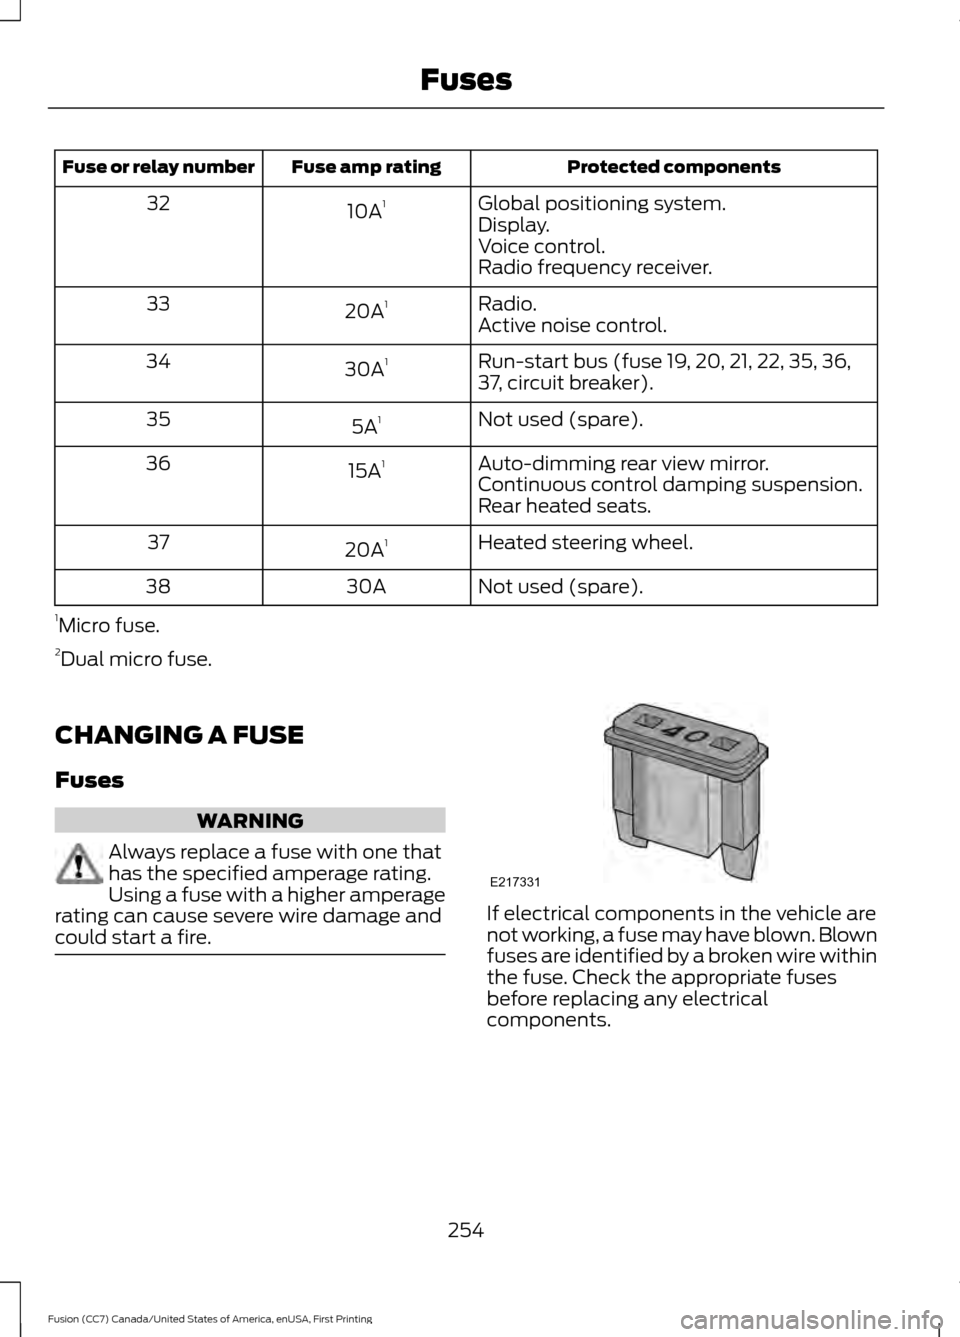
could start a fire. If electrical components in the vehicle are
not working, a fuse may have blown. Blown
fuses are identified by a broken wire within
the fuse. Check the appropriate fuses
before replacing any electrical
components.
254
Fusion (CC7) Canada/United States of America, enUSA, First Printing FusesE217331
Page 265 of 528

Do not use supplemental engine oil
additives because they are unnecessary
and could lead to engine damage that may
not be covered by the vehicle Warranty.
Only use oils certified for gasoline engines
by the American Petroleum Institute (API).
An oil with this trademark symbol
conforms to the current engine and
emission system protection standards and
fuel economy requirements of the
International Lubricants Specification
Advisory Committee (ILSAC), comprised
of U.S. and Japanese automobile
manufacturers.
To top up the engine oil level do the
following:
Clean the area surrounding the engine oil
filler cap before you remove it.
1. Remove the engine oil filler cap. See
Under Hood Overview (page 257).
Turn it counterclockwise and remove
it.
2. Add engine oil that meets the correct specification. See
Capacities and
Specifications (page 330). You may
have to use a funnel to pour the engine
oil into the opening.
3. Recheck the oil level.
4. If the oil level is correct, replace the dipstick and make sure it is fully seated. 5. Replace the engine oil filler cap. Turn
it clockwise until you feel a strong
resistance.
Note: Do not add oil further than the
maximum mark. Oil levels above the
maximum mark may cause engine damage.
Note: Make sure you install the oil filler cap
correctly.
Note: Soak up any spillage with an
absorbent cloth immediately.
OIL CHANGE INDICATOR
RESET
Use the information display controls on
the steering wheel to reset the oil change
indicator.
From the main menu scroll to: Action and description
Message
Press the right arrow button,
then from this menu scroll
to the following message.
Settings
Press the right arrow button,
then from this menu scroll
to the following message.
Vehicle
Press the right arrow button,
then from this menu scroll
to the following message.
Oil Life
Press and hold the
OK
button until the instrument
cluster displays the
following message.
Hold OK to
Reset
Reset Successful
When the oil change indic-
ator resets the instrument
cluster displays 100%.
Remaining Life
{00}%
262
Fusion (CC7) Canada/United States of America, enUSA, First Printing MaintenanceE142732
Page 268 of 528
Vehicles driven year-round in non-extreme
climates should use prediluted coolant for
optimum cooling system and engine
protection.
Fail-Safe Cooling
Fail-safe cooling allows you to temporarily
drive your vehicle before any incremental
component damage occurs. The fail-safe
distance depends on ambient
temperature, vehicle load and terrain.
How Fail-Safe Cooling Works
If the engine begins to overheat, the
coolant temperature gauge moves toward
the red zone:
A warning lamp illuminates and
a message may appear in the
information display.
If the engine reaches a preset
over-temperature condition, the engine
automatically switches to alternating
cylinder operation. Each disabled cylinder
acts as an air pump and cools the engine.
When this occurs, your vehicle still
operates, however:
• Engine power is limited.
• The air conditioning system turns off.
Continued operation increases the engine
temperature, causing the engine to
completely shut down. Your steering and
braking effort increases in this situation.
When the engine temperature cools, you
can re-start the engine. Have your vehicle
checked as soon as possible to minimize
engine damage. When Fail-Safe Mode Is Activated WARNINGS
Fail-safe mode is for use during
emergencies only. Operate your
vehicle in fail-safe mode only as long
as necessary to bring your vehicle to rest
in a safe location and seek immediate
repairs. When in fail-safe mode, your
vehicle will have limited power, will not be
able to maintain high-speed operation, and
may completely shut down without
warning, potentially losing engine power,
power steering assist, and power brake
assist, which may increase the possibility
of a crash resulting in serious injury. Never remove the coolant reservoir
cap while the engine is running or hot.
Your vehicle has limited engine power
when in the fail-safe mode, drive your
vehicle with caution. Your vehicle does not
maintain high-speed operation and the
engine may operate poorly.
Remember that the engine is capable of
automatically shutting down to prevent
engine damage. In this situation:
1. Pull off the road as soon as safely
possible and switch the engine off.
2. If you are a member of a roadside assistance program, we recommend
that you contact your roadside
assistance service provider.
3. If this is not possible, wait a short period for the engine to cool.
4. Check the coolant level. If the coolant level is at or below the minimum mark,
add prediluted coolant immediately.
5. When the engine temperature cools, you can re-start the engine. Have your
vehicle checked as soon as possible to
minimize engine damage.
Note: Driving your vehicle without repair
increases the chance of engine damage.
265
Fusion (CC7) Canada/United States of America, enUSA, First Printing Maintenance
Page 285 of 528
CLEANING THE INTERIOR
WARNINGS
Do not use cleaning solvents, bleach
or dye on the vehicle
’s safety belts,
as these actions may weaken the
belt webbing. On vehicles equipped with
seat-mounted airbags, do not use
chemical solvents or strong
detergents. Such products could
contaminate the side airbag system and
affect performance of the side airbag in a
collision. For fabric, carpets, cloth seats, safety belts
and seats equipped with side airbags:
•
Remove dust and loose dirt with a
vacuum cleaner.
• Remove light stains and soil with
Motorcraft Professional Strength
Carpet & Upholstery Cleaner.
• If grease or tar is present on the
material, spot-clean the area first with
Motorcraft Spot and Stain Remover. In
Canada, use Motorcraft Multi-Purpose
Cleaner.
• If a ring forms on the fabric after spot
cleaning, clean the entire area
immediately (but do not oversaturate)
or the ring will set.
• Do not use household cleaning
products or glass cleaners, which can
stain and discolor the fabric and affect
the flame retardant abilities of the seat
materials. CLEANING THE INSTRUMENT
PANEL AND INSTRUMENT
CLUSTER LENS WARNING
Do not use chemical solvents or
strong detergents when cleaning the
steering wheel or instrument panel
to avoid contamination of the airbag
system. Note:
Follow the same procedure as
cleaning leather seats for cleaning leather
instrument panels and leather interior trim
surfaces. See Cleaning Leather Seats
(page 283).
Clean the instrument panel and cluster
lens with a clean, damp and soft cloth,
then use a clean, dry and soft cloth to dry
these areas.
• Avoid cleaners or polishes that increase
the gloss of the upper portion of the
instrument panel. The dull finish in this
area helps protect you from
undesirable windshield reflection.
• Do not use any household cleaning
products or glass cleaners as these
may damage the finish of the
instrument panel, interior trim and
cluster lens.
• Wash or wipe your hands clean if you
have been in contact with certain
products such as insect repellent and
suntan lotion to avoid possible damage
to the interior painted surfaces.
• Do not allow air fresheners and hand
sanitizers to spill onto interior surfaces.
If a spill occurs, wipe off immediately.
Your warranty may not cover these
damages.
If a staining liquid like coffee or juice has
been spilled on the instrument panel or on
interior trim surfaces:
282
Fusion (CC7) Canada/United States of America, enUSA, First Printing Vehicle Care