2017 FORD FUSION (AMERICAS) remote control
[x] Cancel search: remote controlPage 85 of 528

GLOBAL OPENING AND
CLOSING
You can use the remote control to operate
the windows with the ignition off.
Note:
You can enable or disable this feature
in the information display or see an
authorized dealer. See General
Information (page 93).
Note: To operate this feature, accessory
delay must not be active.
Opening the Windows
You can only open the windows for a short
time after you unlock your vehicle with the
remote control. After you unlock your
vehicle, press and hold the remote control
unlock button to open the windows and
vent the moonroof. Release the button
once movement starts. Press the lock or
unlock button to stop movement.
Closing the Windows WARNING
When closing the windows and
moonroof, you should verify they are
free of obstructions and make sure
that children and pets are not in the
proximity of the window openings. To close the windows and moonroof, press
and hold the remote control lock button.
Release the button once movement starts.
Press the lock or unlock button to stop
movement.
EXTERIOR MIRRORS
Power Exterior Mirrors
WARNING
Do not adjust the mirrors when your
vehicle is moving. Left-hand mirror
A
Adjustment control
B
Right-hand mirror
C
To adjust a mirror:
1. Select the mirror you want to adjust. The control will illuminate.
2. Adjust the position of the mirror.
3. Press the mirror switch again.
Fold-Away Exterior Mirrors
Push the mirror toward the door window
glass. Make sure that you fully engage the
mirror in its support when returning it to its
original position.
Heated Exterior Mirrors
(If Equipped)
See Heated Windows and Mirrors (page
125
).
Memory Mirrors
(If Equipped)
You can save and recall the mirror
positions through the memory function.
See
Memory Function (page 131).
Auto-Dimming Feature
(If Equipped)
The driver exterior mirror automatically
dims when the interior auto-dimming
mirror turns on.
82
Fusion (CC7) Canada/United States of America, enUSA, First Printing Windows and MirrorsE144073
Page 99 of 528

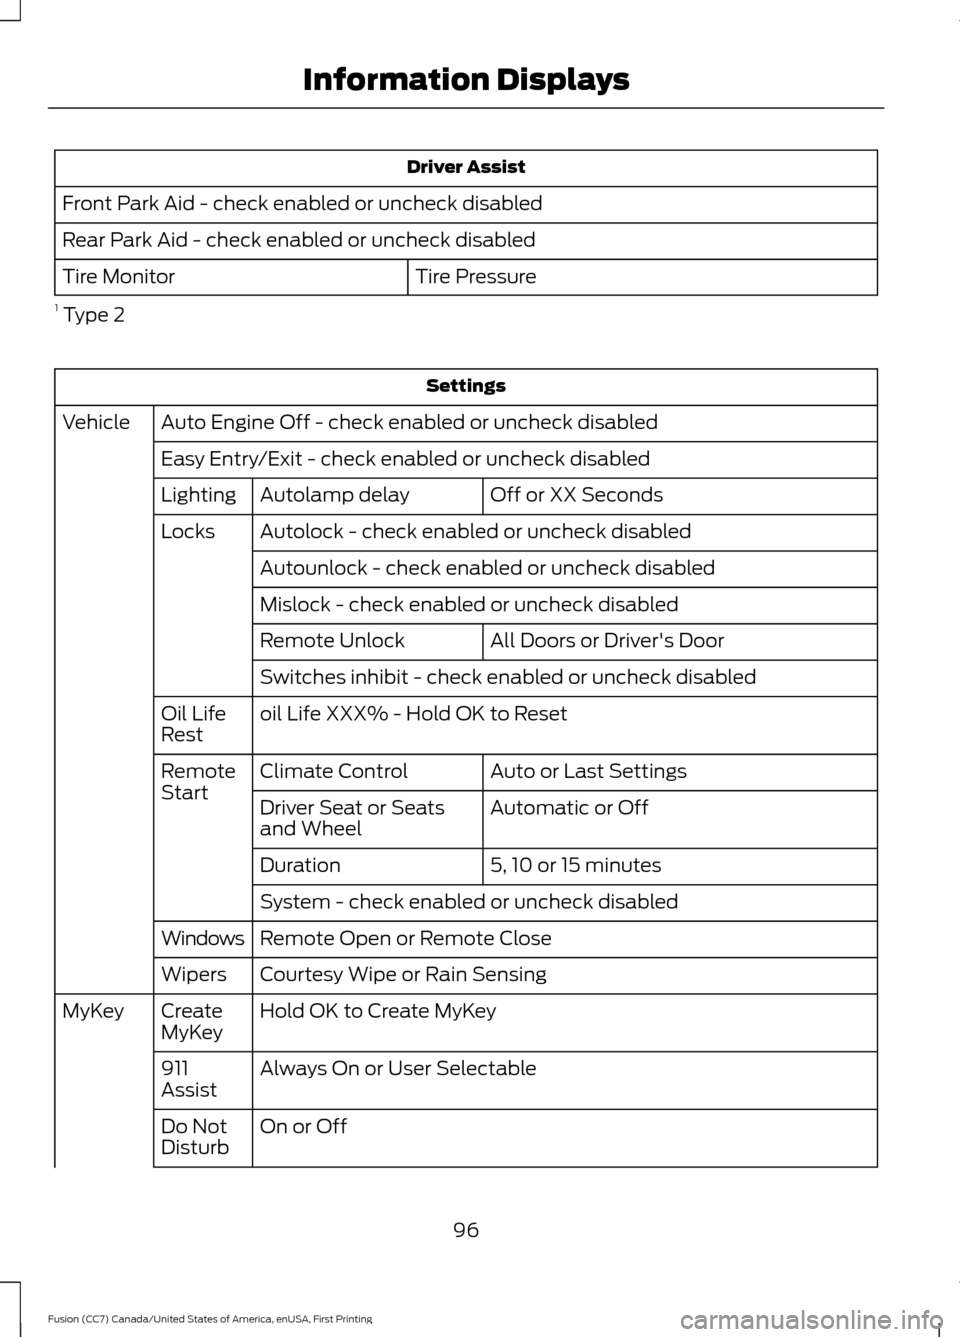
Driver Assist
Front Park Aid - check enabled or uncheck disabled
Rear Park Aid - check enabled or uncheck disabled Tire Pressure
Tire Monitor
1 Type 2 Settings
Auto Engine Off - check enabled or uncheck disabled
Vehicle
Easy Entry/Exit - check enabled or uncheck disabled Off or XX Seconds
Autolamp delay
Lighting
Autolock - check enabled or uncheck disabled
Locks
Autounlock - check enabled or uncheck disabled
Mislock - check enabled or uncheck disabled All Doors or Driver's Door
Remote Unlock
Switches inhibit - check enabled or uncheck disabled
oil Life XXX% - Hold OK to Reset
Oil Life
Rest
Auto or Last Settings
Climate Control
Remote
Start
Automatic or Off
Driver Seat or Seats
and Wheel
5, 10 or 15 minutes
Duration
System - check enabled or uncheck disabled
Remote Open or Remote Close
Windows
Courtesy Wipe or Rain Sensing
Wipers
Hold OK to Create MyKey
Create
MyKey
MyKey
Always On or User Selectable
911
Assist
On or Off
Do Not
Disturb
96
Fusion (CC7) Canada/United States of America, enUSA, First Printing Information Displays
Page 104 of 528

Settings
Autounlock - check enabled or uncheck disabled
Mislock - check enabled or uncheck disabled All Doors or Driver First
Remote Unlock
Switch Inhibit - check enabled or uncheck disabled
Autofold - check enabled or uncheck disabled
Mirrors
XXX% - Hold OK to Reset
Oil Life
Rest
Auto or Last setting
Climate Control
Remote
Start
Auto or Off
Seats or Seats and
Wheel
5, 10 or 15 minutes
Duration
System - check enabled or uncheck disabled
Seatbelts Remote Open or Remote Close
Windows
Courtesy Wipe or Rain Sensing
Wipers
Hold OK to Create MyKey
Create
MyKey
MyKey
Always On or User Selectable
911
Assist
On or Off
Do Not
Disturb
Always On or User Selectable
Traction
Control
Choose desired speed or Off
Max
Speed
Choose desired speed or Off
Speed
Minder
Volume Limiter - check enabled or uncheck disabled
Hold OK to Clear All MyKeys
Clear
MyKeys
101
Fusion (CC7) Canada/United States of America, enUSA, First Printing Information Displays
Page 128 of 528

HEATED WINDOWS AND
MIRRORS
Heated Rear Window
Note:
Make sure the engine is running
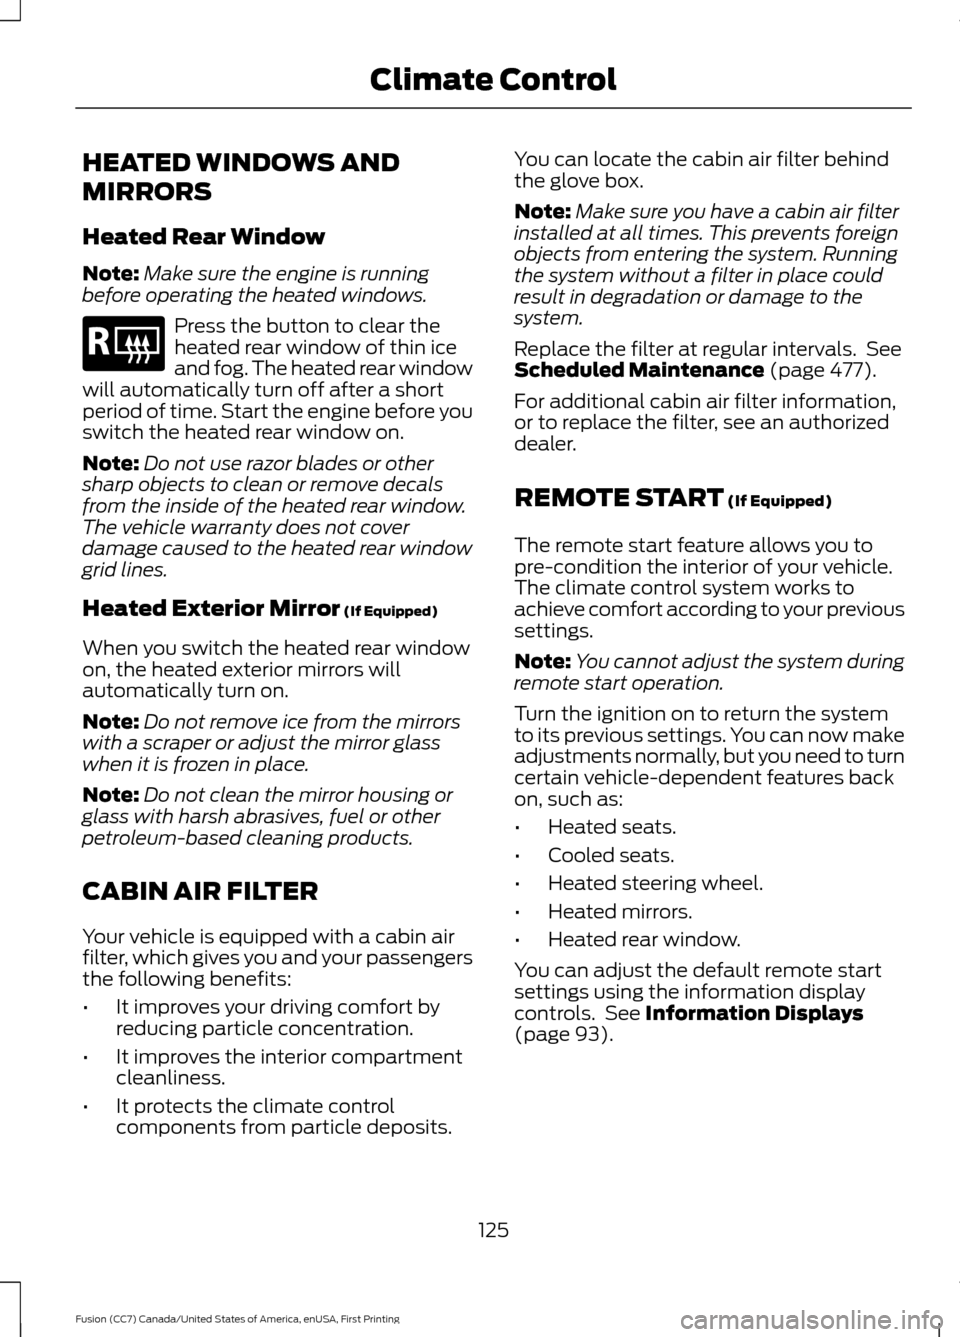
before operating the heated windows. Press the button to clear the
heated rear window of thin ice
and fog. The heated rear window
will automatically turn off after a short
period of time. Start the engine before you
switch the heated rear window on.
Note: Do not use razor blades or other
sharp objects to clean or remove decals
from the inside of the heated rear window.
The vehicle warranty does not cover
damage caused to the heated rear window
grid lines.
Heated Exterior Mirror (If Equipped)
When you switch the heated rear window
on, the heated exterior mirrors will
automatically turn on.
Note: Do not remove ice from the mirrors
with a scraper or adjust the mirror glass
when it is frozen in place.
Note: Do not clean the mirror housing or
glass with harsh abrasives, fuel or other
petroleum-based cleaning products.
CABIN AIR FILTER
Your vehicle is equipped with a cabin air
filter, which gives you and your passengers
the following benefits:
• It improves your driving comfort by
reducing particle concentration.
• It improves the interior compartment
cleanliness.
• It protects the climate control
components from particle deposits. You can locate the cabin air filter behind
the glove box.
Note:
Make sure you have a cabin air filter
installed at all times. This prevents foreign
objects from entering the system. Running
the system without a filter in place could
result in degradation or damage to the
system.
Replace the filter at regular intervals. See
Scheduled Maintenance
(page 477).
For additional cabin air filter information,
or to replace the filter, see an authorized
dealer.
REMOTE START
(If Equipped)
The remote start feature allows you to
pre-condition the interior of your vehicle.
The climate control system works to
achieve comfort according to your previous
settings.
Note: You cannot adjust the system during
remote start operation.
Turn the ignition on to return the system
to its previous settings. You can now make
adjustments normally, but you need to turn
certain vehicle-dependent features back
on, such as:
• Heated seats.
• Cooled seats.
• Heated steering wheel.
• Heated mirrors.
• Heated rear window.
You can adjust the default remote start
settings using the information display
controls. See
Information Displays
(page 93).
125
Fusion (CC7) Canada/United States of America, enUSA, First Printing Climate ControlE184884
Page 135 of 528

•
Driver seat.
• Power mirrors.
• Power steering column.
The memory control is on the driver door. Saving a PreSet Position
1. Adjust the memory features to your
desired position.
2. Press and hold the SET button until you hear a single tone.
3. Press the desired preset button until you hear a single tone.
You can save up to two preset memory
positions. You can save a memory preset
at any time.
Recalling a PreSet Position
Press and release the preset button
associated with your desired driving
position. The memory features move to
the position stored for that preset.
Note: A preset memory position can only
be recalled when the ignition is off, or when
the transmission is in park (P) or neutral (N)
if the ignition is on and the vehicle is not
moving. You can also recall a preset memory
position by:
•
Pressing the unlock button on your
intelligent access key fob if it is linked
to a preset position.
• Unlocking the intelligent driver door
handle if a linked key fob is present.
• Entering a personal entry code on the
Securicode keypad. See Locks (page
58).
Note: Using a linked key fob to recall your
memory position when the ignition is off
moves the seat to the Easy Entry position.
Note: Pressing any active memory feature
control - power seat, mirror, or steering
column (or any memory button) during a
memory recall cancels the operation.
Linking a PreSet Position to your
Remote Control or Intelligent
Access Key Fob
Your vehicle can save the preset memory
positions for up to two remote controls or
intelligent access (IA) keys.
After you have saved your desired memory
preset positions:
1. Press and hold the desired preset button for about three seconds until
you hear a single tone.
2. Within three seconds, press the lock button on the remote control you are
linking.
To unlink a remote control, follow the
same procedure – except in step 2, press
the unlock button on the remote control.
Note: If more than one linked remote
control or intelligent access key is in range,
the memory function moves to the settings
of the first key to initiate a memory recall.
132
Fusion (CC7) Canada/United States of America, enUSA, First Printing SeatsE223340
Page 140 of 528

HomeLink Wireless Control
System
WARNINGS
Make sure that the garage door and
security device are free from
obstruction when you are
programming. Do not program the system
with the vehicle in the garage. Do not use the system with any
garage door opener that does not
have the safety stop and reverse
feature as required by U.S. Federal Safety
Standards (this includes any garage door
opener manufactured before April 1, 1982).
A garage door opener which cannot detect
an object, signaling the door to stop and
reverse, does not meet current federal
safety standards. Using a garage door
opener without these features increases
the risk of serious injury or death. Note:
Make sure you keep the original
remote control transmitter for use in other
vehicles as well as for future system
programming.
Note: We recommend that upon the sale
or lease termination of your vehicle, you
erase the programmed function buttons for
security reasons. See Erasing the Function
Button Codes.
Note: You can program a maximum of
three devices. To change or replace any of
the three devices after it has been initially
programmed, you must first erase the
current settings. See Erasing the Function
Button Codes
. The universal garage door opener replaces
the common hand-held garage door
opener with a three-button transmitter
that is integrated into the driver
’s sun visor.
The system includes two primary features,
a garage door opener and a platform for
remote activation of devices within the
home. As well as being programmed for
garage doors, the system transmitter can
be programmed to operate entry gate
operators, security systems, entry door
locks and home or office lighting.
Additional system information can be
found online at www.homelink.com,
www.youtube.com/HomeLinkGentex or
by calling the toll-free help line on
1-800-355-3515.
In-Vehicle Programming
This process is to program your hand-held
transmitter and your in-vehicle HomeLink
button.
Note: The programming steps below
assume you will be programming HomeLink
that was not previously programmed.
Note: Put a new battery in the hand-held
transmitter. This will ensure quicker training
and accurate transmission of the
radio-frequency signal.
137
Fusion (CC7) Canada/United States of America, enUSA, First Printing Universal Garage Door Opener
(If Equipped)E142657
Page 204 of 528

Action
Cause
Clean the grille surface in front of the radar
or remove the object causing the obstruc-
tion.
The surface of the radar in the grille is dirty
or obstructed in some way.
Wait a short time. It may take several
minutes for the radar to detect that it is free
from obstruction.
The surface of the radar in the grille is clean
but the message remains in the display.
Do not use the system in these conditions
because it may not detect any vehicles
ahead.
Heavy rain or snow is interfering with the
radar signals.
Do not use the system in these conditions
because it may not detect any vehicles
ahead.
Swirling water, or snow or ice on the surface
of the road may interfere with the radar
signals.
Wait a short time or switch to normal cruise
control.
You are in a desert or remote area with no
other vehicles and no roadside objects.
Due to the nature of radar technology, it is
possible to get a blockage warning with no
actual block. This happens, for example,
when driving in sparse rural or desert
environments. A false blocked condition
either self clears or clears after a you
restart your vehicle.
Switching to Normal Cruise
Control WARNING
Normal cruise control does not brake
for slower vehicles. Always be aware
of which mode you have selected
and apply the brakes when necessary. You can manually change from adaptive
cruise control to normal cruise control
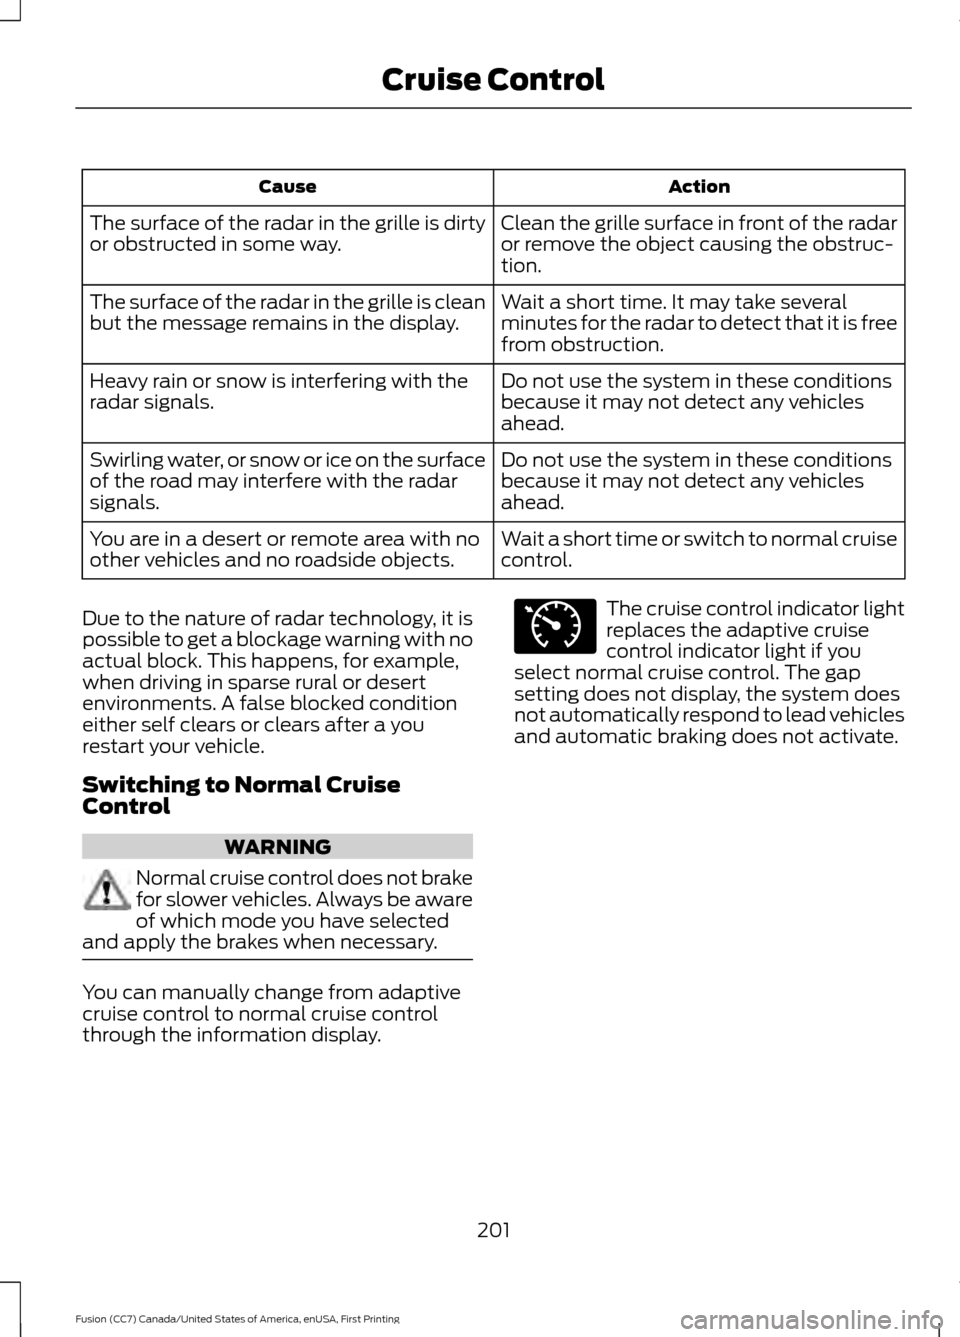
through the information display. The cruise control indicator light
replaces the adaptive cruise
control indicator light if you
select normal cruise control. The gap
setting does not display, the system does
not automatically respond to lead vehicles
and automatic braking does not activate.
201
Fusion (CC7) Canada/United States of America, enUSA, First Printing Cruise ControlE71340
Page 238 of 528

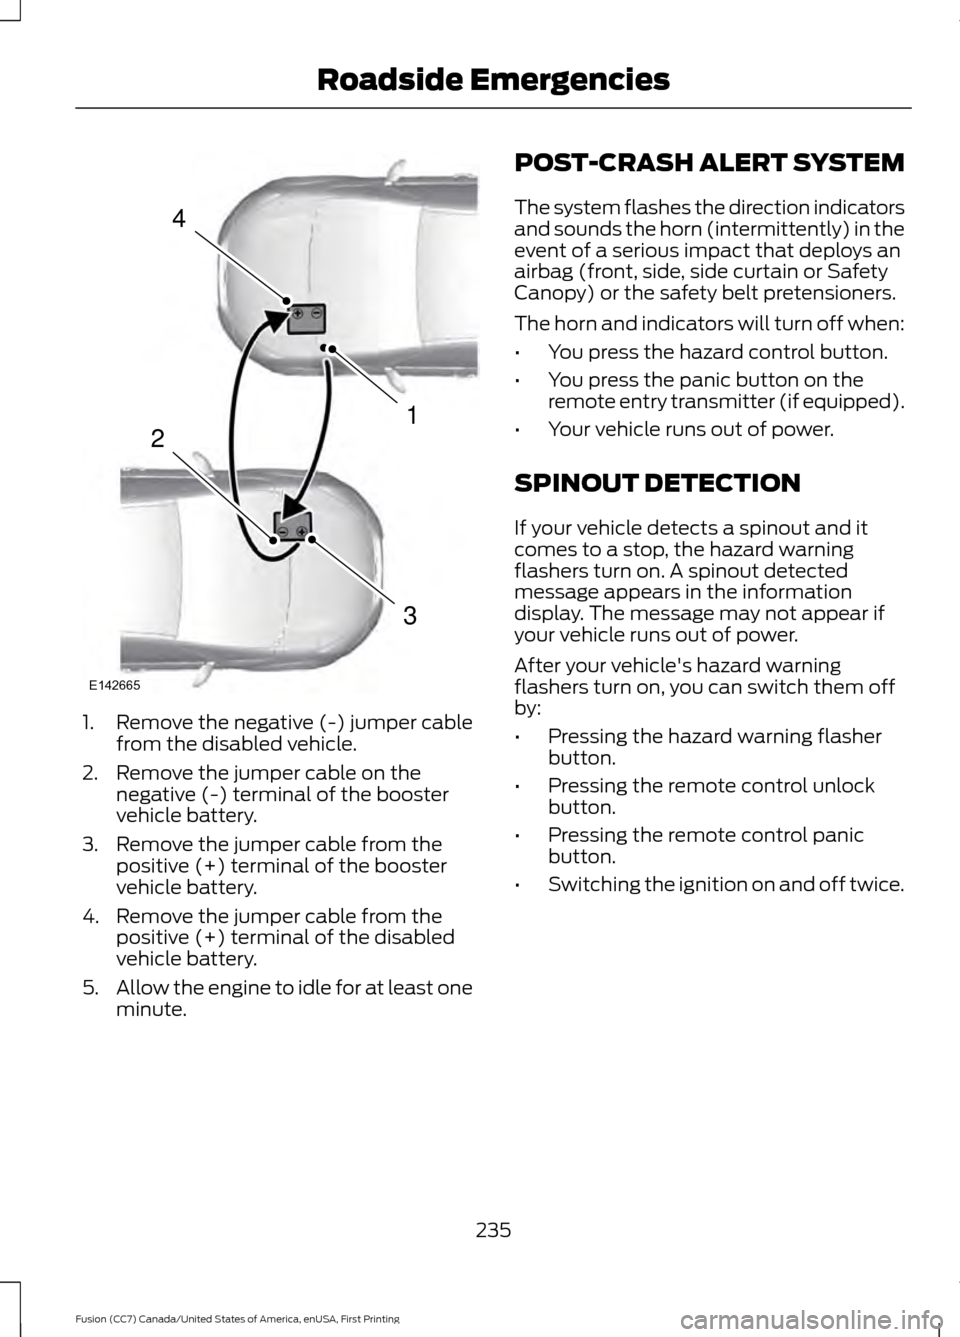
1. Remove the negative (-) jumper cable
from the disabled vehicle.
2. Remove the jumper cable on the negative (-) terminal of the booster
vehicle battery.
3. Remove the jumper cable from the positive (+) terminal of the booster
vehicle battery.
4. Remove the jumper cable from the positive (+) terminal of the disabled
vehicle battery.
5. Allow the engine to idle for at least one
minute. POST-CRASH ALERT SYSTEM
The system flashes the direction indicators
and sounds the horn (intermittently) in the
event of a serious impact that deploys an
airbag (front, side, side curtain or Safety
Canopy) or the safety belt pretensioners.
The horn and indicators will turn off when:
•
You press the hazard control button.
• You press the panic button on the
remote entry transmitter (if equipped).
• Your vehicle runs out of power.
SPINOUT DETECTION
If your vehicle detects a spinout and it
comes to a stop, the hazard warning
flashers turn on. A spinout detected
message appears in the information
display. The message may not appear if
your vehicle runs out of power.
After your vehicle's hazard warning
flashers turn on, you can switch them off
by:
• Pressing the hazard warning flasher
button.
• Pressing the remote control unlock
button.
• Pressing the remote control panic
button.
• Switching the ignition on and off twice.
235
Fusion (CC7) Canada/United States of America, enUSA, First Printing Roadside Emergencies4
1
3
2
E142665