2017 FORD FLEX light
[x] Cancel search: lightPage 53 of 496

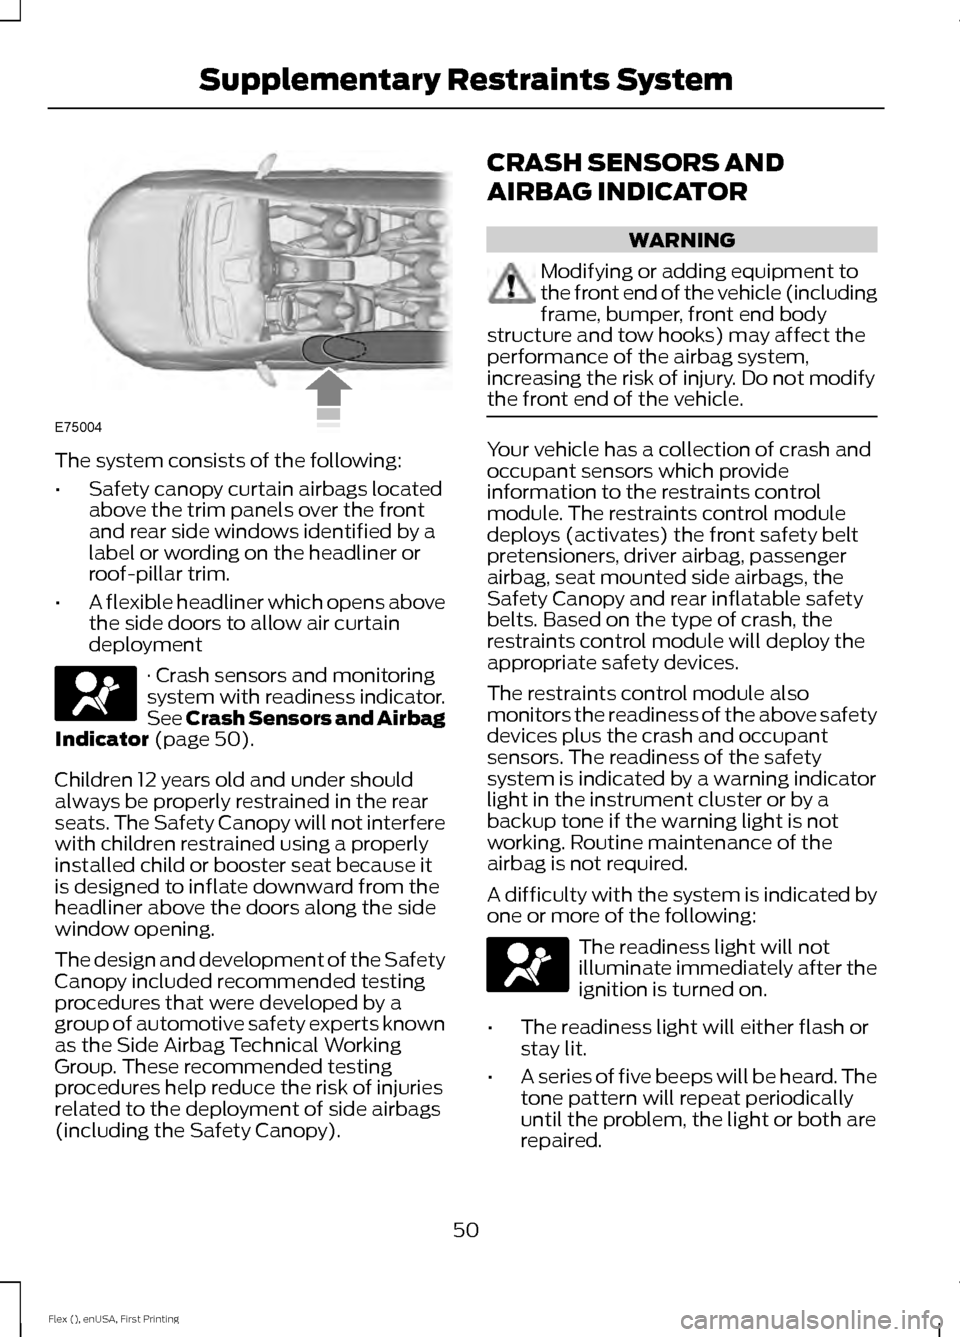
The system consists of the following:
•
Safety canopy curtain airbags located
above the trim panels over the front
and rear side windows identified by a
label or wording on the headliner or
roof-pillar trim.
• A flexible headliner which opens above
the side doors to allow air curtain
deployment · Crash sensors and monitoring
system with readiness indicator.
See Crash Sensors and Airbag
Indicator (page 50).
Children 12 years old and under should
always be properly restrained in the rear
seats. The Safety Canopy will not interfere
with children restrained using a properly
installed child or booster seat because it
is designed to inflate downward from the
headliner above the doors along the side
window opening.
The design and development of the Safety
Canopy included recommended testing
procedures that were developed by a
group of automotive safety experts known
as the Side Airbag Technical Working
Group. These recommended testing
procedures help reduce the risk of injuries
related to the deployment of side airbags
(including the Safety Canopy). CRASH SENSORS AND
AIRBAG INDICATOR WARNING
Modifying or adding equipment to
the front end of the vehicle (including
frame, bumper, front end body
structure and tow hooks) may affect the
performance of the airbag system,
increasing the risk of injury. Do not modify
the front end of the vehicle. Your vehicle has a collection of crash and
occupant sensors which provide
information to the restraints control
module. The restraints control module
deploys (activates) the front safety belt
pretensioners, driver airbag, passenger
airbag, seat mounted side airbags, the
Safety Canopy and rear inflatable safety
belts. Based on the type of crash, the
restraints control module will deploy the
appropriate safety devices.
The restraints control module also
monitors the readiness of the above safety
devices plus the crash and occupant
sensors. The readiness of the safety
system is indicated by a warning indicator
light in the instrument cluster or by a
backup tone if the warning light is not
working. Routine maintenance of the
airbag is not required.
A difficulty with the system is indicated by
one or more of the following:
The readiness light will not
illuminate immediately after the
ignition is turned on.
• The readiness light will either flash or
stay lit.
• A series of five beeps will be heard. The
tone pattern will repeat periodically
until the problem, the light or both are
repaired.
50
Flex (), enUSA, First Printing Supplementary Restraints SystemE75004 E67017 E67017
Page 69 of 496

7. Switch the ignition off. The horn
sounds indicating programming is
complete.
Illuminated Entry
The interior lamps and some exterior
lamps illuminate when you unlock the
doors with the remote control.
The lamps turn off if:
• The ignition is on.
• You press the remote control lock
button.
• 25 seconds have elapsed.
The lamps do not turn off if:
• You switch them on with the lighting
control.
• Any door is open.
Illuminated Exit
The interior lamps and some exterior
lamps illuminate when all doors are closed
and you switch the ignition off.
The lamps will turn off if all the doors
remain closed and:
• 25 seconds have elapsed.
• You lock your vehicle from the outside.
Battery Saver
If you leave the courtesy lamps, interior
lamps or headlamps on, the battery saver
shuts them off 10 minutes after you switch
the ignition off.
Battery Saver for Intelligent Access
Keys (If Equipped)
If you leave the ignition switched on and
the engine is not running, the battery saver
will turn the ignition off when it detects a
certain amount of battery drain, or after
45 minutes have elapsed. MANUAL LIFTGATE (If Equipped) WARNINGS
It is extremely dangerous to ride in a
cargo area, inside or outside of a
vehicle. In a crash, people riding in
these areas are more likely to be seriously
injured or killed. Do not allow people to ride
in any area of your vehicle that is not
equipped with seats and seatbelts. Be sure
everyone in your vehicle is in a seat and
using a seatbelt properly. Failure to follow
this warning could result in serious
personal injury or death. Make sure to close and latch the
liftgate to prevent drawing exhaust
fumes into your vehicle. This will also
prevent passengers and cargo from falling
out. If you must drive with the liftgate open,
keep the vents or windows open so outside
air comes into your vehicle. Failure to
follow this warning could result in serious
personal injury. Note:
Be careful when opening or closing
the liftgate in a garage or other enclosed
area to avoid damaging the liftgate.
Note: Do not hang anything, for example a
bike rack, from the glass or liftgate. This
could damage the liftgate and its
components.
Note: Do not leave the liftgate open while
driving. This could damage the liftgate and
its components.
66
Flex (), enUSA, First Printing Doors and Locks
Page 85 of 496

GENERAL INFORMATION
Condensation in Lamp Assemblies
Exterior lamps have vents to
accommodate normal changes in air
pressure.
Condensation can be a natural by-product
of this design. When moist air enters the
lamp assembly through the vents, there is
a possibility that condensation can occur
when the temperature is cold. When
normal condensation occurs, a fine mist
can form on the interior of the lens. The
fine mist eventually clears and exits
through the vents during normal operation.
Clearing time may take as long as 48 hours
under dry weather conditions.
Examples of acceptable condensation are:
•
The presence of a fine mist (no streaks,
drip marks or large droplets).
• A fine mist covers less than 50% of the
lens.
Examples of unacceptable condensation
are:
• A water puddle inside the lamp.
• Streaks, drip marks or large droplets
present on the interior of the lens.
If you see any unacceptable condensation,
have your vehicle checked by an authorized
dealer. LIGHTING CONTROL
Off.A
Parking lamps, instrument panel
lamps, license plate lamps and
tail lamps.
B
Headlamps.
C
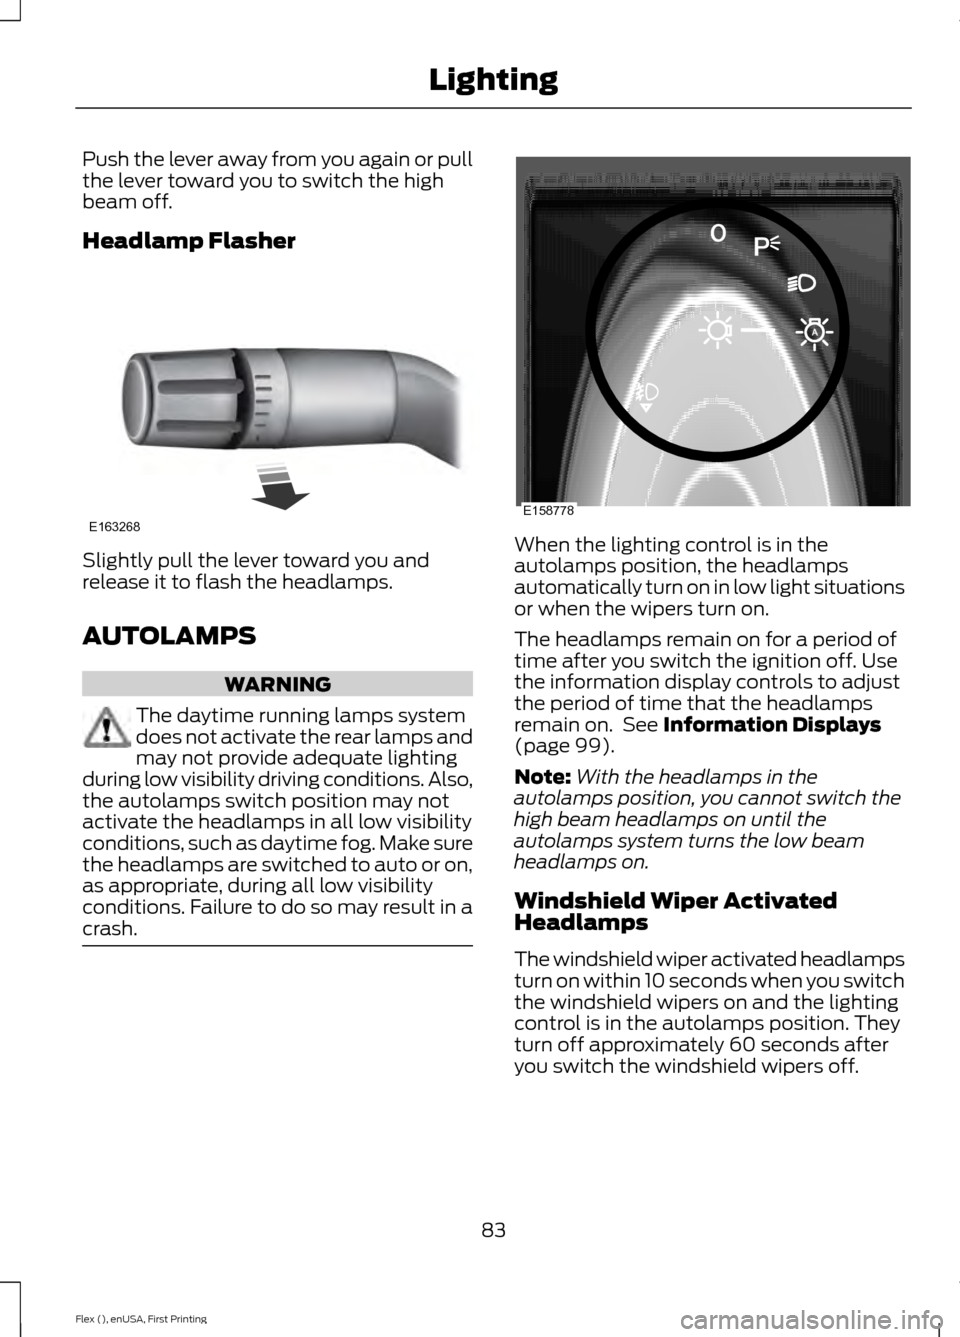
High Beams Push the lever away from you to switch
the high beam on.
82
Flex (), enUSA, First Printing LightingE156651
ABC E167827
Page 86 of 496

Push the lever away from you again or pull
the lever toward you to switch the high
beam off.
Headlamp Flasher
Slightly pull the lever toward you and
release it to flash the headlamps.
AUTOLAMPS
WARNING
The daytime running lamps system
does not activate the rear lamps and
may not provide adequate lighting
during low visibility driving conditions. Also,
the autolamps switch position may not
activate the headlamps in all low visibility
conditions, such as daytime fog. Make sure
the headlamps are switched to auto or on,
as appropriate, during all low visibility
conditions. Failure to do so may result in a
crash. When the lighting control is in the
autolamps position, the headlamps
automatically turn on in low light situations
or when the wipers turn on.
The headlamps remain on for a period of
time after you switch the ignition off. Use
the information display controls to adjust
the period of time that the headlamps
remain on. See Information Displays
(page 99).
Note: With the headlamps in the
autolamps position, you cannot switch the
high beam headlamps on until the
autolamps system turns the low beam
headlamps on.
Windshield Wiper Activated
Headlamps
The windshield wiper activated headlamps
turn on within 10 seconds when you switch
the windshield wipers on and the lighting
control is in the autolamps position. They
turn off approximately 60 seconds after
you switch the windshield wipers off.
83
Flex (), enUSA, First Printing LightingE163268 E158778
Page 87 of 496

The headlamps will not turn on by wiper
activation:
•
During a single wipe.
• When the wipers are on to clear washer
fluid during a wash condition.
Note: If you switch autolamps and
autowipers on, the headlamps will
automatically turn on when the windshield
wipers continuously operate.
INSTRUMENT LIGHTING
DIMMER Use to adjust the brightness of the
instrument panel and all applicable lit
components in the vehicle during
headlamp and parking lamp operation.
•
Tap the top or bottom of the control
to brighten/dim all interior lit
components incrementally, or
• Press and hold at the first position the
top or bottom of the control until the
desired lighting level is reached.
• Press and hold the top of the control
to the full on position to activate the
“dome on ” feature. This will turn on the
interior courtesy lights. The lights will
remain on until the bottom of the
control is pressed. HEADLAMP EXIT DELAY
You can set the delay time to keep the
headlamps on for up to three minutes after
you switch off the ignition.
Follow the steps below to change the
delay time (Steps 1 to 6 must be
completed within 10 seconds):
1. Switch the ignition off.
2. Select the autolamp position on the
lighting control.
3. Turn the lighting control to the off position.
4. Switch the ignition on.
5. Switch the ignition off.
6. Select the autolamp position on the lighting control. The headlamps and
parking lamps will turn on.
7. Turn the lighting control to the off position when the required delay time
has been reached. The headlamps and
parking lamps will turn off.
You can set the headlamp exit delay to
one of the following settings:
• Off
• 10 seconds
• 20 seconds
• 120 seconds
Note: You can adjust the time delay using
the display controls in the instrument
cluster. See Information Displays (page
99).
84
Flex (), enUSA, First Printing LightingE163270
Page 88 of 496

DAYTIME RUNNING LAMPS (If
Equipped) WARNING
Always remember to switch your
headlamps on in low light situations
or during inclement weather. The
system does not activate the tail lamps
and may not provide adequate lighting
during these conditions. Failure to activate
your headlamps under these conditions
may result in a collision. The system switches the signature lamps
on in day light conditions.
To switch the system on, switch the
ignition on, and switch the lighting control
to the off, autolamp, or parking lamp
position.
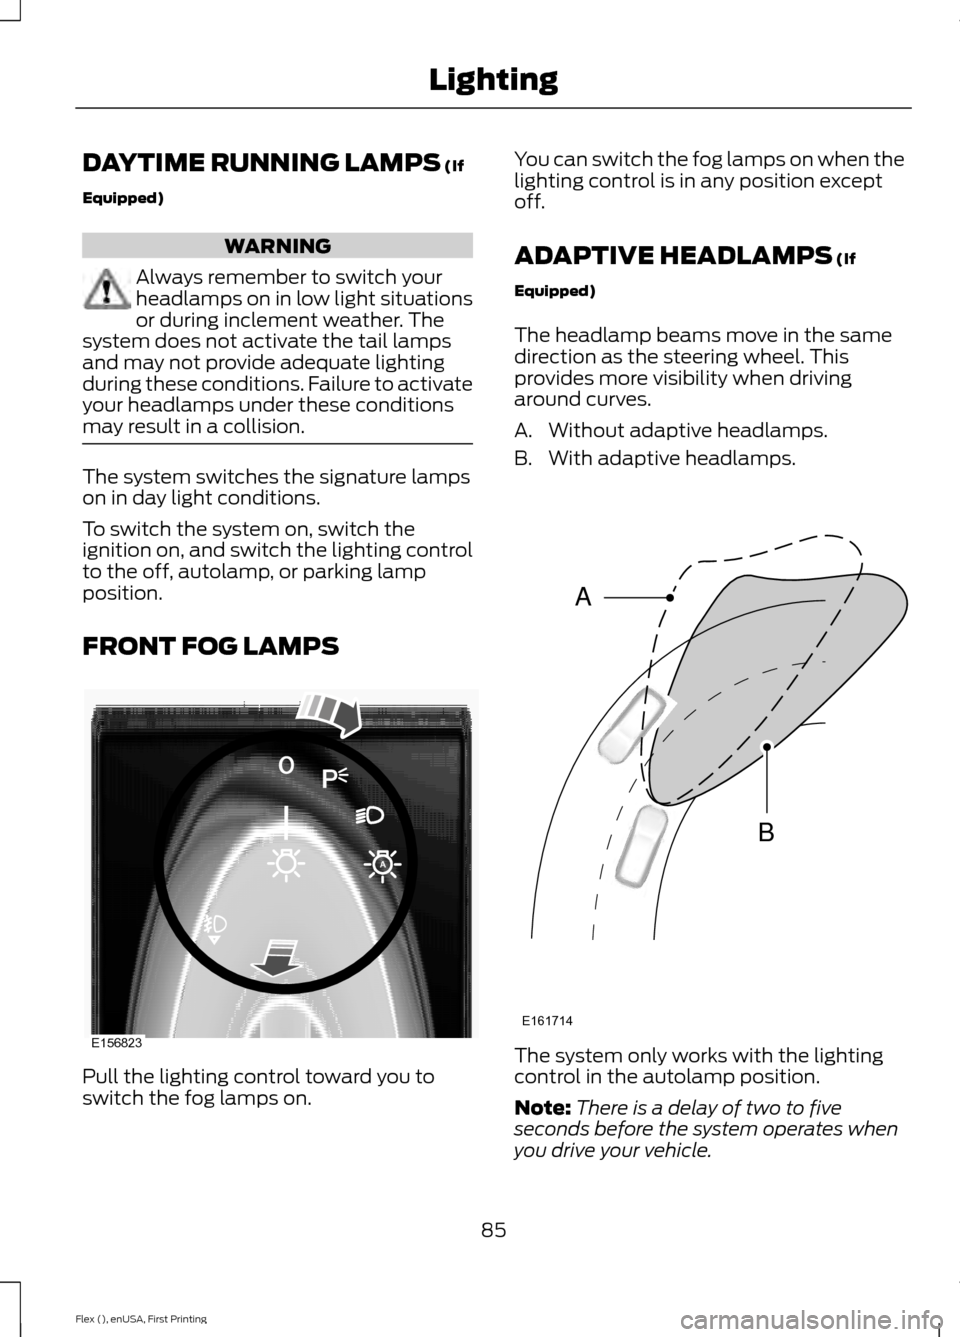
FRONT FOG LAMPS
Pull the lighting control toward you to
switch the fog lamps on. You can switch the fog lamps on when the
lighting control is in any position except
off.
ADAPTIVE HEADLAMPS
(If
Equipped)
The headlamp beams move in the same
direction as the steering wheel. This
provides more visibility when driving
around curves.
A. Without adaptive headlamps.
B. With adaptive headlamps. The system only works with the lighting
control in the autolamp position.
Note:
There is a delay of two to five
seconds before the system operates when
you drive your vehicle.
85
Flex (), enUSA, First Printing LightingE156823 E161714
B
A
Page 89 of 496

Note:
The system is only active at speeds
above 3 mph (5 km/h).
The system has a power-up movement
check feature. When your start your
vehicle, the lamps track left to right, then
back to center to alert the driver that the
system is working properly.
DIRECTION INDICATORS •
To operate the left-hand direction
indicator, push the lever down until it
stops.
• To operate the right-hand direction
indicator, push the lever up until it
stops.
• To manually cancel direction indicator
operation, push the lever again in either
direction.
Lane Change
To indicate a left or right lane change:
• Push the lever up or down to the first
stop position and release. The direction
indicator will flash three times and
stop.
• Push the lever up or down to the first
stop position and hold. The direction
indicator will flash for as long as you
hold the lever in this position. INTERIOR LAMPS
The lamps will switch on when you have
met one of the following conditions:
•
You open any door.
• You press a remote control button.
• You press the outer edge of the clear
lens on the front row map lamp.
Front Row Map Lamps To switch on the map lamps, press the
outer edge of the clear lens.
The front row map lamp will automatically
turn on when:
•
Any door is opened.
• You press and hold the top of the
instrument lighting dimmer switch past
the first detent.
• You press any of the remote entry
controls and the ignition is in the off
position.
86
Flex (), enUSA, First Printing LightingE163272 E166237
Page 90 of 496

Second Row Map Lamps
The second row lamps light when:
•
Any door is open.
• You press and hold the top of the
instrument lighting dimmer switch past
the first detent.
• You press any of the remote entry
controls and the ignition is in the off
position.
Press the lamp lens to activate the reading
lamps.
AMBIENT LIGHTING (If Equipped)
Adjust the ambient lighting using the
touchscreen.
87
Flex (), enUSA, First Printing LightingE173272