2017 FORD F SERIES MOTORHOME AND COMMERCIAL CHASSIS light
[x] Cancel search: lightPage 4 of 164
Introduction
About This Manual...........................................3
Symbols Glossary.............................................3
California Proposition 65
...............................5
Perchlorate..........................................................5
Ford Credit...........................................................5
Replacement Parts Recommendation........................................6
Special Notices
.................................................6
Mobile Communications Equipment.......................................................7
Export Unique Options
...................................7
Environment
Protecting the Environment
.........................9
Steering Wheel
Adjusting the Steering Wheel
....................10
Cruise Control
...................................................10
Wipers and Washers
Windshield Wipers...........................................11
Windshield Washers
.......................................11
Lighting
Lighting Control................................................12
Instrument Lighting Dimmer.......................12
Daytime Running Lamps
..............................13
Direction Indicators.........................................13
Instrument Cluster
Gauges................................................................14
Warning Lamps and Indicators..................16
Audible Warnings and Indicators
..............18
Information Displays
General Information
.......................................19
Information Messages
.................................20 Starting and Stopping the
Engine
General Information
......................................23
Ignition Switch
.................................................23
Starting a Gasoline Engine.........................23
Engine Block Heater......................................25
Fuel and Refueling
Safety Precautions........................................26
Fuel Quality
.......................................................27
Running Out of Fuel.......................................27
Refueling............................................................27
Fuel Consumption
.........................................29
Emission Control System
...........................30
Transmission
Automatic Transmission.............................33
Brakes
General Information
......................................36
Hints on Driving With Anti-Lock Brakes.............................................................36
Parking Brake
...................................................37
Cruise Control
Principle of Operation..................................38
Using Cruise Control.....................................38
Load Carrying
Load Limit.........................................................39
Towing
Towing a Trailer...............................................45
Recommended Towing Weights
..............46
Essential Towing Checks............................48
Towing the Vehicle on Four Wheels.......50
Driving Hints
Breaking-In........................................................51
1
Motorhome (TY3) Canada/United States of America, enUSA, First Printing Table of Contents
Page 7 of 164
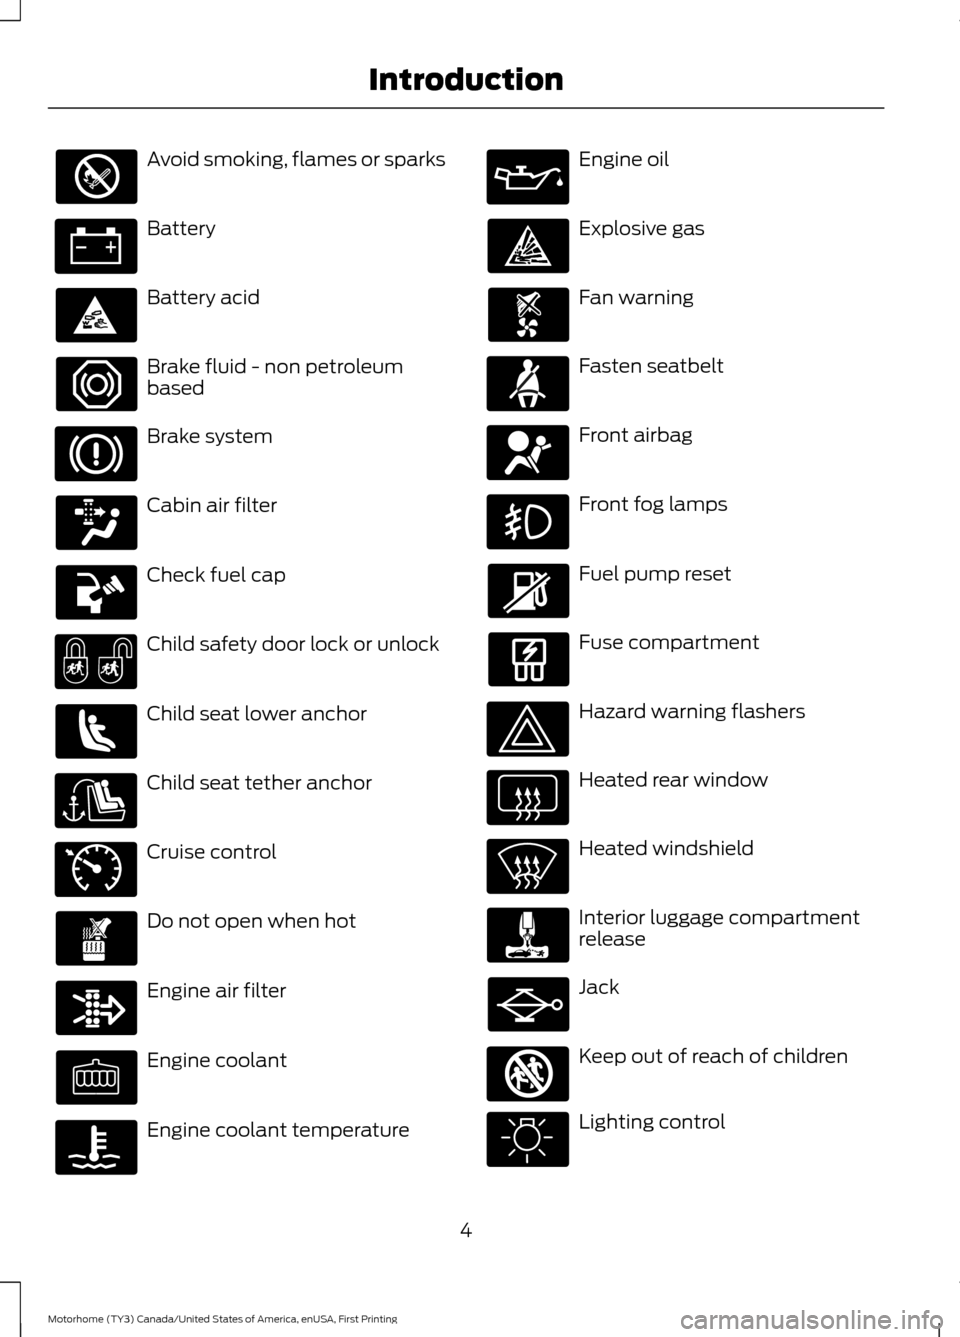
Avoid smoking, flames or sparks
Battery
Battery acid
Brake fluid - non petroleum
based
Brake system
Cabin air filter
Check fuel cap
Child safety door lock or unlock
Child seat lower anchor
Child seat tether anchor
Cruise control
Do not open when hot
Engine air filter
Engine coolant
Engine coolant temperature Engine oil
Explosive gas
Fan warning
Fasten seatbelt
Front airbag
Front fog lamps
Fuel pump reset
Fuse compartment
Hazard warning flashers
Heated rear window
Heated windshield
Interior luggage compartment
release
Jack
Keep out of reach of children
Lighting control
4
Motorhome (TY3) Canada/United States of America, enUSA, First Printing Introduction E71340 E161353
Page 9 of 164
We offer a number of convenient ways for
you to contact us and help to manage your
account.
Call 1-800-727-7000.
For more information about Ford Credit
and access to the Account Manager, go to
www.fordcredit.com.
REPLACEMENT PARTS
RECOMMENDATION
We have built your vehicle to the highest
standards using quality parts. We
recommend that you demand the use of
genuine Ford and Motorcraft parts
whenever your vehicle requires scheduled
maintenance or repair. You can clearly
identify genuine Ford and Motorcraft parts
by looking for the Ford, FoMoCo or
Motorcraft branding on the parts or their
packaging.
Scheduled Maintenance and
Mechanical Repairs
One of the best ways for you to make sure
that your vehicle provides years of service
is to have it maintained in line with our
recommendations using parts that
conform to the specifications detailed in
this Owner
’s Manual. Genuine Ford and
Motorcraft parts meet or exceed these
specifications.
Collision Repairs
We hope that you never experience a
collision, but accidents do happen.
Genuine Ford replacement collision parts
meet our stringent requirements for fit,
finish, structural integrity, corrosion
protection and dent resistance. During vehicle development we validate that
these parts deliver the intended level of
protection as a whole system. A great way
to know for sure you are getting this level
of protection is to use genuine Ford
replacement collision parts.
Warranty on Replacement Parts
Genuine Ford and Motorcraft replacement
parts are the only replacement parts that
benefit from a Ford Warranty. The Ford
Warranty may not cover damage caused
to your vehicle as a result of failed
non-Ford parts. For additional information,
refer to the terms and conditions of the
Ford Warranty.
SPECIAL NOTICES
New Vehicle Limited Warranty
For a detailed description of what is
covered and what is not covered by your
vehicle
’s New Vehicle Limited Warranty,
refer to the Warranty Manual that is
provided to you along with your Owner ’s
Manual.
Special Instructions
For your added safety, your vehicle is fitted
with sophisticated electronic controls. WARNINGS
You risk death or serious injury to
yourself and others if you do not
follow the instruction highlighted by
the warning symbol. Failure to follow the
specific warnings and instructions could
result in personal injury. Never place front seat mounted
rear-facing child or infant seats in
front of an active passenger airbag. 6
Motorhome (TY3) Canada/United States of America, enUSA, First Printing Introduction
Page 15 of 164
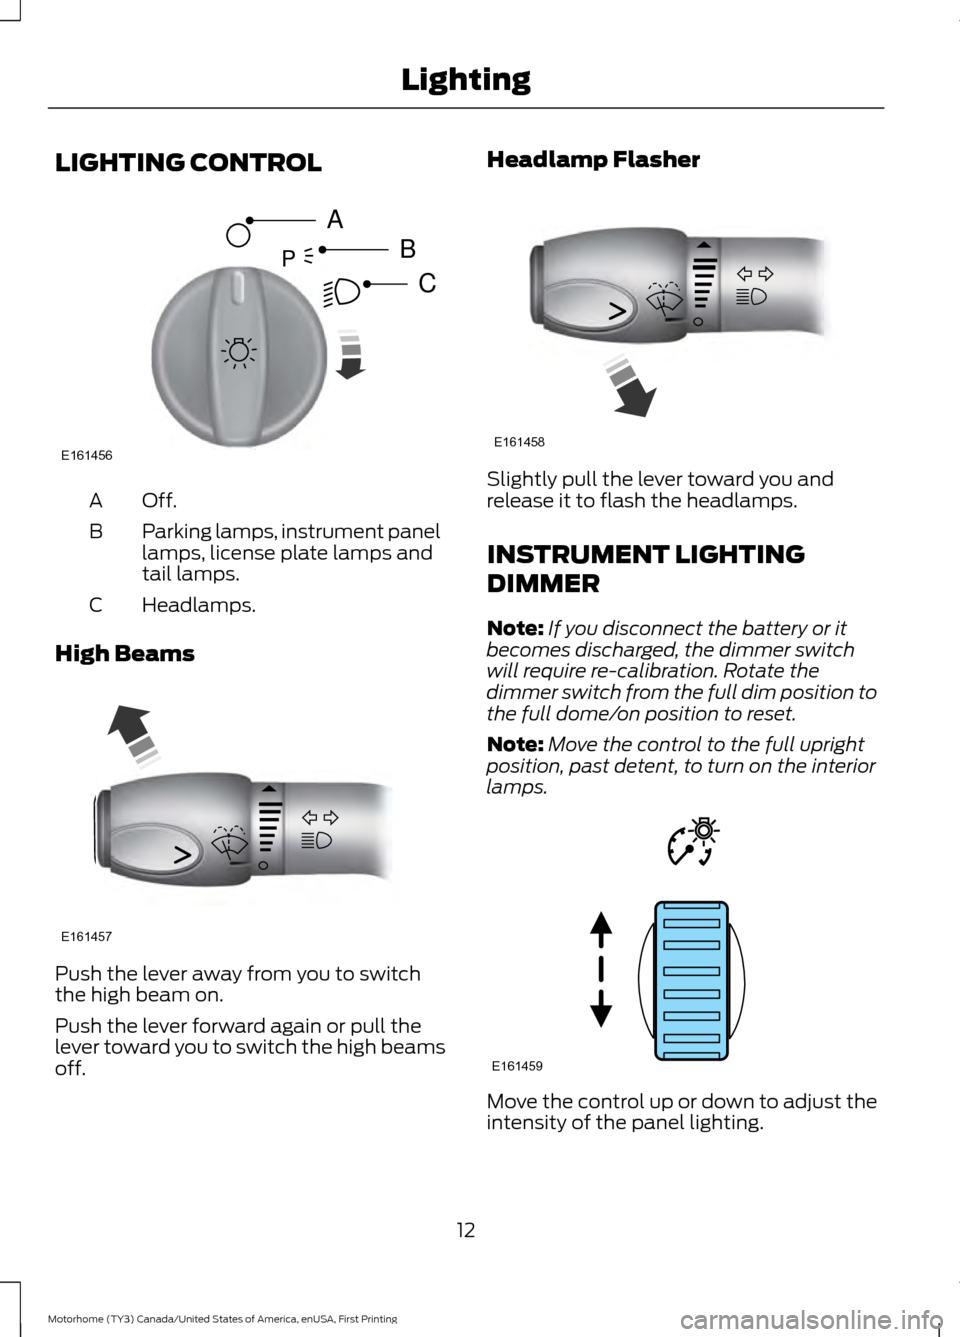
LIGHTING CONTROL
Off.A
Parking lamps, instrument panel
lamps, license plate lamps and
tail lamps.
B
Headlamps.
C
High Beams Push the lever away from you to switch
the high beam on.
Push the lever forward again or pull the
lever toward you to switch the high beams
off. Headlamp Flasher
Slightly pull the lever toward you and
release it to flash the headlamps.
INSTRUMENT LIGHTING
DIMMER
Note:
If you disconnect the battery or it
becomes discharged, the dimmer switch
will require re-calibration. Rotate the
dimmer switch from the full dim position to
the full dome/on position to reset.
Note: Move the control to the full upright
position, past detent, to turn on the interior
lamps. Move the control up or down to adjust the
intensity of the panel lighting.
12
Motorhome (TY3) Canada/United States of America, enUSA, First Printing LightingE161456
A
B
CP E161457 E161458 E161459
Page 16 of 164
DAYTIME RUNNING LAMPS (If
Equipped) WARNING
The daytime running lamps system
does not activate the rear lamps and
may not provide adequate lighting
during low visibility driving conditions. Also,
the autolamps switch position may not
activate the headlamps in all low visibility
conditions, such as daytime fog. Make sure
the headlamps are switched to auto or on,
as appropriate, during all low visibility
conditions. Failure to do so may result in a
crash. The system switches the low beam
headlamps on at a reduced intensity in
daylight conditions.
To switch the system on, switch the
ignition on, and switch the lighting control
to the off or parking lamp position.
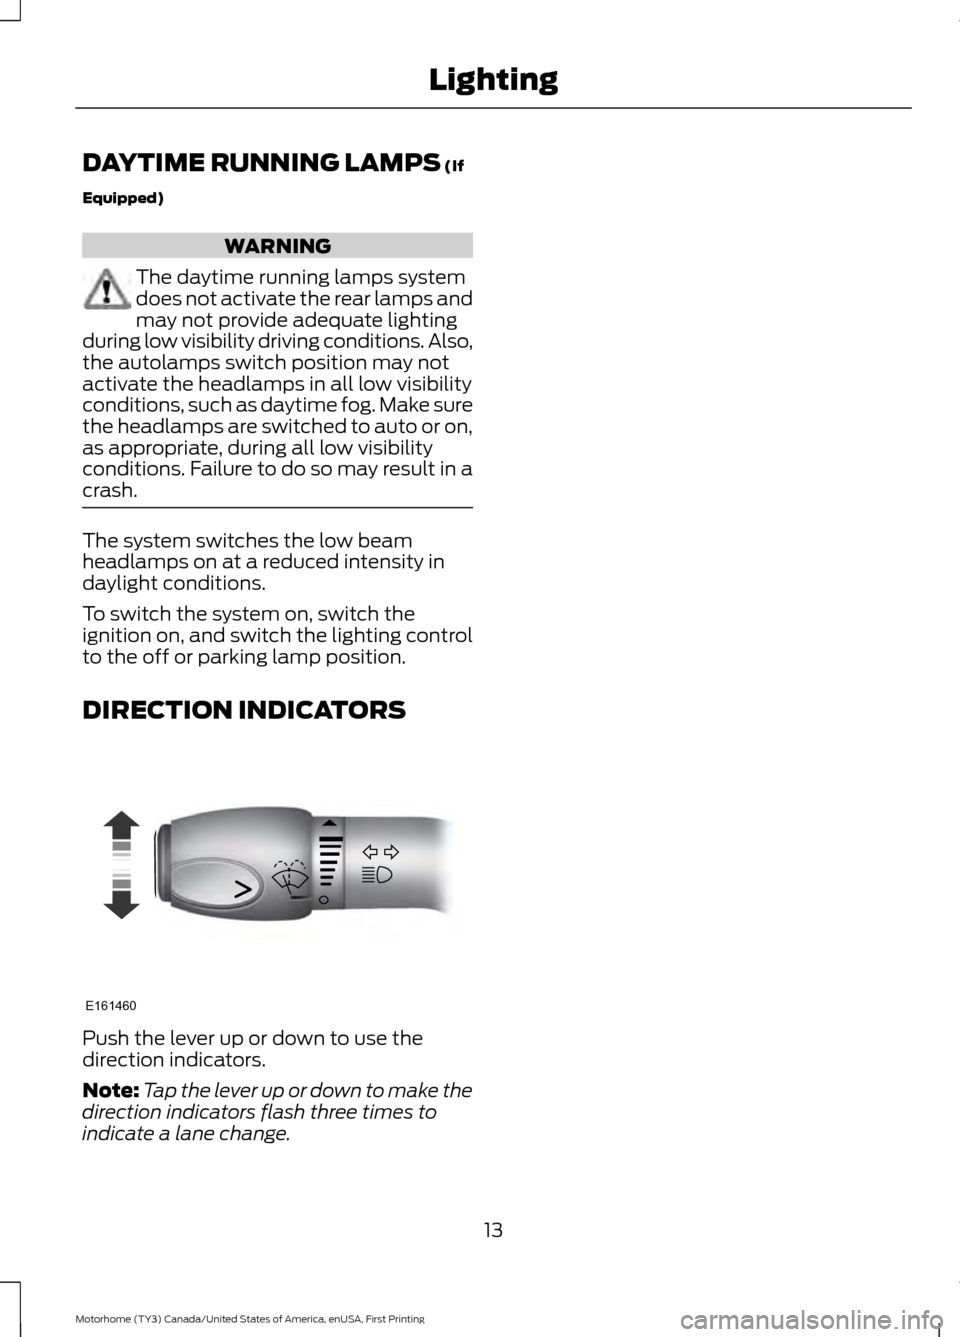
DIRECTION INDICATORS
Push the lever up or down to use the
direction indicators.
Note:
Tap the lever up or down to make the
direction indicators flash three times to
indicate a lane change.
13
Motorhome (TY3) Canada/United States of America, enUSA, First Printing LightingE161460
Page 18 of 164
Engine Oil Pressure Gauge
Indicates engine oil pressure. The needle
should stay in the normal operating range
(between L and H). If the needle falls
below the normal range, stop the vehicle,
turn off the engine and check the engine
oil level. Add oil if needed. If the oil level is
correct, have your vehicle checked by your
authorized dealer.
Speedometer
Indicates vehicle speed. Vehicle speed is
limited to either 65 mph (105 km/h) or 75
mph (120 km/h).
Transmission Fluid Temperature
Gauge
Normal area
The transmission fluid is within the normal
operating temperature (between H and
C).
Yellow area
The transmission fluid is higher than
normal operating temperature. This can
be caused by special operation conditions
(i.e. snowplowing, towing or off-road use).
Operating the transmission for extended
periods of time with the gauge in the
yellow area may cause internal
transmission damage. Altering the severity
of the driving conditions is recommended
to lower the transmission temperature into
the normal range.
Red area
The transmission fluid is overheating. Stop
the vehicle to allow the temperature to
return to normal range.
If the gauge is operating in the yellow or
red area, stop the vehicle and verify the
airflow is not restricted such as snow or
debris blocking airflow through the grill. If
the gauge continues to show high
temperatures, see your authorized dealer.
Engine Coolant Temperature
Gauge WARNING
Never remove the coolant reservoir
cap while the engine is running or hot.
At normal operating temperature, the
needle will remain in the center section.
Note:
Do not restart the engine until the
cause of overheating has been resolved.
If the needle enters the red section, the
engine is overheating. Stop the engine,
switch the ignition off and determine the
cause once the engine has cooled down.
Fuel Gauge
Note: The fuel gauge may vary slightly
when your vehicle is moving or on a slope.
Switch the ignition on. The fuel gauge
indicates approximately how much fuel
you have left in the fuel tank. The arrow
adjacent to the fuel pump symbol
indicates on which side of your vehicle the
fuel filler door is located.
The needle should move toward F when
you refuel your vehicle. If the needle points
to E after adding fuel, have an authorized
dealer check the system soon.
After refueling, some variability in the
position of the needle is normal:
15
Motorhome (TY3) Canada/United States of America, enUSA, First Printing Instrument Cluster
Page 20 of 164
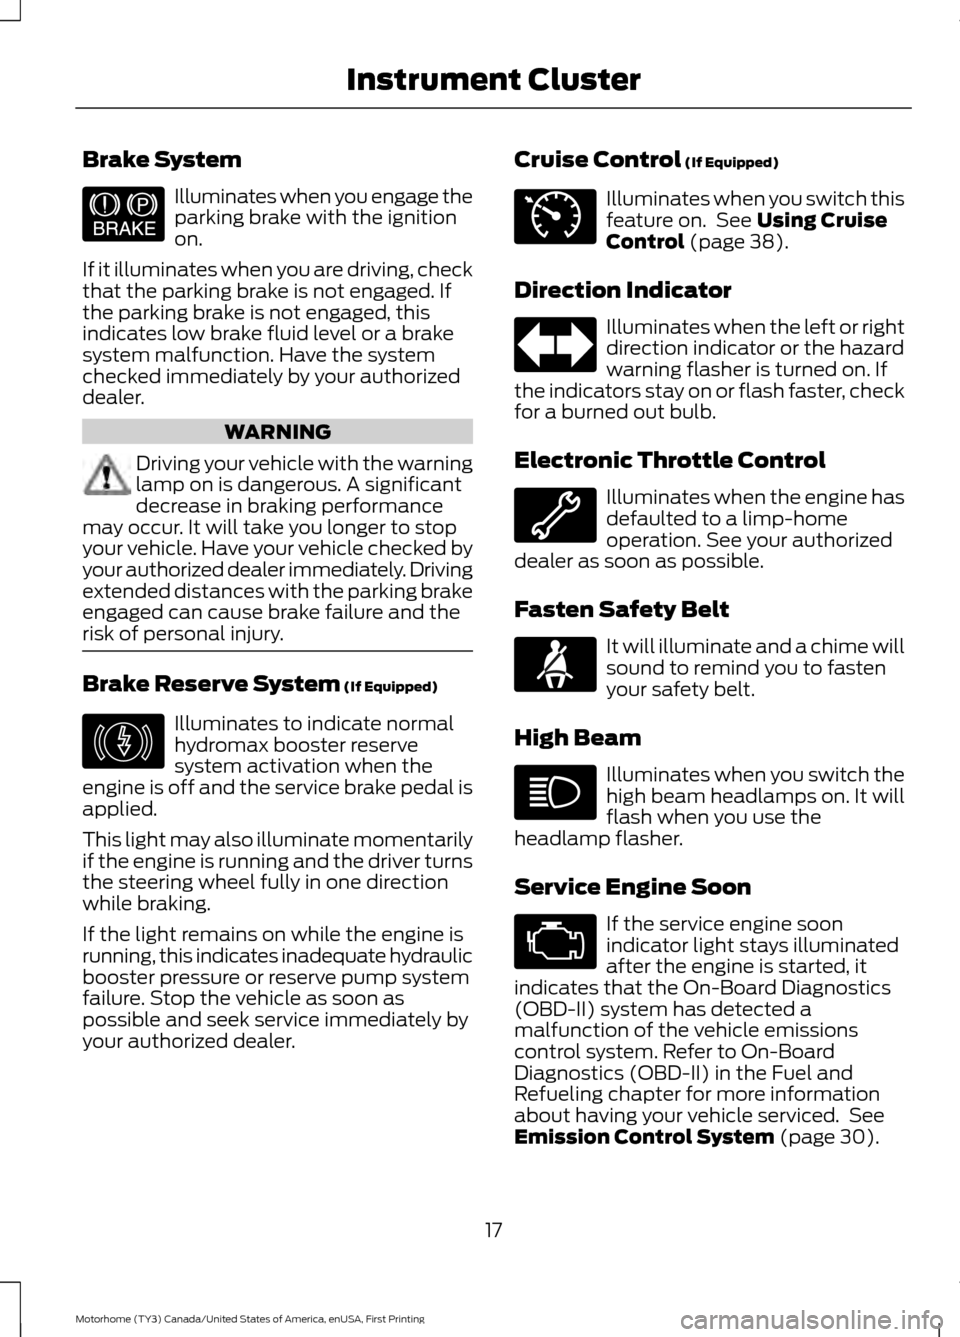
Brake System
Illuminates when you engage the
parking brake with the ignition
on.
If it illuminates when you are driving, check
that the parking brake is not engaged. If
the parking brake is not engaged, this
indicates low brake fluid level or a brake
system malfunction. Have the system
checked immediately by your authorized
dealer. WARNING
Driving your vehicle with the warning
lamp on is dangerous. A significant
decrease in braking performance
may occur. It will take you longer to stop
your vehicle. Have your vehicle checked by
your authorized dealer immediately. Driving
extended distances with the parking brake
engaged can cause brake failure and the
risk of personal injury. Brake Reserve System (If Equipped)
Illuminates to indicate normal
hydromax booster reserve
system activation when the
engine is off and the service brake pedal is
applied.
This light may also illuminate momentarily
if the engine is running and the driver turns
the steering wheel fully in one direction
while braking.
If the light remains on while the engine is
running, this indicates inadequate hydraulic
booster pressure or reserve pump system
failure. Stop the vehicle as soon as
possible and seek service immediately by
your authorized dealer. Cruise Control
(If Equipped) Illuminates when you switch this
feature on. See
Using Cruise
Control (page 38).
Direction Indicator Illuminates when the left or right
direction indicator or the hazard
warning flasher is turned on. If
the indicators stay on or flash faster, check
for a burned out bulb.
Electronic Throttle Control Illuminates when the engine has
defaulted to a limp-home
operation. See your authorized
dealer as soon as possible.
Fasten Safety Belt It will illuminate and a chime will
sound to remind you to fasten
your safety belt.
High Beam Illuminates when you switch the
high beam headlamps on. It will
flash when you use the
headlamp flasher.
Service Engine Soon If the service engine soon
indicator light stays illuminated
after the engine is started, it
indicates that the On-Board Diagnostics
(OBD-II) system has detected a
malfunction of the vehicle emissions
control system. Refer to On-Board
Diagnostics (OBD-II) in the Fuel and
Refueling chapter for more information
about having your vehicle serviced. See
Emission Control System
(page 30).
17
Motorhome (TY3) Canada/United States of America, enUSA, First Printing Instrument ClusterE144522 E146190 E71340
Page 21 of 164

If the light is blinking, engine misfire is
occurring which could damage your
catalytic converter. Drive in a moderate
fashion (avoid heavy acceleration and
deceleration) and have your vehicle
serviced immediately.
WARNING
Under engine misfire conditions,
excessive exhaust temperatures
could damage the catalytic
converter, the fuel system, interior floor
coverings or other vehicle components,
possibly causing a fire. Have your vehicle
serviced immediately. The service engine soon indicator light
illuminates when the ignition is first turned
on prior to engine start to check the bulb
and to indicate whether the vehicle is ready
for Inspection/Maintenance (I/M) testing.
Normally, the service engine soon light will
stay on until the engine is cranked, then
turn itself off if no malfunctions are
present. However, if after 15 seconds the
service engine soon light blinks eight times,
it means that the vehicle is not ready for
I/M testing. See Emission Control
System (page 30).
Transmission Tow/Haul
(If Equipped) Illuminates when the tow/haul
feature has been activated. If the
light flashes steadily, have the
system serviced immediately, damage to
the transmission could occur.
AUDIBLE WARNINGS AND
INDICATORS
Fail-Safe Cooling Warning Chime
Sounds when the coolant gauge pointer
has moved to hot. There are three stages
of chimes: •
Stage 1 is a single chime when the
engine temperature begins to overheat.
• Stage 2 is multiple chimes and engine
power becomes limited in order to help
cool the engine.
• Stage 3 is multiple chimes and the
engine will shut down.
Headlamps On Warning Chime
Sounds when you remove the key from the
ignition and open the driver's door and you
have left the headlamps or parking lamps
on.
Key in Ignition Warning Chime
Sounds when you open the driver's door
and you have left the key in the ignition.
Parking Brake On Warning Chime
Sounds when you have left the parking
brake on and drive your vehicle. If the
warning chime remains on after you have
released the parking brake, have the
system checked by your authorized dealer
immediately.
Shift to Park Warning Chime
Sounds when you open the driver's door
and your vehicle is not in park.
18
Motorhome (TY3) Canada/United States of America, enUSA, First Printing Instrument ClusterE161509