2017 FORD EXPLORER fuel type
[x] Cancel search: fuel typePage 94 of 541

GAUGES
Type 1
Tachometer.
A
Information display. See Information Displays (page 99).
B
Speedometer.
C
Fuel gauge.
D
Engine coolant temperature gauge.
E
91
Explorer (TUB) Canada/United States of America, enUSA, Edition date: 03/2016, First Printing Instrument ClusterE193714
Page 96 of 541

Type 3
Tachometer.
A
Information display. See Information Displays (page 99).
B
Speedometer.
C
Fuel gauge.
D
Engine coolant temperature gauge.
E
Information Display
Odometer
Located in the bottom of the information
display. Registers the accumulated
distance your vehicle has traveled.
Compass
Displays the vehicle's heading direction. Trip Computer
See
General Information (page 99).
Vehicle Settings and Personalization
See
General Information (page 99).
93
Explorer (TUB) Canada/United States of America, enUSA, Edition date: 03/2016, First Printing Instrument ClusterE203205
Page 107 of 541

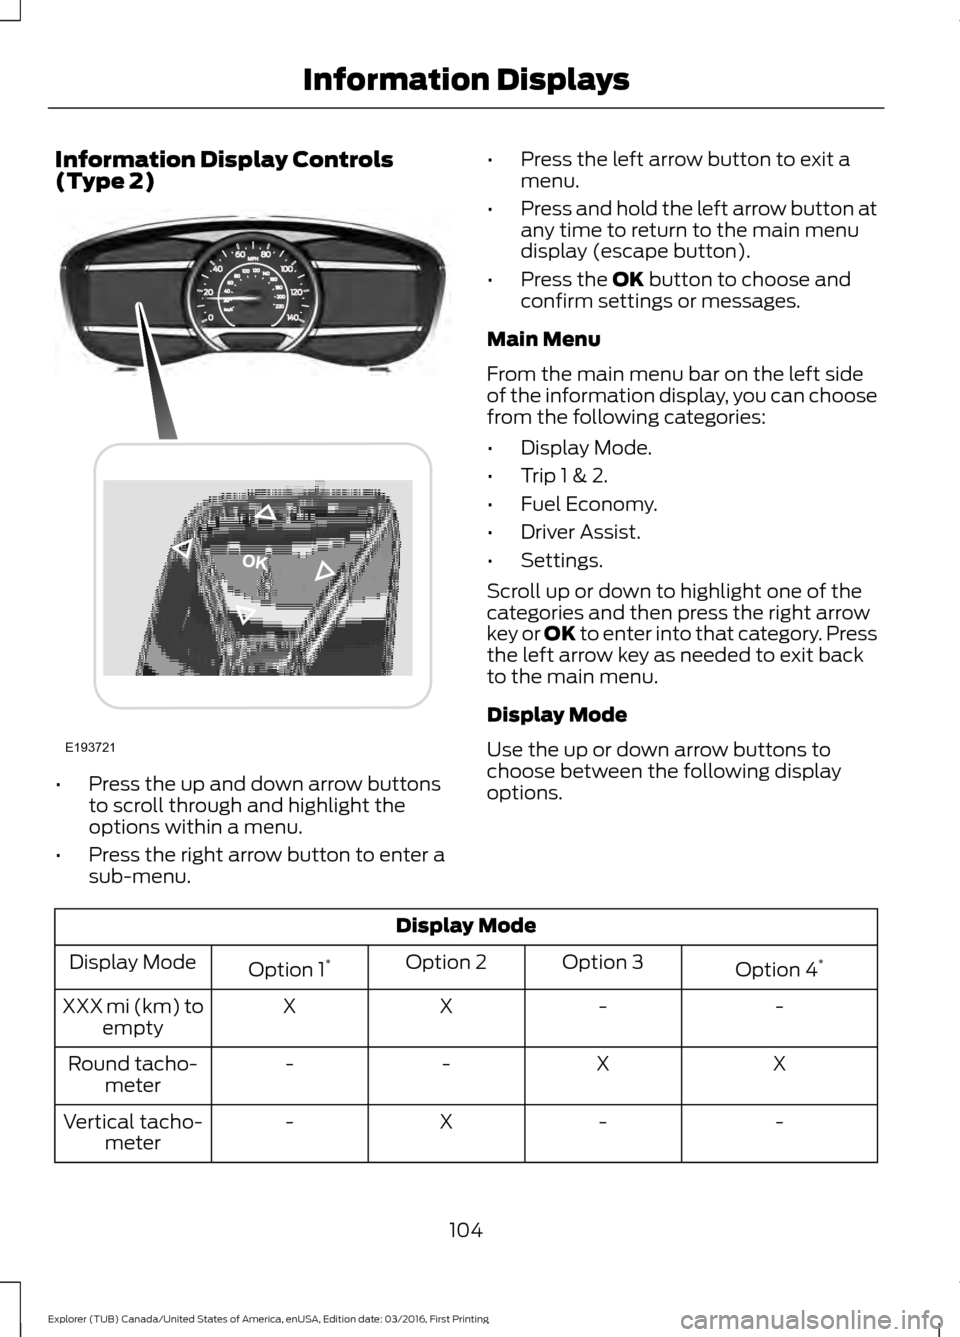
Information Display Controls
(Type 2)
•
Press the up and down arrow buttons
to scroll through and highlight the
options within a menu.
• Press the right arrow button to enter a
sub-menu. •
Press the left arrow button to exit a
menu.
• Press and hold the left arrow button at
any time to return to the main menu
display (escape button).
• Press the OK button to choose and
confirm settings or messages.
Main Menu
From the main menu bar on the left side
of the information display, you can choose
from the following categories:
• Display Mode.
• Trip 1 & 2.
• Fuel Economy.
• Driver Assist.
• Settings.
Scroll up or down to highlight one of the
categories and then press the right arrow
key or OK to enter into that category. Press
the left arrow key as needed to exit back
to the main menu.
Display Mode
Use the up or down arrow buttons to
choose between the following display
options. Display Mode
Option 4*
Option 3
Option 2
Option 1 *
Display Mode
-
-
X
X
XXX mi (km) to
empty
X
X
-
-
Round tacho-
meter
-
-
X
-
Vertical tacho-
meter
104
Explorer (TUB) Canada/United States of America, enUSA, Edition date: 03/2016, First Printing Information DisplaysE193721
Page 112 of 541

Settings
Fuel Gauge or Fuel + Tach
Gauge
Display
psi
, kPa or bar
Tire Pres-
sure
Choose your applicable setting
Language
Note: Some MyKey items only appear if a
MyKey is set.
Information Display Controls
(Type 3) •
Press and hold the left arrow button at
any time to return to the main menu
display (escape button).
• Press the
OK button to choose and
confirm settings or messages. •
Press the up and down arrow buttons
to scroll through and highlight the
options within a menu.
• Press the right arrow button to enter a
sub-menu.
• Press the left arrow button to exit a
menu.
Main Menu
From the main menu bar on the left side
of the information display, you can choose
from the following categories:
• Trip 1 & 2.
• Fuel Economy.
• Driver Assist.
• Settings.
Scroll up or down to highlight one of the
categories and then press the right arrow
key or OK to enter into that category. Press
the left arrow key as needed to exit back
to the main menu.
Trip 1 & 2
You can access the menu using the
information display control.
Note: Some options may appear slightly
different or not at all if the items are
optional.
109
Explorer (TUB) Canada/United States of America, enUSA, Edition date: 03/2016, First Printing Information DisplaysE203206
Page 178 of 541

Keep a record for at least one month and
record the type of driving (city or highway).
This provides an accurate estimate of your
vehicle
’s fuel economy under current
driving conditions. Keeping records during
summer and winter will show how
temperature impacts fuel economy.
Conditions
• Heavily loading your vehicle reduces
fuel economy.
• Carrying unnecessary weight in your
vehicle may reduce fuel economy.
• Adding certain accessories to your
vehicle such as bug deflectors, rollbars
or light bars, running boards and ski
racks may reduce fuel economy.
• Using fuel blended with alcohol may
lower fuel economy.
• Fuel economy may decrease with lower
temperatures.
• Fuel economy may decrease when
driving short distances.
• You will get better fuel economy when
driving on flat terrain than when driving
on hilly terrain.
EMISSION CONTROL SYSTEM WARNINGS
Do not park, idle or drive your vehicle
on dry grass or other dry ground
cover. The emission system heats up
the engine compartment and exhaust
system, creating the risk of fire. Exhaust leaks may result in entry of
harmful and potentially lethal fumes
into the passenger compartment. If
you smell exhaust fumes inside your
vehicle, have your vehicle inspected
immediately. Do not drive if you smell
exhaust fumes. Your vehicle has various emission control
components and a catalytic converter that
enables it to comply with applicable
exhaust emission standards.
To make sure that the catalytic converter
and other emission control components
continue to work properly:
•
Use only the specified fuel listed.
• Avoid running out of fuel.
• Do not turn off the ignition while your
vehicle is moving, especially at high
speeds.
• Have the items listed in scheduled
maintenance information performed
according to the specified schedule.
The scheduled maintenance items listed
in scheduled maintenance information are
essential to the life and performance of
your vehicle and to its emissions system.
If you use anything other than Ford,
Motorcraft or Ford-authorized parts for
maintenance replacements or for service
of components affecting emission control,
such non-Ford parts should be equivalent
to genuine Ford Motor Company parts in
performance and durability.
Illumination of the service engine soon
indicator, charging system warning light or
the temperature warning light, fluid leaks,
strange odors, smoke or loss of engine
power could indicate that the emission
control system is not working properly.
An improperly operating or damaged
exhaust system may allow exhaust to
enter the vehicle. Have a damaged or
improperly operating exhaust system
inspected and repaired immediately.
Do not make any unauthorized changes to
your vehicle or engine. By law, vehicle
owners and anyone who manufactures,
repairs, services, sells, leases, trades
vehicles, or supervises a fleet of vehicles
are not permitted to intentionally remove
175
Explorer (TUB) Canada/United States of America, enUSA, Edition date: 03/2016, First Printing Fuel and Refueling
Page 245 of 541

Trailer Brakes
WARNING
Do not connect a trailer's hydraulic
brake system directly to your
vehicle's brake system. Your vehicle
may not have enough braking power and
your chances of having a collision greatly
increase. Electric brakes and manual, automatic or
surge-type trailer brakes are safe if you
install them properly and adjust them to
the manufacturer's specifications. The
trailer brakes must meet local and federal
regulations.
The rating for the tow vehicle's braking
system operation is at the gross vehicle
weight rating, not the gross combined
weight rating.
Separate functioning brake systems
are required for safe control of towed
vehicles and trailers weighing more
than 1500 pounds (680 kilograms)
when loaded.
Trailer Lamps
WARNING
Never connect any trailer lamp wiring
to the vehicle's tail lamp wiring; this
may damage the electrical system
resulting in fire. Contact your authorized
dealer as soon as possible for assistance
in proper trailer tow wiring installation.
Additional electrical equipment may be
required. Trailer lamps are required on most towed
vehicles. Make sure all running lights, brake
lights, turn signals and hazard lights are
working. Before Towing a Trailer
Practice turning, stopping and backing up
to get the feel of your vehicle-trailer
combination before starting on a trip.
When turning, make wider turns so the
trailer wheels clear curbs and other
obstacles.
When Towing a Trailer
•
Do not drive faster than 70 mph
(113 km/h) during the first 500 mi
(800 km).
• Do not make full-throttle starts.
• Check your hitch, electrical connections
and trailer wheel lug nuts thoroughly
after you have traveled 50 mi (80 km).
• When stopped in congested or heavy
traffic during hot weather, place the
gearshift in position P to aid engine and
transmission cooling and to help A/C
performance.
• Turn off the speed control with heavy
loads or in hilly terrain. The speed
control may turn off automatically
when you are towing on long, steep
grades.
• Shift to a lower gear when driving down
a long or steep hill. Do not apply the
brakes continuously, as they may
overheat and become less effective.
• If your transmission is equipped with a
Grade Assist or Tow/Haul feature, use
this feature when towing. This provides
engine braking and helps eliminate
excessive transmission shifting for
optimum fuel economy and
transmission cooling.
• Allow more distance for stopping with
a trailer attached. Anticipate stops and
brake gradually.
• Avoid parking on a grade. However, if
you must park on a grade:
1. Turn the steering wheel to point your vehicle tires away from traffic flow.
242
Explorer (TUB) Canada/United States of America, enUSA, Edition date: 03/2016, First Printing Towing
Page 308 of 541

GENERAL INFORMATION
Use only approved wheel and tire sizes,
using other sizes could damage your
vehicle. If you change the diameter of the
tires from that fitted at the factory, the
speedometer may not display the correct
speed. Take your vehicle to an authorized
Ford dealer to have the system
reprogrammed. If you intend to change the
size of the wheels from that fitted by the
manufacturer, you can check the suitability
with an authorized dealer.
Additional information related to the
functionality and maintenance of your tires
can be found later in this chapter. See Tire
Care (page 308).
The Ford recommended tire inflation
pressures can be found on the Tire Label,
which is located on the B-pillar or the edge
of the driver's door. This information can
also be found on the Safety Compliance
Certification Label (affixed to either the
door hinge pillar, door-latch post, or the
door edge that meets the door last post;
next to the driver ’s seating position).
Ford strongly recommends maintaining
these tire pressures at all times. Failure to
follow the tire pressure recommendations
can cause uneven treadwear patterns,
reduced fuel economy, and adversely
affect the way your vehicle handles.
Note: Check and set the tire pressure at the
ambient temperature in which you are
intending to drive your vehicle and when the
tires are cold.
Note: Check your tire pressures at least
once per month.
Set the pressure for your spare tire to the
highest value given for your vehicle and tire
size combination (if equipped). Notice to utility vehicle and truck
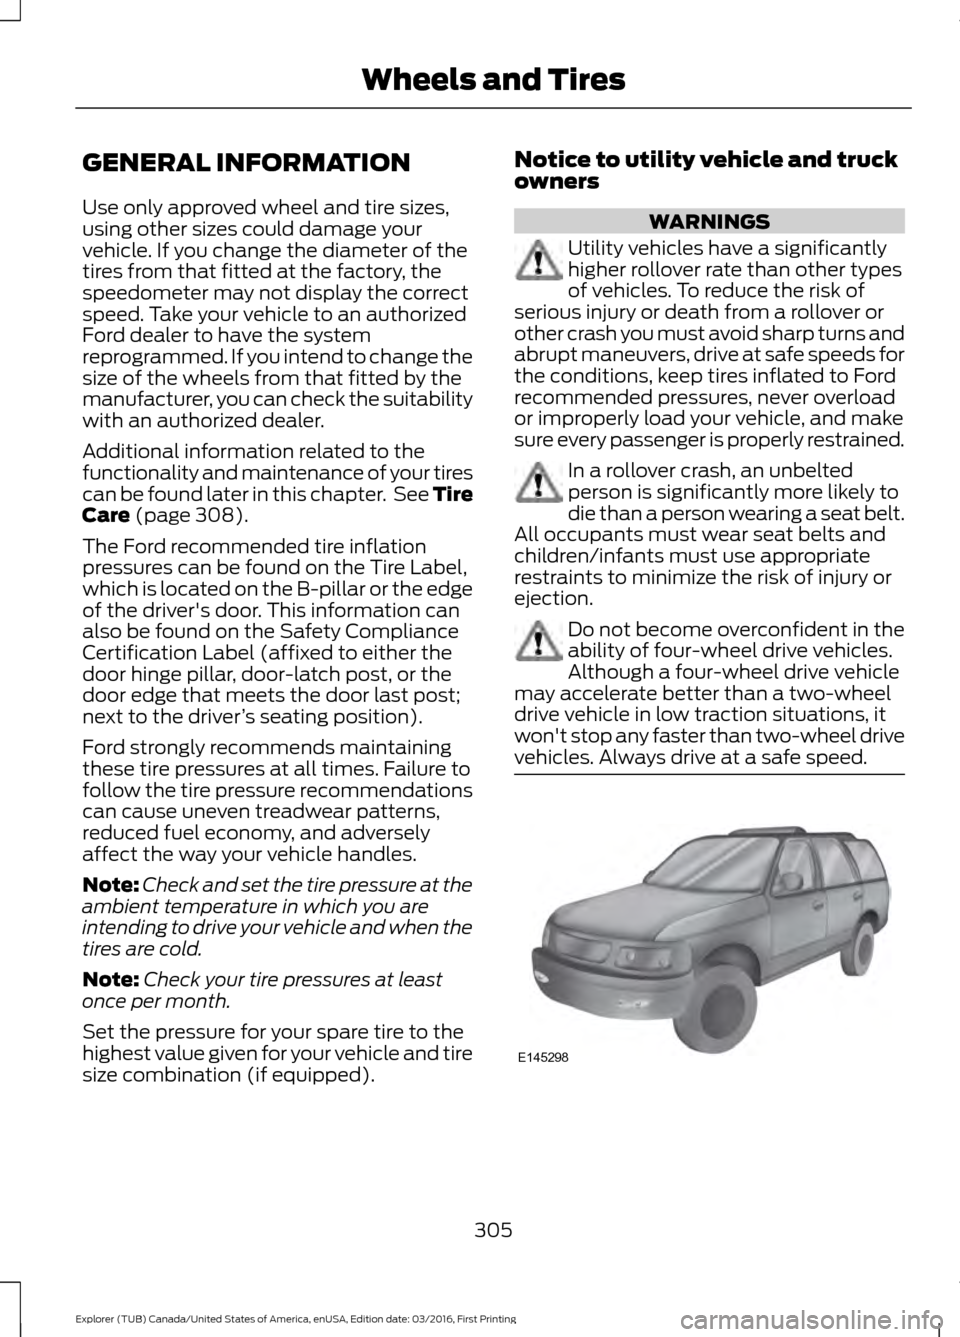
owners WARNINGS
Utility vehicles have a significantly
higher rollover rate than other types
of vehicles. To reduce the risk of
serious injury or death from a rollover or
other crash you must avoid sharp turns and
abrupt maneuvers, drive at safe speeds for
the conditions, keep tires inflated to Ford
recommended pressures, never overload
or improperly load your vehicle, and make
sure every passenger is properly restrained. In a rollover crash, an unbelted
person is significantly more likely to
die than a person wearing a seat belt.
All occupants must wear seat belts and
children/infants must use appropriate
restraints to minimize the risk of injury or
ejection. Do not become overconfident in the
ability of four-wheel drive vehicles.
Although a four-wheel drive vehicle
may accelerate better than a two-wheel
drive vehicle in low traction situations, it
won't stop any faster than two-wheel drive
vehicles. Always drive at a safe speed. 305
Explorer (TUB) Canada/United States of America, enUSA, Edition date: 03/2016, First Printing Wheels and TiresE145298
Page 448 of 541

You can adjust the view in preset
increments. You can also pinch to zoom in
or out of the map.
The information bar tells you the names
of streets, cities or landmarks as you hover
over them with the crosshair curser.
You can change your view of the map by
tapping on the location indicator icon on
the right hand side of the screen. You can
choose from the following options:
Heading up (2D map) This
always shows the direction of
forward travel to be upward on
the screen. This view is available
for map scales up to
3 mi (5 km). North up (2D map)
always
shows the northern direction to
be upward on the screen. 3D map mode
provides an
elevated perspective of the map.
Adjust this viewing angle and
rotate the map 180 degrees by
touching the map twice, and
then dragging your finger along the shaded
bar with arrows at the bottom of the map. Re-center the map by pressing
this icon whenever you scroll the
map away from your vehicle
’s
current location. Points of Interest (POI)
grouping icon: You can choose
up to three POI icons to display
on the map. If the chosen POIs
are located close together or are
at the same location a box is used to
display a single category icon instead of
repeating the same icon, in order to reduce
clutter. When you select the box on the
map, a pop-up appears indicating how
many POIs are in this location. Select the
pop up to see a list of the available POIs.
You can scroll through and select POIs
from this list.
If your vehicle is low on charge or fuel,
station icons automatically display on the
map.
If you have subscribed to SiriusXM Traffic
and Travel Link (where available), traffic
flow will be indicated on the map by green
(clear), yellow (slowing), and red
(stopped) road highlights. Traffic flow is
indicated where the information is
available and varies across the US.
You can choose to display traffic icons on
the map representing twelve different
types of incidents. See
Settings (page
454).
You can set a destination by hovering
above a location and selecting: Button
Start
Destination Mode
To set a destination, press: Description
Menu Item
Destination
Enter a navigation destination in any of the following formats: Street Address
Search
445
Explorer (TUB) Canada/United States of America, enUSA, Edition date: 03/2016, First Printing SYNC™ 3E207750 E207749 E207748 E207751 E207754