2017 FIAT TIPO 5DOORS STATION WAGON wipers
[x] Cancel search: wipersPage 2 of 264

This Owner Handbook is intended to show the vehicle's operating conditio\
ns.
For the enthusiast user who wants to have insights, curiosities and deta\
iled information about the characteristics and functions
of the vehicle, Fiat gives the opportunity to consult a dedicated sectio\
n which is available in electronic format.
ONLINE VEHICLE OWNER HANDBOOK
The following symbol is reported within the text of the Owner Handbook, next to the subjects \
for which details are provided.
Go to the www.mopar.eu/owner
website and access your personal area.
The “Maintenance and care” page includes all the information about\
your vehicle and the link to access eLUM, where you will find
all the details of the Owner Handbook.
Alternatively, to access this information, go to the Internet website at\
http://aftersales.fiat.com/elum/
.
The eLUM website is free and will allow you, among many other things, to easily c\
onsult the on-board documents
of all the other vehicles of the Group.
Have a nice reading and happy motoring!
We really know your car because we invented, designed and built it: we r\
eally know every single detail.
At Fiat Service authorised workshops you can find technicians directly trained by us,
offering quality and professionalism for all service operations.
Fiat workshops are always close to you for the regular servicing operati\
ons, season checks and practical recommendations by our experts.
With Original Parts distributed by MOPAR
®, you maintain the reliability, comfort
and performance features that you bought your new car for over time.
Always ask for Genuine Parts for the components used on our cars; we rec\
ommend them because
they come from our steady commitment in research and development of high\
ly innovative technologies. For all these reasons: rely on Genuine Parts, because they are the only ones designed by FCA for your car.
SAFETY:
BRAKING SYSTEMENVIRONMENT: PARTICULATE FILTERS, CLIMATE CONTROL MAINTENANCECOMFORT: SUSPENSION
AND WINDSCREEN WIPERS PERFORMANCE: SPARK PLUGS, INJECTORS AND BATTERIESLINEACCESSORI
ROOF RACK BARS, WHEEL RIMS
WHY CHOOSING GENUINE PARTS
COP TIPO 5 DOORS UM SW GB.qxp_500 UM ITA 31/05/16 17:11 Pagina 2
Page 9 of 264

KNOWING YOUR CAR
In-depth knowledge of your new vehicle
starts here.
The booklet that you are reading simply
and directly explains how it is made and
how it works.
That’s why we advise you to read it
seated comfortably on board, so that
you can see immediately what is
described here for yourself.INSTRUMENT PANEL...........8
THE KEYS.................11
IGNITION DEVICE............12
FIAT CODE.................13
DOORS...................14
SEATS....................16
HEAD RESTRAINTS...........20
STEERING WHEEL............21
REAR VIEW MIRRORS.........22
EXTERNAL LIGHTS...........23
INTERIOR LIGHTS............26
WINDSCREEN / REAR WINDOW
WIPERS..................26
CLIMATE CONTROL...........29
ELECTRIC WINDOWS..........33
BONNET..................33
DUALDRIVE ELECTRIC POWER
STEERING.................34
LUGGAGE COMPARTMENT......35
HEADLIGHTS...............40
ROOF RACK/SKI RACK........41
VERSION WITH LPG SYSTEM....41
ACTIVE GRILLE SHUTTER.......49
7
Page 28 of 264

INTERIOR LIGHTS
FRONT CEILING LIGHT
Switch 1 fig. 35 is used to switch on/off
the ceiling light bulbs.
Switch 1 positions:
central position: lights 2 and 5 switch
on/off when the doors are
opened/closed;
pressed to the left (OFF): lights 2 and
5 are always switched off;
pressed to the right (): lights
2 and 5 are always switched on.
The lights switch on/off gradually.
Switch 3 switches on/off light 2.
Switch 4 switches on/off light 5.
IMPORTANT Before getting out of the
vehicle, make sure that the roof light
bulbs are off; this will prevent thebattery from being drained once the
doors are closed. In any case, if a light
is left on by mistake, the ceiling light
switches off automatically about
15 minutes after the engine has been
switched off.
Ceiling light timing
On certain versions, to facilitate getting
in/out of the vehicle at night or in
poorly-lit areas, two timed modes have
been provided.
Timing while getting into the car
The ceiling lights switch on according to
the following modes:
for a few seconds when the doors
are unlocked;
for about 3 minutes when one of the
doors is opened;
for a few seconds when the doors
are locked.
Timing is interrupted when the ignition
device is turned to MAR.
Timing while getting out of the car
The roof lights come on when the key is
removed from the ignition within
2 minutes of switching off the engine,
on opening and closing a door with the
removed key.
The timing stops automatically when
the doors are locked.
WINDSCREEN /
REAR WINDOW
WIPERS
The right stalk controls screen
wiper/washer operation.
Operation is only possible with the
ignition device at MAR.
WINDSCREEN WIPER /
WASHER
Operation
21)
5) 6)
Ring 1 fig. 36 can be set to the
following positions:
windscreen wiper off
slow intermittent operation
fast intermittent operation
LOWslow continuous operation
HIGHfast continuous operation
MIST function3504136J0001EM
26
KNOWING YOUR CAR
Page 29 of 264

Move the stalk upwards (unstable
position) to activate the MIST
function: operation is limited to the
time for which the stalk is held in this
position. When released, the stalk will
return to its default position and the
windscreen wiper will be stopped.
“Smart washing” function
Pull the stalk towards the steering
wheel (unstable position) to operate the
windscreen washer.
When the stalk is held pulled for longer
than half a second, the windscreen
wiper is moved with active control.
When the driver releases the stalk, the
windscreen wiper makes three strokes.
Afterwards, if the control is in position
, the washing cycle is concluded by
one last stroke after a 6 second pause.If the position isLOWorHIGH, the
smart washing function is not carried
out.
“Service Position” function
This function makes it possible to
replace the wipers or protect them in
conditions of ice and/or snow.
It can only be activated after stopping
the engine.
The "Service Position" function can be
explicitly requested within two minutes
of stopping the engine, when the
wipers have correctly returned to the
parking position.
The function can be activated by
turning the ring nut to position
and
moving the stalk upwards, to the MIST
position, more than three times. The
activations are used to position the
wipers as preferred. The function is
deactivated when the vehicle is turned
on, with a wiping request or when the
vehicle is moving (speed above
5 Km/h).
IMPORTANT Make sure, when starting
the engine, that the windscreen is free
of snow or ice before turning the
ignition key.RAIN SENSOR
(where provided)
7) 8)
This is a device located behind the
interior rear view mirrorfig. 37, in
contact with the windscreen and can
measure the amount of rain and,
consequently, manage the automatic
wiping mode of the windscreen in
accordance with the amount of water
on the screen (see the “Automatic
Wiping” paragraph).
REAR WINDOW WIPER /
WASHER
Ring nut 2, shown in fig. 38 can be set
to the following positions:
rear window wiper stopped
intermittent operation
continuous operation, without
pausing between two strokes.
36P2000061-000-000
3704146J0003EM
27
Page 30 of 264

The rear window wiper can be activated
in the following ways:
intermittent with a 2-second pause
between two strokes, when ring nut 2 is
in position
and the windscreen
wiper is not in operation;
synchronous (at half the windscreen
wiper frequency), when ring nut 2 is in
position
and the windscreen
wiper is in operation or when ring nut
2 is in position
, reverse gear is
engaged and the windscreen wiper is in
operation;
continuous when ring nut 2 is in
position
.
Push the stalk towards the dashboard
(rocking position) to activate the rear
window washer jet. Keep pushing the
lever to automatically activate both the
rear window washer jet and the rear
window wiper with a single movement.
Releasing the stalk will activate threestrokes, as described for the
windscreen wiper. If the position is
(rear window wiper stopped), after a
6 second pause, the washing cycle is
completed by a single stroke. The
smart wash cycle will not be performed
if the position is
.
WARNING
21)If the window needs to be cleaned,
make sure the device is deactivated or the
key is on STOP.
IMPORTANT
5)Never use the windscreen wipers to
remove layers of snow or ice from the
windscreen. In such conditions, the
windscreen wiper may be subjected to
excessive stress and the motor cut-out
switch, which prevents operation for a few
seconds, may intervene. If operation is not
subsequently restored, even after restarting
the engine, contact a Fiat Dealership.
6)Do not operate the windscreen wiper
with the blades lifted from the windscreen.
7)Do not activate the rain sensor when
washing the car in an automatic car wash.
8)Make sure the device is switched off if
there is ice on the windscreen.
38P2000062-000-000
28
KNOWING YOUR CAR
Page 36 of 264

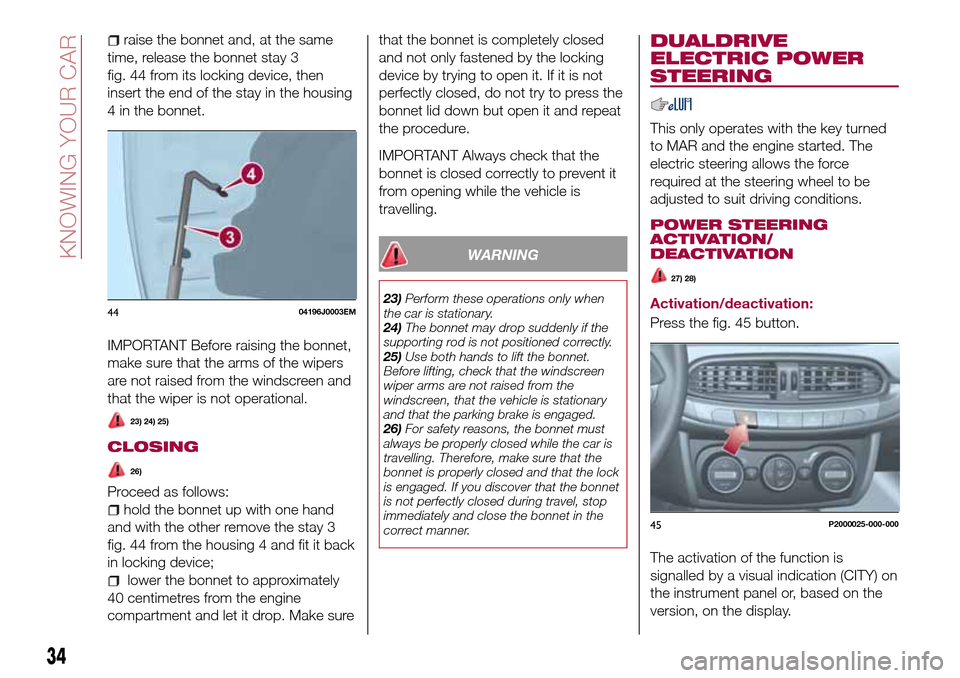
raise the bonnet and, at the same
time, release the bonnet stay 3
fig. 44 from its locking device, then
insert the end of the stay in the housing
4 in the bonnet.
IMPORTANT Before raising the bonnet,
make sure that the arms of the wipers
are not raised from the windscreen and
that the wiper is not operational.
23) 24) 25)
CLOSING
26)
Proceed as follows:
hold the bonnet up with one hand
and with the other remove the stay 3
fig. 44 from the housing 4 and fit it back
in locking device;
lower the bonnet to approximately
40 centimetres from the engine
compartment and let it drop. Make surethat the bonnet is completely closed
and not only fastened by the locking
device by trying to open it. If it is not
perfectly closed, do not try to press the
bonnet lid down but open it and repeat
the procedure.
IMPORTANT Always check that the
bonnet is closed correctly to prevent it
from opening while the vehicle is
travelling.
WARNING
23)Perform these operations only when
the car is stationary.
24)The bonnet may drop suddenly if the
supporting rod is not positioned correctly.
25)Use both hands to lift the bonnet.
Before lifting, check that the windscreen
wiper arms are not raised from the
windscreen, that the vehicle is stationary
and that the parking brake is engaged.
26)For safety reasons, the bonnet must
always be properly closed while the car is
travelling. Therefore, make sure that the
bonnet is properly closed and that the lock
is engaged. If you discover that the bonnet
is not perfectly closed during travel, stop
immediately and close the bonnet in the
correct manner.
DUALDRIVE
ELECTRIC POWER
STEERING
This only operates with the key turned
to MAR and the engine started. The
electric steering allows the force
required at the steering wheel to be
adjusted to suit driving conditions.
POWER STEERING
ACTIVATION/
DEACTIVATION
27) 28)
Activation/deactivation:
Press the fig. 45 button.
The activation of the function is
signalled by a visual indication (CITY) on
the instrument panel or, based on the
version, on the display.4404196J0003EM
45P2000025-000-000
34
KNOWING YOUR CAR
Page 59 of 264

Automatic Trip B reset: allows you to
set the reset options for Trip B;
Display brightness: this function is
used to set the brightness level
(8 levels) for the display and all the other
backlit components. The display
brightness can be adjusted in all
environmental conditions, whereas all
the other components (e.g. climate
control, radio, dashboard, buttons, etc.)
can only be adjusted at night or when
the dipped headlights are on. To set the
brightness, briefly press theOKbutton,
the display will show the previously set
brightness “level”; then press the
or
button to adjust. To return to the
previous screen, briefly press the
button.
Units
Selecting the item "Units" you can
choose the unit of measurement to be
used for displaying the various values.
The possible options are:
Imperial
Metric
Customised
Clock & Date
Select item "Clock & Date" to adjust the
clock.
The possible options are:
Set time: hours/minutes adjustment;
Time format: adjustment of the time
format "12h" (12-hour) or "24h"
(24-hour);
Set date: adjustment of
day/month/year.
Security
Select item "Security" to make the
following adjustments:
Passenger AIR BAG: passenger side
airbag activation/deactivation “Off” (to
deactivate) or “On” (to activate).
Passenger's protection not active:
the
LED comes on constantly in the
instrument panel dashboard;
Speed beep: setting of the vehicle
speed limit (km/h or mph). When this is
exceeded, the driver is notified through
an acoustic and visual signal;
Seat belt buzzer: this function can be
only displayed after a Fiat Dealership
has deactivated the SBR system (see
the "SBR system" paragraph in the
"Security" chapter).
Safety & Assistance
Select item "Safety & Assistance" to
make the following adjustments:
Rain sensor: activation/deactivation
of the automatic switching on of the
wipers in the case of rain;
Buzzer volume: selection of the
volume of the buzzer that accompanies
the display of the failure/warning;
Brake Control: selection of the
intervention mode for the Full Brake
Control system;
“Brake C.Sensitivity": selection of the
"readiness" of the Full Brake Control
system to intervene, on the basis of the
distance from the obstacle;
Park Assist: selection of the type of
warning provided by the Park Assist
system;
Park Assist Vol.: selection of the
volume of the acoustic warnings
provided by the Park Assist system.
Lights
Select item "Lights" to make the
following adjustments:
Courtesy lights: interior light
brightness selection;
Daytime running lights:
activation/deactivation of the daytime
running lights;
Cornering lights: activation/
deactivation of cornering lights (where
provided);
Headlamp sensor: adjustment of
headlight activation sensitivity;
Follow me home: setting of the
headlight deactivation delay after
switching off the engine.
57
Page 181 of 264

AIR FILTER
163)
Replacing the air cleaner
See the "Scheduled servicing plan" for
the correct servicing intervals.
It is advisable to replace it with a
genuine spare part, specifically
designed for this vehicle.
AIR CONDITIONING
SYSTEM MAINTENANCE
75) 76)
To ensure the best possible
performance, the air conditioning
system must be checked and undergo
maintenance at a Fiat Dealership at the
beginning of the summer.
WINDSCREEN / REAR
WINDOW WIPERS
164)
Periodically clean the windscreen and
rear window and rubber profile of the
windscreen/rear window wiper blades,
using a sponge or a soft cloth and a
non-abrasive detergent. This eliminates
the salt or impurities accumulated when
driving.
Prolonged operation of the windscreen
window wipers with dry glass may
cause the deterioration of the blades, in
addition to abrasion of the surface of
the glass. To eliminate the impurities onthe dry glass, always operate the
windscreen/rear window washers.
In the case of very low outdoor
temperatures (below 0 °C), ensure that
the movement of the rubber part in
contact with the glass is not
obstructed, before activating the
windscreen/rear window wiper. Use a
suitable deicing product to release it if
required.
Do not use the windscreen wipers to
remove frost or ice.
Also avoid contact of the rubber profile
of the blades with petroleum derivatives
such as engine oil, petrol, etc.
IMPORTANT The envisaged life of the
windscreen and rear window wiper
blades varies according to the usage
frequency. In any case, it is advisable to
replace the blades approximately once
a year. When the blades are worn,
noise, marks on the glass or streaks of
water may be noticed. In the presence
of these conditions, clean the wiper
blades or, if necessary, replace them.
IMPORTANT Driving with worn
windscreen/rear window wiper blades
is a serious hazard, because visibility is
reduced in bad weather.
Raising the windscreen wiper
blades ("Service position" function)
The "Service position" function allows
the driver to replace the windscreen
wiper blades more easily, protecting
them from snow.
Function activation
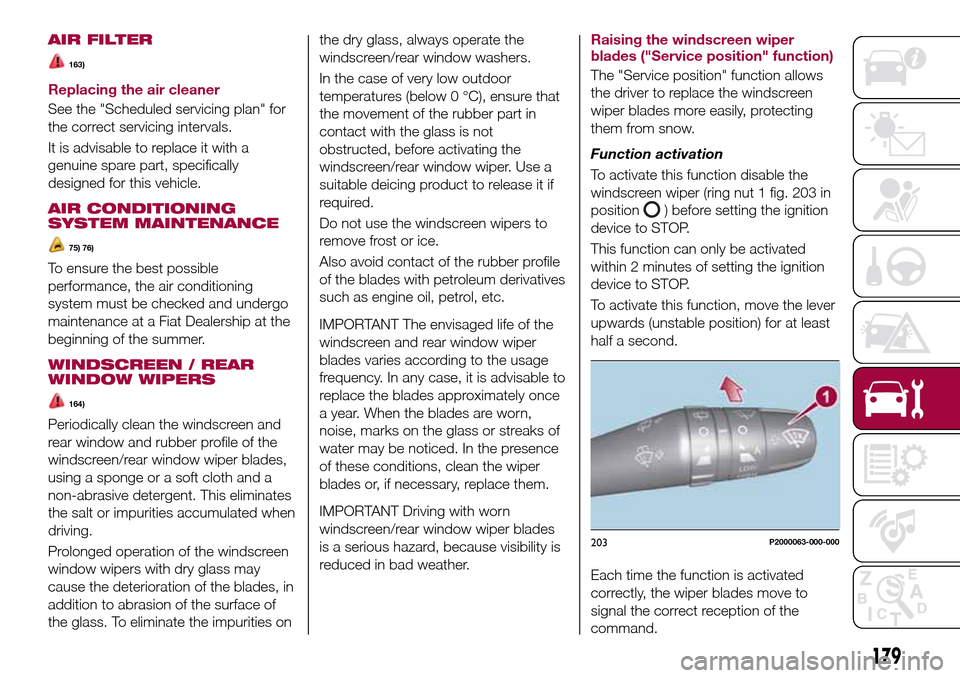
To activate this function disable the
windscreen wiper (ring nut 1 fig. 203 in
position
) before setting the ignition
device to STOP.
This function can only be activated
within 2 minutes of setting the ignition
device to STOP.
To activate this function, move the lever
upwards (unstable position) for at least
half a second.
Each time the function is activated
correctly, the wiper blades move to
signal the correct reception of the
command.
203P2000063-000-000
179